


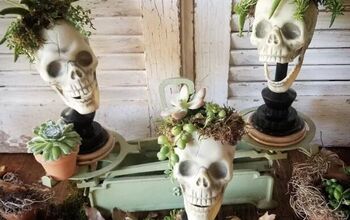
Halloween DIY - Spooky Skull

Debbie Hayes of My Patch of Blue Sky dreamed up a Halloween DIY to die for! This Spooky Skull will be a fright on your mantle’s ghoulish gallery. The eerie bonus? It’ll thrill your wicked guests…right down to the bone.
Supplies Needed
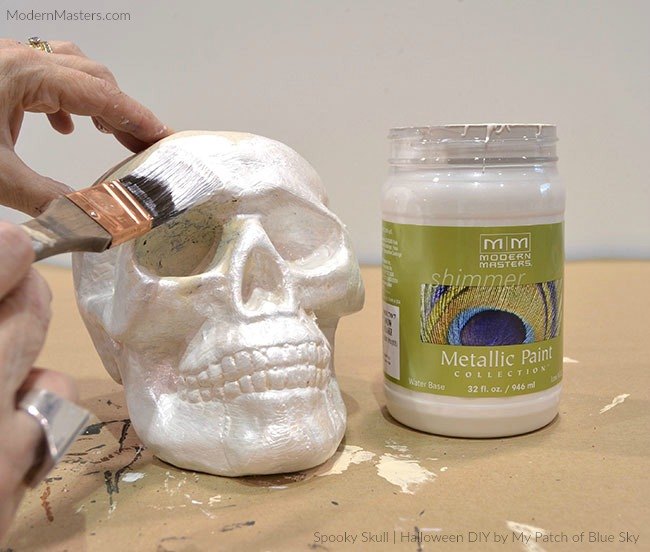
Brush on two coats of Snowflake Metallic Paint for opaque coverage. Let dry.
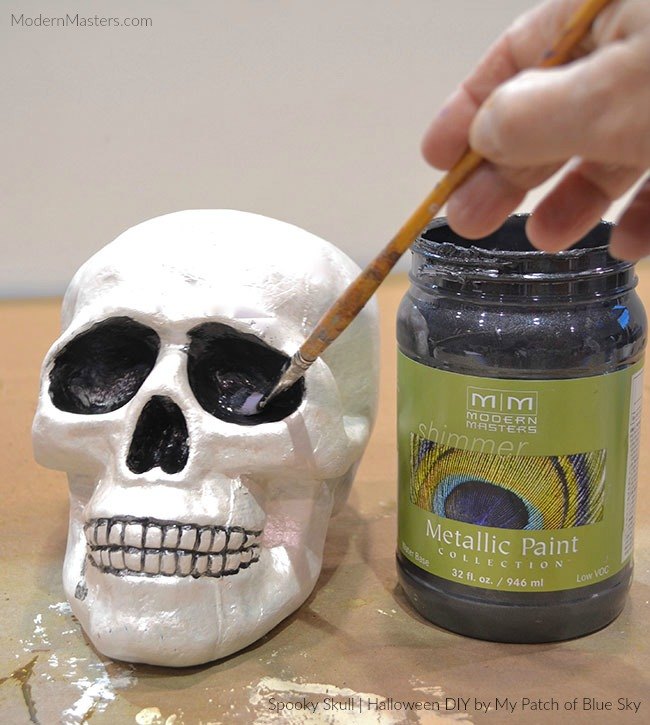
Use small brushes to add outline areas of Black Pearl Metallic Paint.
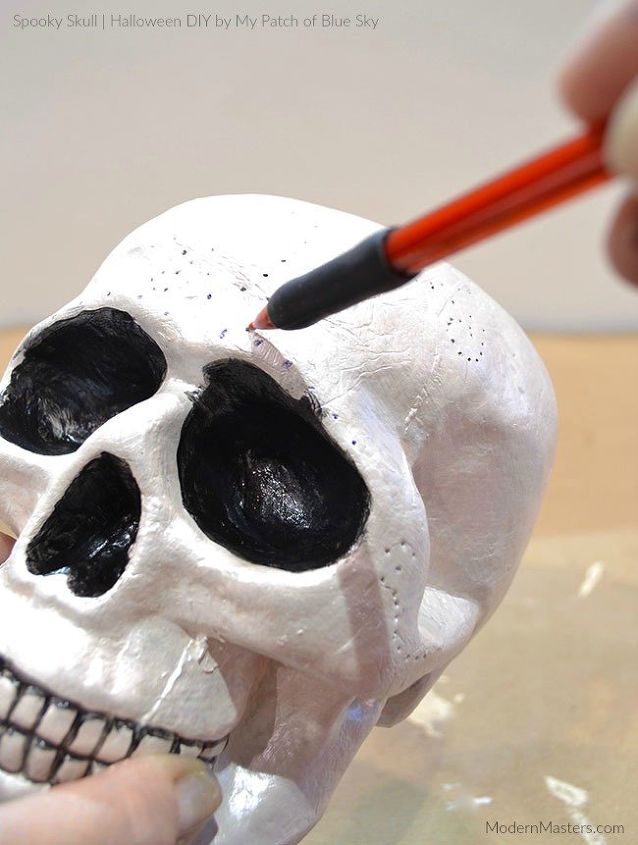
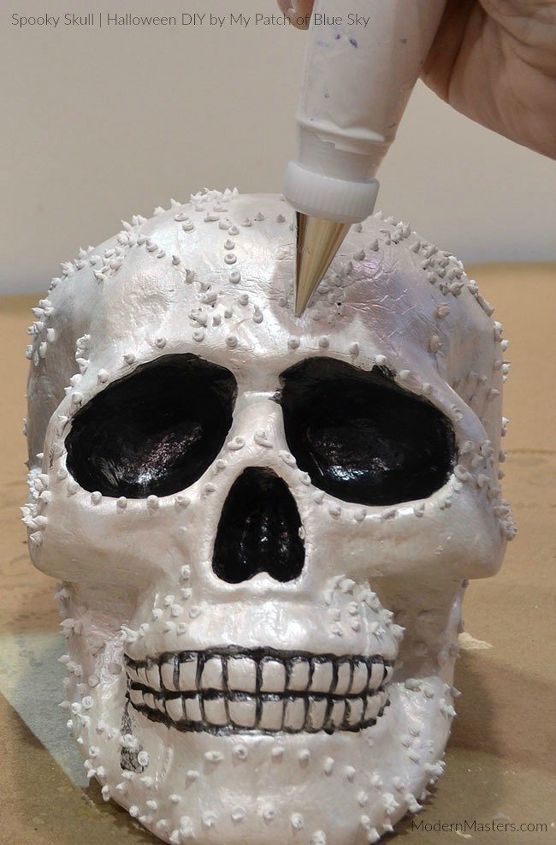
Next, use a pencil to mark where you’d want the textured dots to appear, creating any pattern you’d like.
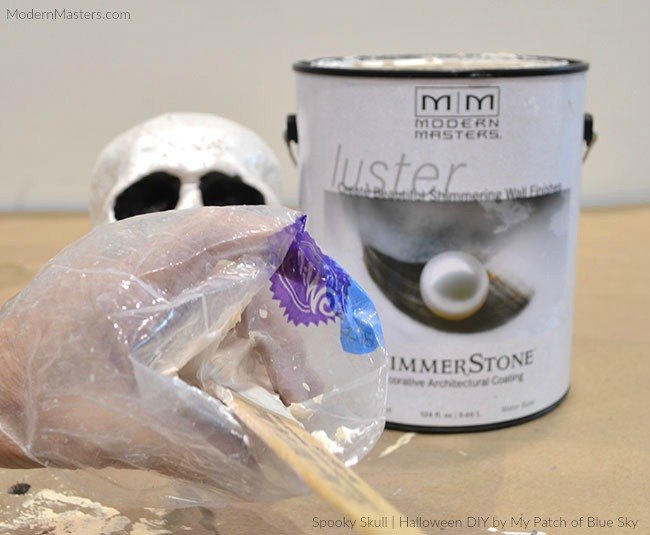
Fill a frosting bag with Shimmerstone, close it up tight and then create small raised dots over your pencil patterns. Let dry overnight.
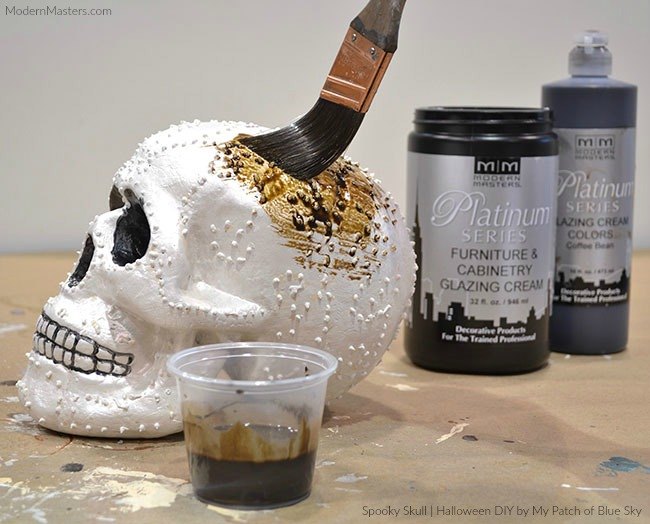
Mix a custom glaze of approximately 1:1 Coffee Bean Glazing Cream Color to Furniture & Cabinetry Glazing Cream. Brush on and then dab off with a rag until you like the look.
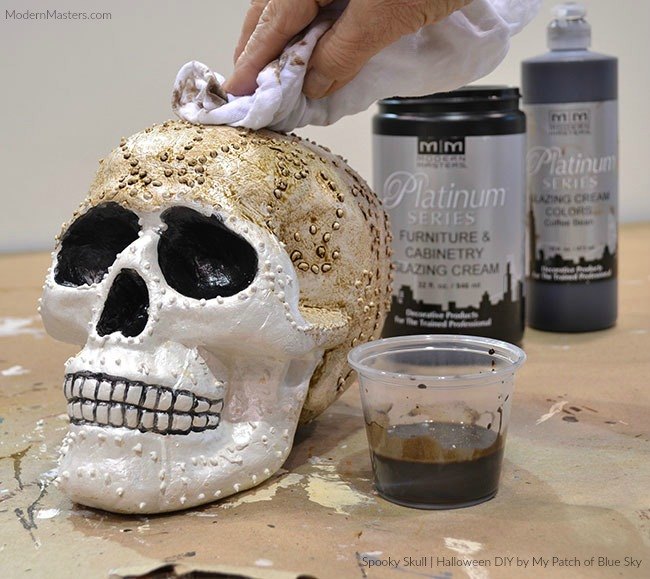
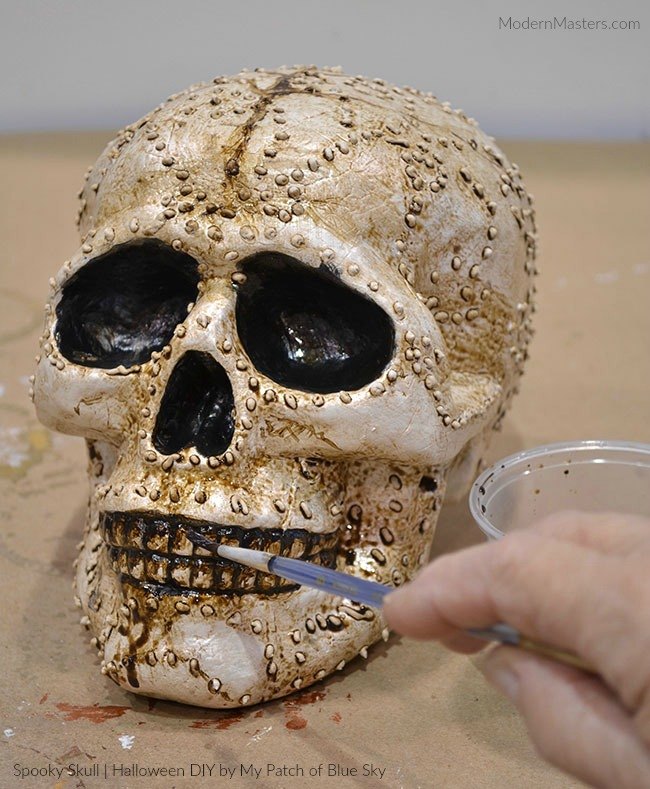
Use a small brush with 100% Coffee Bean to add accents and drips. Let dry overnight.
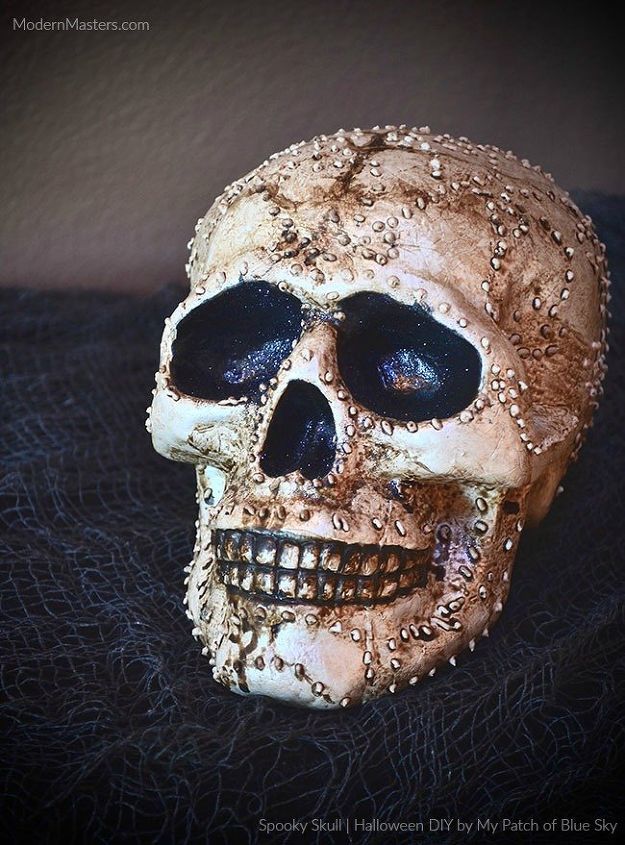
Want more Halloween DIY projects? Head over to our blog by clicking the link below! We hope we've inspired you to create your own Spooky Skull for your decor this Halloween!
Comments
Join the conversation
2 comments
-
Looks great! Great tutorial. Great job!
-
Very artistic, not just crafty. Nice!


Frequently asked questions
Have a question about this project?