


17 DIY Skull & Skeleton Decorations For a Bone-Chilling Halloween

Get ready to spook up your home for Halloween with these chilling DIY skull and skeleton decorations! From haunting skull topiaries to eerie skeleton wind chimes, this collection of creative and budget-friendly ideas will help you transform ordinary items into spooktacular decorations.
Whether you're crafting succulent-filled skulls or creating creepy candle holders, these step-by-step guides will have your home ready for a frightfully fun Halloween season. Let's dive into these bone-chilling DIY skeleton and skull decor projects and get your Halloween spirit soaring!
DIY skull and skeleton decoration ideas
- 1. Succulent skulls
- 2. DIY skull topiary
- 3. DIY double skull
- 4. DIY skull floral arrangement
- 5. DIY voodoo skull
- 6. Skeleton bride wreath
- 7. DIY aluminum skull
- 8. Joann skull planter dupe
- 9. DIY Halloween graveyard
- 10. DIY Halloween candle holders
- 11. DIY Halloween candy bowl
- 12. Halloween cages
- 13. DIY Halloween cloche
- 14. DIY Halloween tray dish
- 15. DIY Halloween skull candle
- 16. DIY skeleton wind chime
- 17. DIY skeleton wine glasses
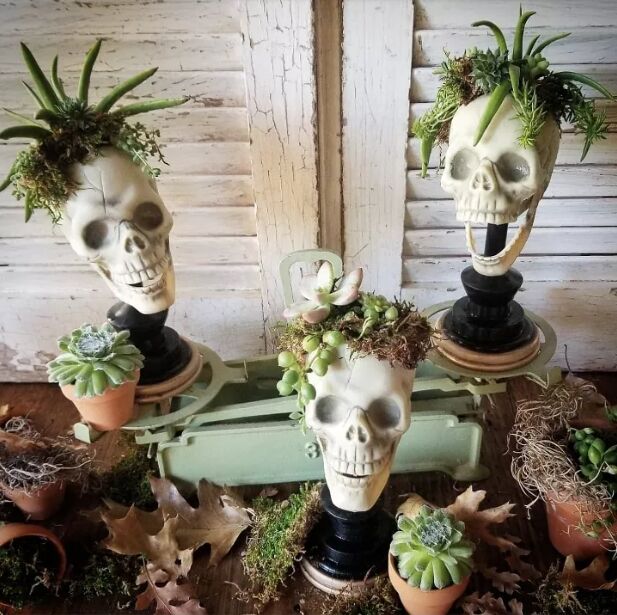
1. Succulent skulls
First up, @JagCagDesign shows us how to create spooky succulent skulls by filling Dollar Store skulls with moss and a variety of plants, including Sempervivum Cobweb, Sea Urchin Sedum Lineare, String of Pearls, Devil's Horns, and Ghost Plants.
Follow these steps: 1) Carefully remove the top center of the skull using a knife after marking the cut lines. 2) Fill the skull with potting soil, optionally adding gravel at the base and compacting the soil. 3) Arrange succulents and insert moss between them for a creepy effect. 4) Water your creation and enjoy. You can use thrift store candlesticks as stands for skulls if needed.
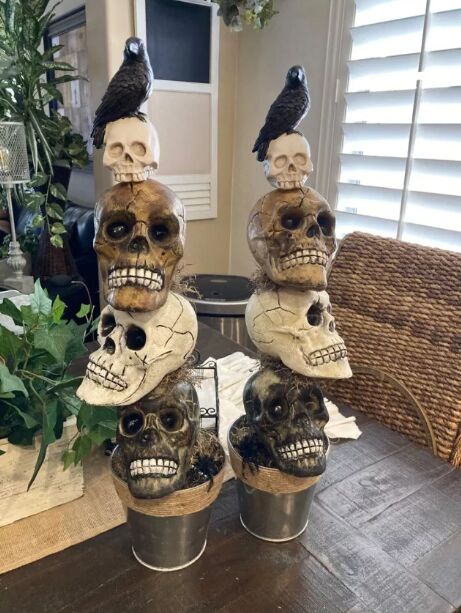
2. DIY skull topiary
Next, Shelly L Nemeth demonstrates how to create a spooky Halloween skull topiary for your front door using these steps: Start by preparing materials including skulls, a skull with a crow, pots, metal signs, styrofoam, Spanish moss, paint (black, white, and red), stain (Waverly Wax antique and clear), sponges, brushes, and a hot glue gun.
Follow these steps:
- Remove labels from skulls.
- Cut styrofoam to fit pots and secure it with glue, insert metal pole through the center.
- Heat the top of the metal pole, insert skulls, stacking them.
- Paint and stain skulls for realistic effect.
- Highlight crevices with black paint, paint teeth with white paint.
- Apply clear wax in white and black paint for texture.
- Glue Spanish moss to cover styrofoam.
- Stack skulls onto the metal pole, cover exposed areas with moss.
- Add a decorative topper.
The finished product is a creepy and perfect Halloween decoration for your front door.
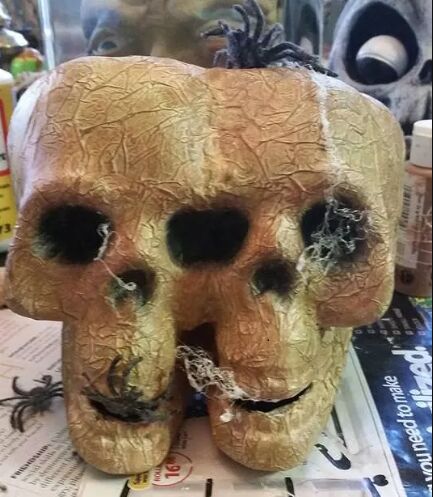
3. DIY double skull
Katrina Warren challenged herself to transform Dollar Store skulls into scarier decorations. She combined two skulls into a DIY double skull by removing black spaces between teeth, gluing them together, and adding crinkled tissue paper with Mod Podge for a mummified effect.
After drying, she painted them with a beige base coat, dry brushed with golden brown and dark brown, added black to eye sockets and mouth, and applied a clear spray coat. For added scare, Katrina attached plastic spiders with webbing made of hot glue and lint, making them look realistic and ready to bite.
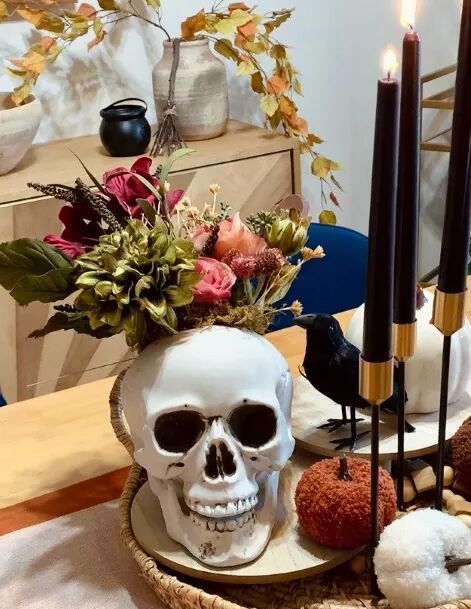
4. DIY skull floral arrangement
Next, Stephanie Donica shares how to create a simple and stunning Halloween decoration by repurposing a skull into a floral centerpiece. With a skull from Joann Fabrics and foam from Dollar Tree, the project starts by cutting an opening at the top and securing the foam inside using E6000 glue.
Add faux florals, leaves, and fillers, acquired from various sources, to achieve the desired look. Adding rocks for stability and using dried moss to conceal cut edges, the final result is a captivating centerpiece perfect for Halloween or future use.
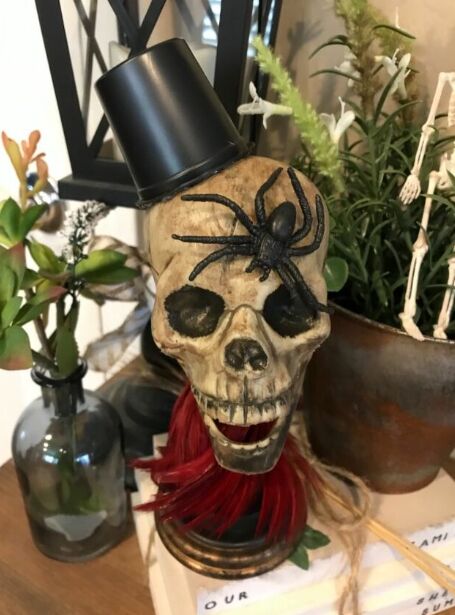
5. DIY voodoo skull
Discover a thrifty and creative project as Shelly L Nemeth transforms inexpensive Dollar Store skulls into steampunk-inspired voodoo skull decor. Using brown and black paint, the skulls are given a distressed effect with attention to cracks and details. K-cups are ingeniously repurposed as stylish hats, and feathers add extra flair.
The final result showcases a set of three whimsical and unique steampunk skulls, all achieved with a budget-friendly price tag.
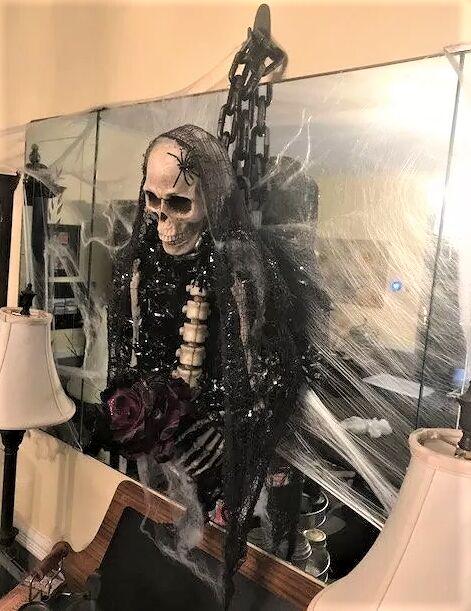
6. Skeleton bride wreath
Venturing into Michaels and AC Moore, Donna Schwartz was inspired by exquisite Halloween wreaths but opted to craft her own skeleton bride wreath after a productive trip to the Dollar Store. Employing a green 9-foot garland and metal wreath, the garland was spray-painted with Rust-Oleum Flat paint.
Skillfully arranging a 'bag of bones' from Big Lots, tinsel garland, and creepy cloth, a skeletal bride came to life, complete with flowers, spiderwebs, and a Halloween chain link. The finished masterpiece was hung over a mirror, to add to the creepy effect.
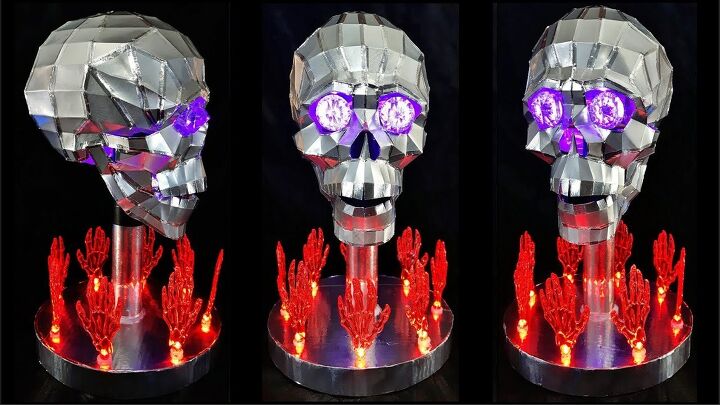
7. DIY aluminum skull
Repurposing saved beer cans, NerdyKat embarked on a crafty journey to fashion an eerie aluminum skull perfect for Halloween. Detailed steps involved cutting and straightening aluminum sheets from cans, adhering paper templates for bone pieces, folding and gluing the components.
Assembling the skull with precision, the process included utilizing aluminum tape for reinforcement and reflective effect. For the skull's base, cardboard circles were fashioned with LED string eyes, while the skull's structure was affixed atop a tube.
Diamond-shaped eyes, LEDs, and a lower jaw were strategically integrated, resulting in an intricate and captivating DIY aluminum skull centerpiece.
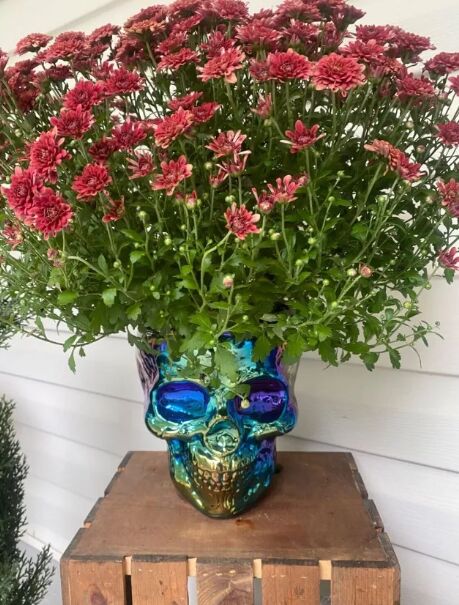
8. Joann skull planter dupe
Stacy Davis shows us how to create budget-friendly skull planters inspired by Joann's designs with a clever twist. Spying a skull food container at Walmart, the maker devised an affordable alternative to the pricier $30 Joann's version. Contemplating whether to paint or leave it iridescent, she sought advice from the Hometalk question forum.
Opting to paint the inside black while maintaining the iridescent exterior, the transformation was quick and easy. The resulting planters perfectly cradle mums, adding a unique touch to Halloween decor. These DIY skull planters offer a creative and cost-effective festive solution.

9. DIY Halloween graveyard
Get ready for Halloween by transforming an old pallet into a spooky graveyard scene with this DIY guide by Mitch Couch. Start by gathering affordable Halloween decorations from Dollar Tree, including orange lights for an eerie glow.
Paint the pallet with grey primer, add layers of black and driftwood-colored paint, and place it in your desired location. Weave orange lights underneath the pallet and secure them with a stapler. Create a faux border with bricks or rocks and decorate with skull and hand decorations, orange twigs, and small Halloween-themed accessories.
When night falls, your haunted graveyard will come to life, welcoming trick-or-treaters with a chilling scene!
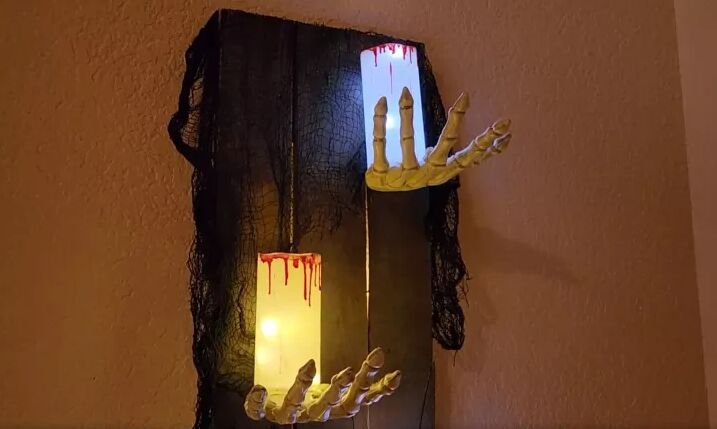
10. DIY Halloween candle holders
Mitch also has another skeletal DIY up his sleeve. Here, he demonstrates how to create spooky Halloween candle holders using skeletal hands from Dollar Tree. Cut each finger at the knuckle, attach them with hot glue, and bend for a natural look.
Remove the bulb and clip from fairy lights, placing them inside plastic candles from Dollar Tree. Mount the battery pack on the back and secure it with hot glue. Drip red crayon for a bloody effect on the candles. Build a pallet wood board with an antique finish, paint with black and gray, then attach hands using screws and hot glue.
Velcro secures candles to the hands. Add lights and a scarf for a spooky display. The glowing candles held by skeleton hands create an eerie effect.
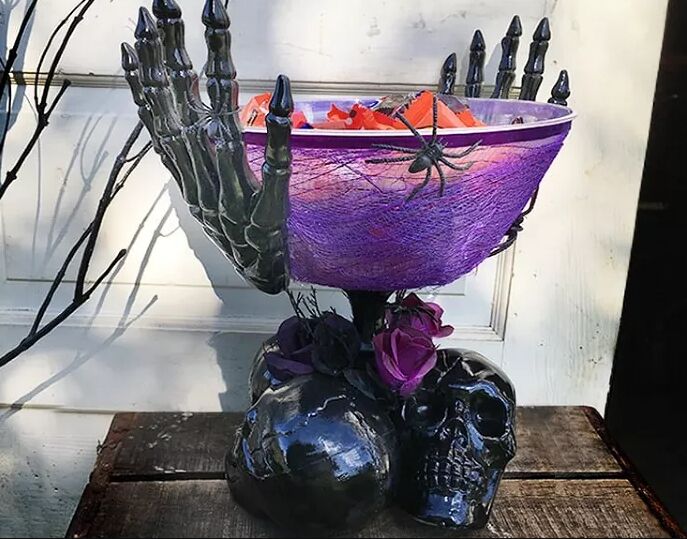
11. DIY Halloween candy bowl
Next, Dawn Stewart from Craftidly shares how to create your very own spooky and stylish DIY Halloween candy bowl with ease! Despite a few trial-and-error moments, this project comes together seamlessly. Follow these simple steps for crafting a skeletal candy bowl that's sure to impress.
Using materials like plastic bowls, mesh, glue, felt, spray paint, and plastic skulls, you'll assemble a unique and eerie candy bowl that's perfect for Halloween treats. From adhering the mesh and spray-painting plastic skulls to using GE Silicone 2+ Window and Door Caulk for sturdy assembly, this guide has you covered.
Complete your creation with decorations like skeleton hands, plastic spiders, and flowers, and voila – you'll have a spooktacular candy bowl ready to delight your Halloween guests!
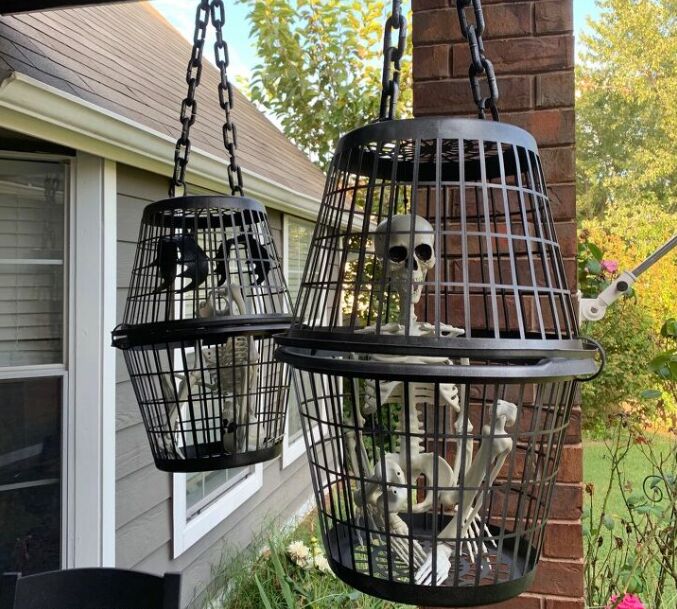
12. Halloween cages
Easily create budget-friendly decorative Halloween cages with this straightforward project by Amanda. Using inexpensive materials like small laundry baskets, fake chains, shower curtain rings, and spray paint, you can craft eye-catching cage props for under $4 each.
Cut the handles of one basket and attach chains using shower curtain rings for a secure fit. After a black and silver spray paint treatment, hang your finished cages for a spooky effect. Complete the look with Halloween decor such as miniature skeletons, bats, skulls, and spiders.
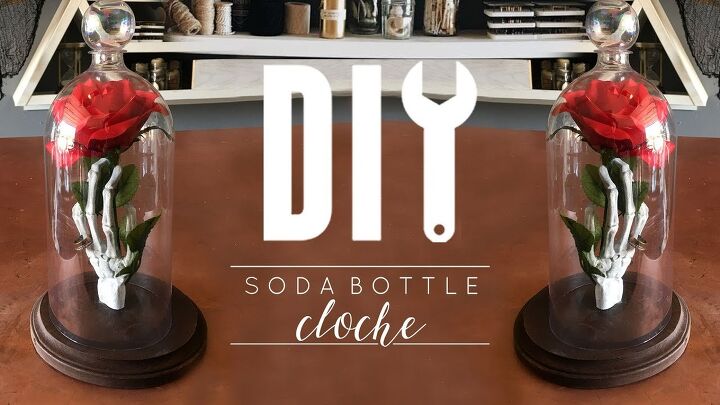
13. DIY Halloween cloche
Rachel Metz shows us how to make a DIY Halloween cloche that can be reused after the spooky season finishes. Follow these steps to craft a cloche using materials like a clear ornament, soda bottle, wooden base, skeleton arm, and faux flower.
E6000 the ornament upside down, insert the skeleton arm, and paint or distress as desired. Attach the arm to a dowel on a wooden base, add decorations like roses and rings, and cover with the cloche top. The result is a customizable cloche that can be used for Halloween and repurposed for year-round decoration.
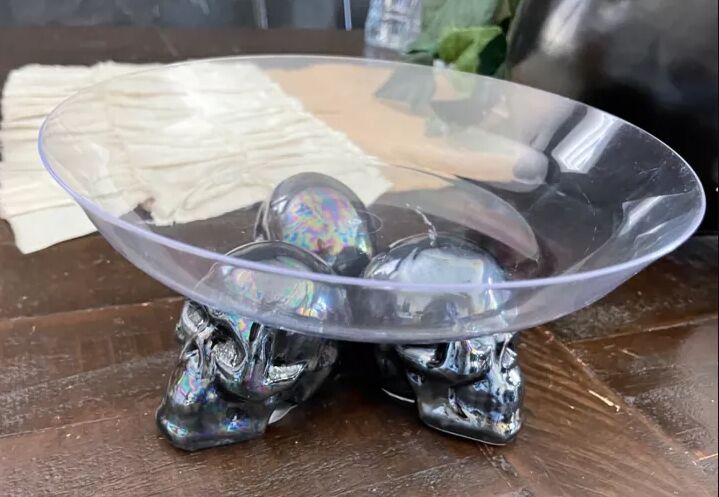
14. DIY Halloween tray dish
Shelly L Nemeth is back and this time she's showing us how to create a simple DIY Halloween tray dish using just three items from the Dollar Tree. Combine three skulls with E6000 glue, allowing them to dry for 24 hours. Attach a clear plastic dish to the tops of the skulls using minimal glue.
The result is a versatile tray that can hold treats or spooky decorations. Customize its use, from countertop decor to bathroom essentials. This easy and enjoyable Dollar Tree DIY adds a touch of Halloween haunting to your home.
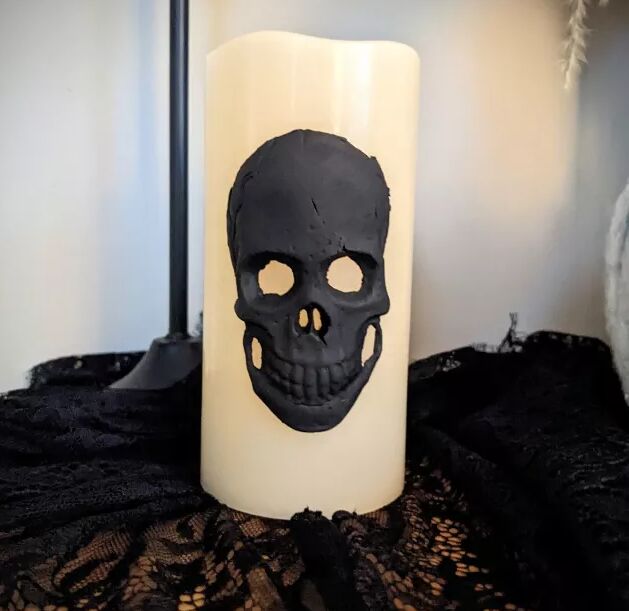
15. DIY Halloween skull candle
Deer Run Revamps shares how to easily create creepy DIY Halloween candles using silicone molds and paper clay. Press warmed clay into the Finnabair Skull And Bones mold, apply wood glue, and adhere to a plain LED candle.
Let dry for 12 hours, paint the clay, and insert batteries for a spooky effect. This straightforward project can be customized year-round with different molds and colors.
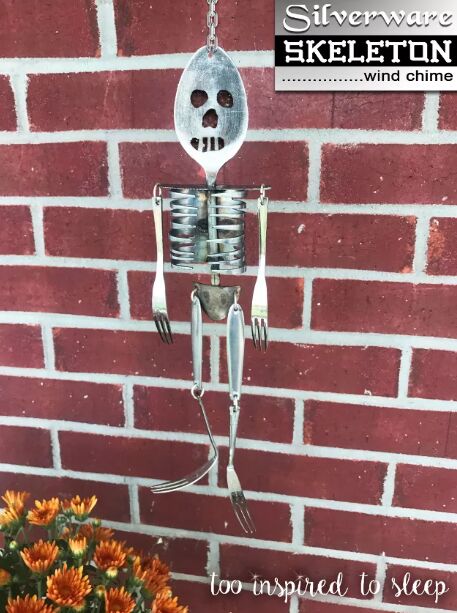
16. DIY skeleton wind chime
Next, Heather McKinney demonstrates how to create a unique skeleton wind chime using recycled silverware. Craft a ribcage from fork tines, a head and spine from a spoon, a collarbone from a knife blade, and legs from a spoon.
Attach arms made from pickle forks and weld all parts together. Use jump rings to hang arms and legs, completing the wind chime. Consider adding a face using a Dremel tool for an extra touch. A fun and creative Halloween project to display or hear in the breeze!
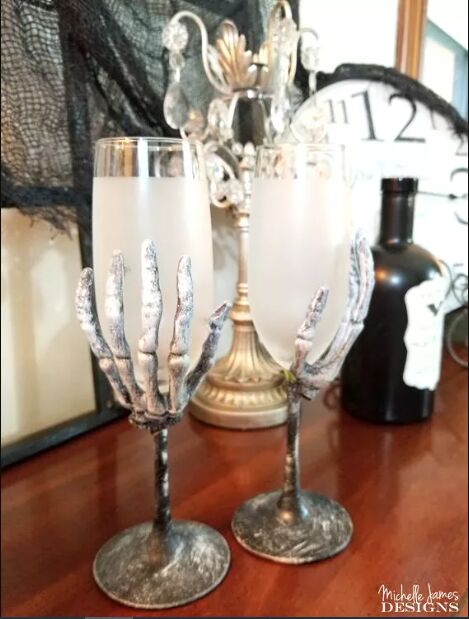
17. DIY skeleton wine glasses
Enhance your Halloween decor with these cool skeleton wine glasses by Michelle James. Crafted from dollar store wine glasses and skeleton tongs, the hands were cut off, painted with black primer, and dry brushed with cream and silver acrylic paint.
Frosted glass spray paint added an eerie touch to the stems. Although washing may be limited, these glasses make striking and spooky decorations.
More Haunting Halloween Decorating Ideas!
DIY skull and skeleton decorations
As the shadows lengthen and the air grows crisp, you now have an array of ghoulishly delightful DIY skull and skeleton decorations to set the stage for a spine-tingling Halloween. We hope these step-by-step guides have sparked your creativity and inspired you to embark on your own crafting journey.
Which of these Halloween decor projects were you most impressed by? Let us know in the comments.
May your home be filled with both tricks and treats. Have a hauntingly happy Halloween and stay wickedly creative


Frequently asked questions
Have a question about this project?