


Mason Jar Jack O'Lanterns
$10
2 Hours
Easy
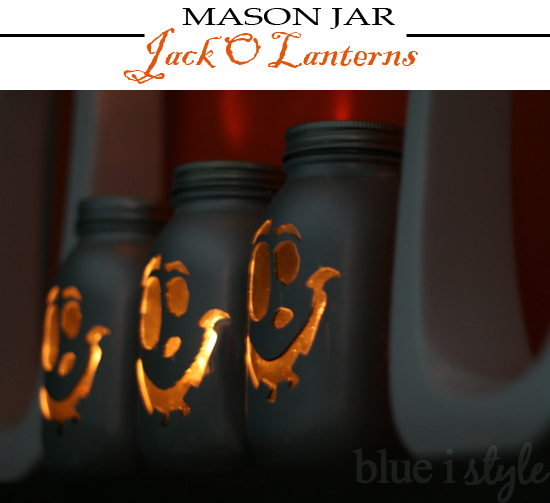
Over the last year or two, I've seen a lot of mason jar Jack O Lanterns on Pinterest, but they've all had black faces and the light has shown through translucent paint or paper covering the remainder of the jar. I love all of these, but wanted to do something a bit different - so I opted for an opaque paint on the jar with the light shining through the unpainted eyes, nose, and mouth. I also wanted to make my pumpkins a bit more modern to fit my decor, so I went with silver!
You'll find the full tutorial for these cute Jack O'Lanterns on my blog, but I'll give you the quick overview below.
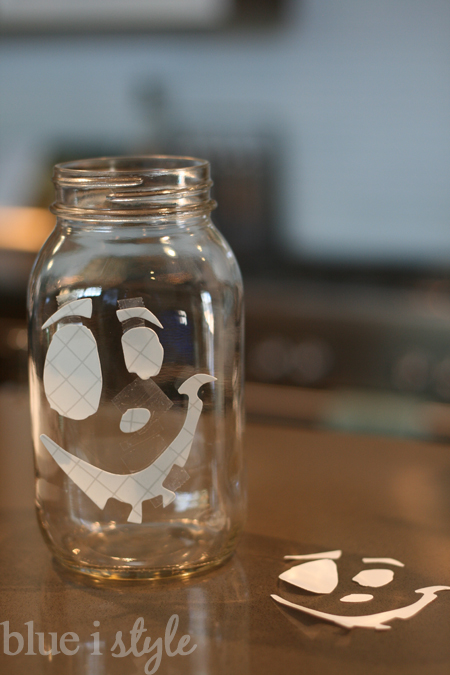
I then painted the inside of each jar black and used white spray primer to paint the outside of each jar.

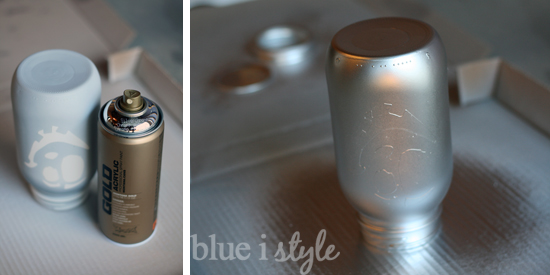
Once the primer was dry, I sprayed the outside of each jar with metallic silver spray paint.
Once the paint was dry, I remove the face stickers for the inside and outside of the jar. {You'll find some good tips for cleanly and easily removing the stickers in the full tutorial on my blog}. With the stickers removed, the jars looked like this.
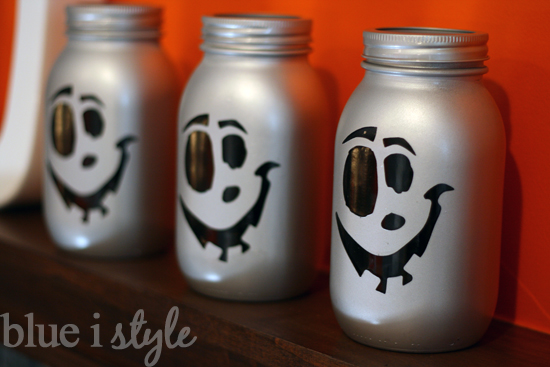
The reason I painted the inside of the jars a different color than the outside is so that the Jack O'Lantern faces would show up even when the candles inside the jars are not lit.
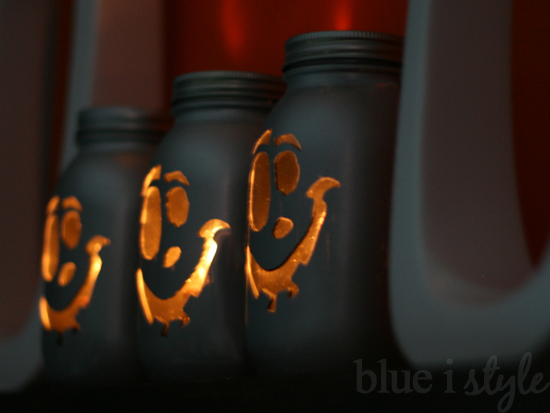
And finally, here's what my Mason Jar Jack O'Lanterns look like with candles glowing on the inside. They are a fun and modern addition to my Halloween decor.

Want more details about this and other DIY projects? Check out my blog post!
Comments
Join the conversation
3 of 18 comments
-
THIS IS REALY AWESOME!..I WAS THINKING THOETH WHAT YOU COULD USE TO STICK ON FARS WOULD BE THE PAINTING TYPE TAPE....THAT WOULD PEEL OFF REALY NICE.
-
these look great!


Frequently asked questions
Have a question about this project?