


No Carve, No Mess Pumpkins
This project was definitely less messy than carving a real pumpkin but I do miss those times with the kids. They were some real special memories.
Follow along as I walk you through how I made these cuties into decorative centerpieces for your Thanksgiving table, coffee table or you can even use them as hostess gifts.
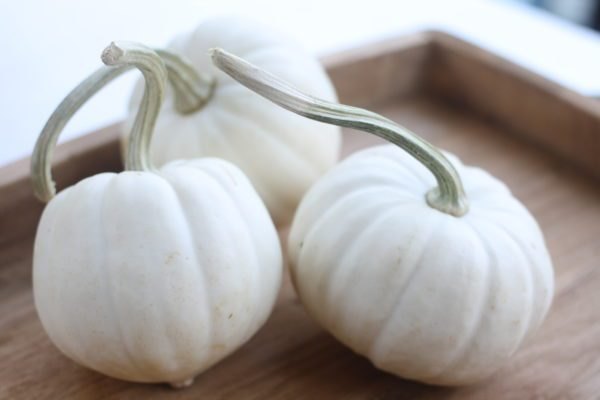
I decided to buy some small pumpkins and and paint them blush, grey & copper. Believe it or not, I had a hard time finding some real pumpkins to paint. Typically, I can find them right at the grocery store. Finally, I found some at a grocery store I only shop at occasionally. I have to give a shout out to our local Winn Dixie. They had the most beautiful choices of pumpkins. I ended up with these beautiful white ones which would have been gorgeous to leave as they are or decorate with some gold paint and/or glitter. You don't have to find white pumpkins, paint will cover orange pumpkins, too!

The photo above shows the blush color already painted on the pumpkin. The grey that I used was from Deco Art in smoke grey. Sponge brushes work great for this. One coat of paint was enough for both but if you want a richer deeper color feel free to put two coats on.
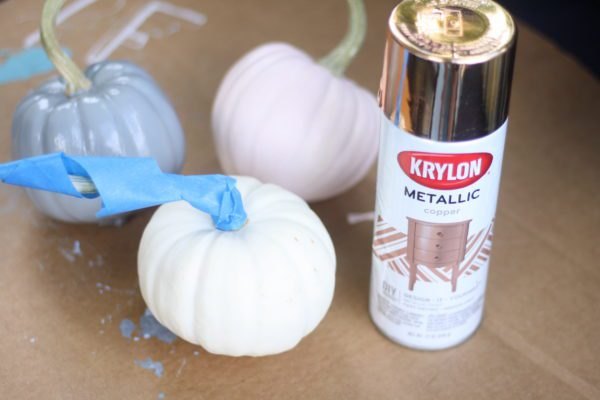
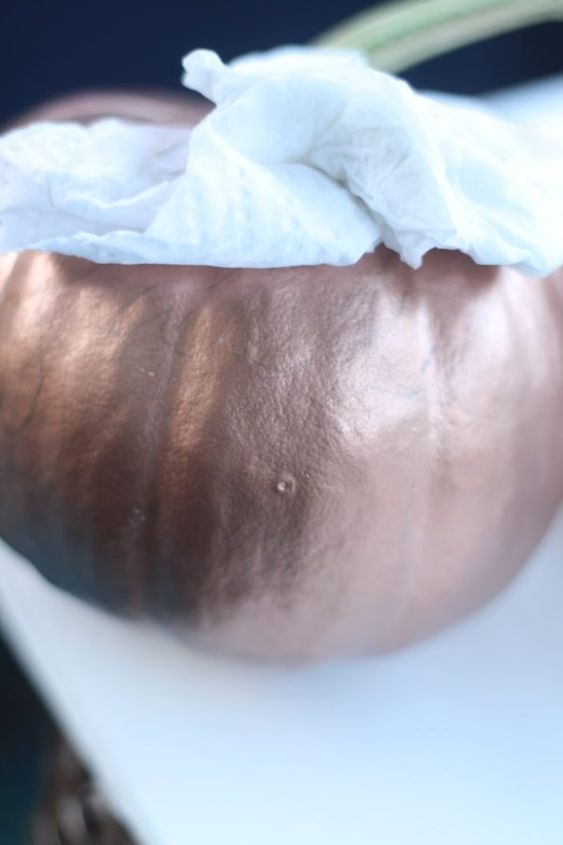
Before I spray painted the last pumpkin in the Krylon Metallic Copper paint, I loosely taped the stem with Frog tape to avoid getting the spray paint on the pumpkin. It only took one coat to cover fully. Be sure you are spray painting in a well ventilated area. I like to do all my spray painting outdoors.
I love to practice lettering anytime I can so writing words of inspiration on them was the plan. It was a little challenging writing on such an uneven surface but remember it doesn't have to be perfect. Before I started painting, I penciled the lettering on then traced over it with paint. I erased the pencil marking after the paint had dried.
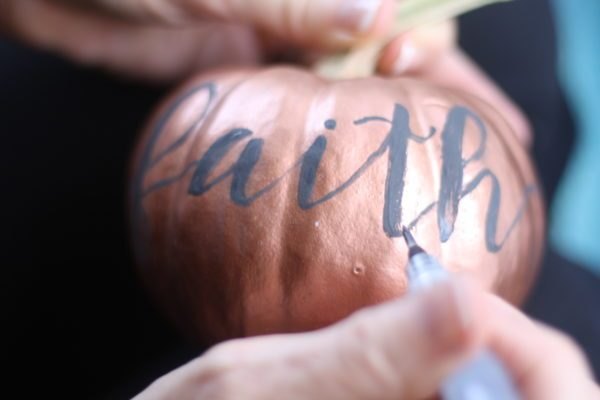
I experimented with the colors of lettering and on the copper pumpkin, I liked the darker color better. The grey I used was Annie Sloan Chalk Paint in Graphite. I used my Pental watercolor paint brush pen to apply.

And, here we have it! No carve, no mess pumpkins for fall decoration. Oh by the way, if you enjoyed this post and want to see more of our DIY goodness, head on over here to our blog and sign up for our occasional DIY updates.


Frequently asked questions
Have a question about this project?