


Patriotic Clothespin Wreath
Fourth of July is around the corner and people are preparing by decorating their homes red, white, and blue you know very patriotic. I was asked to make a patriotic wreath and I did not want to go with the traditional one with ribbons and burlap. So, I went on Pinterest and searched unique ways to make a wreath and stumbled across a clothespin wreath. (There were so many people who made these, so I am not sure whom to give credit to. The one I liked the most was Maymay Made it Crafts). I know you thinking clothespin what? Yes, a clothespin wreath and let me tell you they are so beautiful and so easy to make.
Just a FIY clothespins are hard to find at least for me. I went to my favorite store Dollar Tree and they didn't have any which was so shocking to me. Then I went on Amazon and they wanted to much for not a lot ($5.39 for 50). So off to Target and I was lucky to snag some for $1.75 for 50 so I bought 4 packs just in case I needed them.
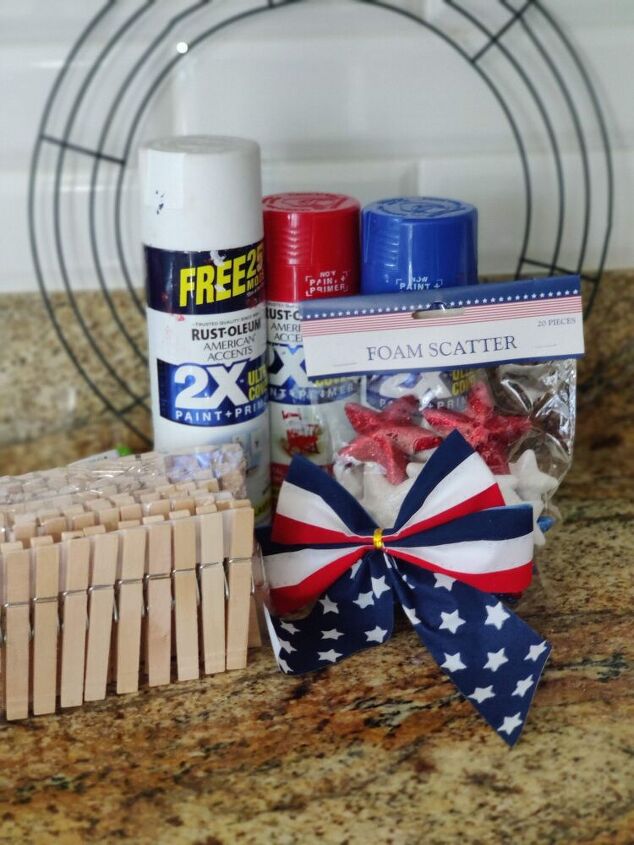
Ok now that's out the way let's get started! These are all the materials you will need for this project. Spray paint (red, white, and blue). I had these already from previous projects, but Rust-Oleum spray paint is my favorite. Wire wreath form, patriotic ribbon and stars are from Dollar Tree. Lastly clothespins Target.
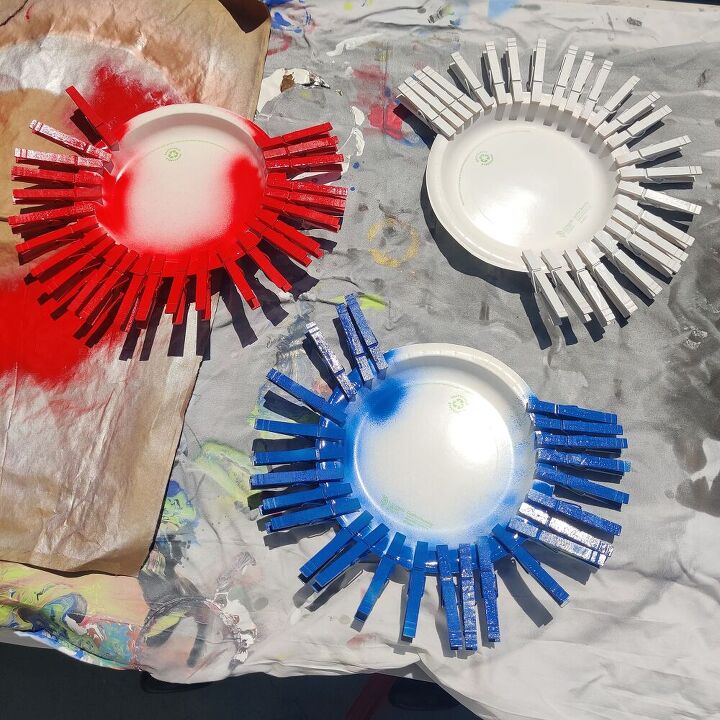
I started by putting my clothespins on paper plates. I put 25 on each plate because I wanted to have extras. This is a cool trick to do when spray painting clothespins because you can hold the plate and spray. Do not worry about spraying in between the clothespins. You will not see it. Just spray paint the front and back. Please spray paint in a well- ventilated area and wear a mask to prevent any fumes from entering your airways.
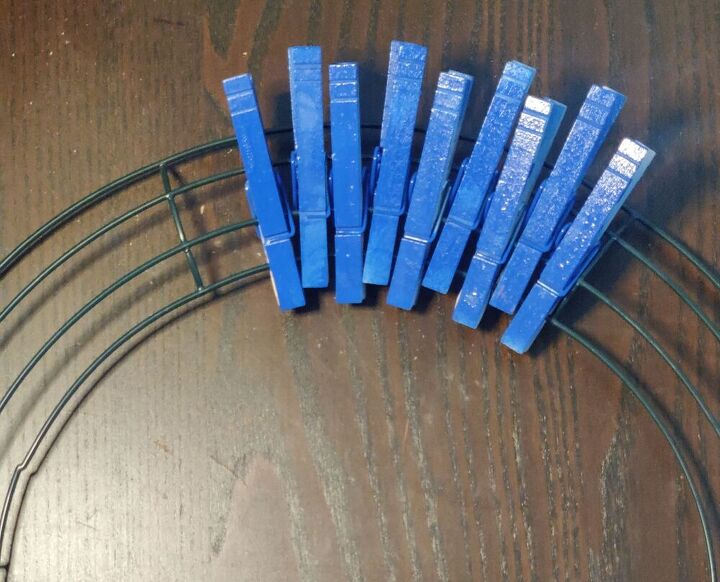
Your paint will take up to an hour to dry. But once it is dry, the fun will begin. Start with the blue clothespins on the left-hand side. This will be the union part of the flag. You will be putting the clothespins on the bottom 2 wires. Make sure they are close together. To have this up and down pattern you will need to do this: For the down effect open the clothespin and push it down onto the first wire and second wire until it cannot go any more then close it. For the up effect open the clothespin onto the first wire and when you get to the second wire shut the two prongs on it. The prongs will grip the wires and will not move. You will not need any glue. It should look like this.
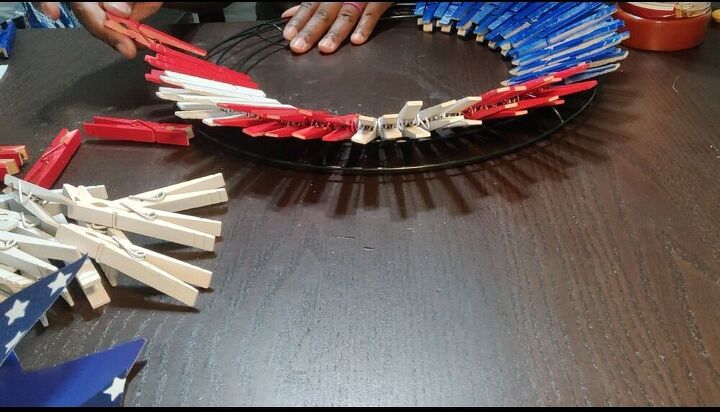
You will use 17 blue clothespins. Then start the red and white clothespins in a pattern of 5 red and 5 white. You will use 25 in each color to finish the wreath.
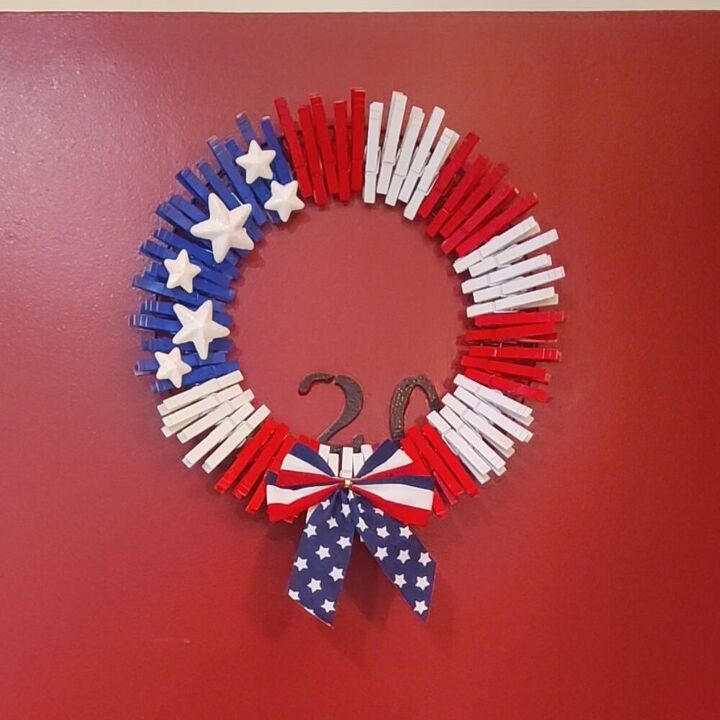
Once you are done with the clothespins. Hot glue some stars on it however you like. I just chose to put them on the blue clothespins only. Add a patriotic ribbon at the bottom by the twist tie already attached. Tie it around 2 or 3 clothespins. Then your wreath is ready to hang.
I had so much fun making this and it turned out better than I thought. If you try this project the longest part will be waiting on the spray paint to dry.
Resources for this project:
See all materials


Comments
Join the conversation
-
That looks so nice. Great job!
-
I’ve seen several wreaths done like this and they are very pretty. I love yours the most because of the ribbon you added on the bottom


Frequently asked questions
Have a question about this project?
what size wreath form did you use????