


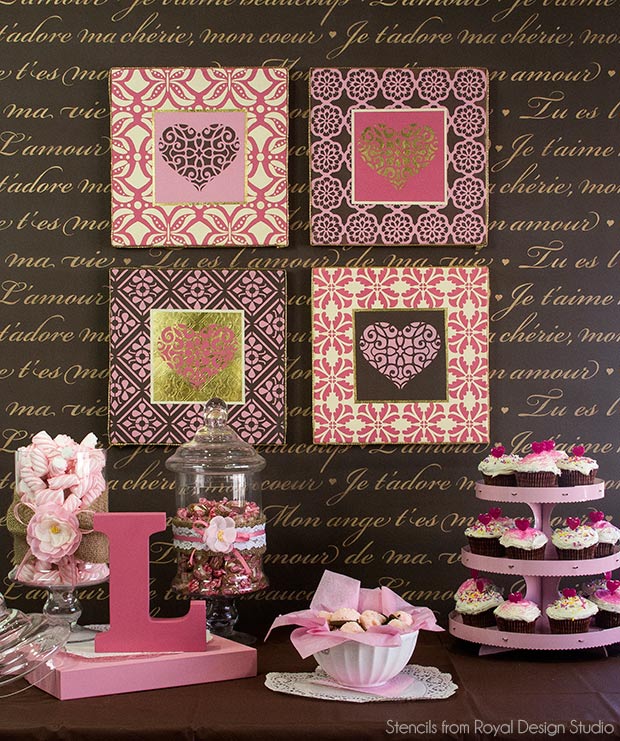
Stencil How to: Sweetheart Stenciled Wall Art

Are you ready to fall in love?? We're setting the mood for a Valentine's Day celebration with a stenciled wall art project that you can adore all year long. Pretty shades of pink, brown and metallic gold come together with sweet stencil patterns, including the Royal Design Studio FREE stencil of the month for January 2015, the Lace Heart Stencil. You can easily adapt this stenciled wall art project idea to paint colors and stencil patterns you might already have on hand. Let's paint!
Stencil Supplies you will need for this project from www.royaldesignstudio.com
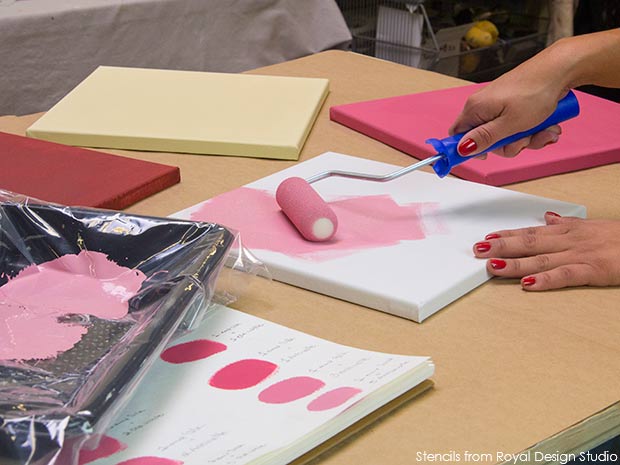
Step 1: First paint each one of your canvases with the Chalk Paint(R) color mixes using a foam brush or roller. For a better coverage apply two coats of each color, Allow Paint to dry Between Coats.

Step 2: Once the base color has dried, stencil each canvas with a contrasting color from your Chalk Paint(R) Color Mixes. We used four different stencils from Royal Design Studio and combined the following colors:
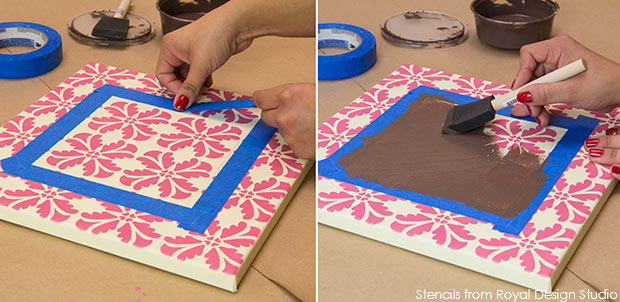
Step 3: Use a measuring tape or a ruler to measure and mark off a 6 " square on the center of each canvas. Use Blue Painter's Tape to mask off this section and paint with a foam brush.
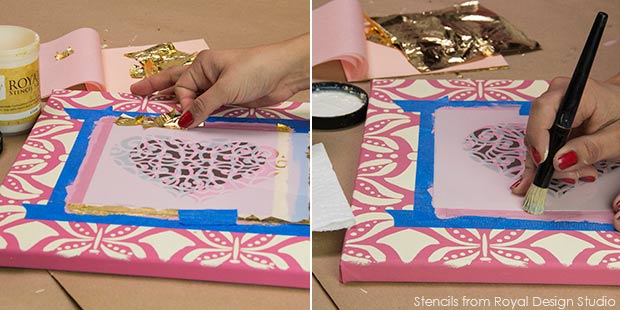
Applying Gold Leaf to the Custom Brown and Custom Soft Pink stenciled canvas:
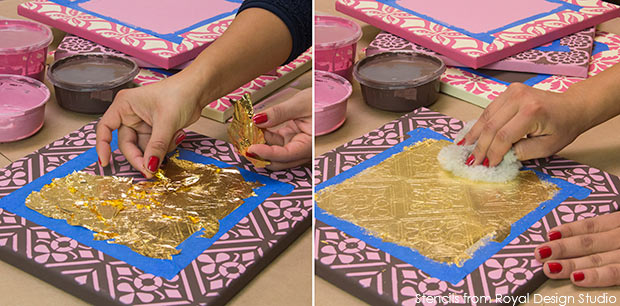
Apply a layer of gold leaf to the area with the size. Finally, use a soft rag or lambswool to lightly burnish the gold leaf into the size and remove any loose flakes.
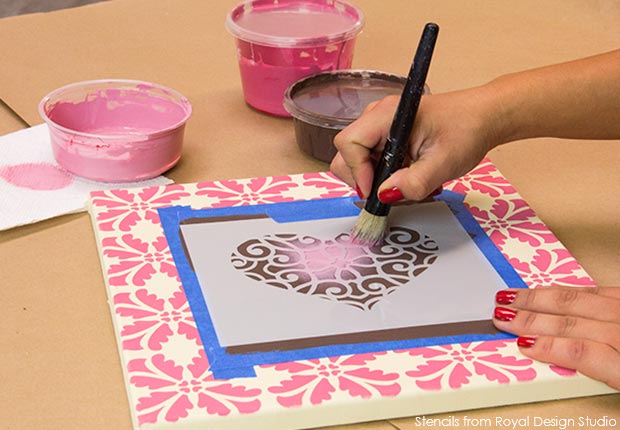
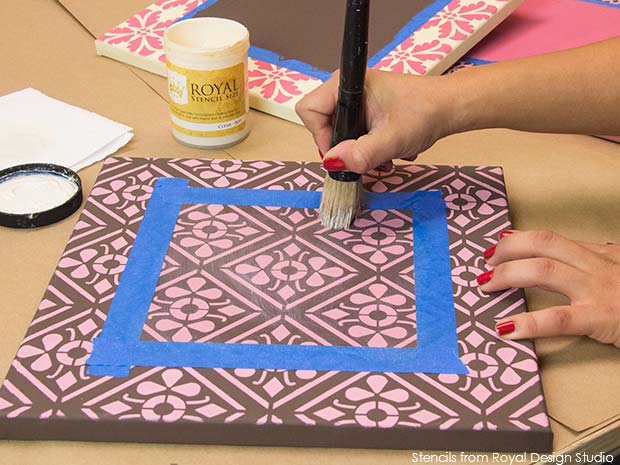
Step 4: Center the heart stencil on top of the canvas and stencil:
Applying Gold Leaf to the Custom Pink Square:
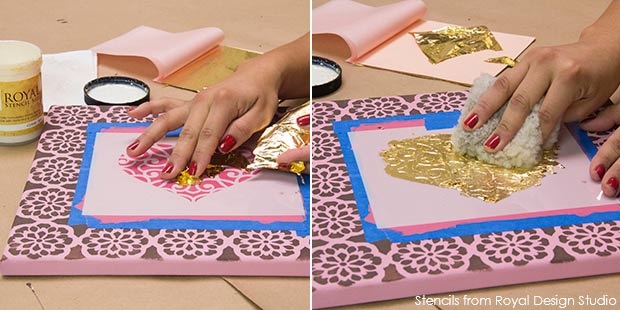
Apply a layer of gold leaf with your fingers through the pattern. Use a soft rag or lambswool to burnish the leaf in to the size and remove any excess.
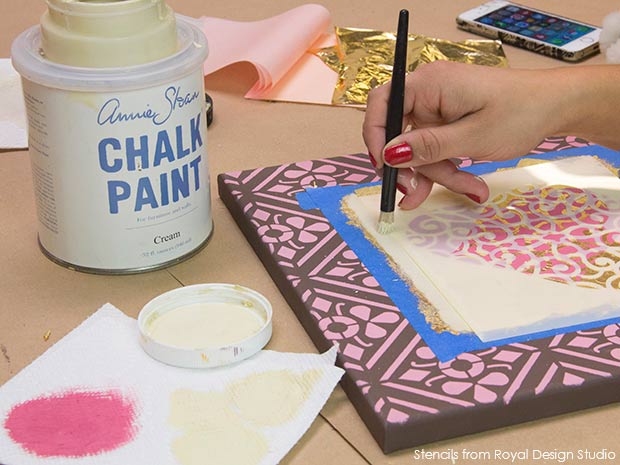
Step 5: Using the tape surrounding each square and the edge of your stencil, stencil a 1/8" pin stripe on the inside edge of each square using a small Stencil Brush.
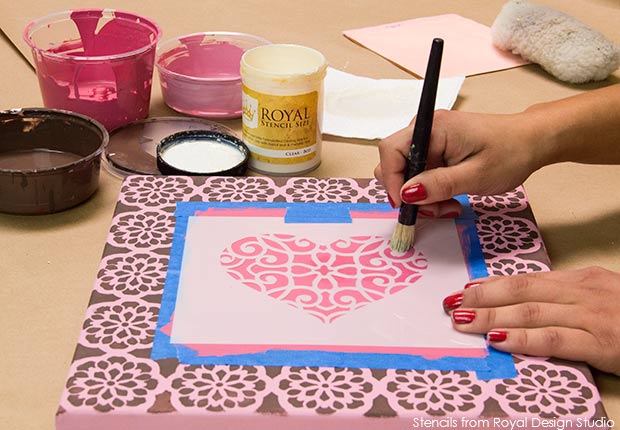
For the two canvases stenciled with Cream and Pink Chalk Paint(R) apply two coats of Clear Stencil Size with a small Stencil Brush. Allow a drying time of 10 to 15 min. between coats.


Frequently asked questions
Have a question about this project?