


How to Make an Unlined Drawstring Gift Bag
Knowing how to make a drawstring bag is SUPER handy. I use them in a ton of my projects. Some uses are straight-forward, such as a pretty gift bag. Others are for foam pillow insert lining, dust covers for purses or shoes, travel laundry bags (well, heck, any laundry bag), packing cubes, etc etc. Ideas are endless. BUT first, you need to know how to make one.
This is a VERY easy sewing project. It's a perfect beginner sewing project that takes primarily straight stitches (with just a few variations, as you'll see).
These bags are easy to personalize using trims, applique, embroidery, pretty fabric and ribbon, fabric paint, HTV, and on and on. You get the idea.
You may also want to check out my post on how to make LINED drawstring gift bags. Great to use up scraps and make a "wrapping" that isn't one-and-done! Perfect for reusing and repurposing.
Let's get started!
Here's the supplies you need:
- Fabric (Canvas or Quilting Cotton is great to start)
- Drawstring (Ribbon and Cording work well)
- Thread
- Two-sided Fusible Tape (Optional)
- Bias or Binding Tape (Optional)
- Sewing Machine
- Serging Machine (Optional)
- Sewing Supplies
- Iron and Ironing Board
If you're making this bag to hold a particular item, please check out my post on how to calculate dimensions for a drawstring gift bag. In that post, I break this down step-by-step.
If you're making a bag for general purpose, the width needs to accomodate 2 times your seam allowance.
Width = Finished Bag Width + (2 x Seam Allowance)
The height takes a little more planning. You need to write down the following:
- Finished Bag Height
- Finished Bag Depth
- Seam Allowance
- Drawstring Width (Ribbon or Cord)
- Ruffle Height
A "ruffle" that extends up beyond the drawstring is a nice option but not necessary. Decide if you want that now.
The math for the height looks like this:
Height = Finished Bag Height + (.5 x Finished Bag Depth) + Seam Allowance + (2 x Drawstring Width) + (2 x Ruffle Height) + 1/2"
Make sure you make notes on ALL of your measurements!
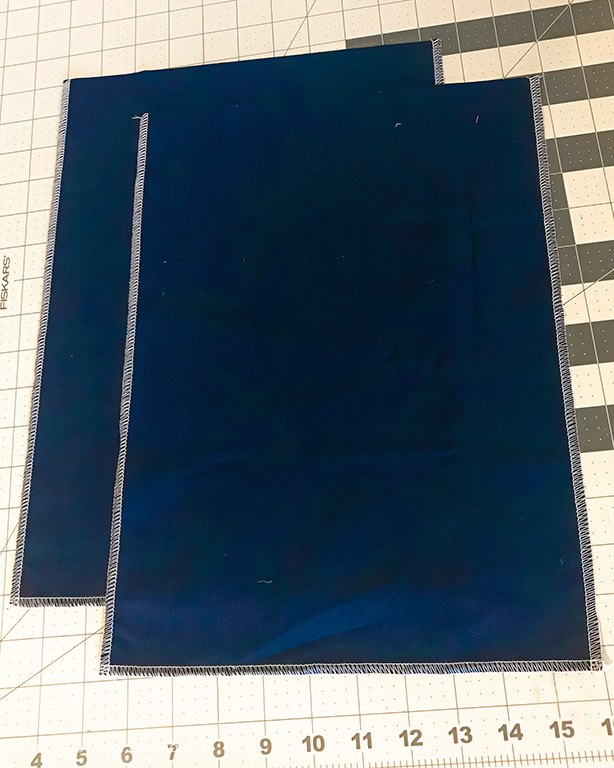
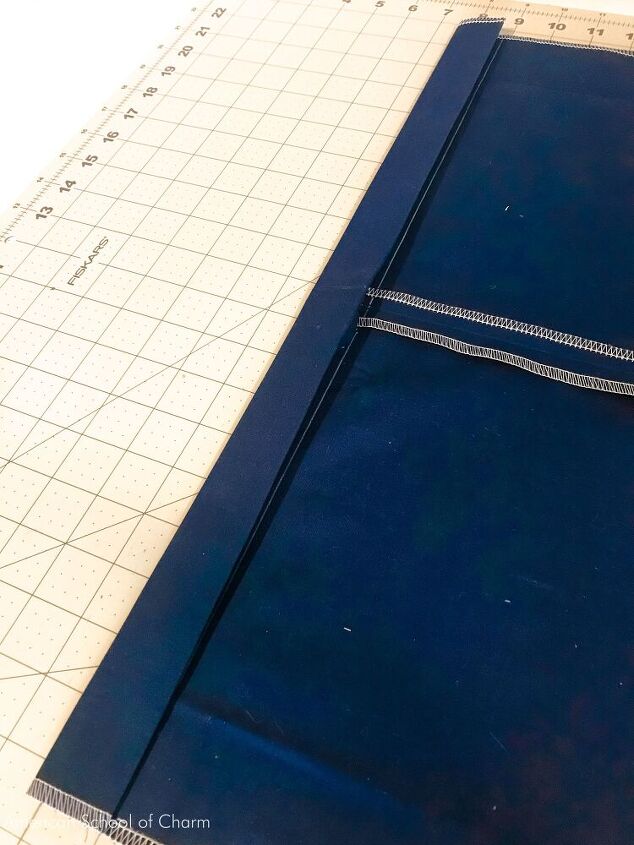
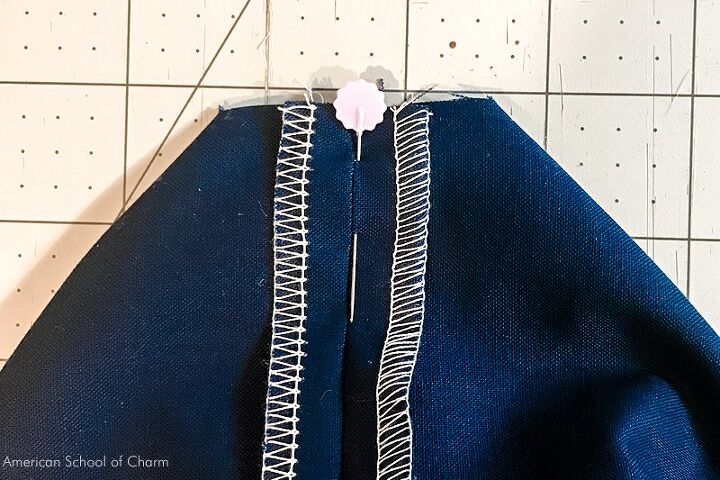
Since this bag is unlined, you need to protect the raw edges of the sides and bottom. You can do this with an overlock stitch (as shown), a zig-zag stitch, a straight-stitch, a felled seam (more advanced), or bias/binding tape. Otherwise, you'll have lots of random strings pulling off of your raw edges.
So you can see all of my seams clearly, I'm using contrasting thread. If I wasn't trying to use this as a photographic tool, I would probably use navy blue thread so all my seams blend in to the fabric.
Note: If you want to have a frayed raw edge, then you can make it by leaving the raw edge untouched, and sewing your side seam allowance to the outside of the bag. I wouldn't recommend this for the bottom seam.
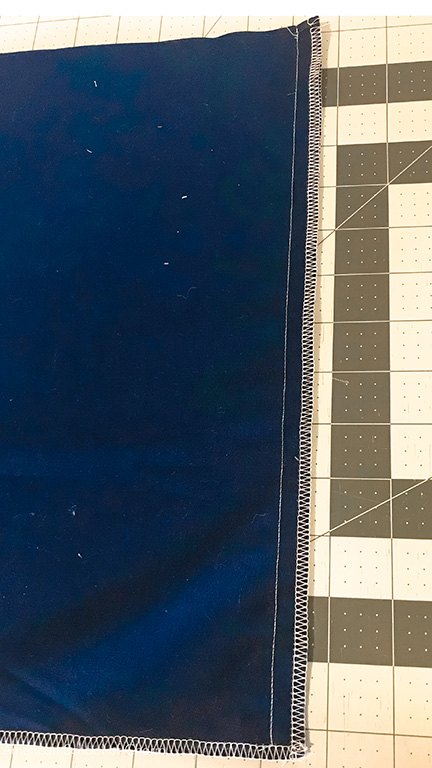
With the raw edges protected, stitch the two panels together on 1 side.
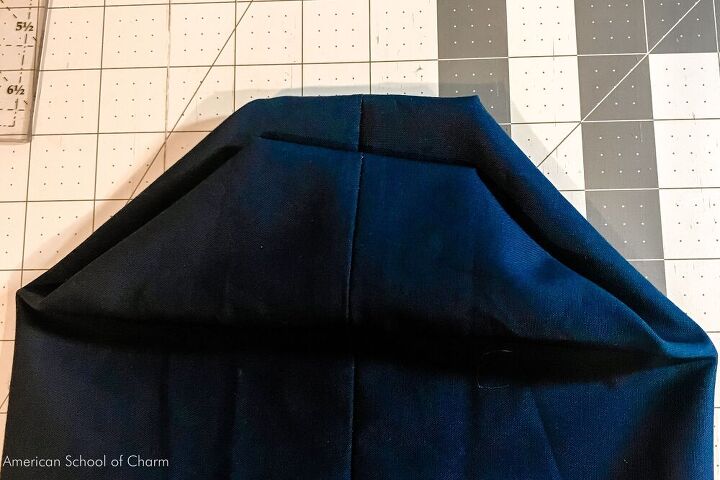
Press open the side seam. Using a quilter's ruler, line up your seam and square off the top edge.
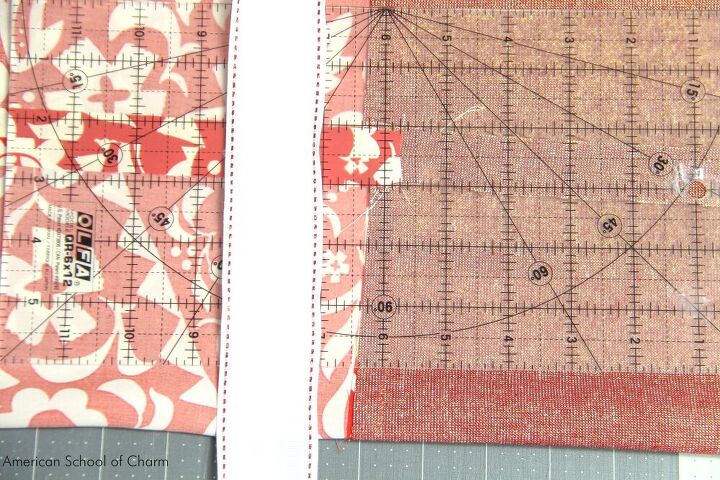
You're going to prepare your drawstring channel, and optional ruffle, in this step.
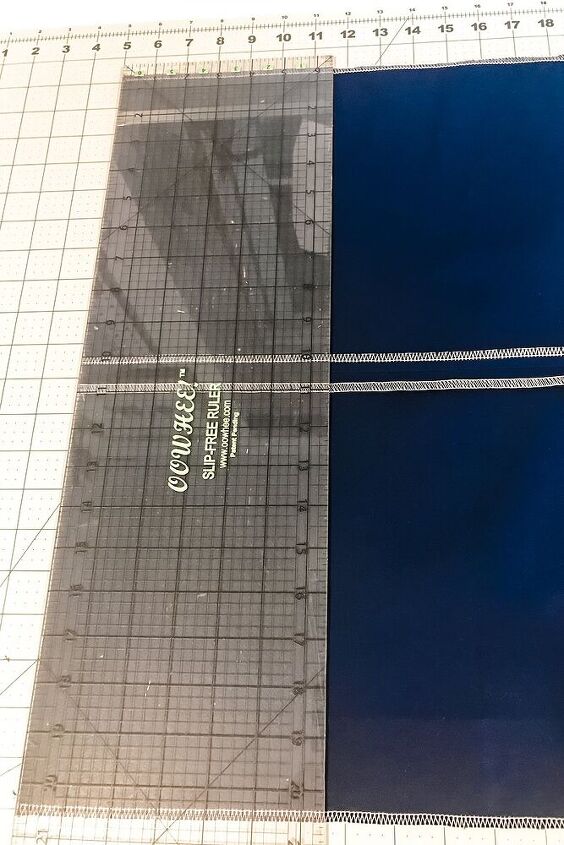
We'll be folding the top edge down to create creases. To make this super easy, double each measurement and mark a line. You will fold the fabric to the line and iron down the crease.
In our example, we aren't having a ruffle. Therefore, we have to mark a line for our 1/2" fold and our ribbon.
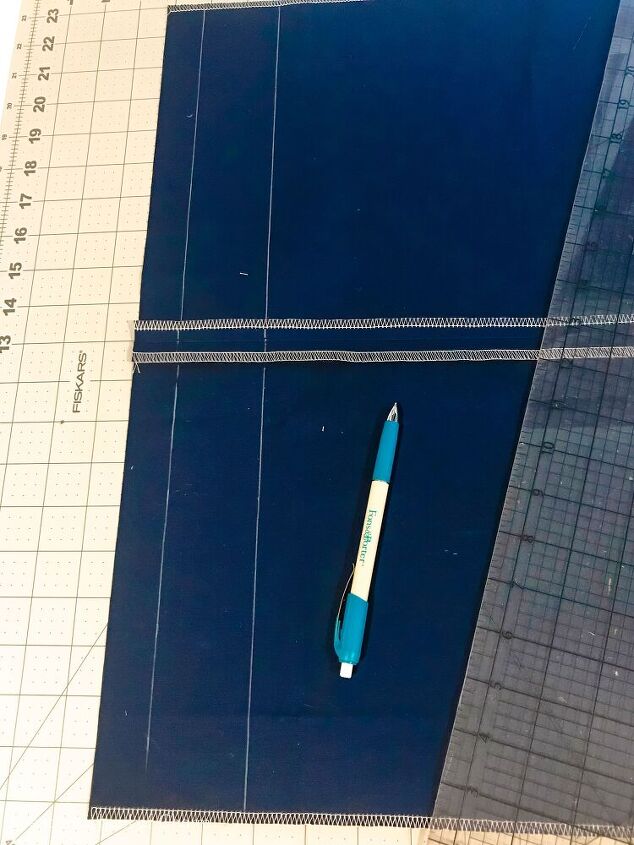
The line on the left is 1" from the top edge. This is for the 1/2" fold.
The line on the right is for our 1" Ribbon Width, thus it is 2" from our other line.
When both are folded over and pressed, they'll create a 1/2" fold and a 1" fold as shown below.
Don't stitch this fold down YET.

You've already sewn one of the side seams. Now you need to sew the other and the bottom.
As you sew the side, unfold the top creases you made in the last step. We'll come back to top edge folds soon.
You may want to secure the seam allowance down in the drawstring channel. The ribbon or cording that you use for your drawstring will rub on the seam allowance as the bag is repeatedly opened or closed.
This is a totally optional step. Since the raw edges of your sides are protected, it's not totally needed, yet is a great idea to protect the longevity of your bag.
Here, I've pulled from my project "How to Make a Lined Drawstring Gift Bag" to show you how.
First, measure down from your top seam to accomodate for the ruffle (if appropriate) and the ribbon/cord width. Make little marks on the seam allowance.
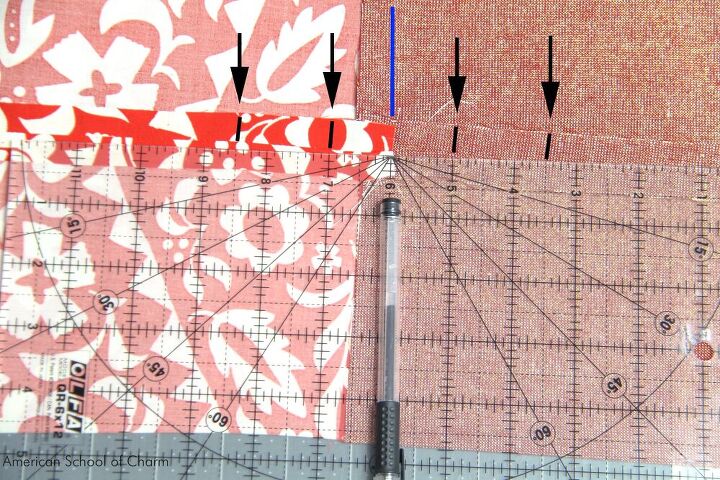
Cut two-sided fusible tape just a little bigger than your marks.
Following the instructions, fuse (using your iron) the seam allowance UNDER the seam allowance. This will hold it down and make it a lot easier to pull the drawstring in and out!
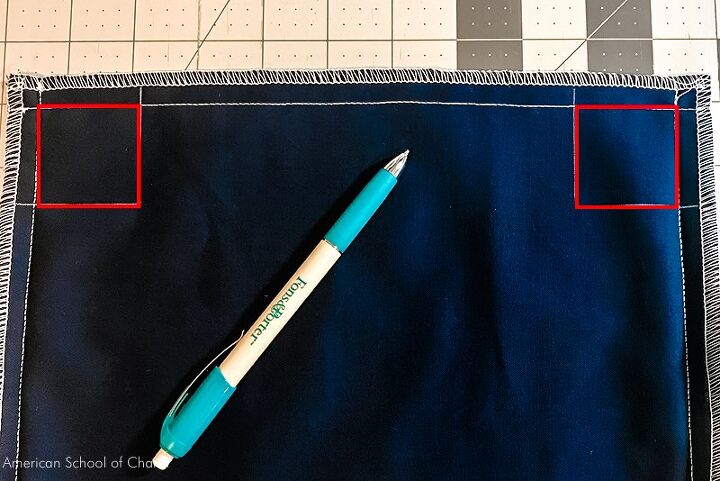
Going back to your measurements, find your bag DEPTH. This measurement is needed to make your gusset corner.
Going from your seam lines, make a square that is 1/2 of your Depth. So, for example, if you want your bag to be 2" deep you will draw a 1" square.
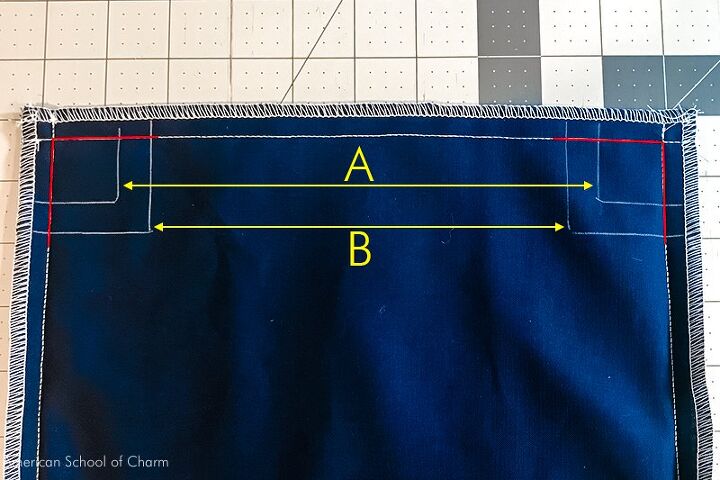
To each corner, you also will be making a box for your seam allowance. In the example, the seam allowance is 1/2" so the A square is 1/2" less than the B (first) square.
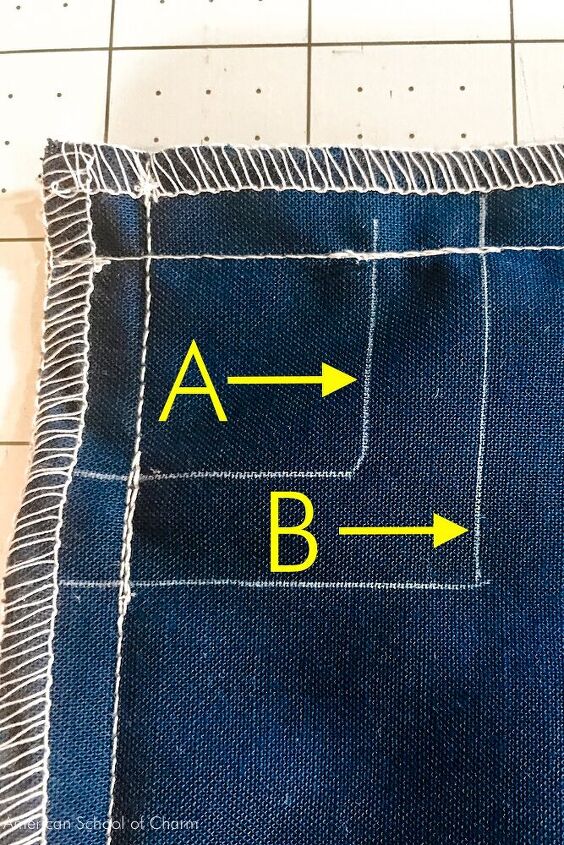
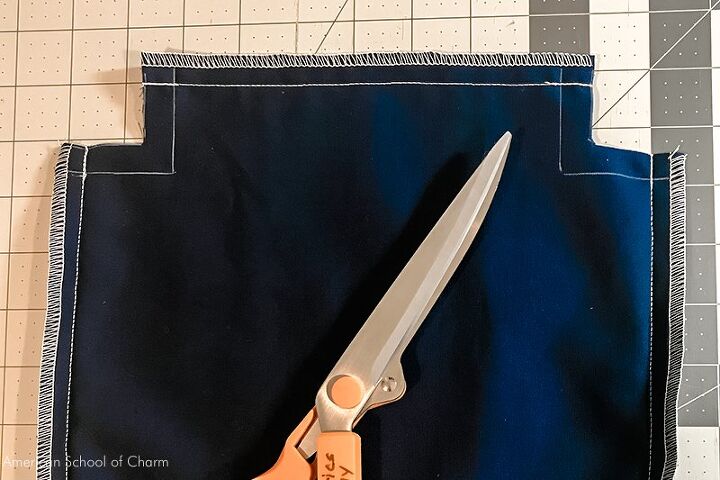
Cut out the smaller square on both corners.
Pull apart the square you just cut. Line up the side seams to the bottom seam and pin. Stitch across to close in the gusset bottom.
Go ahead and press both the side seams and bottom seam open so they lay nicer when the bag is being used.
If you take a minute to flip your bag right-side out, you'll see your bottom corners are just the size you want!
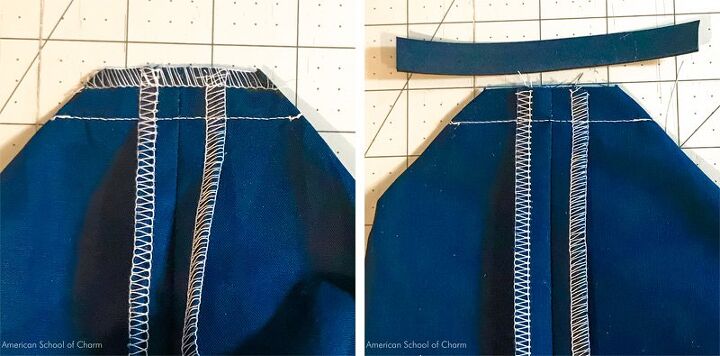
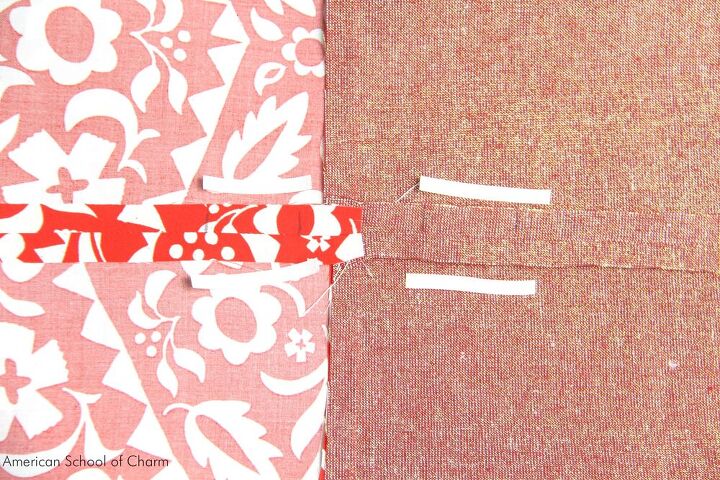
On the inside of your gusset corners, you're left with a raw edge. You need to finish this off on one way or another.
You can use the same method for the sides and bottom panels, as I show in the left side image. In this case, both corners are serged with an overlock stitch.
You can also use bias or binding tape to enclose the bottom. It isn't a difficult option, but does take a few more minutes.
Cut a small piece of double fold bias tape (you can substitute binding) that extends at least 1/2" wider than your gusset corner seam line.
Line up one fold just under your seam line. With the fold open, pin in place and stitch to the gusset corner.
Turn under the sides and pin into place.
Fold the bottom fold up and over the raw edge. Pin or clip into place just past the seam line.
Sew into place. Remember, with matching thread, this looks much cleaner than it does with the white thread against navy blue fabric.
Here it is all finished.

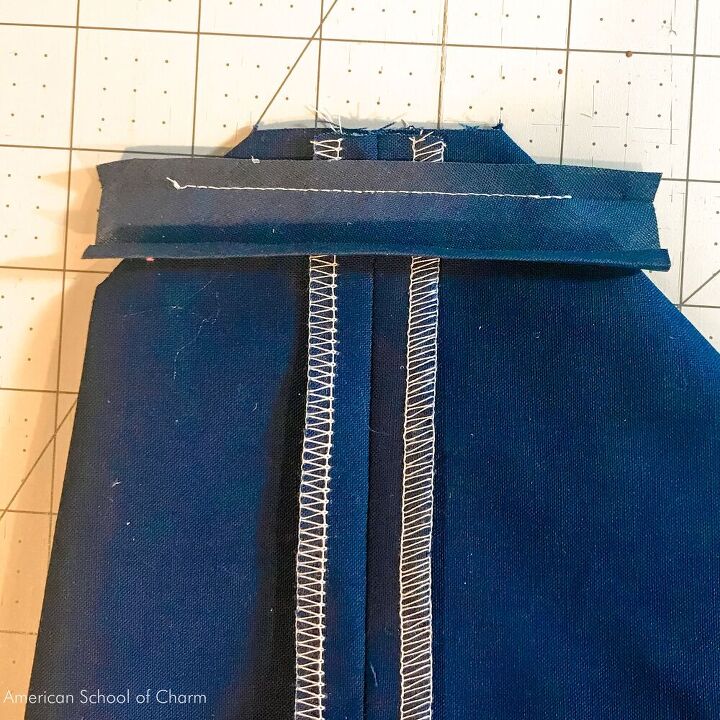
Now we're turning our attention back to the top folds. (Did you think I would forget??"
First, it's helpful to go back to the iron and repress the folds down where you opened up the seam allowances on the sides.
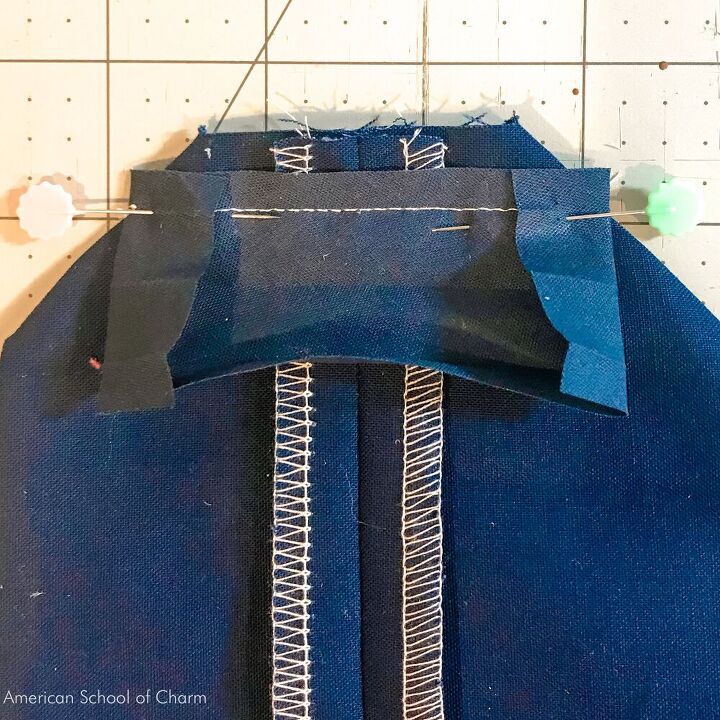
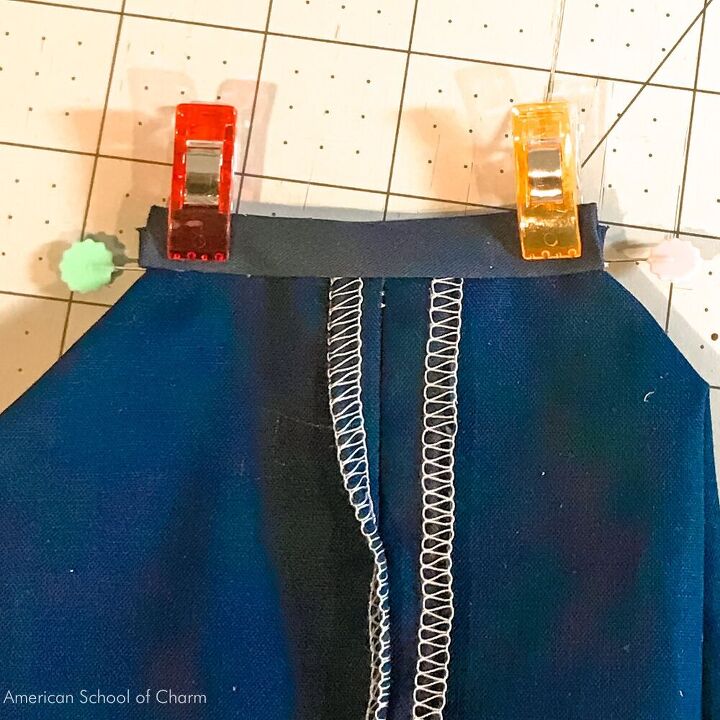
Then fold over to the inside of the bag and pin the ditch lines to match.
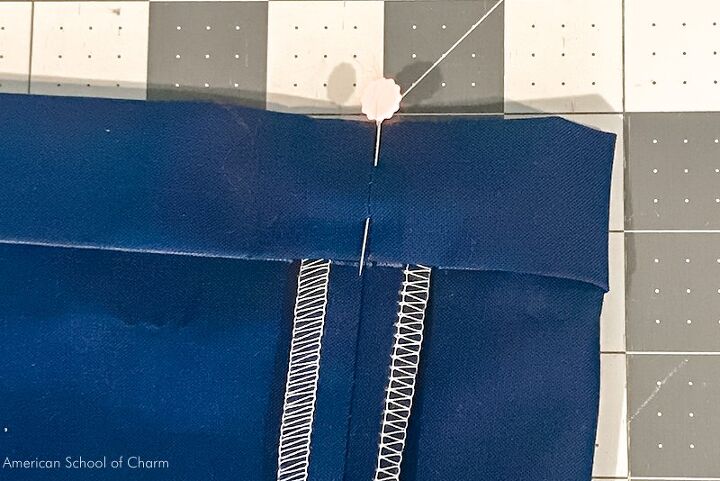
Edge stitch around the fold's edge.
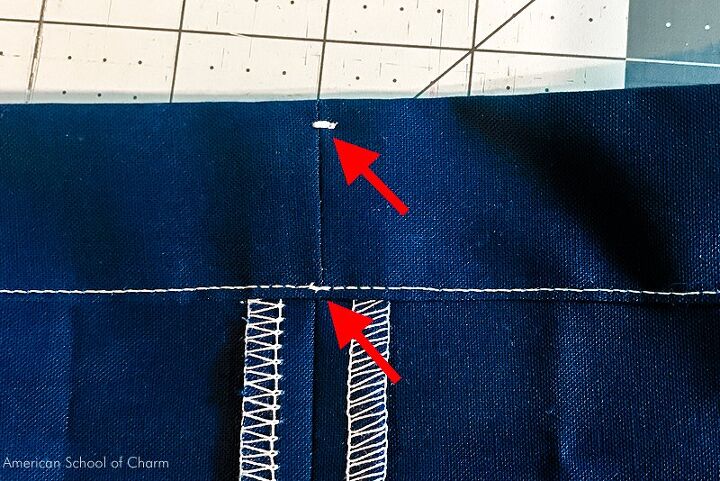
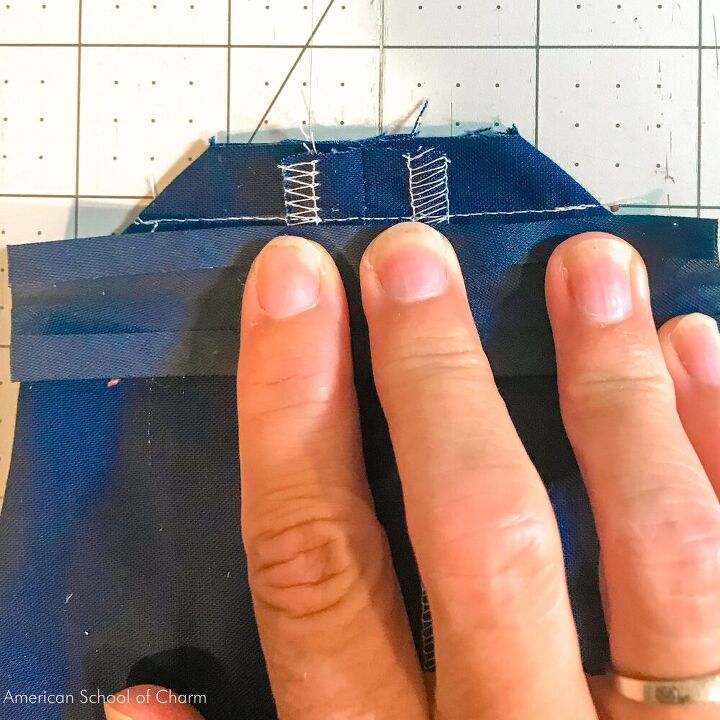
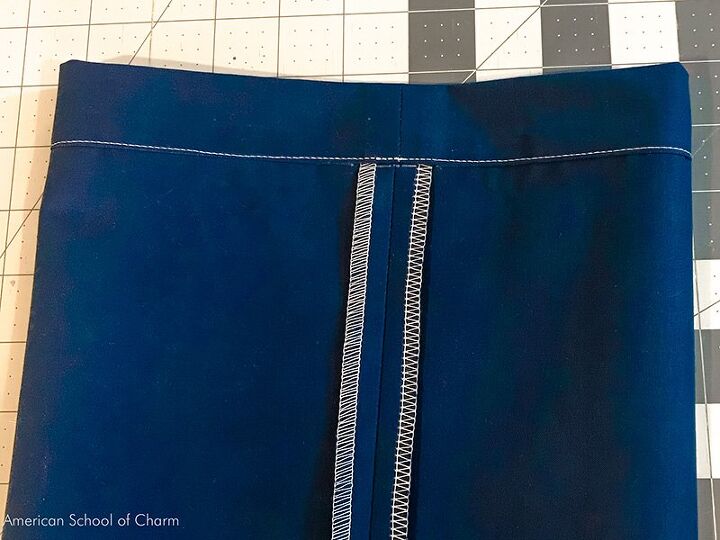
As you sew around the top edge, reinforce the seams as they intersect the side (vertical) seams. To do this, just go back and forth.
Do this at the top of the bag too, as shown by the top arrow.
Personally, I prefer the look of having a top edge stitch. It would look like the photo below.
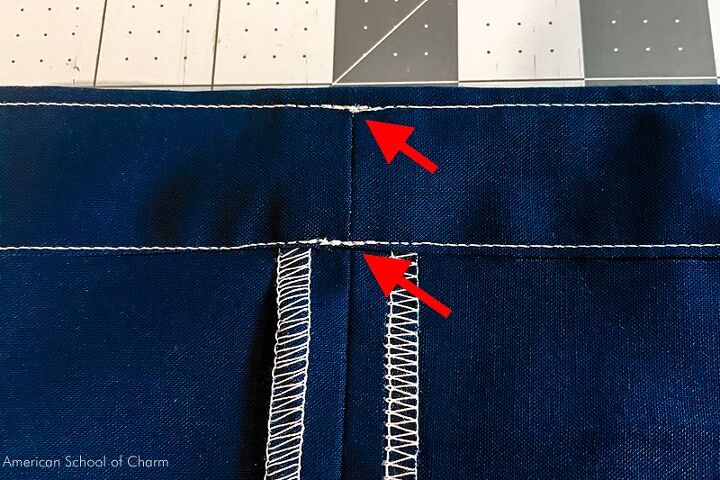
On the left, you see the two reinforced seams from the outside of the bag. On the right, you see if from the inside of the bag.
We're going to open up one of these seams, either the inside or outside, but NOT both. You need to decide if you want your drawstring to tie on the inside or outside of the bag.
Outside??? Does that seem weird?
Most of the time you will want your bow on the outside, however, there are situations when tucking the bow inside the bag makes sense. For example, when I'm making a cover for a foam bolster pillow insert, I want to be able to hide the drawstring cord inside the bag. In this case, the seam is opened up on the inside.
For our example in this tutorial, we'll do what most of you will do and open it up on the outside.
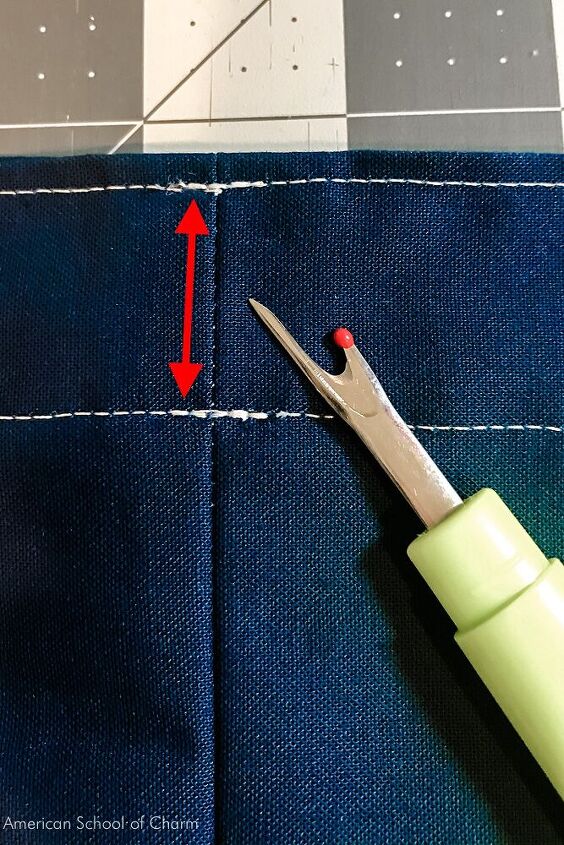
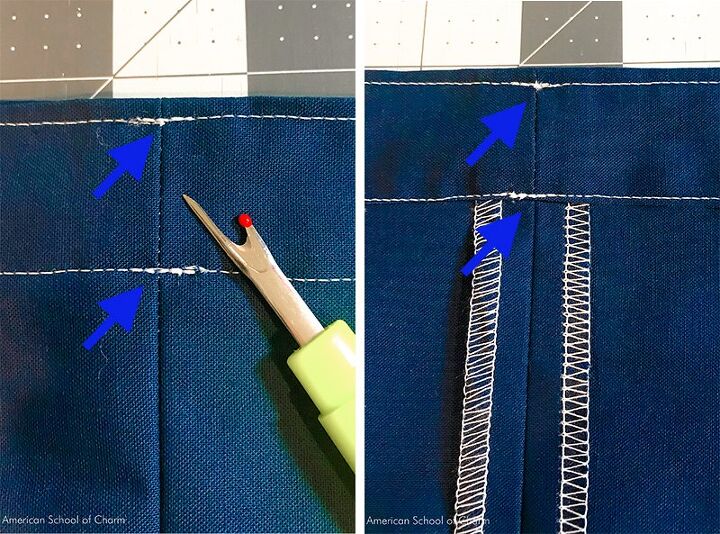
Here you can see where you need to use your seam ripper. Be careful to only rip the seam where shown with the red arrow. Don't go past the seam crossing over into the horizontal seams. Also, it's not that hard to rip open the fabric. Be careful to clip at the thread only!
Since we showed using a two panel bag, you can choose to open just one side seam or to open both sides.
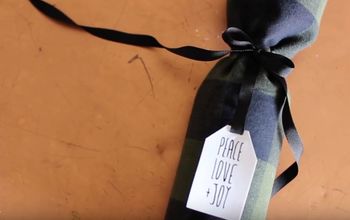
Once the channel is open, you can pull your drawstring through (I've used ribbon) using a safety pin on one end.
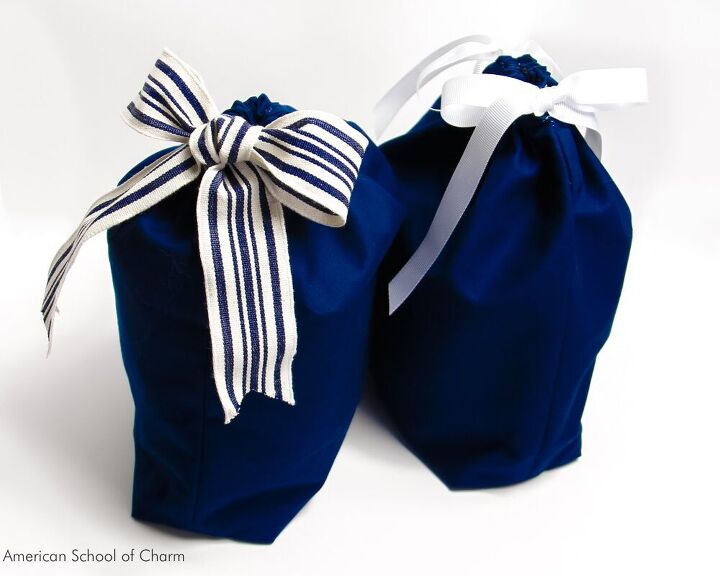
Look at how great these bags look! On the left, a single bow was made on the side. On the right, both seams were opened up for two bows.
Either way, super cute and so easy!!
Check out my other projects here on HomeTalk, as well as on FoodTalkDaily.com, UpstyleDaily.com, and AmericanSchoolofCharm.com.
Thanks so much for visiting my projects! XOXO, Ali.
Resources for this project:


Frequently asked questions
Have a question about this project?