


Twisted Paper Christmas Ornaments

You’ll love making this easy DIY Christmas ornament to decorate your home for the holidays using twisted paper.
For more simple decorating ideas, visit Simply2Moms!
Raise your hand if you love crafting for the holidays.
Us too!
We always enjoy a good DIY project, but during the holidays it feels like we shift into crafting overdrive.
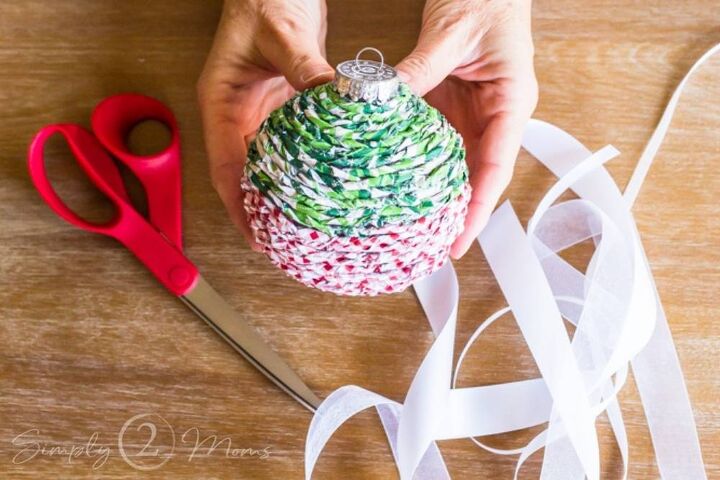
This simple DIY Christmas ornament is made using strips of rolled paper, and we’re planning to make some to send to our families!
This craft is both easy and affordable.
And we love that you can customize the ornaments to work with any style of Christmas decor!
Simply change up the colors and styles of paper you use to make a one-of-a-kind gift that will be beautiful and sentimental.
Let’s take a look at the supplies you’ll need to create these simple ornaments.
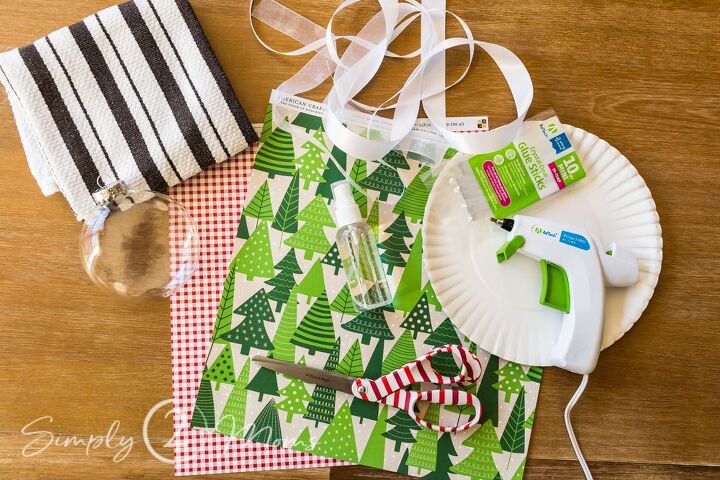
- Clear plastic Christmas ornaments (not glass!)
- Assorted papers such as patterned paper, cardstock, glittered cardstock
- Scissors or paper trimmer
- Spritz bottle filled with water
- Hot glue gun and glue sticks
- Ribbon, twine, or yarn
A few extra items we suggest:
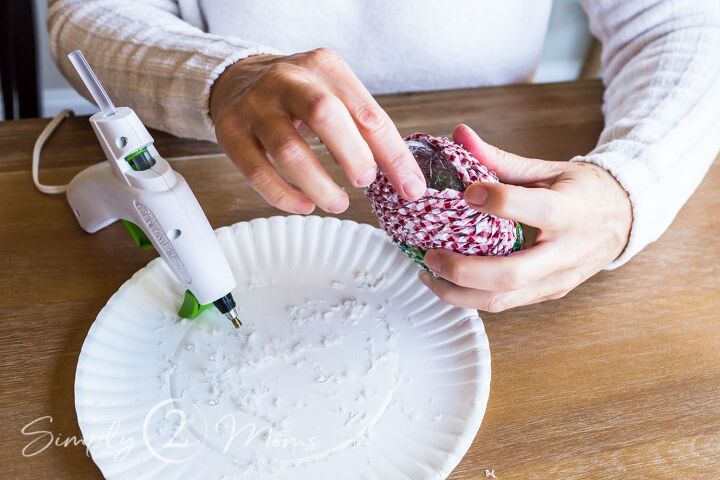
When we use a hot glue gun, we like to place it on a paper plate to catch any glue drips.
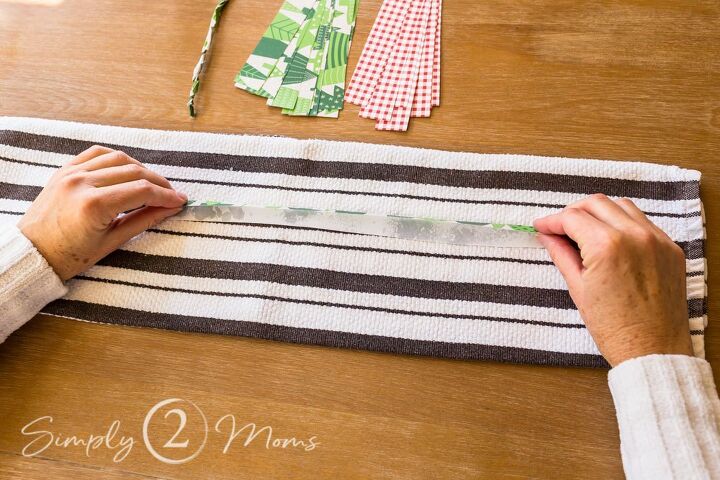
We also recommend placing a towel under the paper when spritzing it with water to protect your craft surface.
Be sure to use plastic ornaments for this project. The heat of the hot glue could cause a glass ornament to shatter in your hand!
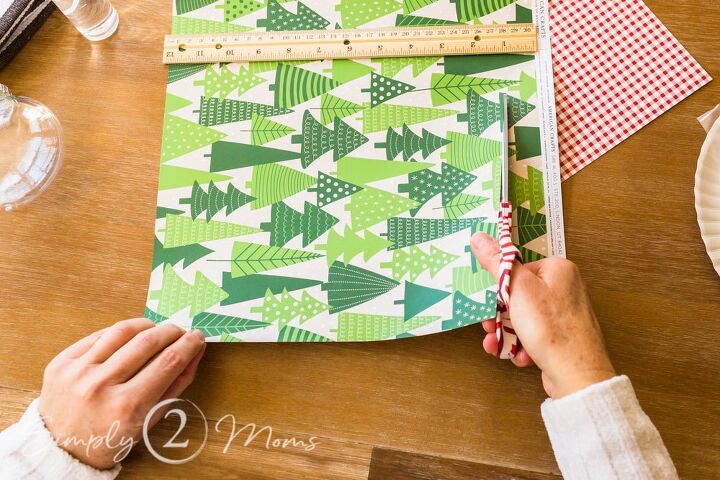
Use scissors or a paper trimmer to cut the paper into 1-inch strips.
You’ll need approximately 2 sheets of 12 x 12 paper to make enough strips to cover one large plastic ornament.
If you’re using a paper trimmer, it’s super easy to cut perfect 1-inch strips.
But you really don’t need those strips to be perfect!
We did find it helpful to use a ruler and make little cuts to help us better estimate an inch.
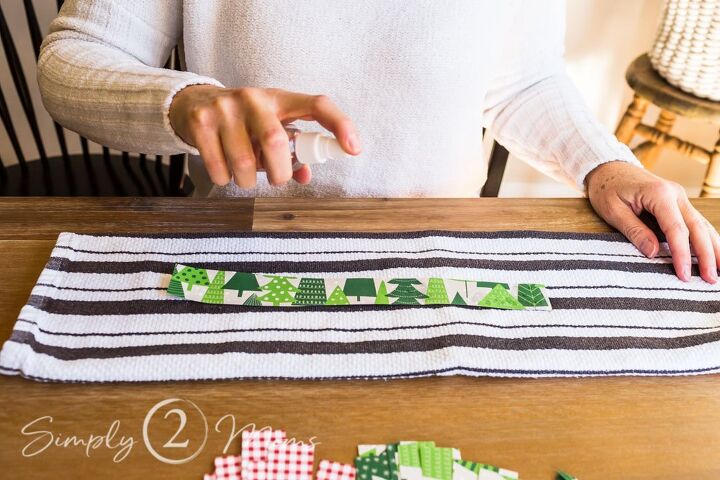
Lightly spritz the paper with water.
You’ll need less water for the patterned papers and a little more for the cardstock or glittered paper.
We found we preferred the way the paper rolls looked without the unpatterned parts showing.
Simply fold the strips long ways so the pattern shows on both sides.
Then twist the paper into a rope.

If you notice the paper is tearing while you try to roll it, you’ve used a little too much water.
No worries!
Just set that piece aside and let it dry a bit before rolling it the rest of the way.
You should do all of the paper rolls first and let them dry a little bit before starting to attach them to the ornament.
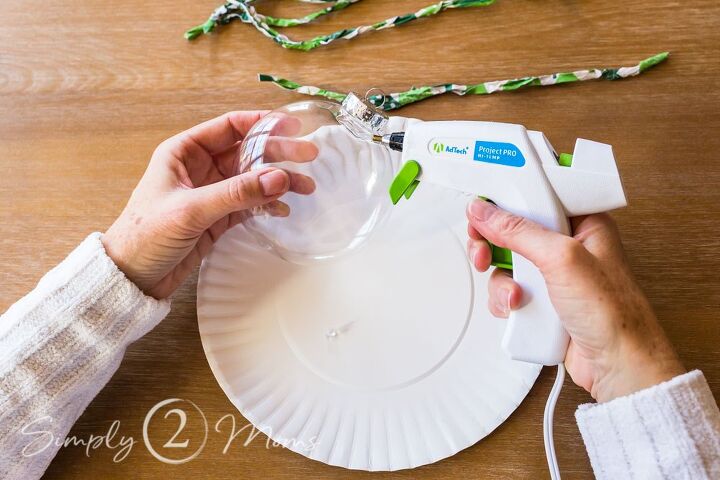
Start at the top by the cap and apply some hot glue.
Then take a strip of rolled paper and work your way around the plastic ornament.
We learned that it helped to twist and roll the paper a little more tightly as you add each strip since the rolls sometimes loosen up a bit while they’re sitting.
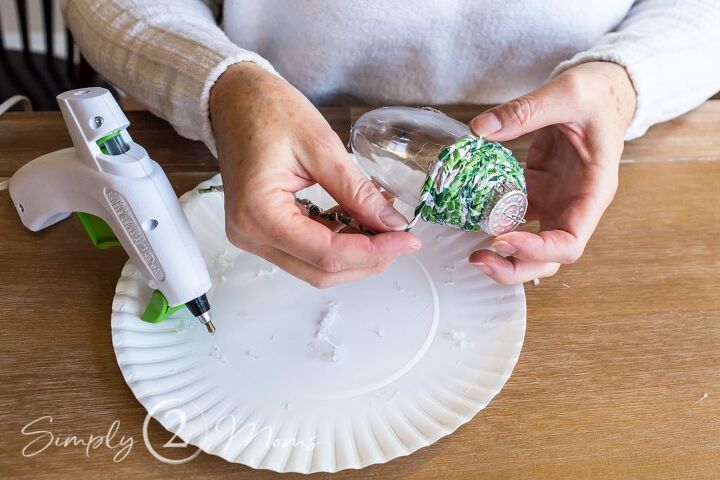
Be sure to press each new roll of paper tightly up against the ones already attached to your ornament.
You don’t want the ornament to show through the paper.
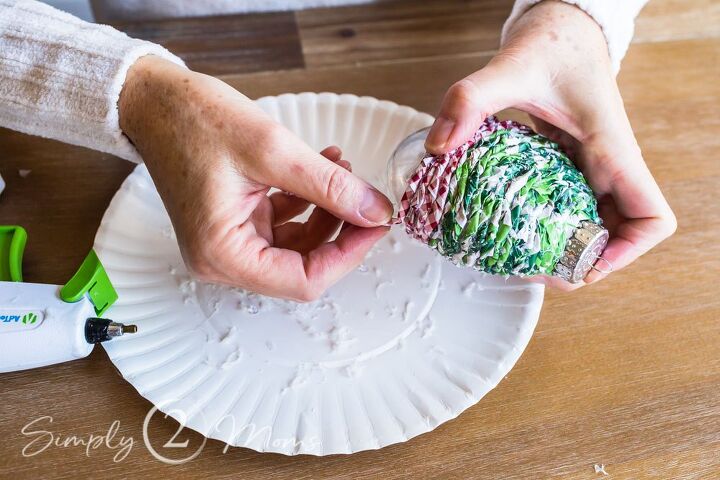
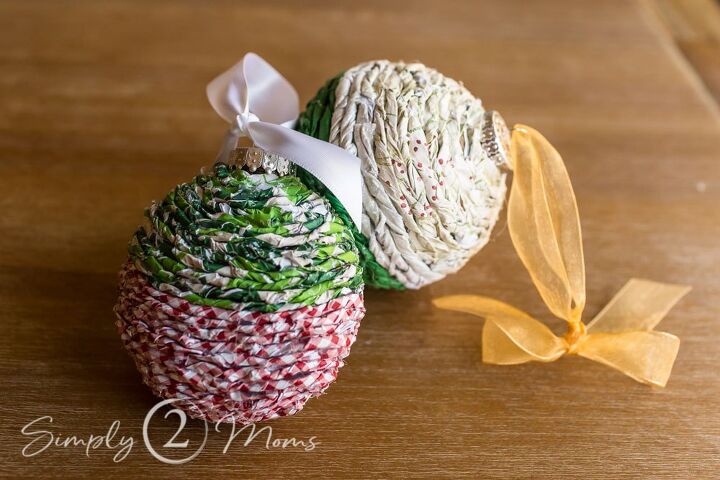
If you’re using multiple patterns, it’s simple to switch to the next pattern.
Just attach one pattern as far as you want it to go, then start a new row with the next kind of paper.
If the hot glue leaves some little strings behind, simply brush them off as you work.
When you get to the bottom of your ornament, make a spiral so the ornament is completely covered and then trim the paper.
You might want to add a final dot of hot glue to attach the end of that last paper roll securely.

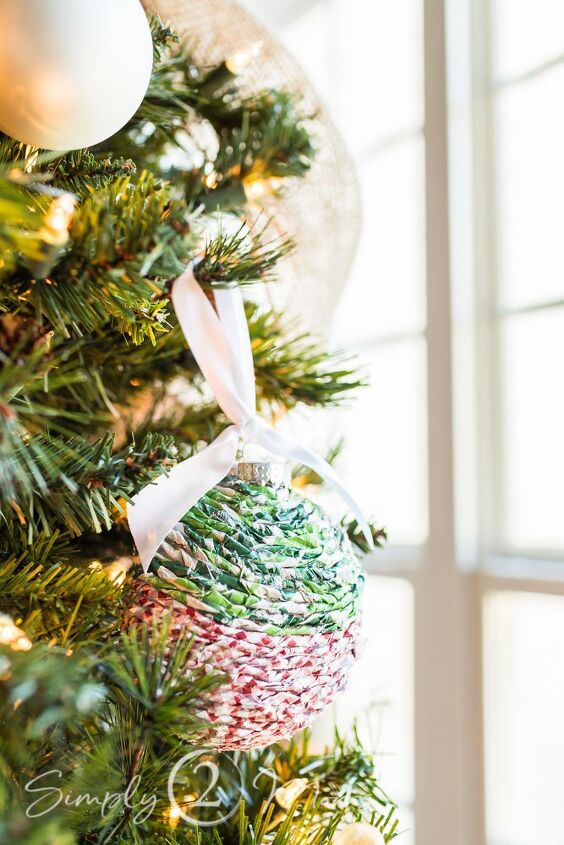
You can get creative with how you hang your ornaments!
Try tying a knot with tails at the bottom of the hanger like AnnMarie did here for a unique look.
If you like a little glitz in your holiday decorating, you could even mist your finished ornament with spray adhesive and give it a dusting of glitter!
Be creative with the papers and ribbons you choose for your DIY Christmas ornaments!
If you’re giving them as a gift, pick colors and styles that will look great in that special someone’s home.
Resources for this project:
See all materials


Comments
Join the conversation
-
What a fantastic idea! My brain cells are already creating some new ornaments! Thank you for sharing! 🌺
-
Very nice! I can visualize many different ornaments with this so thank you!


Frequently asked questions
Have a question about this project?
Could you use napkins?