


How to Make a Corsage for Your Next Big Event

By Stacey Kelleher
For prom, a wedding, or your next major event, you may be looking for ways to save a bit of money on expenses, add a personal touch to your event, or just flex your creative muscle. A DIY corsage is a fun way to accomplish all three.
A corsage is a single flower or small bouquet of flowers worn for special occasions. Corsages can be as simple or as elaborate as you prefer. Most include a ribbon or bow along with unique accents like feathers, crystals, and pearls.
The tradition of wearing corsages at weddings dates back to Ancient Greece, when it was believed that the scent of fresh herbs and flowers could ward off evil spirits. Initially worn on the bodice or waist, corsages are now worn on the wrist, on the upper arm, neck, and even in hair.
We’ll show you how to make a homemade corsage using basic craft supplies and either faux flowers or flowers from your very own garden.
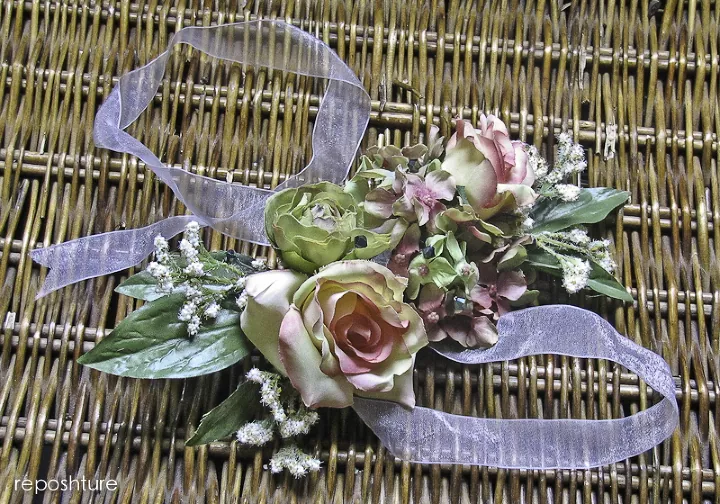
Photo via Reposhture Studio - Kim
Real Flowers vs. Fake Flowers
When designing your corsage, you may be wondering if it’s best to use real flowers or fake flowers. There are pros and cons for both and, ultimately, it comes down to personal preference.
While even the most high-quality silk flowers are lovely, nothing really compares to the beauty of real flowers. And if you use more fragrant flowers, your corsage will smell just as divine as it looks. Fresh blooms tend to be a bit heavier than fake flowers, which is something to consider if it’s going to be worn on your wrist or pinned to a thin strap of clothing.
On the flip side, we know fresh flowers don’t last forever. You can’t create a live corsage too far in advance, and once the night is over, you cannot wear it again. If you want to keep it forever, you’ll have to get it preserved which takes time and money but can be well worth it.
If you’ve been to a craft store, you know that the possibilities for fake flowers are endless. Silk flowers are incredibly realistic and come in a plethora of sizes, shapes, and colors.
The big plus with silk flowers is that you’ll have your corsage forever and, for years to come, it will look just as beautiful as the day you wore it. You can even add dried or preserved flowers to your corsage, or use a combination of real and fake flowers. There are really no rules when it comes to floral design.
How to Make a Corsage
In the following steps, we'll show you how to make a corsage and, if you wish, how to attach a band to make it a wrist corsage.
Tools and Materials Needed
- Pictures for inspiration
- 3-6 flowers
- Floral scissors
- Floral wire (22- or 24-gauge)
- Floral tape
- Pruning shears
- Filler foliage
- Ribbon (⅞- or 1-inch width)
- Floral pins
- Card stock
- Scissors
- Glue gun
- Elastic wristlet band (for wrist corsage)
- Corsage pins
- Corsage box
Step 1: Design the Corsage
Before tackling the practical steps to make a corsage, it’s helpful to plan the general design of your bouquet, particularly the shape you want it to take. Where is it going to be worn? Are you envisioning something simple and sleek, or something more organic and textural? How big or little do you want your corsage to be? Are you aiming for a certain color scheme? Browse through Pinterest and bridal magazines for inspiration.
Step 2: Gather Supplies
When you’re working with delicate, fresh flowers, you don’t want to waste any time. Gather all of your corsage supplies and lay them out neatly in your workspace before you begin.
Step 3: Trim the Stems
Using clean, sharp floral scissors, trim the stems of all the flowers and filler plants so they’re around two inches long.
Step 4: Wire the Stems
Inserting wire into each stem reinforces them to help your corsage retain its shape. To do this, start with the larger flowers. Take an average-sized rose, for example. Cut two five-inch lengths of floral wire for each bloom.
Take one piece of wire and push it into the base of the bloom where the flower meets the stem. Pull the wire out the other side so the flower is in the center with half of the wire sticking out on either side.
Take another wire and push through the base of the bloom again, but this time at a 90-degree angle to the first wire. When this step is complete, the wire should form an “X.” Grasp all of the wires and bend them down together, as if you are forming another stem.
For smaller flowers, like miniature rosebuds, for example, you'll only need one piece of wire. For flowers with thicker stems, like carnations, you can actually insert the wire up into the stem from the bottom, insert one wire into the base of the bloom, and gather all of the ends together.
Wiring is sometimes a matter of experimentation to see what works best for flowers of different sizes. Wire all of the flowers before moving on to the next step. Delicate filler like baby’s breath or ferns do not need to be wired or wrapped.
If you’re working with fake flowers, they should already contain wires or sturdy stems, so you can skip this step.
Step 5: Wrap the Stems
Now grab your floral tape. Starting at the base of the flower, slowly work your way down the stem, spinning the flower with one hand as you release and wrap the tape with the other. It may feel a bit awkward at first, but with some practice, this step will become easier.
When finished, snip off the excess wire and tape about two to three inches from the base of your flowers. (You will trim them down again once your corsage is assembled.)
Step 6: Assemble the Corsage
Now, it’s time to tap into your inner designer. Gather all filler pieces and wrapped flowers together to create the corsage look and shape you want.
Step 7: Wrap the Entire Corsage in Floral Tape
Just as you did with each individual flower, start at the top and work down, winding floral tape around the entire corsage.
Step 8: Cut the Bottom of the Corsage
Use pruning shears to cut the bottom of the corsage to a length of around two inches. Use a single piece of floral tape to cover the bottom of the corsage to prevent any poking or snagging from the sharp wires.
Step 9: Add a Bow
This step is optional and a matter of personal preference!
There are countless ways to tie a bow, whether you’re going for a multi-loop bow or a smaller bow. Use the ribbon to tie a bow firmly around the bouquet. Secure the center knot of the bow to the bouquet with a floral pin.
Keep following the steps if you want to make a wrist corsage.
Step 10: Cut Your Base
Cut a piece of cardboard or cardstock approximately two square inches in size. (Choose green or brown to blend in with your corsage.) This will be the base for your wrist corsage.
Step 11: Glue Your Elements
Use a hot glue gun to glue it to the cardstock or cardboard base. If you have a bow that you haven’t attached yet, you can glue that into your arrangement as well.
Step 12: Attach the Base to the Wristband
You can use a corsage wristband sold online or at your local craft store. Most come with clips or claws that bend inward to secure the flowers. Without a base, the flowers are more likely to fall out of the clips. We recommend using a cardstock base (like the one we outlined in Step 10) and wrapping the wristband clips around that piece for added stability. You can also glue the cardstock base directly to a piece of ribbon or elastic you have at home.
Step 13: Store the Corsage
Once your corsage is complete, place it in a corsage box or large plastic resealable bag until you’re ready to transport it. If you use a bag, just be sure to blow some air into it first to expand it and protect your creation. Refrigerate fresh flower corsages until you are ready to wear them.
What Flowers Are Best for a Corsage?
With so many flowers to choose from, how do you know what to use for your corsage? First, look for hardy flowers that do well without water for long periods of time. You also want to factor in fragrance if that’s important to you—some flowers just smell sweeter than others.
Opt for flowers with robust leaves and blooms that will be more likely to keep their shape throughout your event. Some of our favorite flowers for corsages include:
- Roses
- Carnations
- Chrysanthemums
- Lilies
- Orchids
If you're making a corsage for a wedding, shower, or prom, look into the meaning of certain types of flowers and plants. For example, pink carnations represent the love of a mother—perfect for a baby shower corsage for the mother-to-be. A bride might consider peonies for her corsage or bouquet since they represent a happy marriage and a happy life.
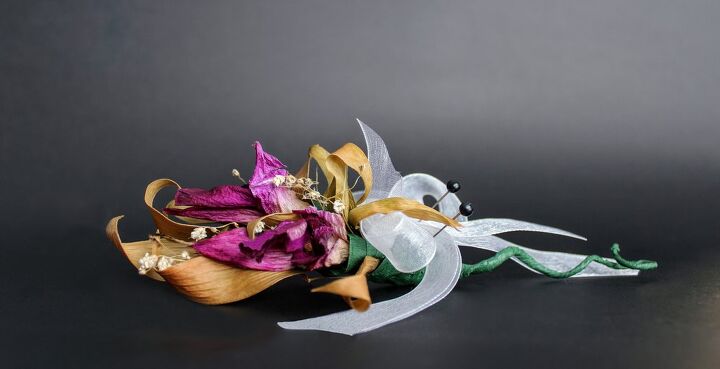
Photo via Shutterstock
How to Preserve a Corsage
You don’t have to toss your corsage away when the big day is over. Consider preserving it and displaying it in your home to keep those memories forever. Here are three easy methods to preserve a fresh flower corsage.
Dry It
Turn the corsage upside down and clip the stem bundle to a hanger with a binder clip or clothespin. Place it in a cool, dark spot in your home, like a closet. Within a few days, the flowers will dry. Keep in mind that they will be quite fragile, so place them in a shadowbox or covered glass container to be admired for years to come.
Press It
Pressing your flowers is another creative way to preserve your corsage. Separate all of the elements of your bouquet and carefully remove the floral tape if possible.
Place a piece of cardboard on a flat surface. Lay down a few pieces of newspaper and then a sheet of tissue paper. Place the flowers on top of the tissue paper. Place another piece of tissue paper over the flowers and cover with more newspaper, followed by another piece of cardboard.
Carefully put down a stack of heavy books on top of your cardboard-newspaper-tissue paper-pressed flower sandwich. Wait anywhere between three to four weeks for the flowers to fully dry. You can then place them in a frame or shadow box to enjoy.
Gel It
This method uses silica flower drying crystals found at most craft stores or home and garden centers. To preserve flowers with silica, simply pour the crystals into the bottom of an airtight container. Add the flowers to the container and cover them gently with silica powder.
Once the flowers are completely covered, close the container and place it in a dry place for five to seven days. This method is the best way to retain the flowers' natural colors and shapes.
A bright and fragrant corsage is a wonderful accessory for any special occasion. And once you see how easy and enjoyable it is to design and make your own corsage, you may never go back to store-bought ones again!
Do you enjoy flower arranging? Share your DIY corsage tips below.


Frequently asked questions
Have a question about this project?