


How to Cheaply & Easily Make a DIY Fire Hydrant For Your Doggy

This DIY fire hydrant was an easy and free project using scrap wood. It would cost around $7 if you needed to buy the wood.
After adopting this cute little dog we weren't prepared and all he had in our yard to raise his leg on was a cinder block. He deserved better, so using scrap wood, my husband made a DIY doggy fire hydrant for him!
This project was part of my Summer Backyard Refresh Project!
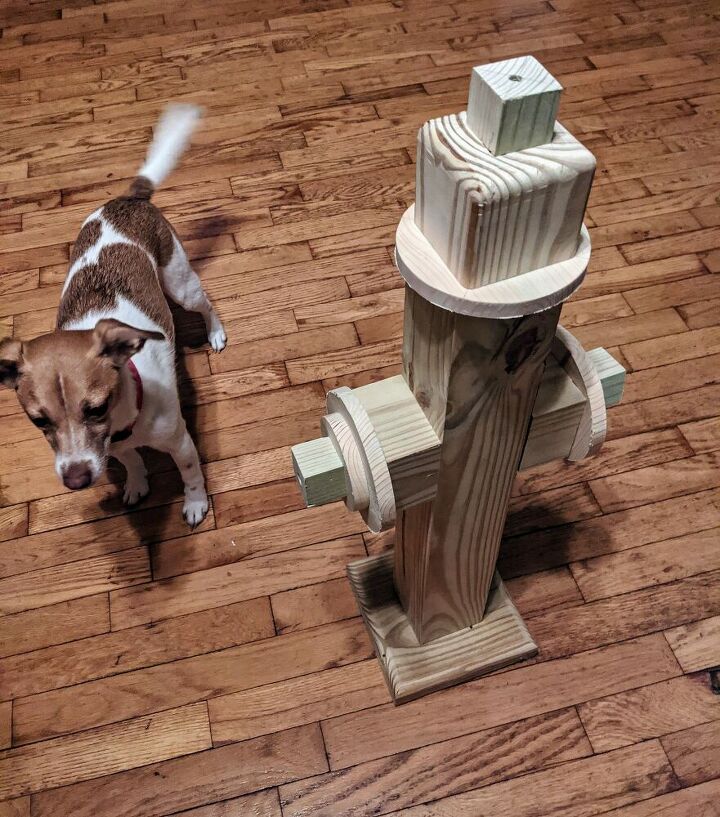
Here it is unpainted. Pepper gives it some side-eye looks.
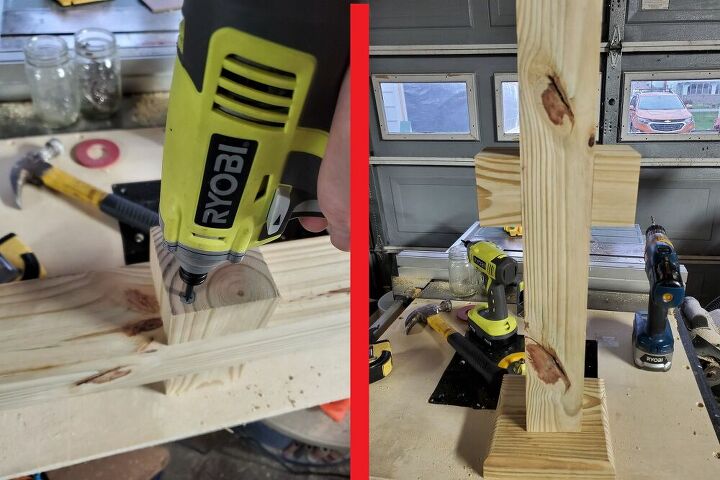
1. Cut the wood blocks
We had a scrap piece of 4x4 about 30" in length and simply cut 3 square blocks off to attach to the sides and top. One was 3" and two were 2".
The base piece on the bottom was another scrap piece of wood and was totally optional unless you don't intend to attach it to the ground.
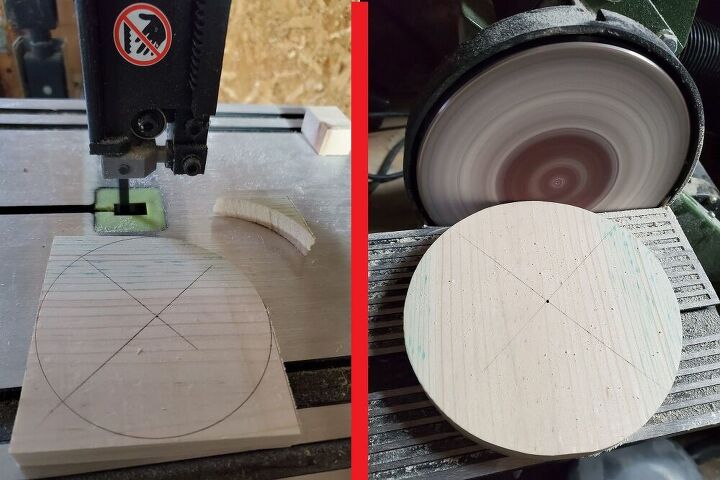
2. Cut circles
With some scrap pine pieces of wood, use a compass to draw circles on the square pieces of wood. You need three that are 5½" and two that are 3½".
Rough-cut the circles with the bandsaw then smooth them with the disc sander. There will be a 5½" on the top and on both sides. There will also be a 3½" on both sides.

3. Assemble the fire hydrant
From scrap wood, you'll want three small 1-12" squares to put on top and both sides.
Using long screws attach your stacks of wood to the 4x4 center post.
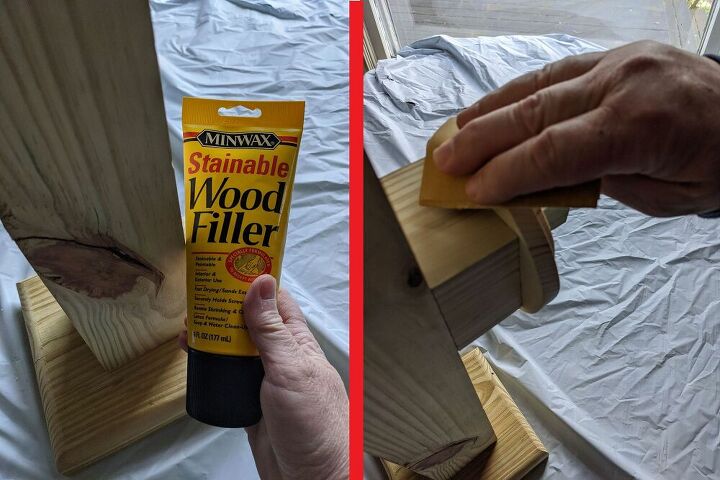
4. Use wood filler & sand
You can use wood filler to fill in the knots and any cracks. I then sanded it smooth and wiped it down.
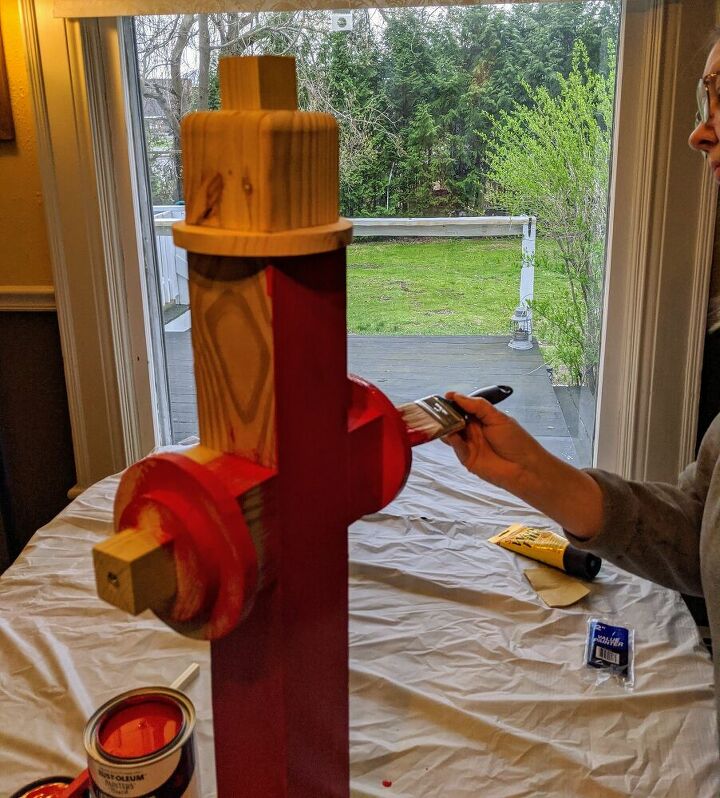
5. Paint
Fire hydrants are traditionally red or yellow but really any color you have on hand will be fine. I had red paint but for sure your doggo won't be complaining about your choice of color. We gave it several coats to better protect it.
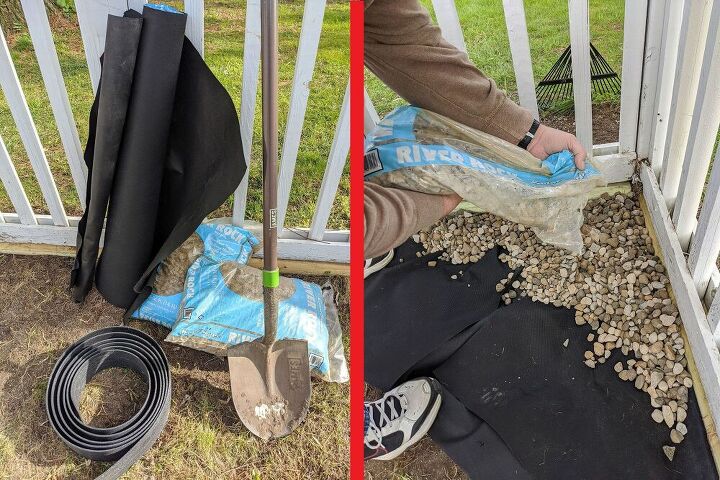
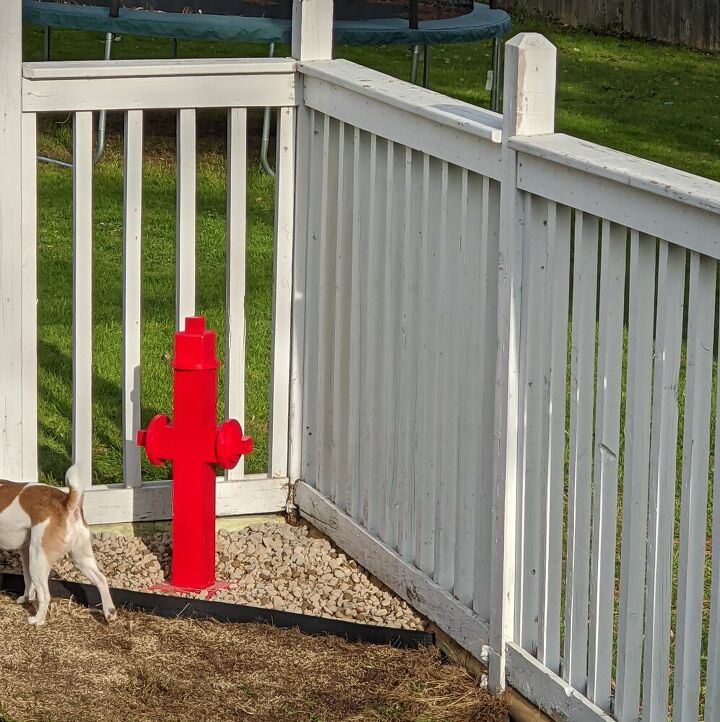
6. Landscape
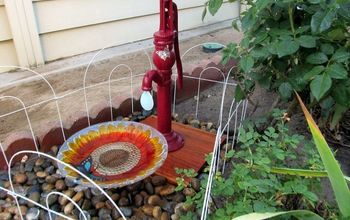
I had a corner spot of the yard I wanted to put it so I gathered supplies: landscaping fabric, border, river rock, and a shovel.
After laying down the landscaping fabric we dropped some rocks to hold it in place. Then put the border in place.
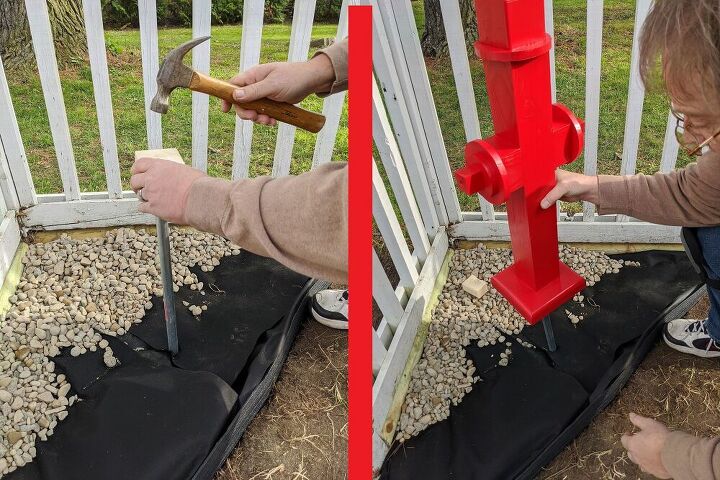
7. Insert the DIY fire hydrant
To hold the fire hydrant in place, drill a hole into the bottom of the hydrant. Then hammer a metal rod into the ground and slide the hydrant onto it. It's quite secure, yet also easily removable.
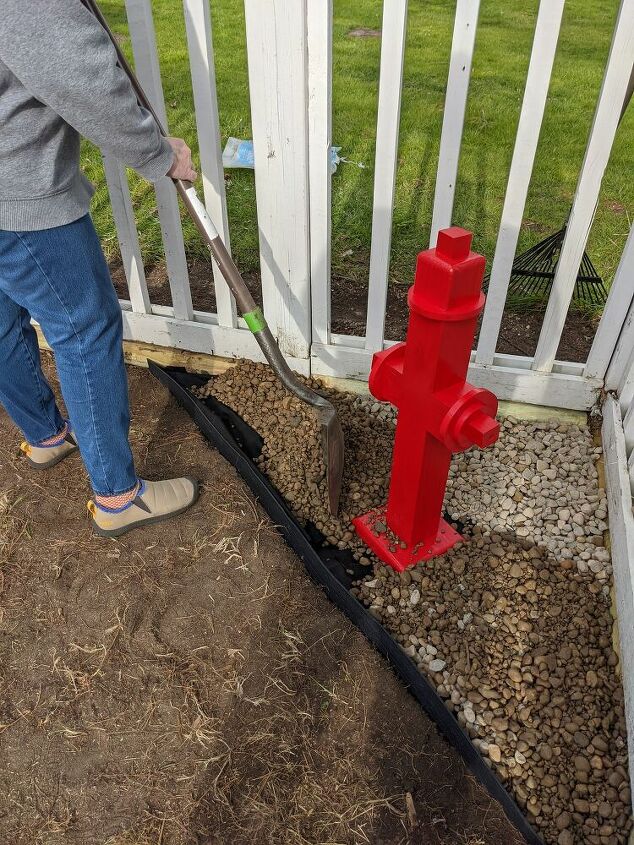
8. Finishing touches
After dumping in a bit more rock I smoothed it into place. I didn't want this to be a large space with a lot of rock because we've discovered he's a kicky kind of dog. Rock all over the new grass seed I was laying would not be good.
DIY fire hydrant
Now Pepper has something worthy of his leg-raising efforts!
This DIY fire hydrant project cost me nothing since I had all the materials and tools, but I've listed everything further below. I would say you would spend less than $10 on the materials.
Let me know what you think of Pepper's doggy fire hydrant in the comment section below.
Resources for this project:
See all materials


Comments
Join the conversation
-
So cute I have to make it..I also have a jack russel named pepper 😄and he’s a “kicker”too..( must be a russel thing)..I think he would love it!
-
Congratulations 👏
this is a very cute project 🐶 🐕️ 🐩
I love it ❤️
Thank you for sharing 👍️


Frequently asked questions
Have a question about this project?
Really nifty. I like it, but I wonder, will my Jack take to it easily? Will he know it's for him?