


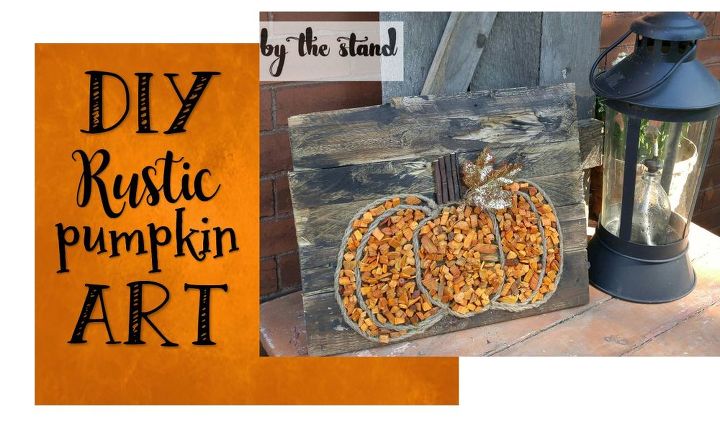
DIY Rustic Pumpkin Art

by
Holly Grace
$10
2 Hours
Easy
Pumpkins, pumpkins, pumpkins! Yay pumpkins!! Can you tell I love pumpkins!? They are probably my favorite part about Fall… actually, that is a lie. I love Fall so much that I can’t pick just one favorite thing! I am in complete Fall go mode and I would like to share this DIY Rustic pumpkin art that me and my mother made. I would take all the credit, it was her idea!😀 Now you know where I get my creative genius from lol!
Let’s dive right in!
Let’s dive right in!
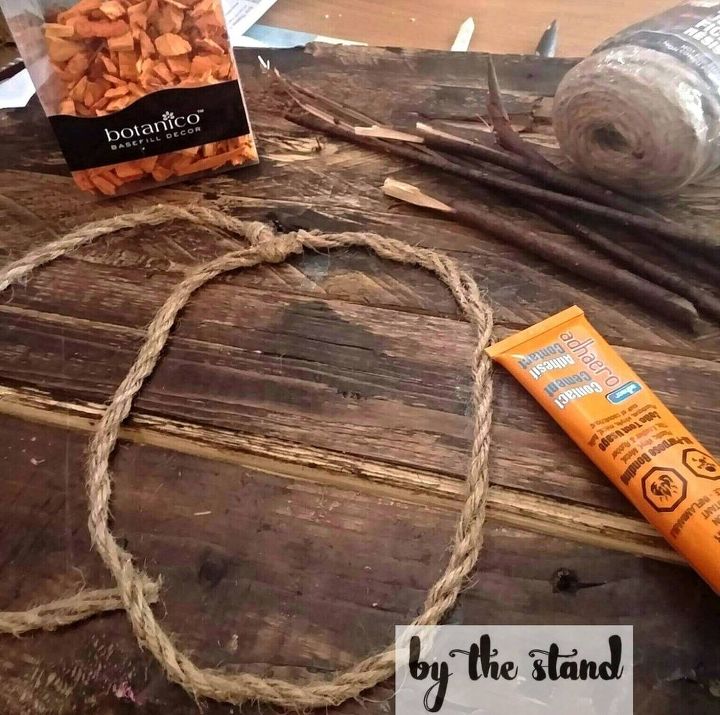
Here are the supplies for this project
I already had my pallet boards together, so I don’t have any pictures for this step. If you would like to do this all that you have to do is secure the boards together from the backside by screwing in two pieces of wood running the opposite directions from the pallet boards.

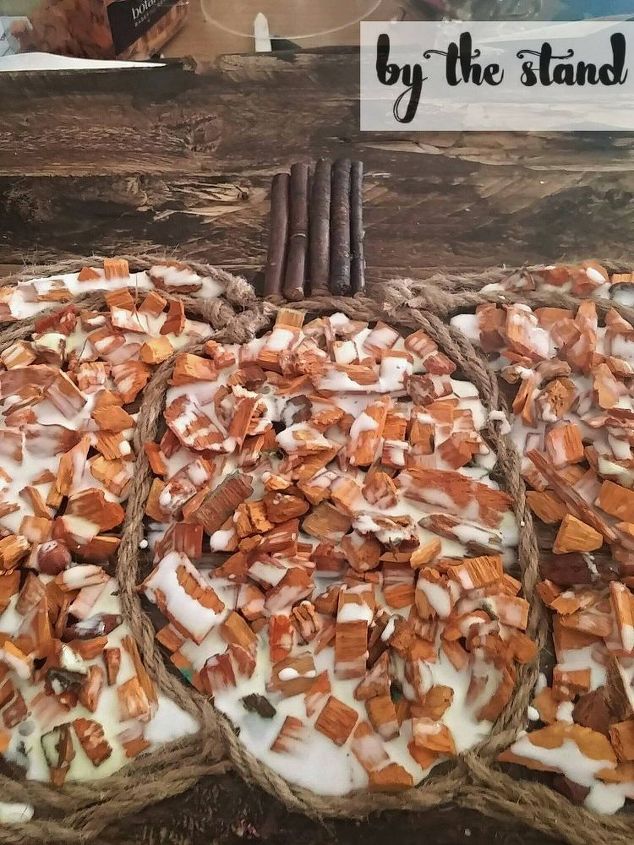
We did this so that we could get the effect of a rope, without having to pay for expensive twine rope. This twine is from the dollar store.
Once we had the pumpkin outline with the twine rope, we filled the inside with the orange wood chips.
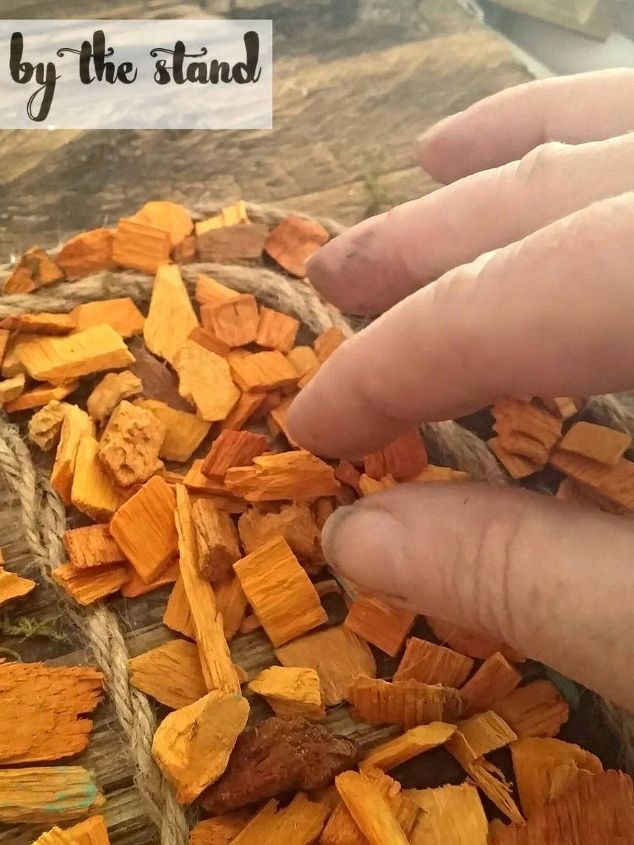
Rather than gluing the chips one by one, we placed them all on the inside of the pumpkin outline and then my mom came up with this crazy idea to lather the white craft glue over top. Crazy thing is — it worked amazingly!
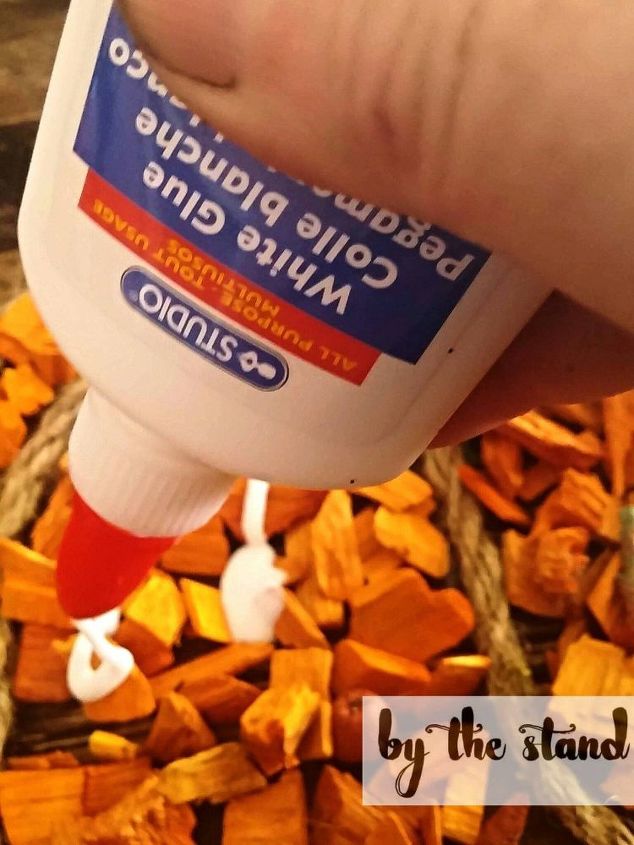
My mom covered the entire thing of wood chips with the white glue and over the drying time it sunk down through the cracks and dried clear.
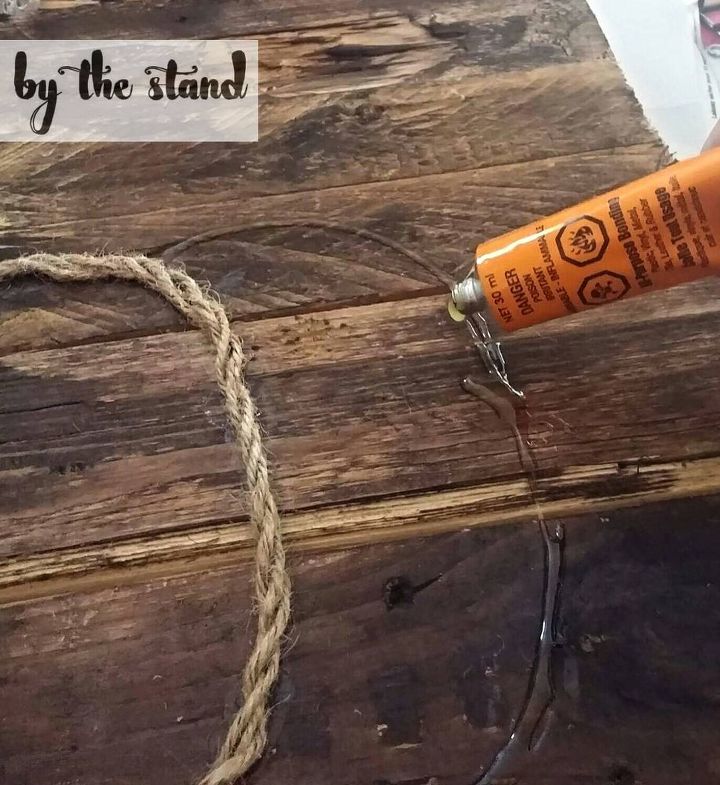
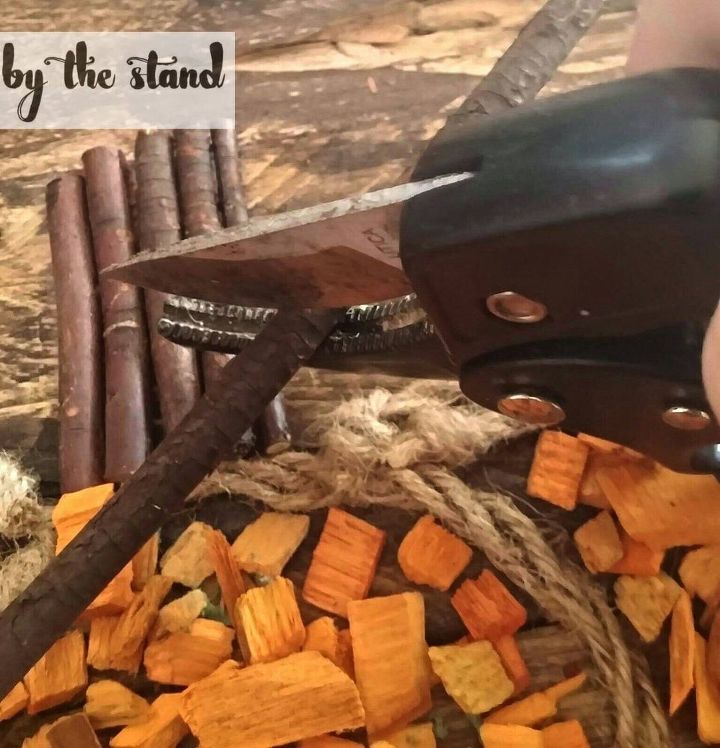
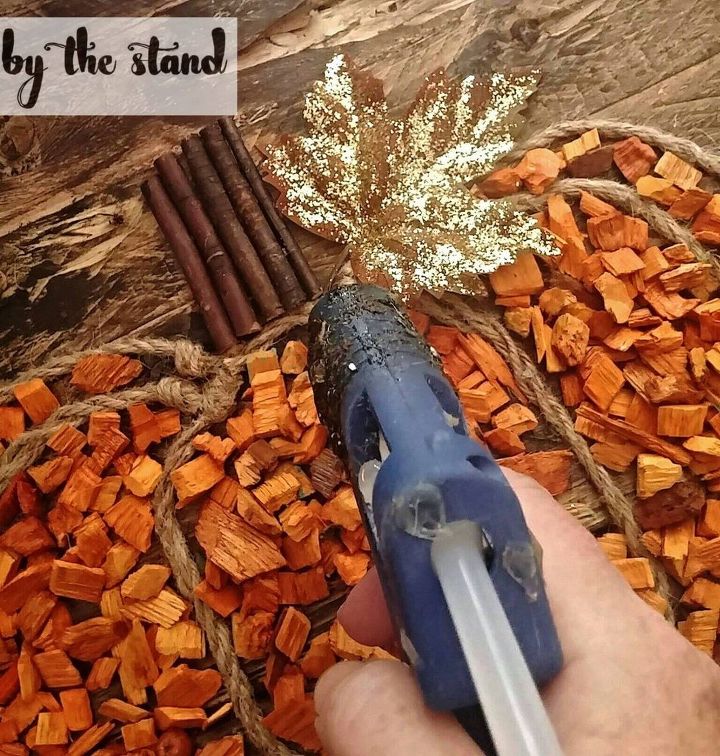
To make the stem, we collect sticks from the yard (okay, we made have had my kids do that part lol) We cut the sticks to the size we wanted and then glued them down with the contact cement.
We added some gold leaves from the dollar store and as well added some copper wire. The copper wire technique can be seen in our Fall Wreath tutorial. Check it out on my blog, or my Hometalk profile!
All done! What do you think?
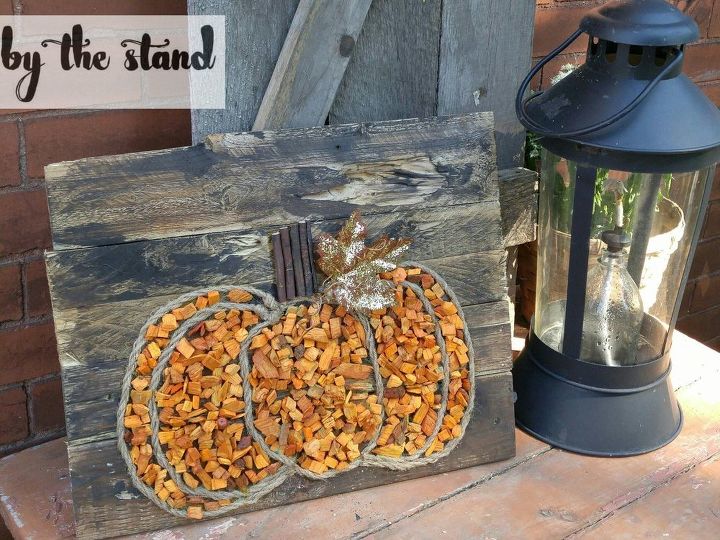
We decided to leave a bit of space at the top so that we can add a word or phrase at the top. I will be sure to share a pic when we do that!
Want more details about this and other DIY projects? Check out my blog post!
Comments
Join the conversation
2 of 26 comments
-
This is wonderful! i want to try it with Pumpkin seeds!
-
Very nice! Definitely going on the DIY list for Fall.


Frequently asked questions
Have a question about this project?