


How To Make A Large Outdoor Christmas Wreath
If you are visiting the blog today I am so excited to share with you how to make a large outdoor Christmas wreath. I promise it’s really easy and by the end of this post you will be wanting to make a wreath for yourself!

How To Make A Large Outdoor Christmas Wreath
Before I share my wreath I have to warn you, I absolutely LOVE Christmas ! I love to go all out, I love to make it all about Jesus and I love that my birthday is 3 days before Christmas!
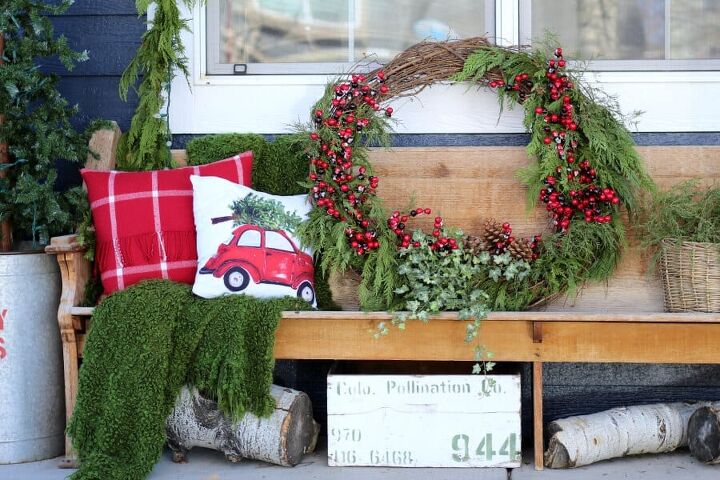
I just shared our Christmas home tour this past Monday and it put me in the mood to get my porch decorated too! And as I was decorating our porch and my favorite outdoor pew for Christmas, I realized that the window above the pew felt blah. Well that doesn’t work for me, remember?!
It was missing something.
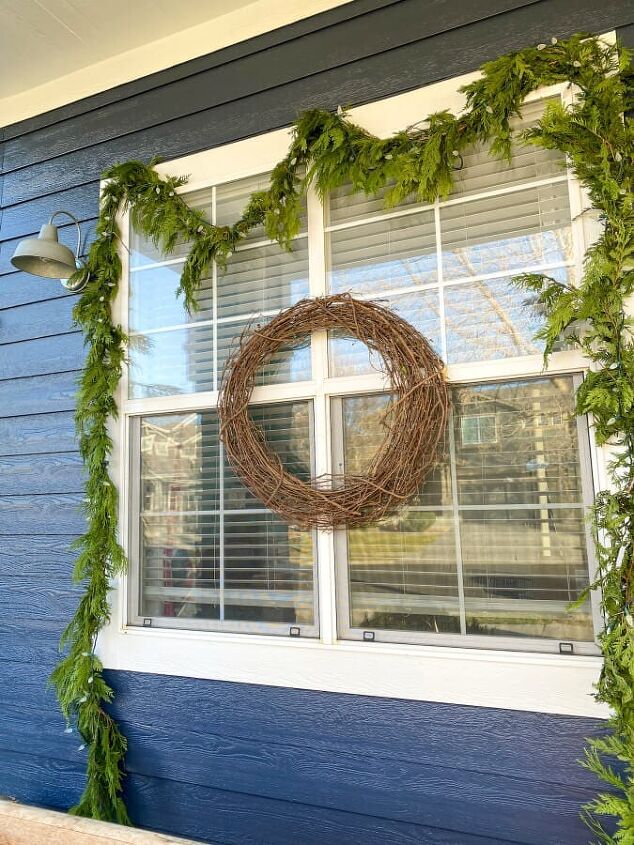
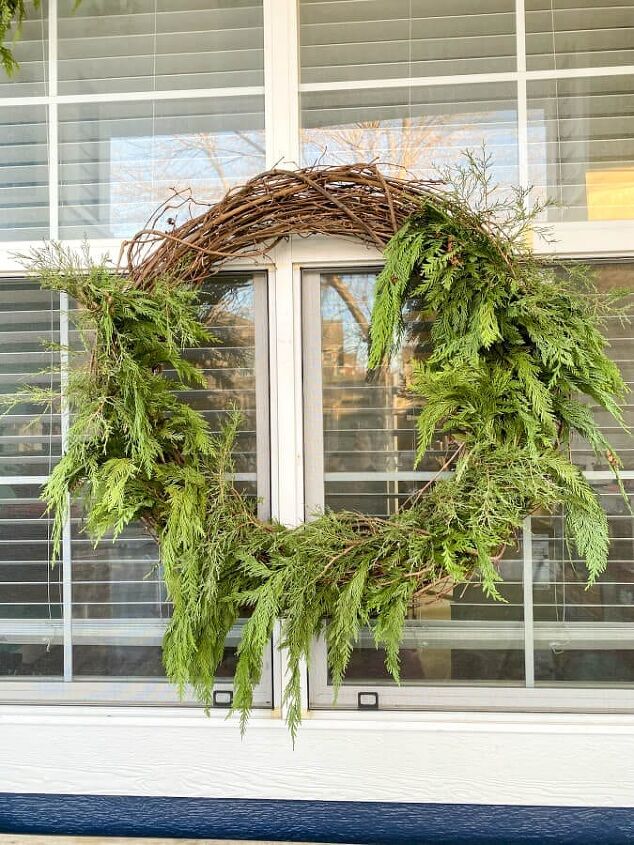
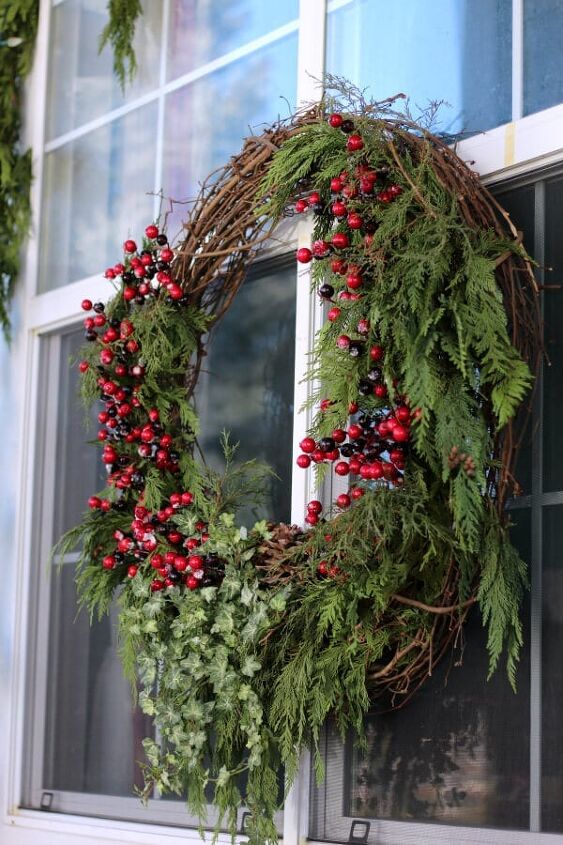
It’s such a large window so I knew it needed something big. Immediately I thought about the large grapevine wreath that I had used for my Fall wreath and also used for my blue hydrangea wreath. I ran down to the basement and dug it out and put it on our windows. It was the perfect size but needed some life!
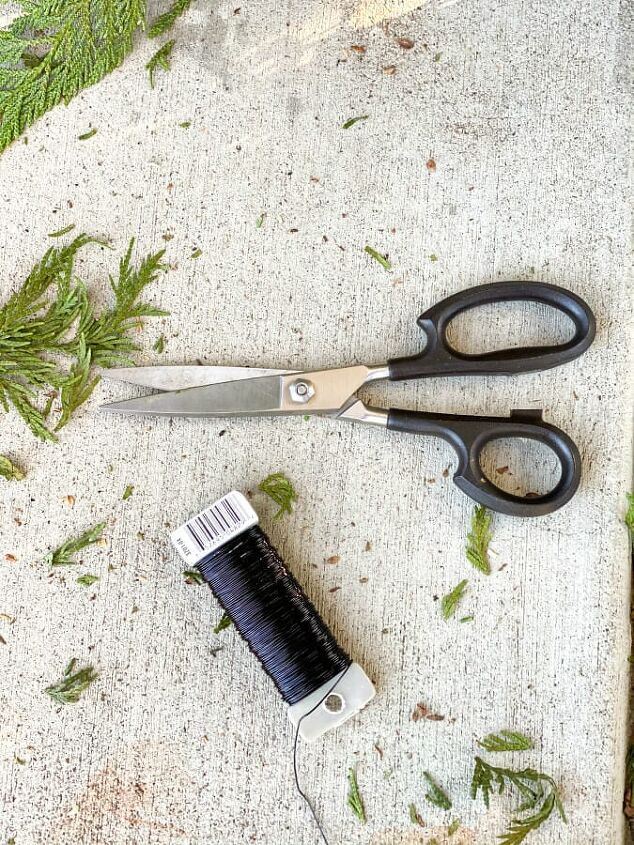
Supplies Need For A Large Outdoor Wreath
All of the supplies I used for this wreath I actually had on hand or found at Hobby Lobby at different times. That means this wreath is an affordable DIY and one that makes a big impact!
- Large grapevine wreath (I got mine at Hobby Lobby for 40% off making it $15)
- Fresh greenery (cedar clippings and juniper clippings)
- Faux ivy greenery (borrowed from my mom but I bet you could find similar at Hobby Lobby)
- Pinecones
- Berry garland (mine was from Hobby Lobby and 50% 0ff making it $10)
- floral wire
- scissors
- wreath hanger (also from Hobby Lobby)
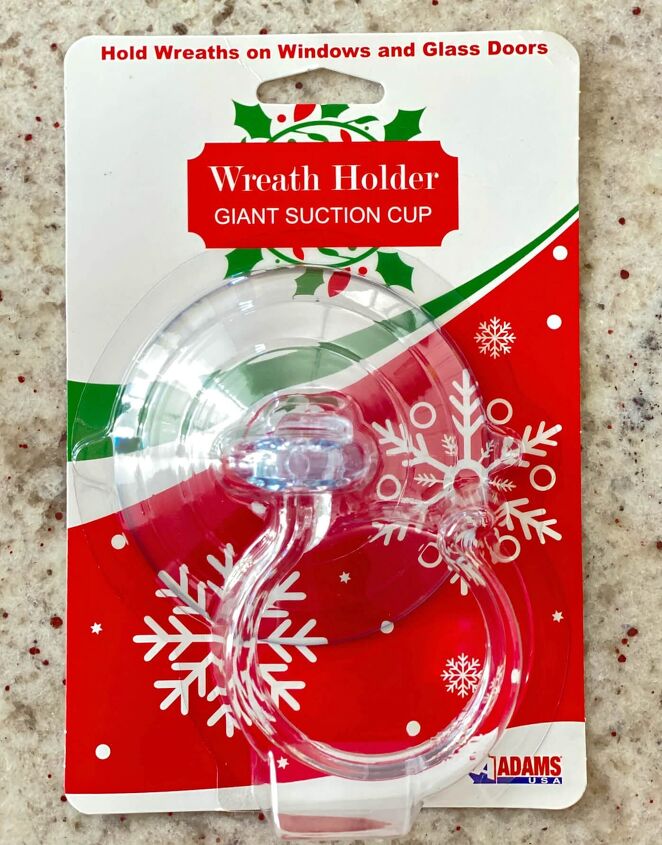
Hanging Tip
This is the wreath holder that the wreath is held up by on my window. However, when I first tried it on my window it did not hold the wreath it just continually slipped down. Even after I followed the directions about cleaning the window, etc.
So what did I do?
I googled how to get a suction cup to stay on your window…and guess what?! It turned up an article about wiping the suction cup with vegetable oil. So that’s what I did and IT WORKED!!! You can thank me and google later. 🙂
How The Wreath Evolved
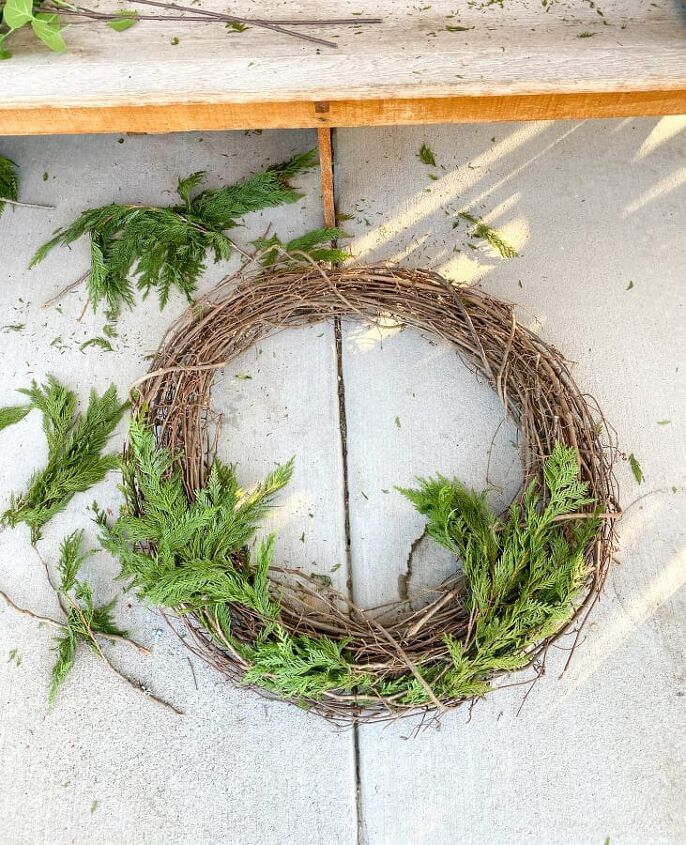
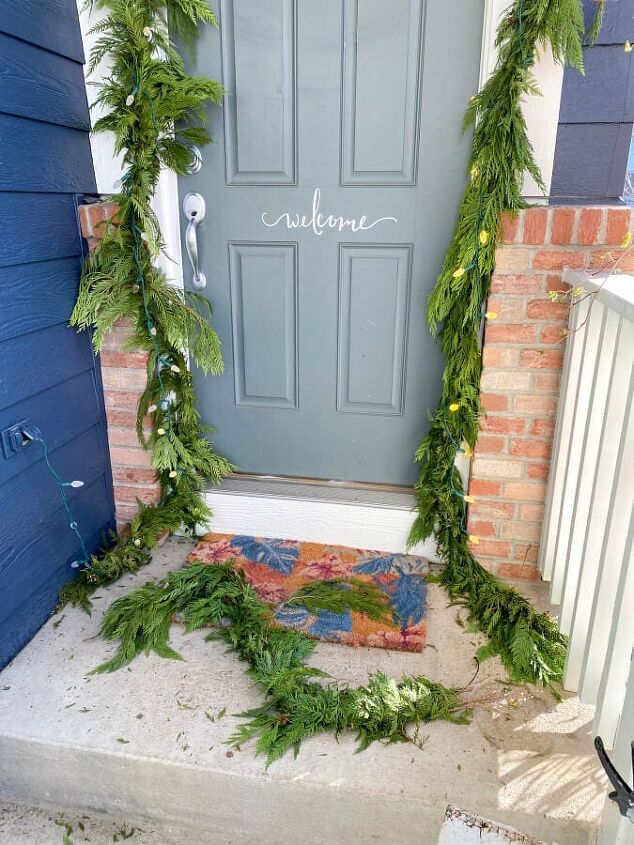
Ok let’s get down to business. This wreath is absolutely super simple to make and took me just under 30 minutes to complete. Once I had the wreath on the window I knew it needed greenery. Luckily, I had some extra live garland from around our door that my neighbor scored for me at Costco for $17! I snipped it off and pulled it apart. This was the first layer.
Tip: always look around your home, inside and out, for greenery to use when making a wreath! This is my favorite money saving tip!
I secured the cedar clippings to the wreath with the floral wire. With no particular method I weaved the branches into the wreath looking for areas that needed to be filled in. I started at the bottom of the wreath and worked my way 3/4 of the way up on the left side and then did the same on the right side of the wreath. There were no rules and I loved being able to just let it come to life slowly.
Getting A Better Look
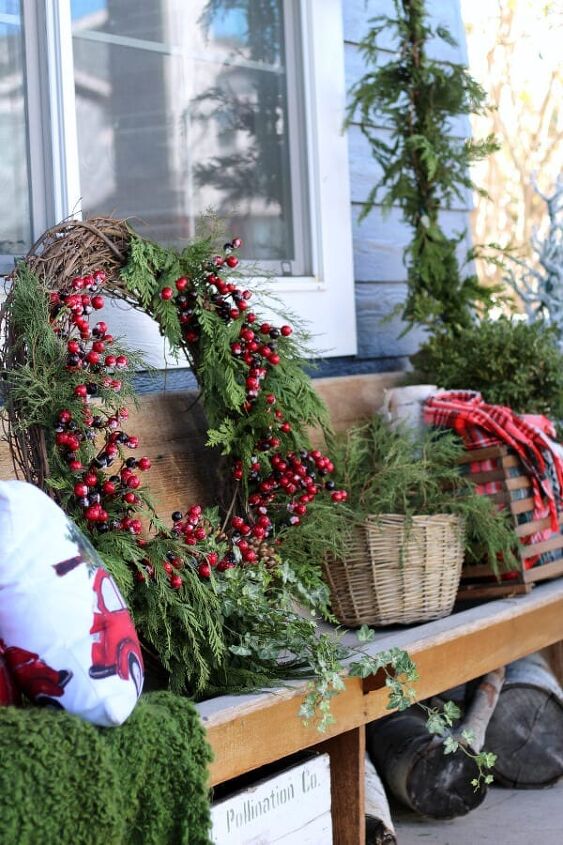
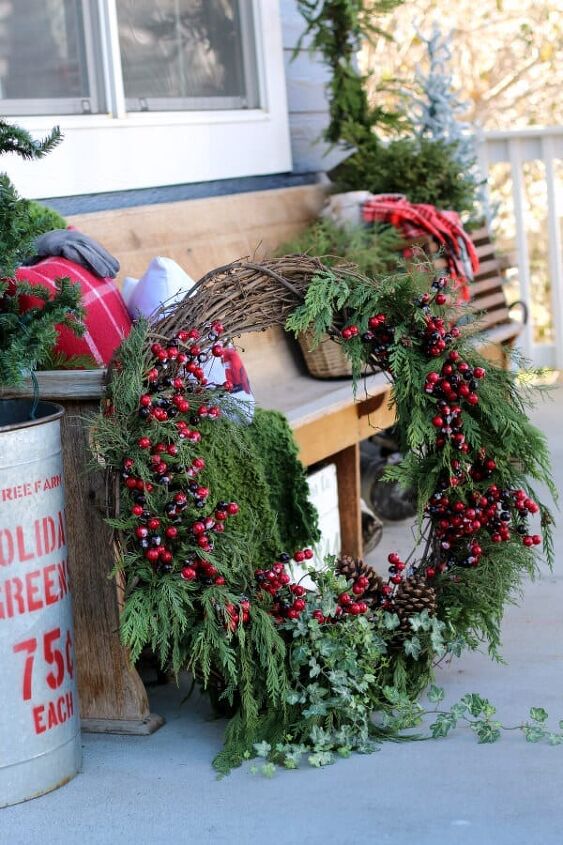
I propped the wreath up against my pew to get a better look at the fullness of the greens and to see how they were falling. Oh boy was it looking wild! The branches were falling all over the place.
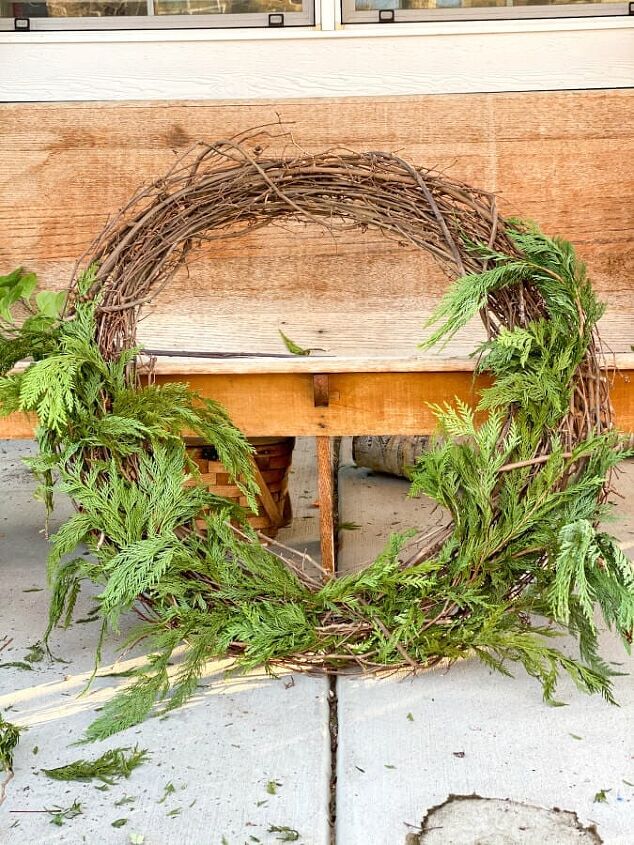
I decided it might be easier to put up on the window as I finished it to see where it needed more greenery and where it needed to be secured with floral wire. This helped a ton! Once it was up I would step back and evaluate and then add more greens. I probably repeat this 5 times before I felt like it looked good. This part took about 15 minutes and was the most work.
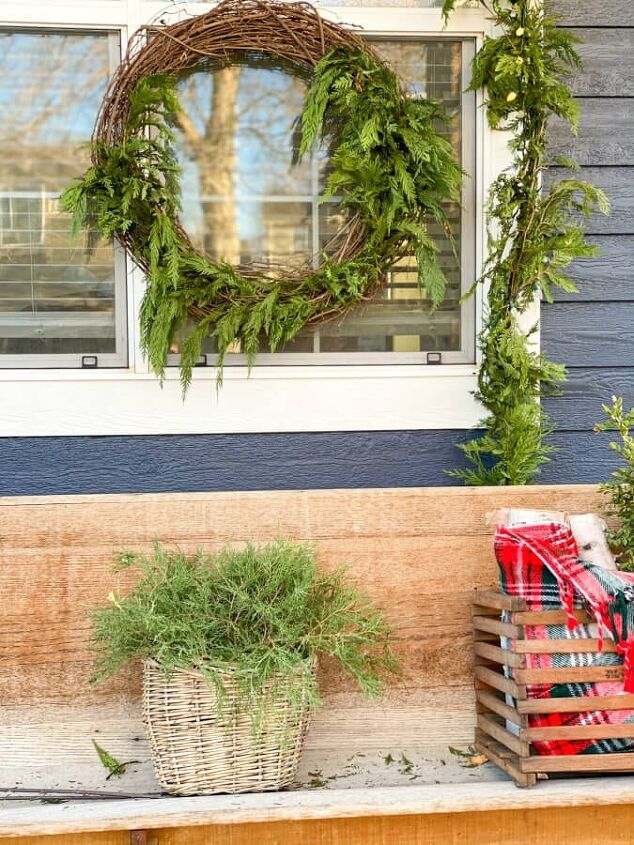
Adding The Juniper Clippings
In the picture above you may notice the basket full of juniper bush clippings. My neighbor has a large bush in her backyard and every year she lets me cut some off for my Christmas decorating. So thankful for my awesome neighbors!
This year I filled the basket up and started adding it to the cedar garland already on the wreath. I love the extra texture and dimension it adds. Plus, it filled in some of my gaps rather nicely. It was still looking a bit wild though. I took about 5 minutes here to secure the clippings in an upwards fashion. It tamed the beast a bit.
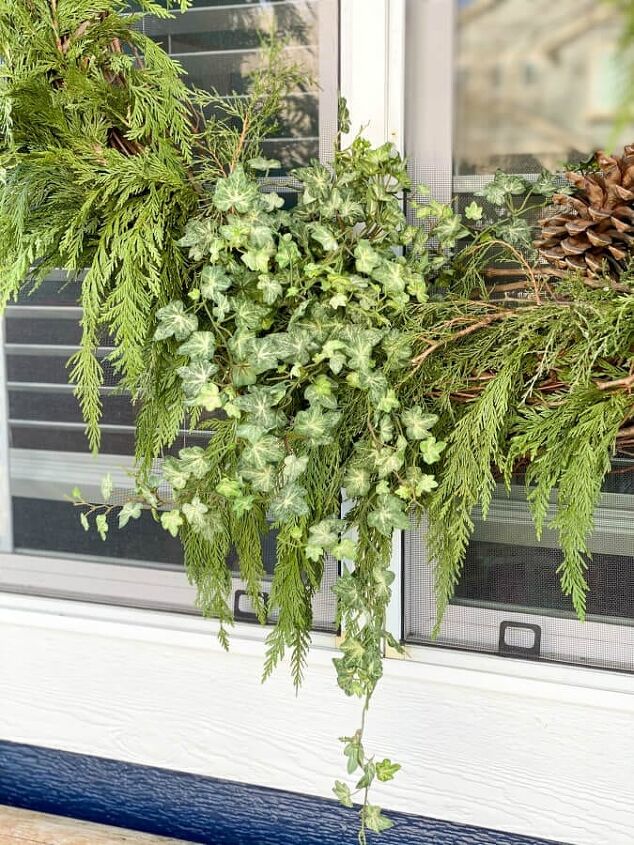
Don’t Be Afraid To Mix Real and Faux
It needed something more and luckily my lovely mom happened to stop by and drop something off and mentioned that I should try some of her faux ivy. Thankfully it was already at my house because we had thought about using it for my indoor Christmas décor. I pulled it out and instantly loved the feel it added to the wreath. It also trailed down to the pew which I loved! Mixing faux greens and real greens is a trick I like to use in my wreaths and my garlands!
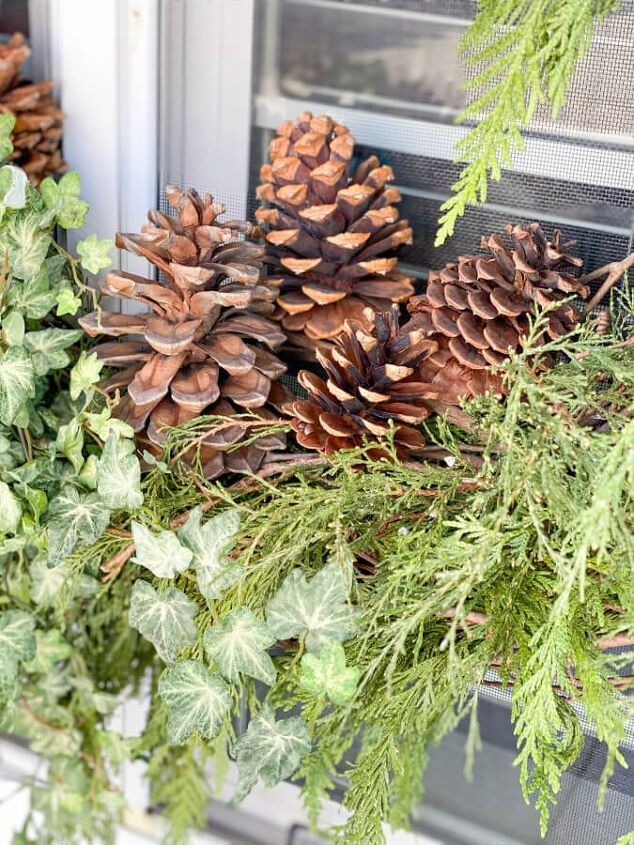
The pinecones were a natural addition that brought new color and more texture. I literally set them on the base of the wreath. These two additions took all of about 5 minutes.
The Final Touch
You may have noticed the theme on my porch is red and green (full tour coming soon). So of course the wreath needed some red berries. I had originally bought the berry garland you see in the picture below for above my bed. But our puppy Zoey got a hold of it one day and chewed off some of the berries. To say I was ticked when I found the mangled garland would be an understatement. But for some reason I didn’t throw it out.
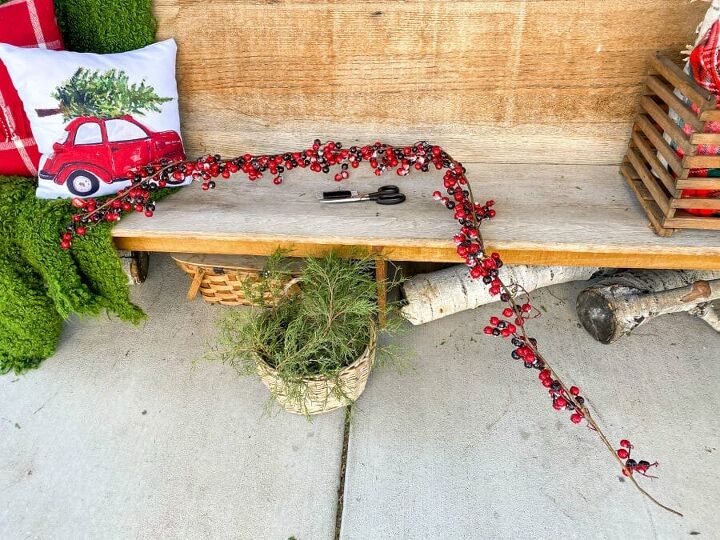
It’s a good thing because I was able to remove the berries from the garland and place them in the wreath for an overall full look that I love. I secured them with floral wire. Each time I added them I would step back and asses which area needed more. My creative juices were flowing and I was in heaven! Once again this only took about 5 minutes,
Tip: If I had bought berry picks I would have needed several and those berry picks are not cheap. But one garland cost me only $10 on sale and I already had it! This is another great money saving tip for wreath making.

My All Time Favorite Wreath
Is it possible to be in love with a wreath? Asking for a friend! 🙂 But seriously, this might just be my all time favorite wreath that I have made. I think it’s mostly because there were no rules. It was a natural process that just flowed and I was able to tweak it as I went along.
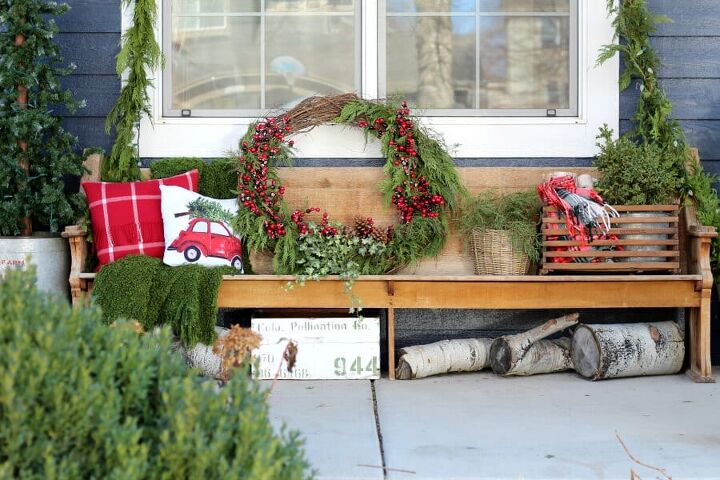

The moody feel of this wreath is perfect for our porch and perfect for that nostalgic Christmas look I crave! I couldn’t be any happier with how it turned out.
Hopefully I have inspired you to take a risk and make your own outdoor Christmas wreath with items from around your home! Come visit me over on my blog, The Tattered Pew, for more fun DIY projects!
How To Make A Large Outdoor Christmas Wreath
Thanks for stopping by today I hope you enjoyed my little tutorial on how to make a large outdoor Christmas wreath! I would love for you to stick around and hang out with me as a subscriber here on the blog. It would also be fun to hang out together over on Pinterest, Facebook and Instagram!
XOXO,
Kelly
Resources for this project:
See all materials


Comments
Join the conversation
-
To all my fellow December birthday babies. Celebrate! As a reminder it must have been on heck of a St Patrick’s Day. We are living proof😊
-
From another Christmas baby, (17) fabulous wreath! There are lots of woods nearby that I can forage for supplies 😀


Frequently asked questions
Have a question about this project?