


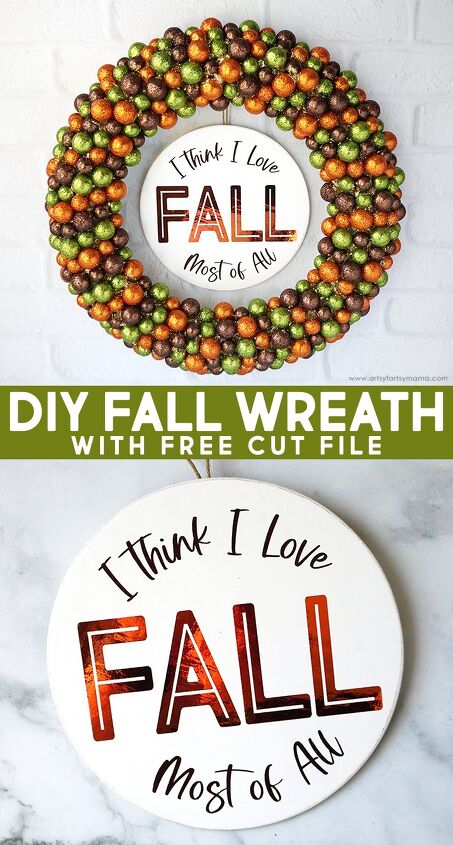
"I Love Fall Most of All" Wreath + Free Cut File
Put your love of fall on display with this "I Love Fall Most of All" Wreath with FREE Cut File!
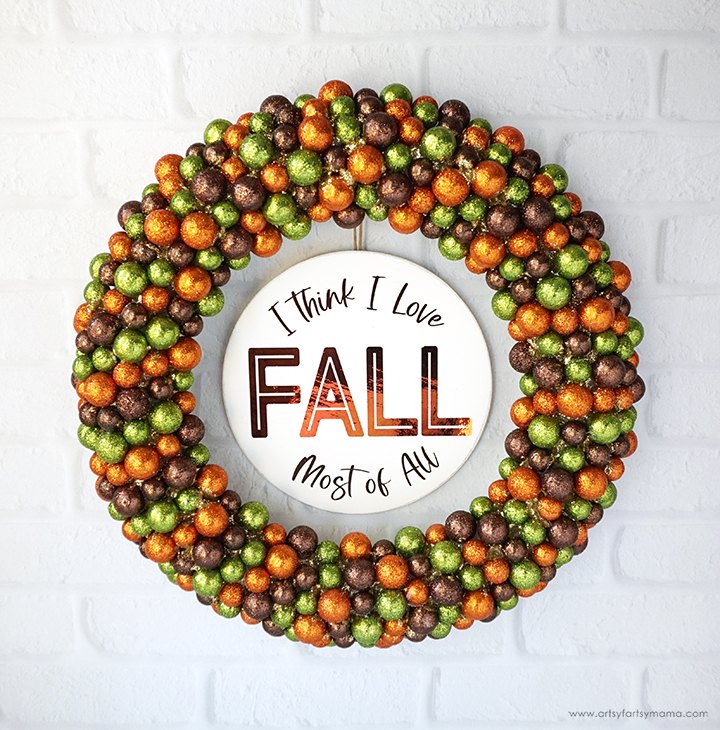
Which season is your favorite? Unless you're new here, you might know that autumn is the one I love most of all! I'm so thrilled that it's here that I decided to craft my adoration of this perfect season with a colorful wreath with my sentiment right there in the middle of it. The best part? I've got the FREE cut file to share so that you can make your own fall wreath to put on display!

The main part of the wreath consists of fall-colored (green, brown, and orange) foam ball vase filler and a 12" foam wreath form. You can find both of these supplies at almost any craft store or online.
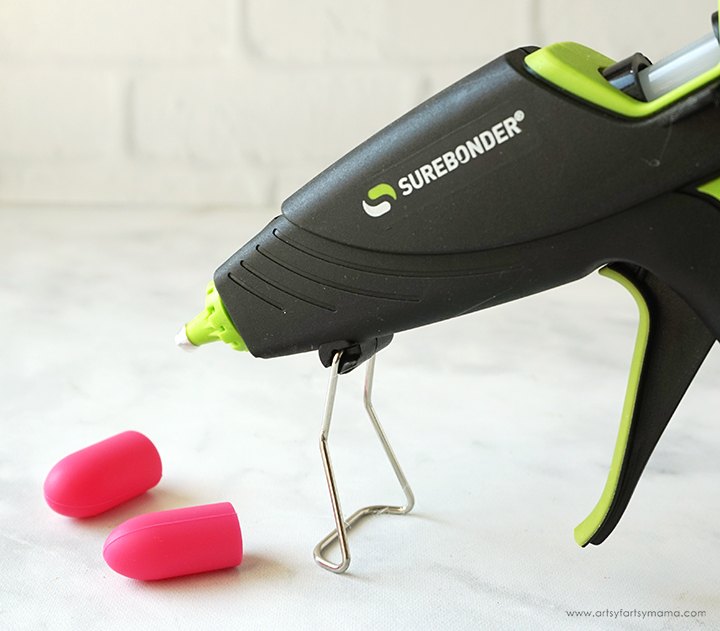
You will also need a glue gun. I also highly recommend having some finger protectors to help prevent any glue burns!
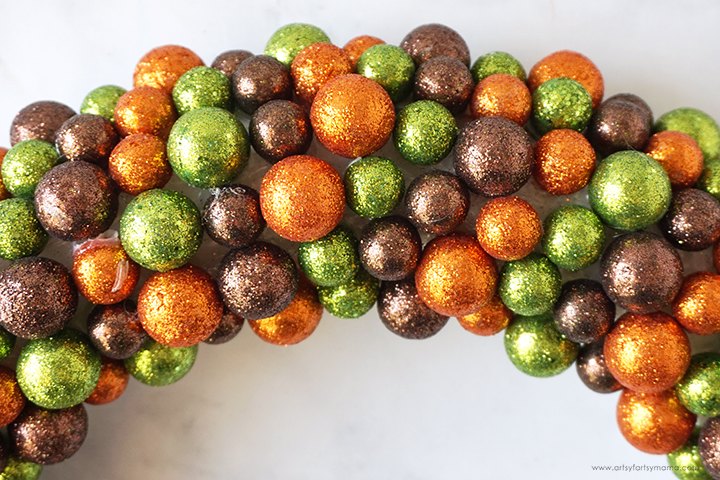
Glue the foam balls onto the wreath, everywhere except for the back. I started by going in a pattern, but then found it easier to put them on randomly instead. As long as they are stuck onto the wreath, you're good to go!
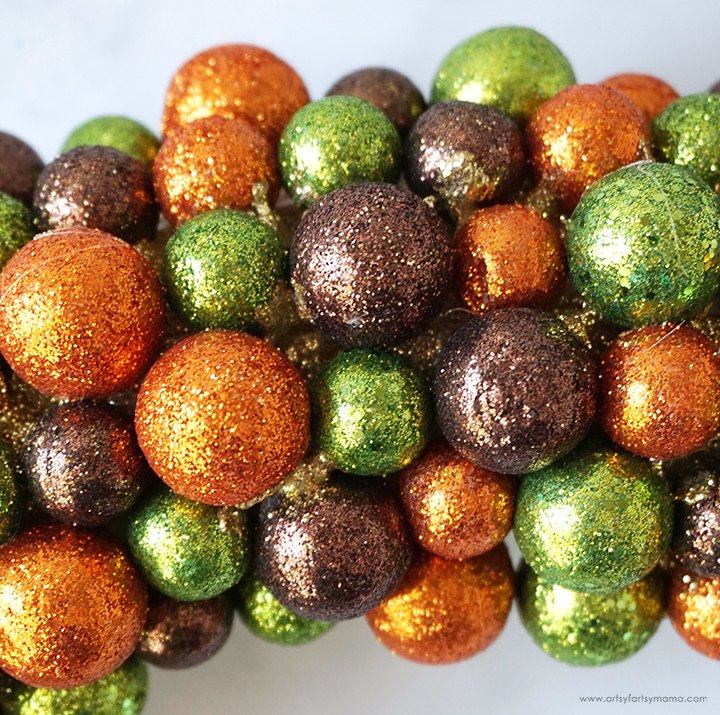
The empty spaces between the foam balls were kind of bothering me, so I decided to do something about it. In a small mixing cup, I added some Mod Podge and a generous amount of fine gold glitter. Stir the mixture well until combined. Next, I used a small detail paintbrush to drop small globs of the glitter mixture in between the foam balls to fill the empty space. Let the Mod Podge dry completely.
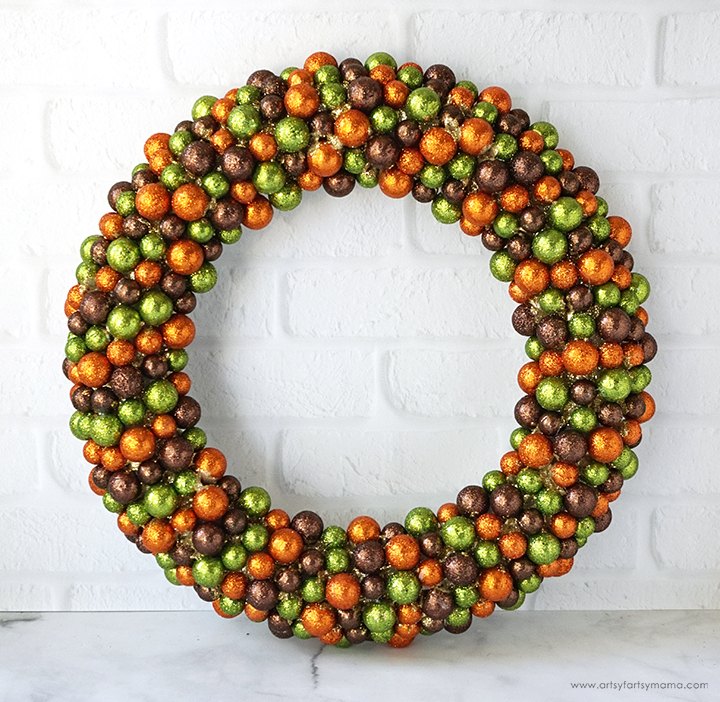
I love the little pops of gold glitter peeking through all of the bold fall colors. Set the wreath aside while working on the next part of the wreath.
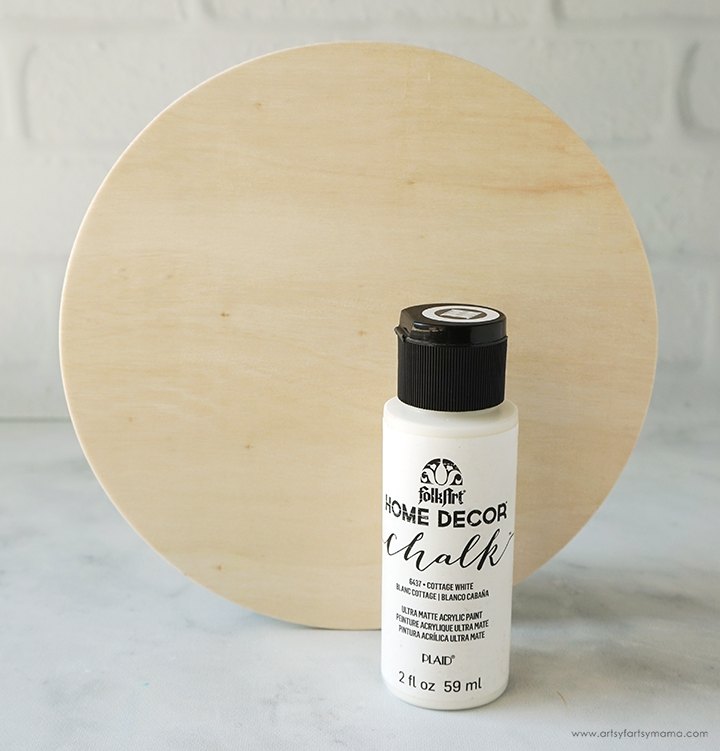
For this next part of the wreath, you will need a 6-6.5" wood circle and some white chalk paint. Paint the front and sides of the wood circle with a coat or two of paint. Be sure to let each coat dry completely before adding another coat.
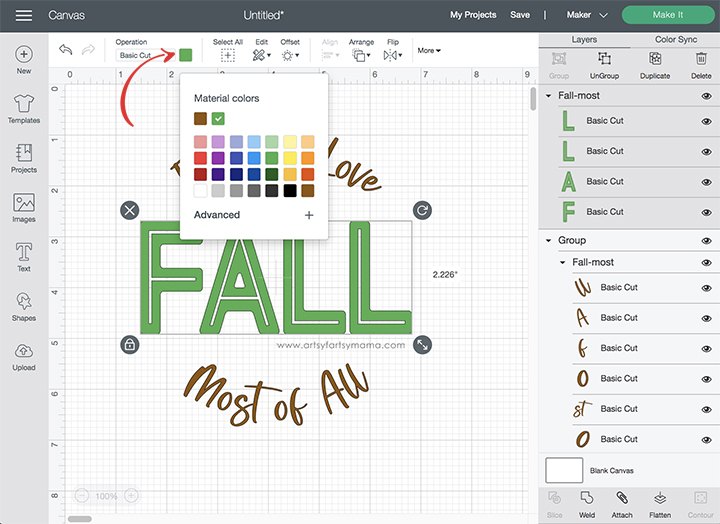
Upload the " I Love Fall Most of All" cut file (personal use only) into Design Space and size the image to fit the wood circle. Select different parts of the design and change colors as necessary. Get creative using fall-colored adhesive vinyl, or add some sparkle with glitter adhesive vinyl.
*Here's a great tutorial on how to upload your own images into Cricut Design Space.
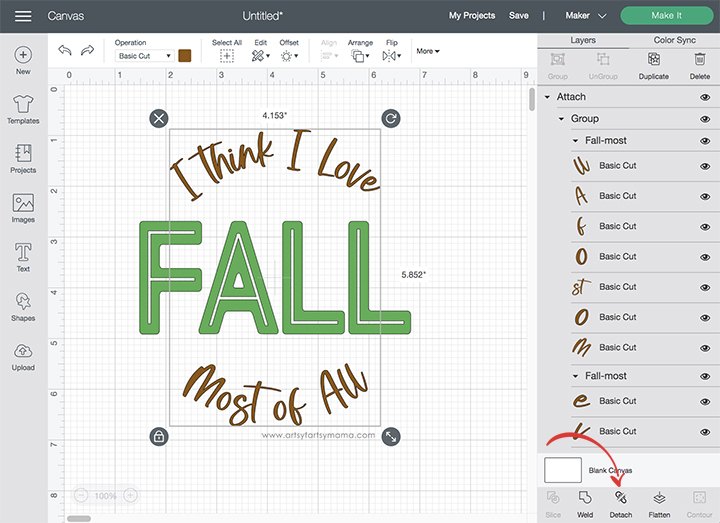
Select the parts of the design that are the same color, and click "Attach" from the bottom right menu to keep the image elements in place. If you don't attach them, all of the letters will arrange themselves to fit the mat instead.
Click the green "Make It" button to cut the vinyl.
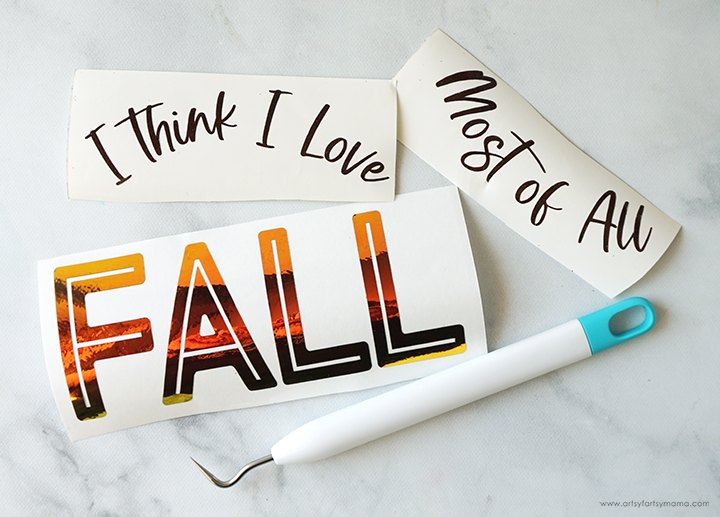
"Weed" the excess vinyl by removing all of the parts that don't belong in the design. I usually peel away the outer edges first (starting at the corner), and then work my way around the design. Then I use weeding tools to help remove the smaller pieces of the design.
I cut the smaller "I Think I Love"/"Most of All" letters out of brown glitter adhesive vinyl. For "Fall" I decided to go with a gorgeous amber-colored opal adhesive vinyl.

Cover the pieces of vinyl with some clear transfer tape. Press the transfer tape down well with a scraper tool to get rid of any air bubbles and to make sure that the vinyl sticks well to the transfer tape.
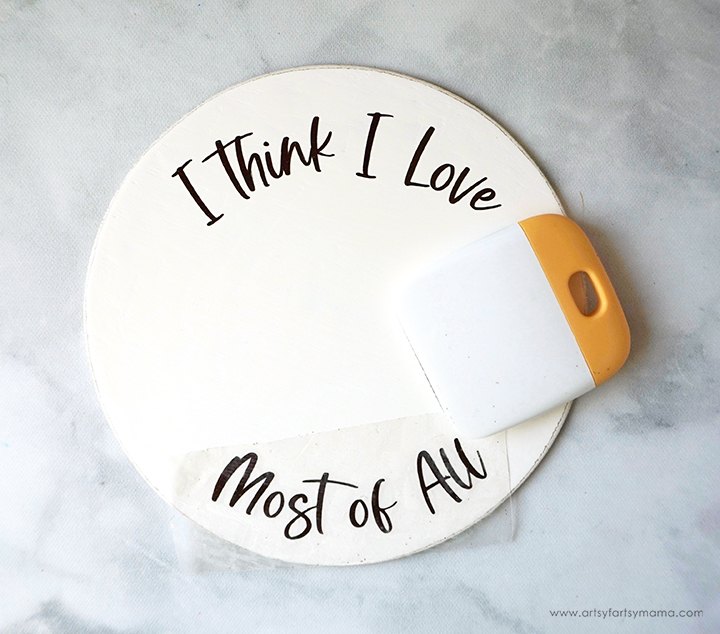
Carefully peel the brown vinyl pieces away from the backing paper, and then place them on the top and bottom of the circle. Once it's in place, use the scraper tool to press the vinyl onto the wood. Slowly peel the transfer tape away. If vinyl is still coming up with the tape, lay it back down and scrape it again until it sticks.
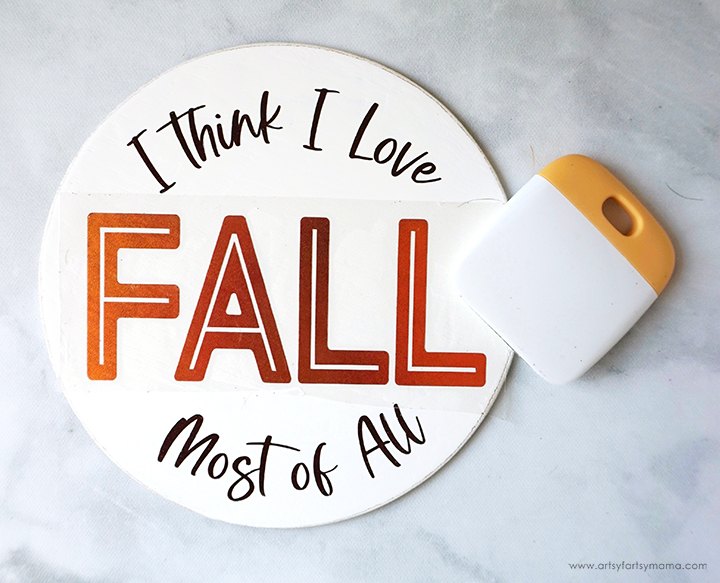
Next, center the word "Fall" on both the wood and between the vinyl at the top and bottom. Scrape the vinyl down the same way as the the other pieces of vinyl.
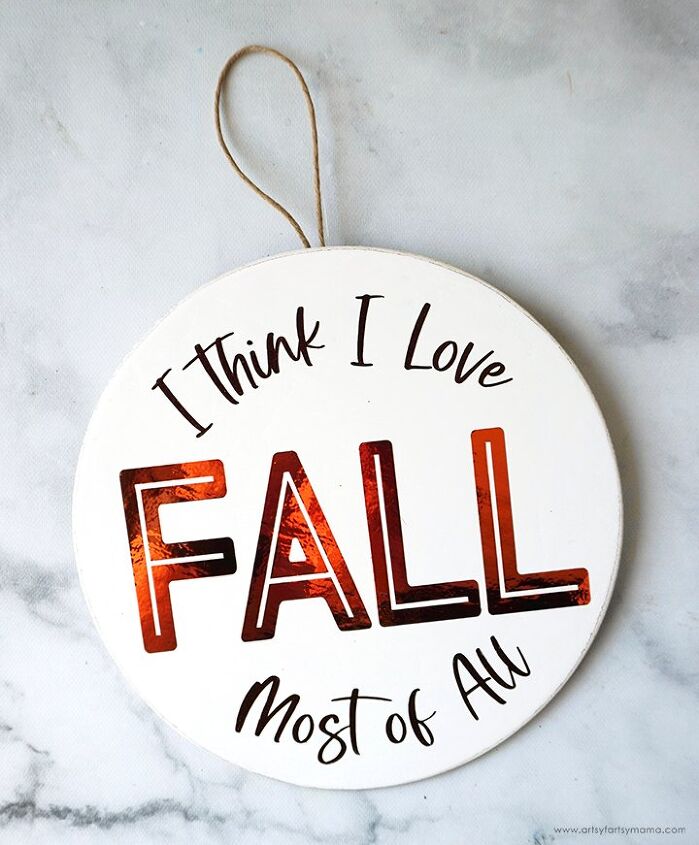
Cut a 8-10" piece of hemp cord and attach the ends to the back of the wood circle using a glue gun so that there's a loop at the top of the wood circle.
Attach the loop to the back of the wreath with a glue gun. Now you can hang the wreath wherever you want to display your love of fall!
I just adore how this wreath turned out, and it displays my adoration of the fall season perfectly! It's got everything I love: fall colors, *sparkle*, iridescent vinyl, and it was so simple to make.
As always, I would love to see your creations! Share your creations on Instagram, Facebook, or leave a comment/photo on the project pin on Pinterest!
Don't forget to Pin, Like, and Share!


Comments
Join the conversation
-
I love fall too, and this is lovely!
-
Pretty colors and I really like the idea of adding the gold glitter between the spaces


Frequently asked questions
Have a question about this project?
I can't seem to find where the cut file to download is.