


Nautical Rope Wreath Tutorial
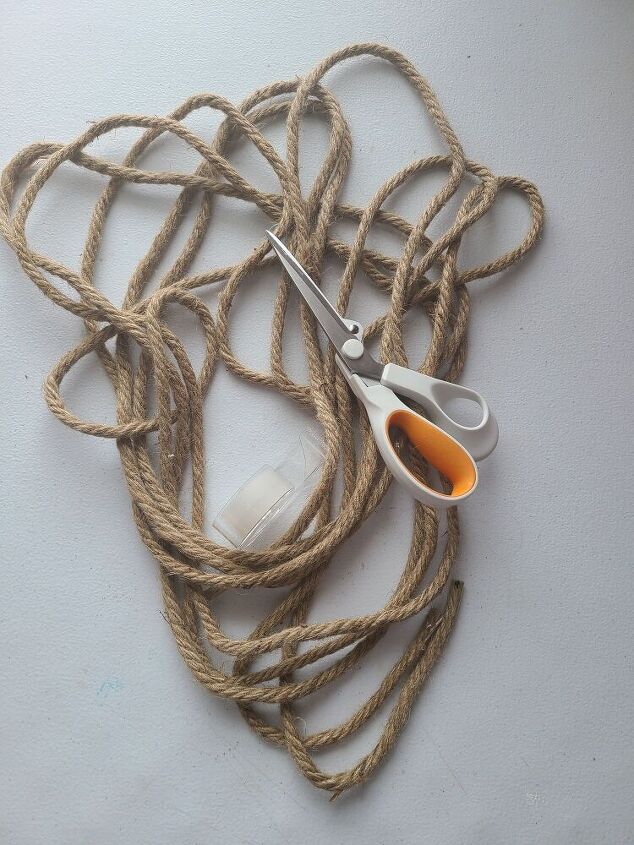
Yesterday I was trying to figure out what I was going to do with a lot of leftover rope, so I decided to try to make a nautical rope wreath. I had six packs of 9.5′ nautical rope from Dollar Tree, so I tried to figure out how I could make them into a wreath. I tried wrapping them around a small 10″ stryfoam wreath form, but I didn’t like the look. There have been some braided rope wreaths on Pinterest, so I decided to give it a go in my own way.
I braided three of the packages together in one rope, but I didn’t like the look. It looked cheap. My plan was to use wire forms that I had somewhere in my craft room, but they were no where to be found. I saw a few braided wreaths that were glued onto a flat wood form. I thought I’d try to make one of my own and it worked out!
To make a nautical rope wreath you need (everything bought from Dollar Tree unless noted):
- 6 packs of nautical rope- Each pack is 6.8ft long. If your Dollar Tree doesn't have the nautical rope, you can use sisal rope from Lowe's or Home Depot. You can also use the white cotton rope from DT.
- foam board or cardboard
- bowl as large as you want your wreath to be (you will trace it on the foam board)
- hot glue gun (can’t be bought at Dollar Tree) and glue sticks
- regular glue stick or liquid glue
- scissors
- clear tape
- cardstock (DT does have them now!)- I used navy and white.
- craft knife
- seashells (optional)
- twine
- anchor wood shape or other nautical shape (or you can use your Cricut to cut one, or a stencil)
- letter stencils or stick on letters
- update- someone asked about adding real items to the wreath. That’s perfectly ok too.
Prep the Ropes
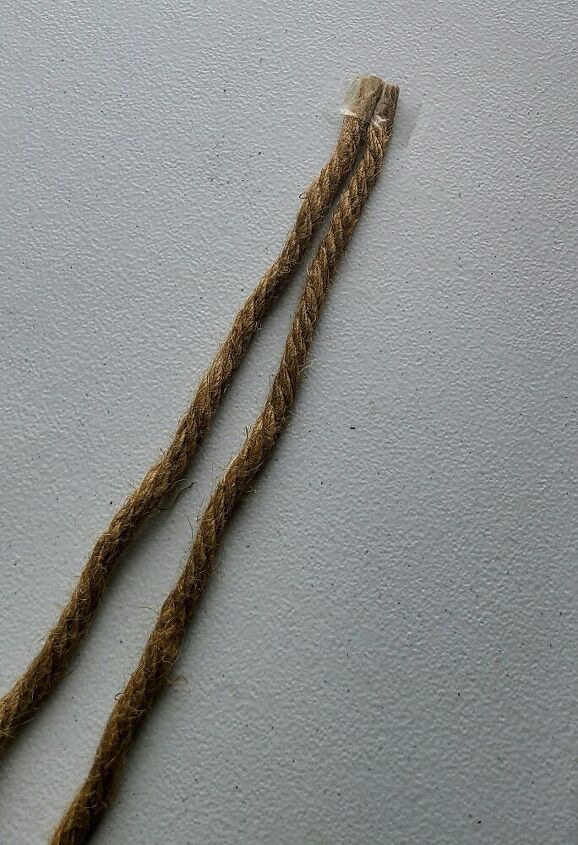
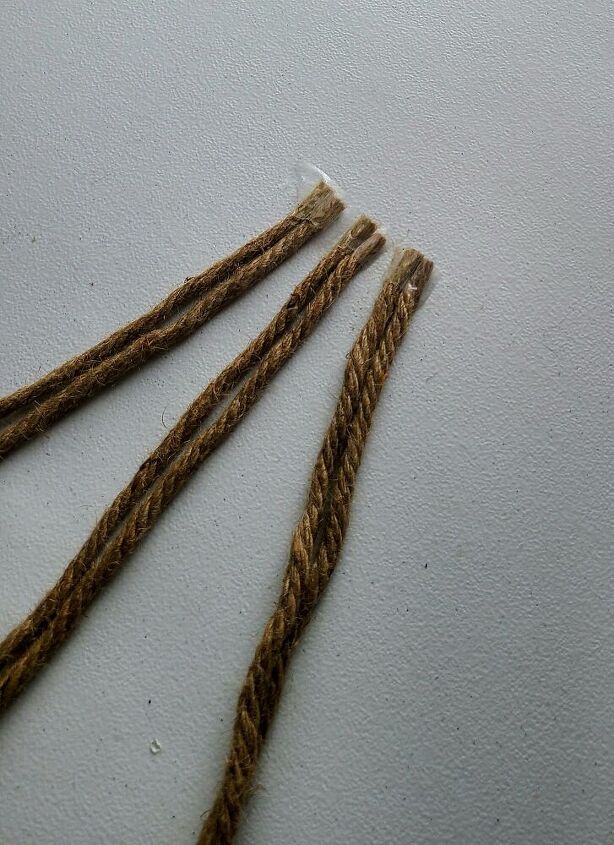
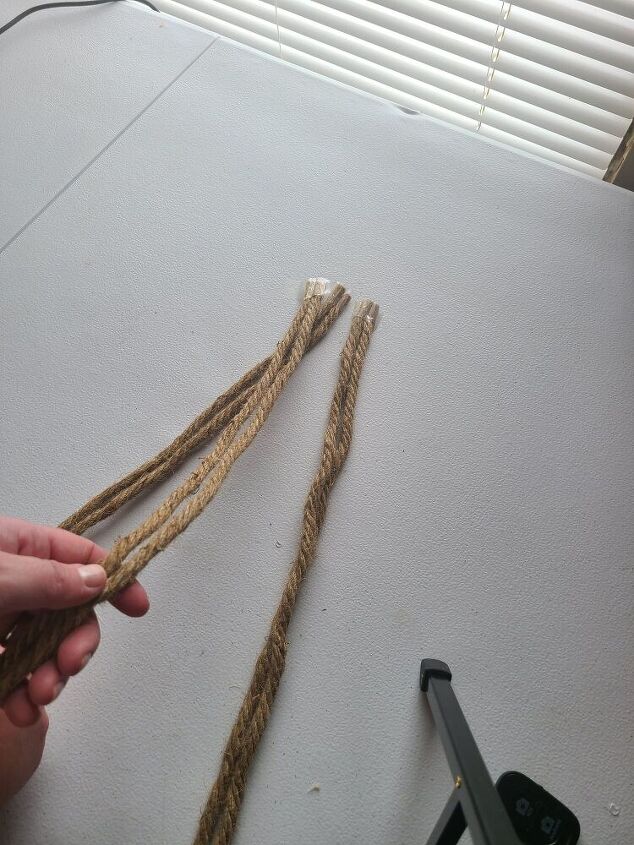
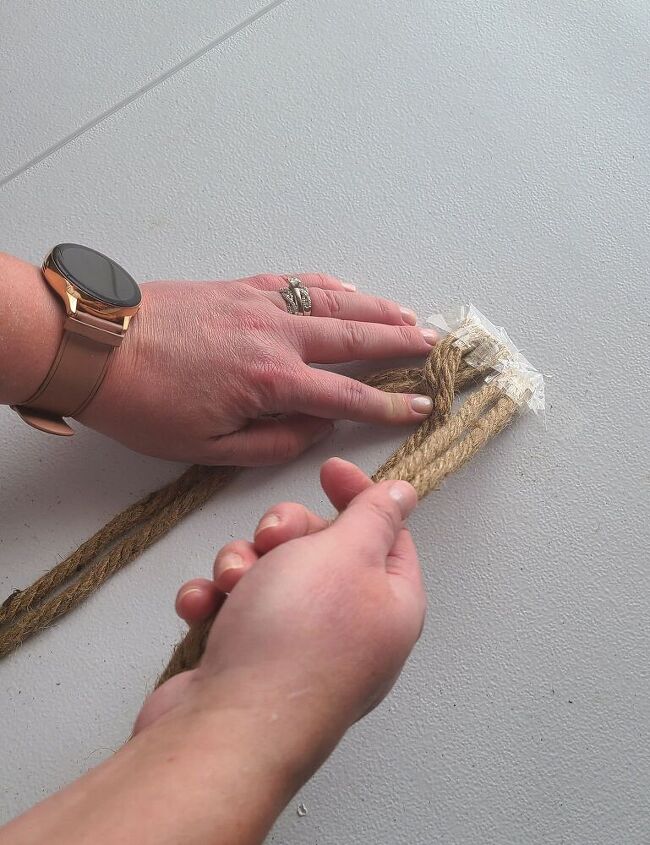
I'm going to add a little note here because for some reason people are confused about the rope length. It's listed in the items needed above. At Dollar Tree they have packs of rope labeled "nautical rope." They come in 6.8ft packs. You are going to use 6 packs (one rope in each pack). You're never going to cut the ropes. They'll all be braided together. They are 6.8ft each. You’re going to use two ropes for each of the three lines. Unpackage and uncoil the ropes. Lay two ropes on your table or desk and tape the top of them to the table touching each other. Take two more and tape them just an inch or so away from the first. Next lay out the last two and tape them right next to the others. If your local DT doesn't have the nautical rope, you can use sisal rope. Lowe's sells it in 25', 50', or 100'. Cut the ropes to however long you'd like for the size of your wreath. You can wrap the rope around the form to get a guess of how long you'll need if you're making a wreath in a size other than the one I'm giving instructions for. Remember when you braid them together they will shorten so add a few feet to your estimate. If you're making the same size, then you can just cut six pieces of rope 6.8' each.
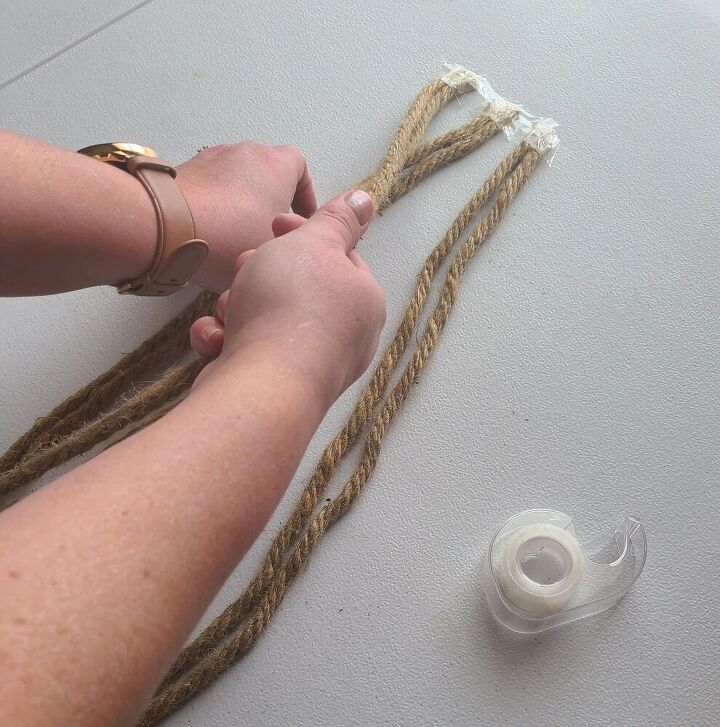
Begin Braiding
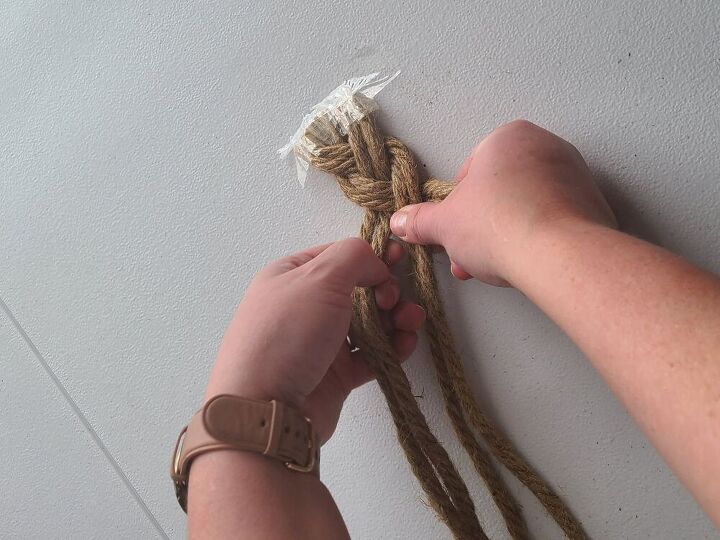
Now braid the rope just like you would your hair. Take the two ropes on the left and lay them over the middle two. Next take the two on the right and lay them over the middle ones. Continue this all the way to the end of the ropes (6.8ft). As you are braiding, make sure that you do not let the ends tangle as you go. When you place one over the other, move the entire ropes so they don’t knot up at the ends.
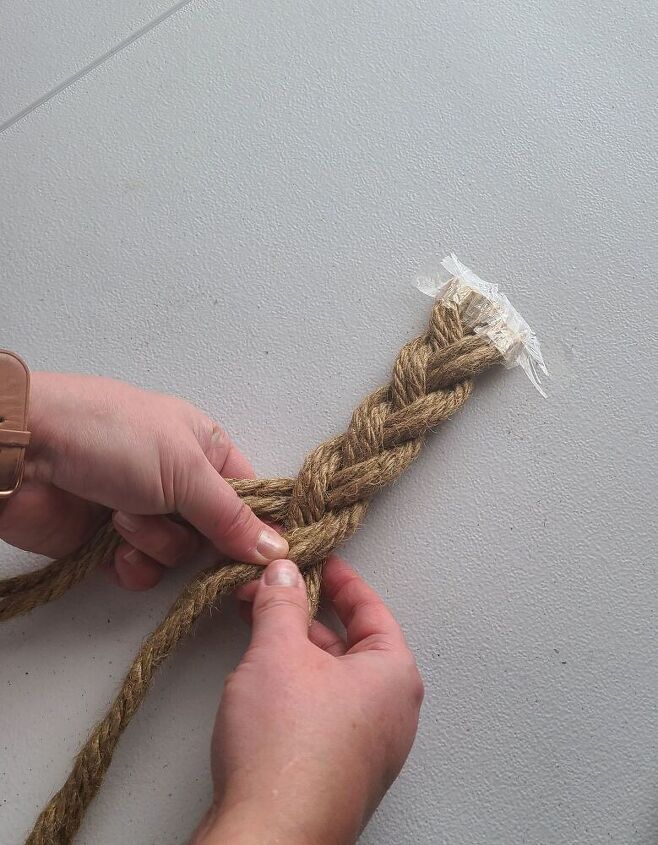

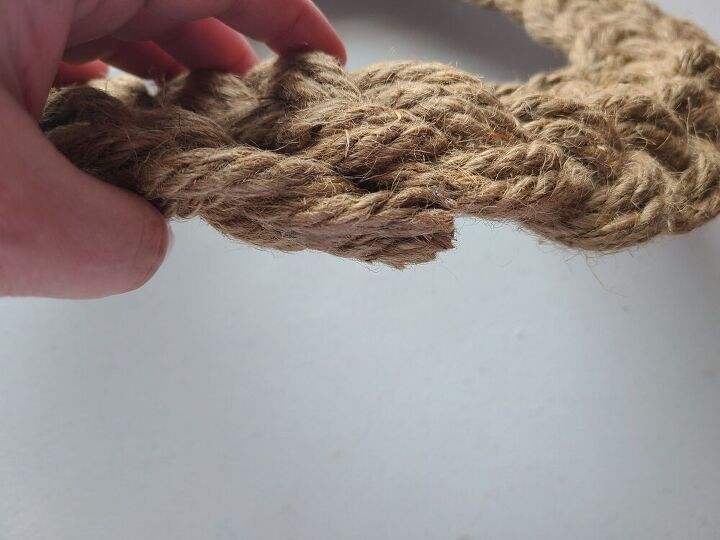
As you get close to the end of the ropes, place hot glue in between each of the groups of two ropes. Hold them together for a moment to let the glue dry. Glue the left two together, then the middle two to each other, then the right two to one another. Don’t glue all together yet.
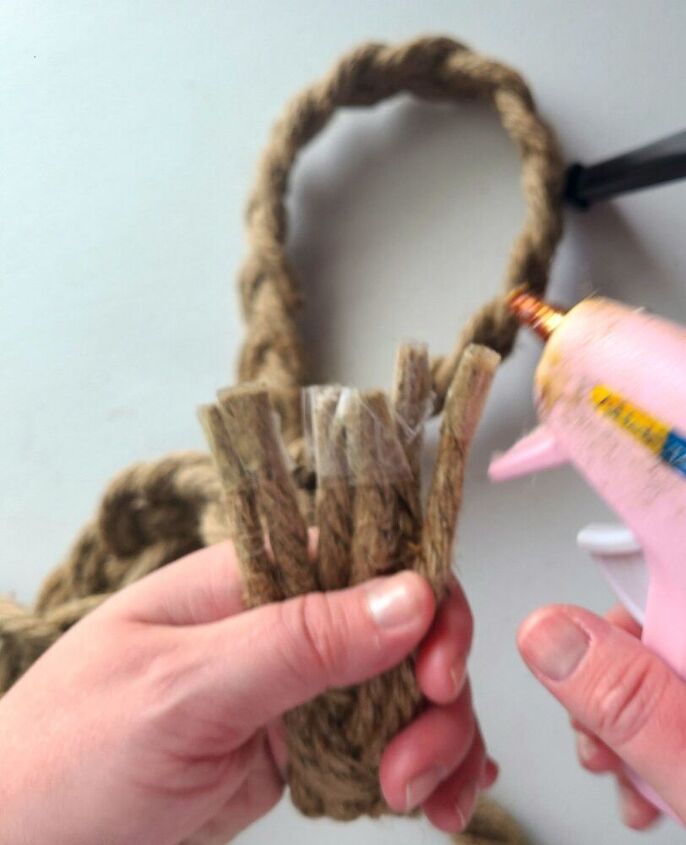
As you make the last few passes over the ropes, you will add hot glue to the top of the ropes that another two will lay on top of. For example, if your last three moves are left over middle, place a line of hot glue on the middle two ropes then press the left ones over it. Then place hot glue on top of what is now the middle two ropes and pass the right over the middle and press them down on the hot glue. Finally add hot glue on the middle two and pass the left over it and down on to the glue. Now the end of the braid should be all glued together.
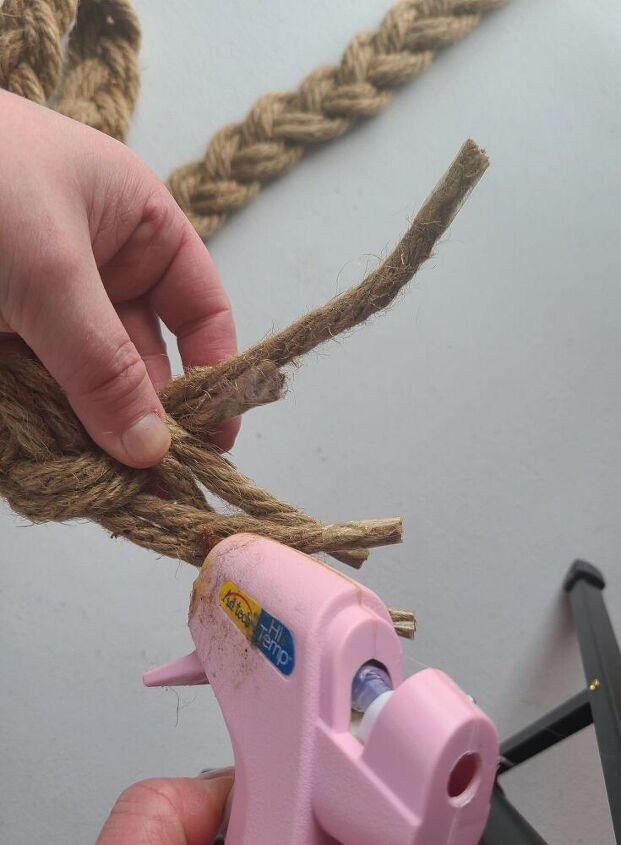
Now cut off any extra, uneven ropes that are left.
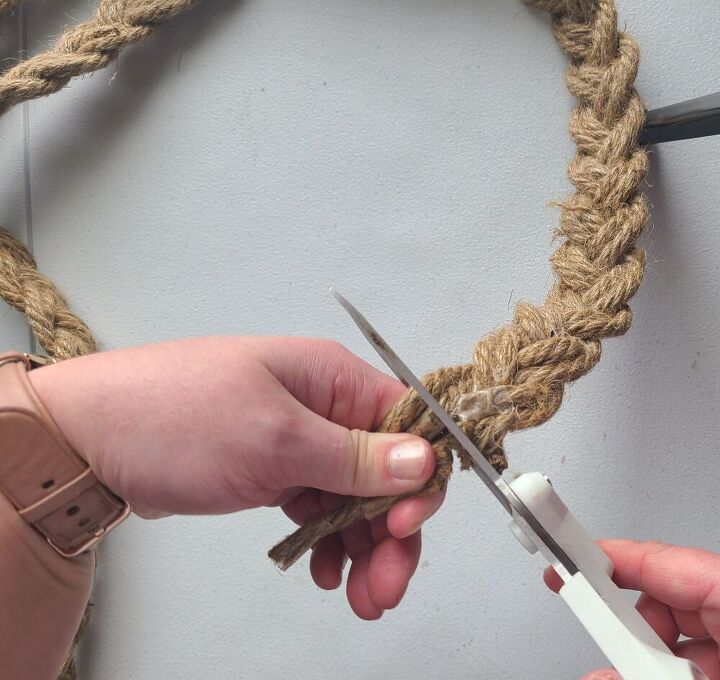
Add clear tape (like gift wrapping tape) to the ends of the ropes to keep it from unraveling.
Cut a Wreath Base
You can use cardboard or a piece of foam board to make a base for your wreath. If you have an old box laying around, that would be perfect. I had a box, but when I laid it out flat, it wasn’t big enough for the wreath I had planned. I had a piece of foam board laying around for the next time I wanted to make a farmhouse sign. It was perfect for a base.
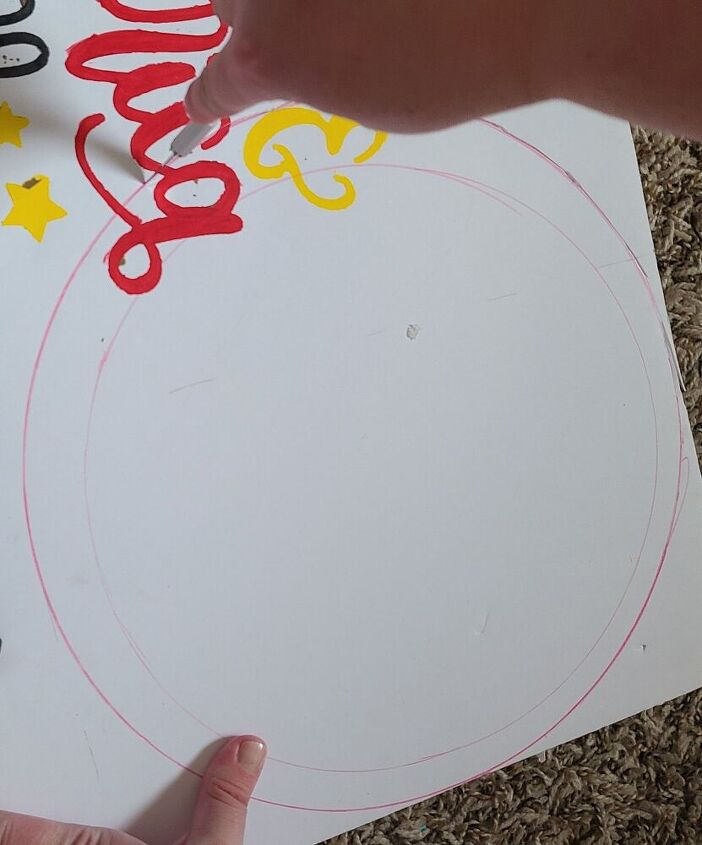
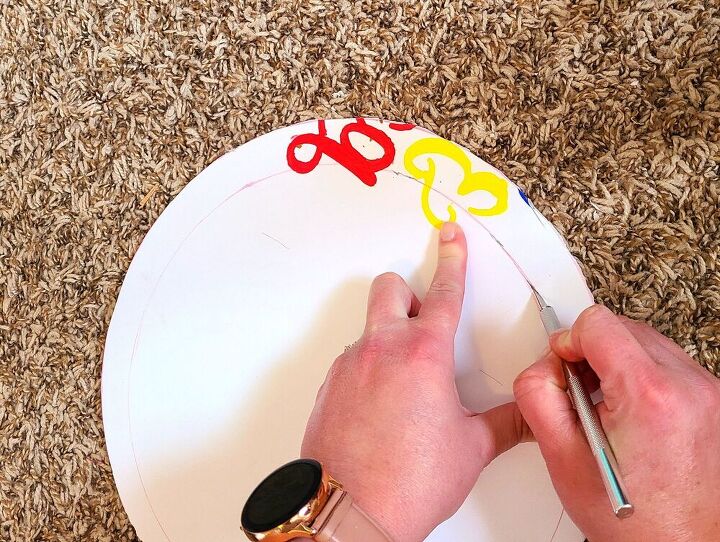
I got a large mixing bowl that was 12″ across. Find something round that is as wide as you’d like your wreath to be. Your wreath will extend about an inch and a half beyond the base. Place your bowl upside down on the board and trace a circle around it. Measure about 2″ inside that circle, and trace another one inside of it.
Use a craft knife (an Exacto knife) and cut along the line. When you have cut the circle out, you may want to smooth out any rough, uneven edges using scissors.
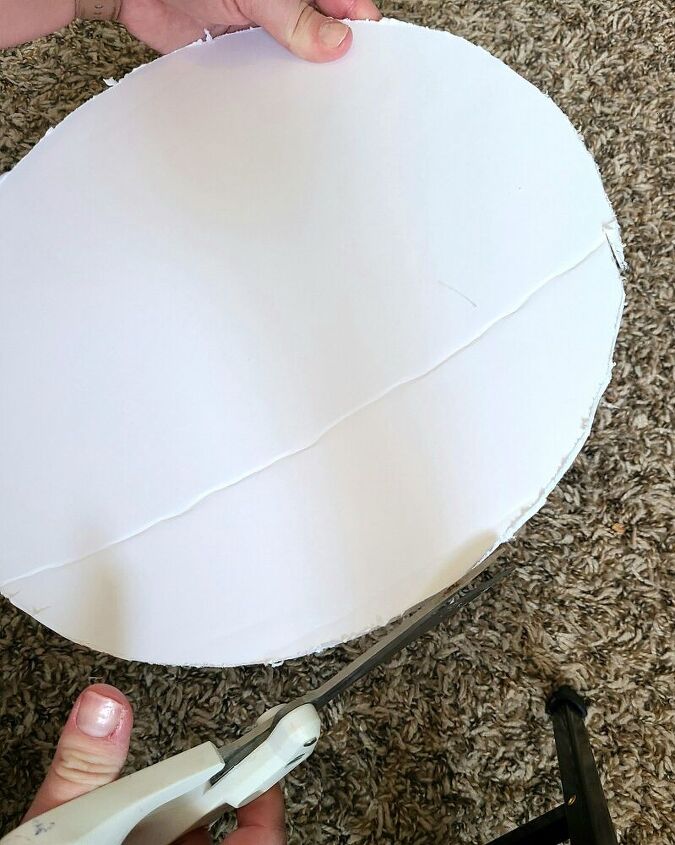
Now use the craft knife again, and cut the inner circle out. This will leave you with about a 2″ wide open circle.
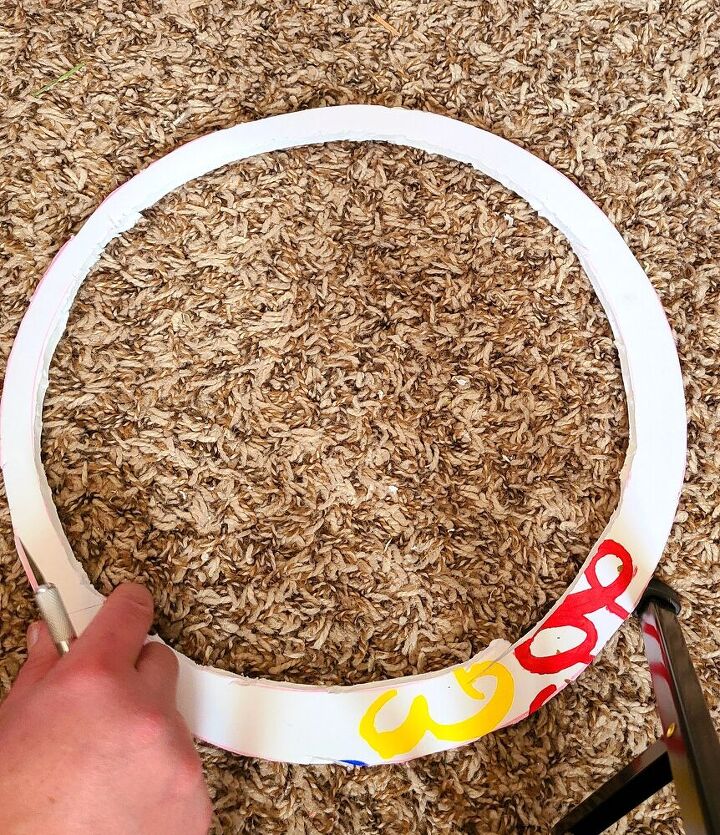
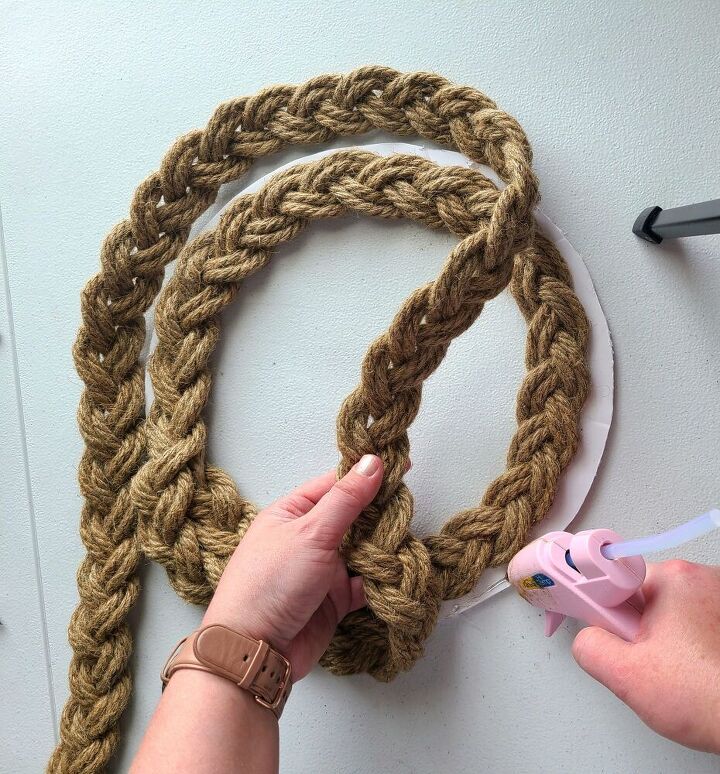
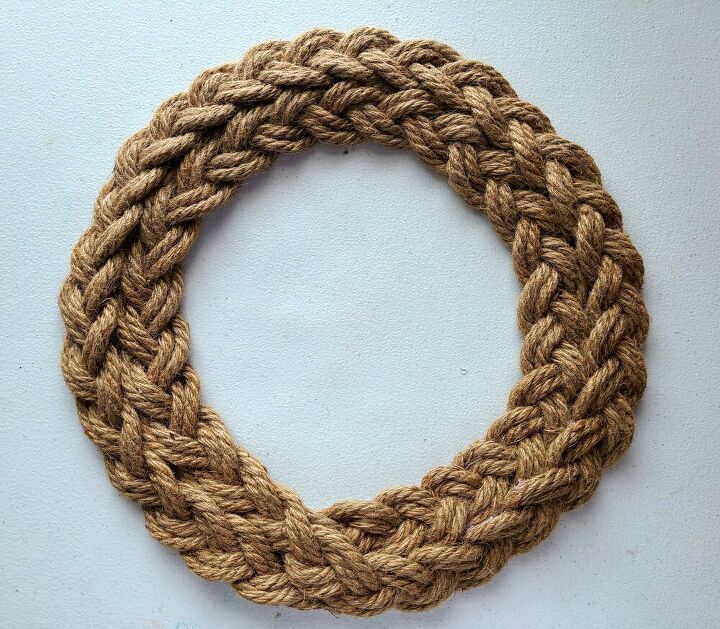
Wind the Braids around the Rope Wreath Form
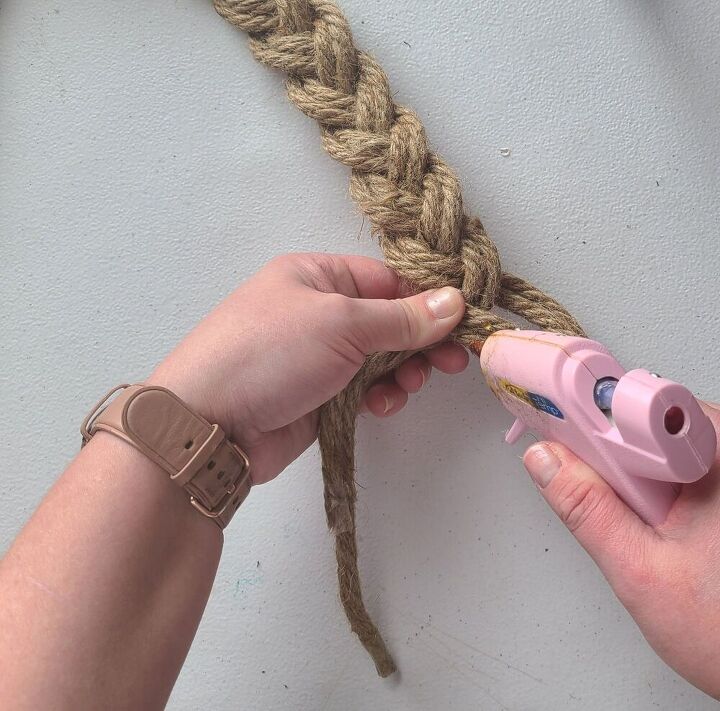
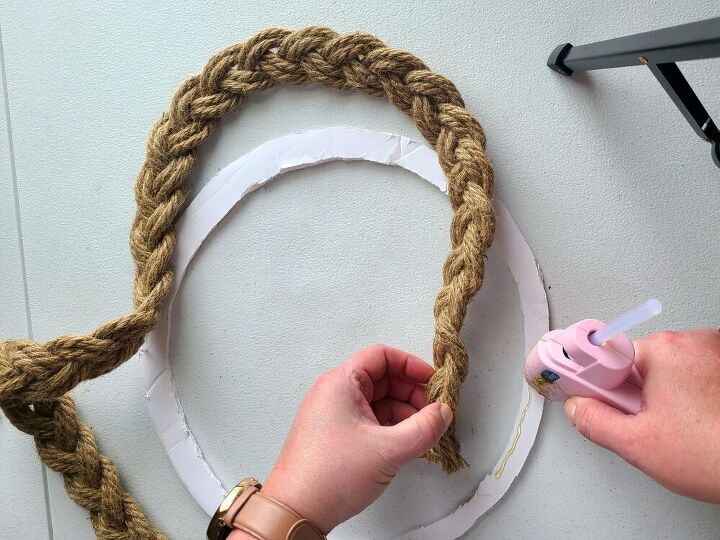
Lay your braid on the edge of the form to start the rope wreath. You want a little piece of the form left open to lay the next layer on. My form was uneven, but if you made yours exactly two inches, glue the first section on about an inch, leaving an inch open. It won’t matter if it’s uneven. The first part of the wreath will hold up the entire thing.
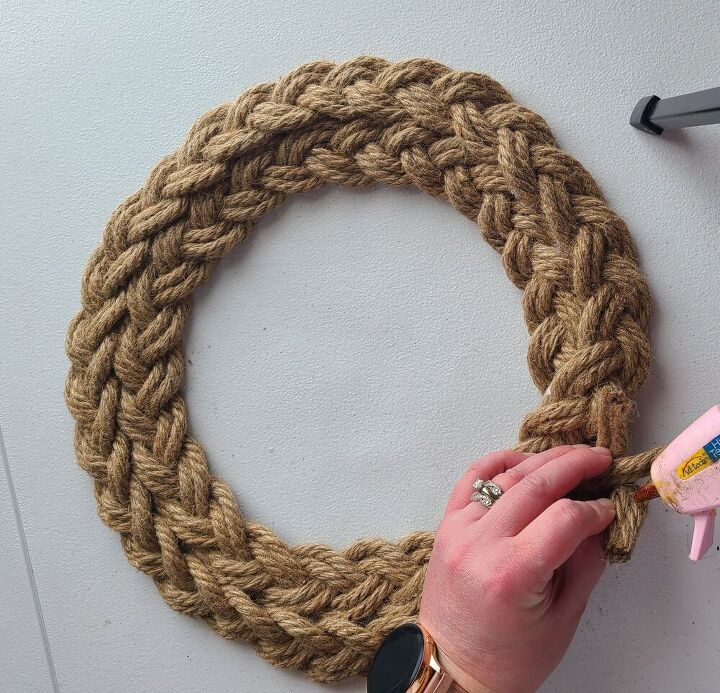
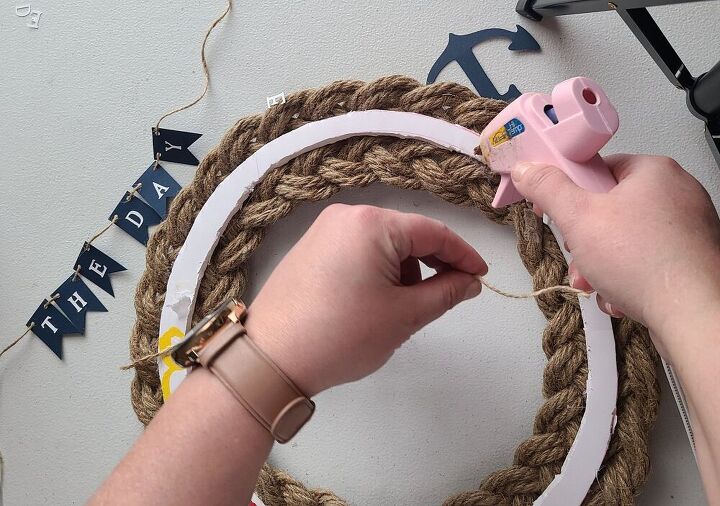
Squeeze hot glue along the form a few inches at a time, and lay the braided rope on top of it. Continue this way until you have a full circle on the form.
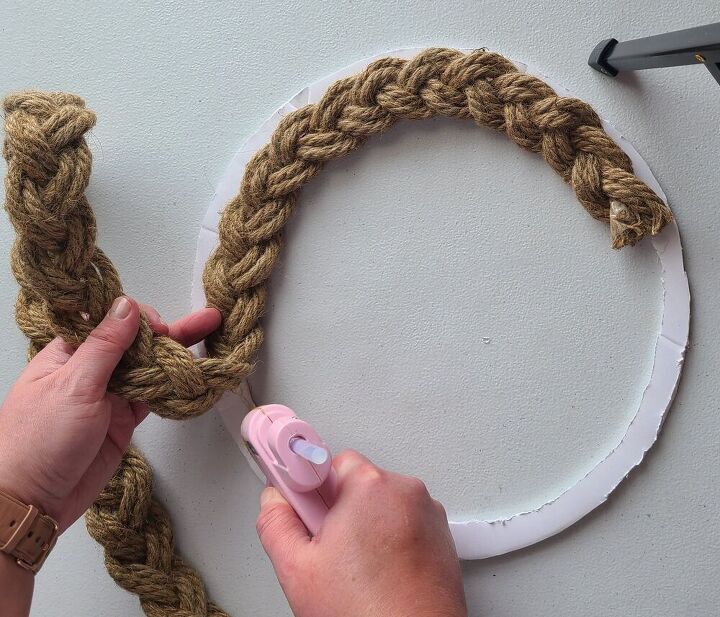
Add hot glue on the part of the for left over. Put the rope on top start of the first section so you can no longer see that part. Then start adding the rope as a second layer. Where parts of the form is skinnier, you may want to add hot glue to the first layer of the rope. You want the second section of the rope, to overlap the first layer about a half inch to an inch.

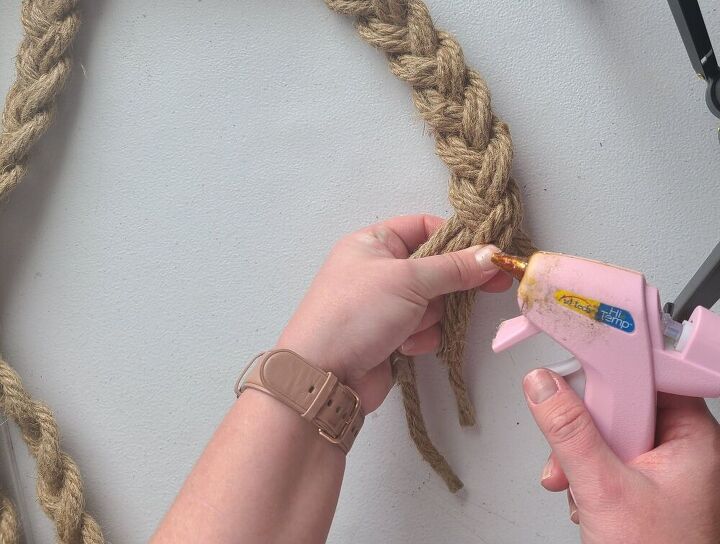
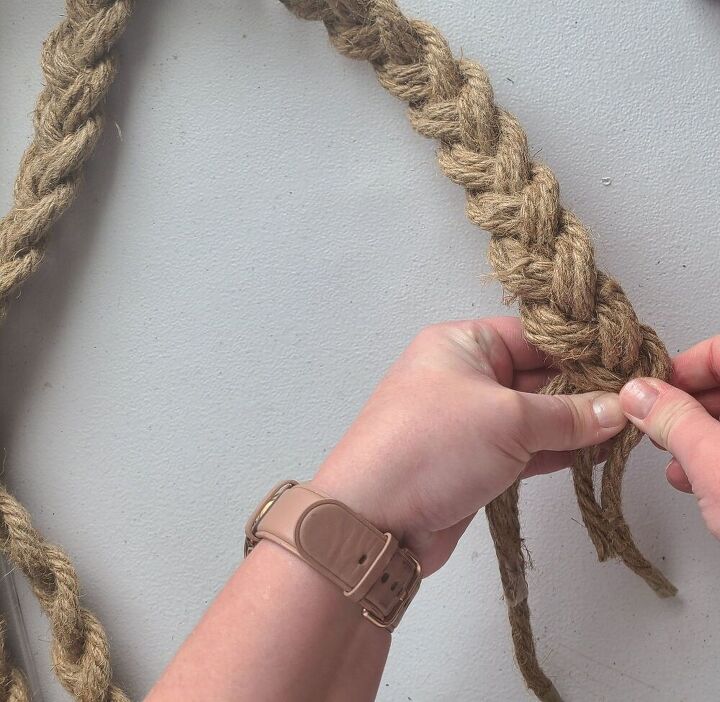
When you get back to where you started, cut the braid off with about 2″ of it going past the beginning. Put hot glue into the six ropes just as you did when you ended the braid at the beginning.
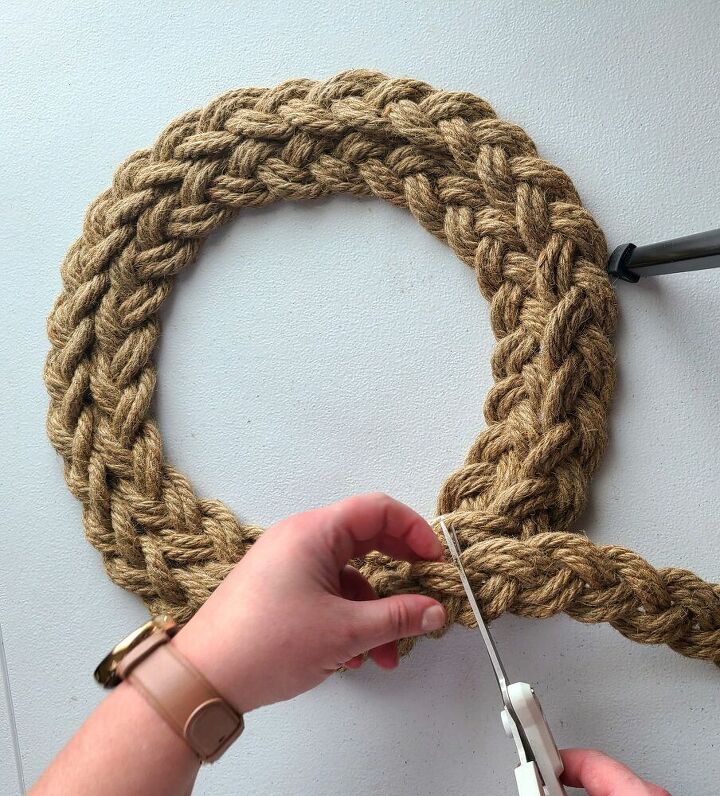
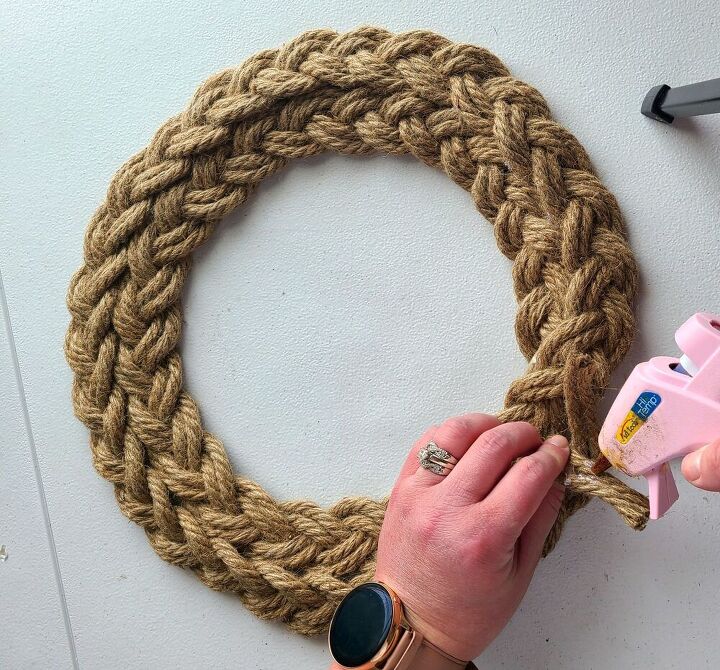
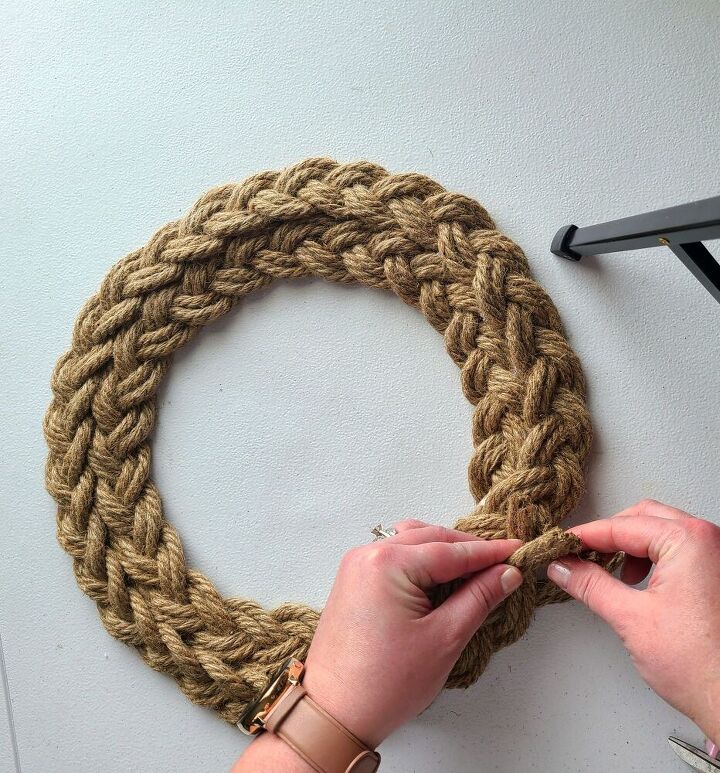
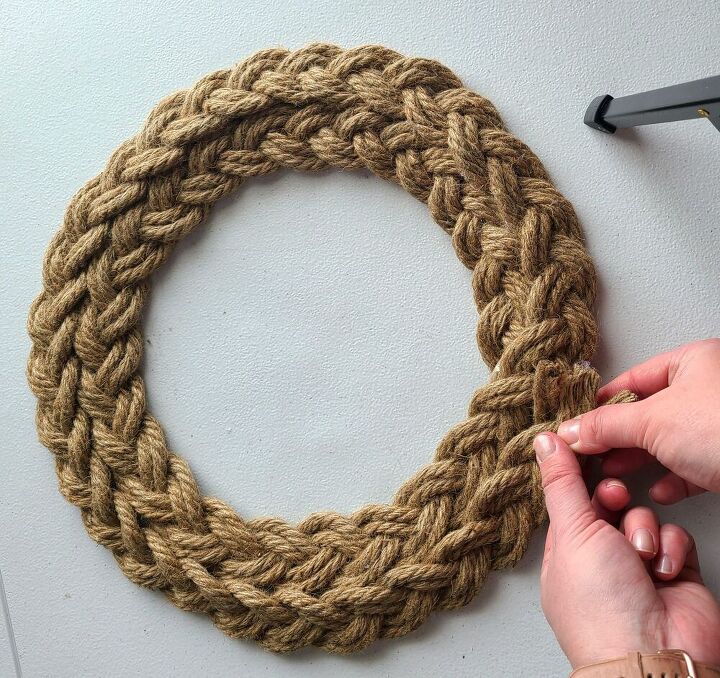
Once it is glued together, slip the ends of the rope under the second part of the wreath so that it is hidden.
Embellishments on the Nautical Rope Wreath
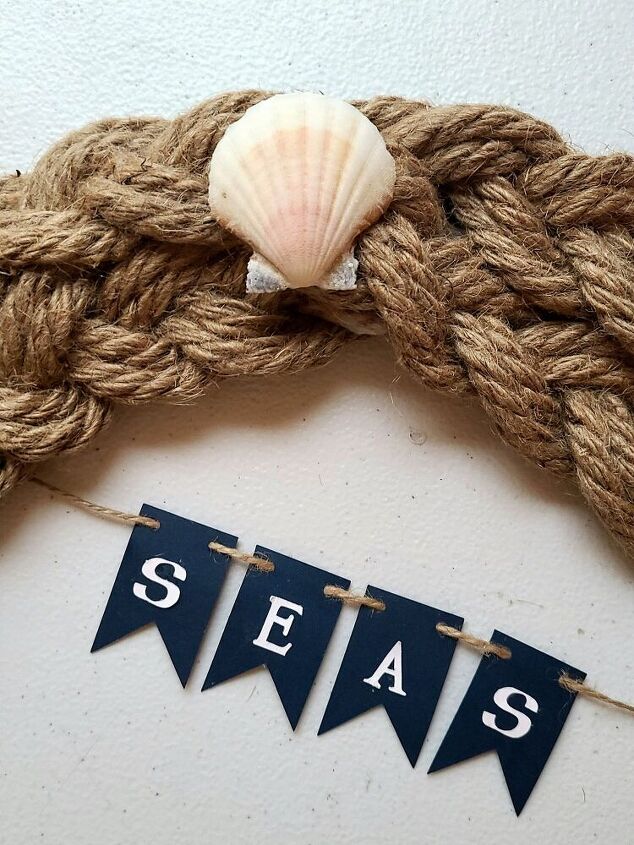
The easiest way to further decorate your wreath is to use seashells and wood shapes from the Dollar Tree or craft stores. Dollar Tree has an anchor shape like the one that I used on my rope wreath. Paint it navy or another beachy color. Glue it at 5 o’clock on the wreath.

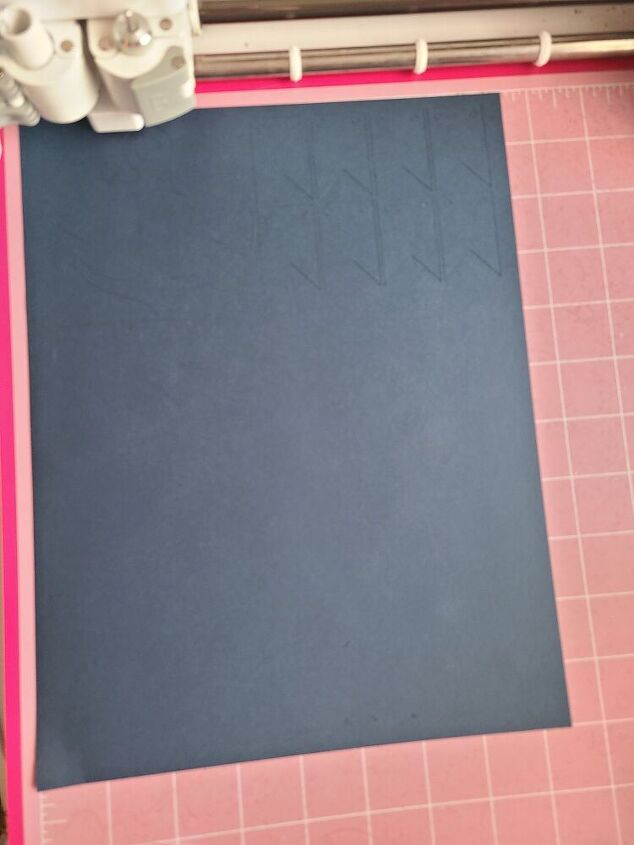
I used a Cricut to cut my anchor and word banners. I cut an anchor, using my Cricut Access Pass, in navy blue cardstock 3.5″ tall. Then I cut ten banner shapes that already cut two holes at the top on each side. If you don’t have a Cricut you can easily hand cut them. Cut ten rectangles 1.75″ tall by 1″ wide. Then cut an upside down V at the bottom. You will use those for the saying strung in the middle of the rope wreath.
Next you will either cut your letters or stencil them on the banners. I chose the words “seas the day.” Get it? Seas/Seize? I know you do. I used the font A Child’s Year. It’s included in the Cricut Access Pass, but you can use any font you’d like.
Cut two pieces of twine. To measure, stretch the twine a bit diagonally across the back of the wreath, then cut with a little extra just in case. String the twine through each of the holes on the banners, four banners on the first, then six on the second.
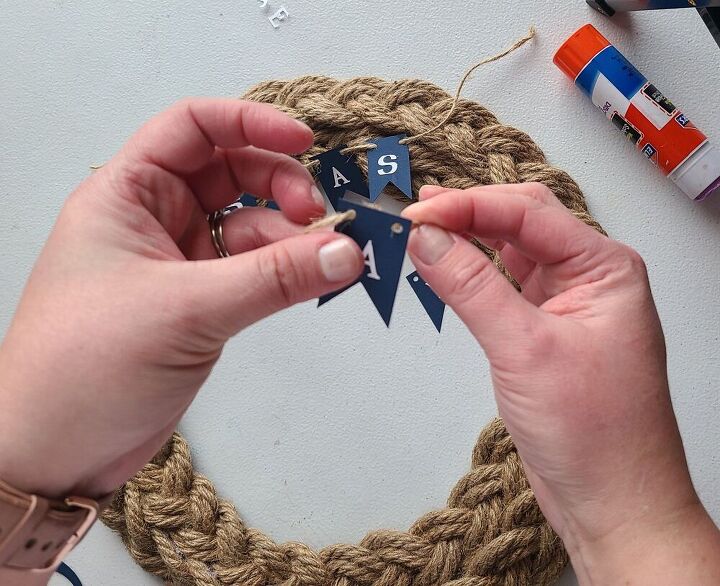
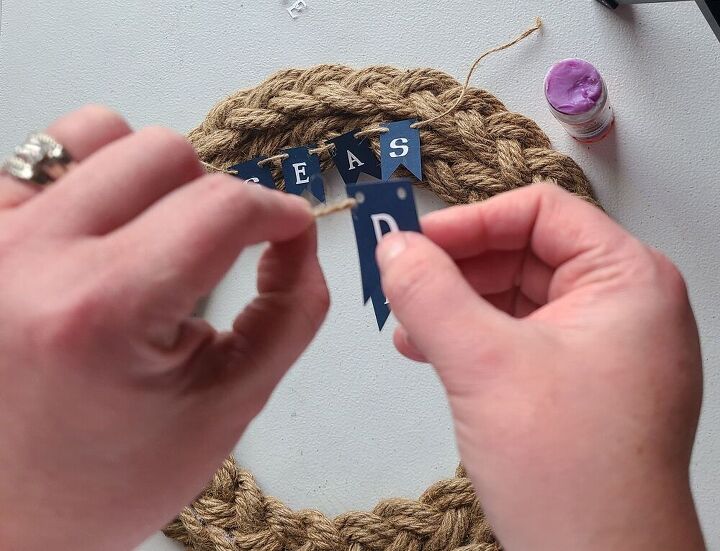
Add glue to the back of the letters, then glues “seas” to the twine with the four banners. Then glue “the day” to the second twine strung banners. Use your hot glue to glue the banners to the back of the nautical rope wreath. I glued mine slightly diagonally. I liked the look better than when they were straight.
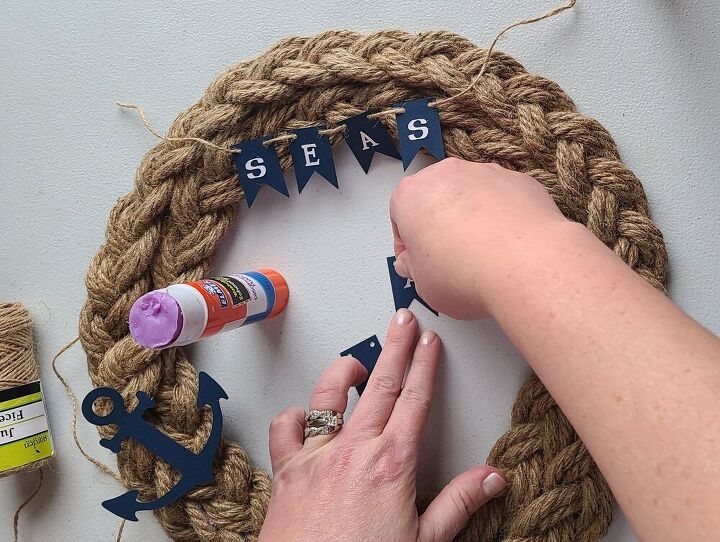


Lastly, you can glue on seashells if you’d like. I just glued one at the top of the wreath which is where I positioned the overlapping of the ropes.
That’s it! You’re nautical rope wreath is complete!
I just love this wreath! I haven’t decided exactly where I’m going to hang it, or if I’ll set it on a shelf if the book case. It might just be my favorite wreath that I’ve ever made. Share a picture with me on social media when you’ve made yours. I can’t wait until I’ve seen the different ways that you embellish yours!

Comments
Join the conversation
-
Beautiful
-
Rather than taping the rope to the table and each other, i put them on a clip board with a tough clamp so they wouldn’t move about. About half way through I realized I could hang the clipboard from a nail so the ripes would hang straight. Easy-peasy.


Frequently asked questions
Have a question about this project?
I will ask again, what was the length of "each piece" of rope?
Very cute!
Niki, do you have a particular way to braid. since you don't cut it until the end, to keep it from being tangled?
I'd like to see the finished product.