


DIY Cardboard Christmas Village | EASY & AESTHETIC CHRISTMAS DECOR
Hey guys! Today I’m going to be showing you how to make a DIY cardboard Christmas village. It is a gorgeous winter village display for your Christmas decor! It was inspired by the gingerbread houses I saw on Pinterest, and I thought I should be sharing it with you!
Ok. Let's begin!
Draw the village
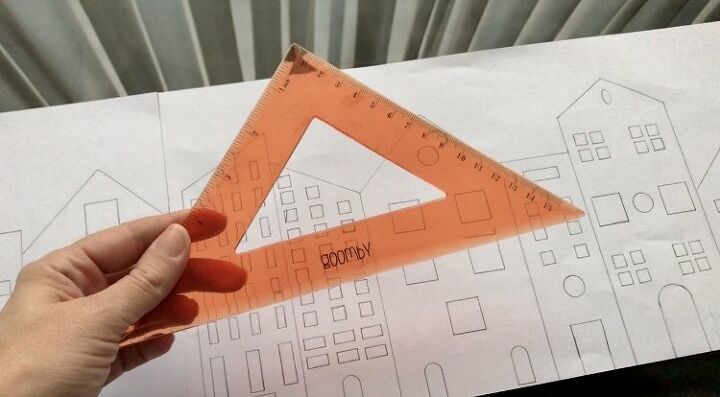
First, I took three sheets of printing paper and joined them with scotch tape.
Then I went ahead and drew my village with a pencil.
Cut out your design
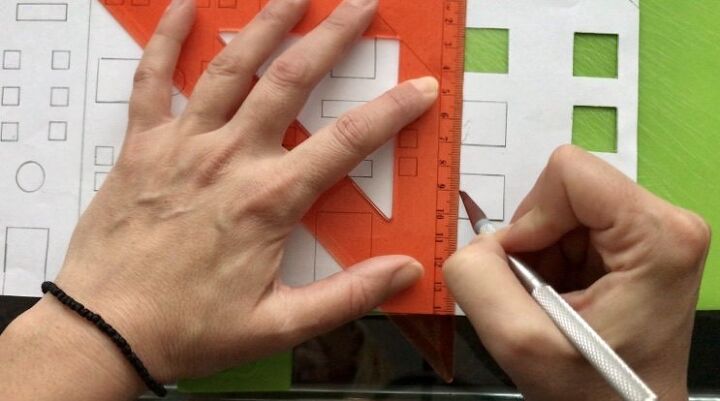
Then I took a cutting board from my kitchen since I didn’t have a cutting mat yet, and with my x-cto knife and my ruler, I cut out the windows, the doors, and the perimeter of my village.
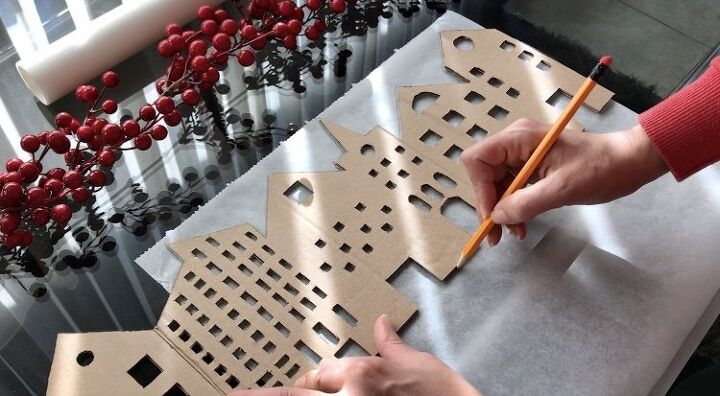
Trace the pattern on the cardboard

Next, I placed my village on the back of my cardboard, and I secured it in place with some scotch tape, and then I went ahead and traced the pattern with the pencil.
Cut out the pattern

Remove the stencil and cut out your pattern.
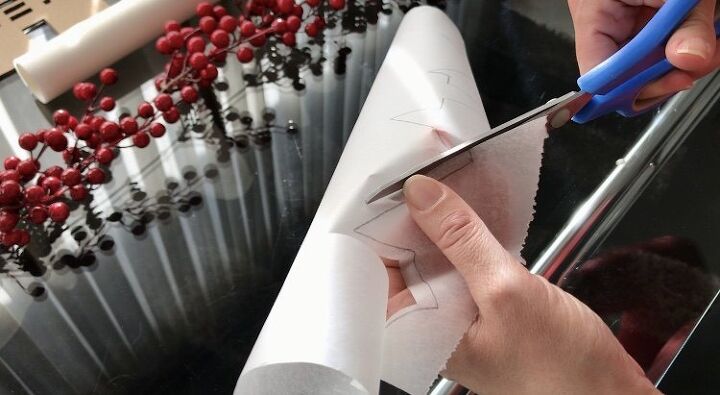
Trace the pattern on a baking sheet.
Next, I took a baking sheet, and I placed it at the back of the cardboard. To keep it in place, I used some scotch tape and then traced all the perimeter.
Cut out the pattern
Next, I removed the cardboard and started to cut my design. You have to cut it about half an inch in only at the pattern of the roofs because we don’t want the baking paper to appear throughout.
Watch my video tutorial if you want more details.
Trace the pattern with a chalk marker
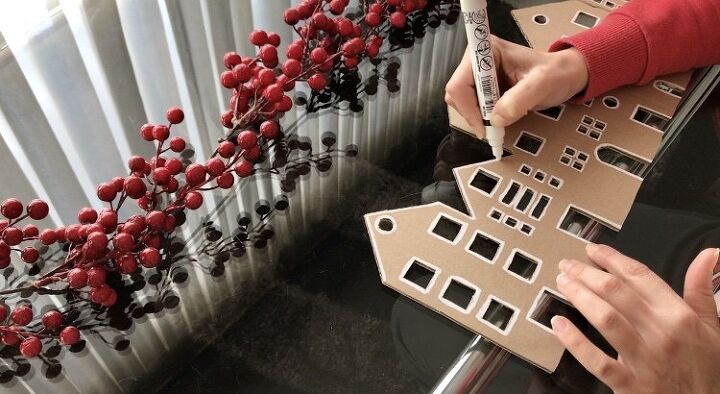
I took a chalk marker and traced all the doors and windows. If you don’t have a chalk marker, you can use white acrylic paint and a painting brush. I kept my design sleek and simple, but you can customize it as you like. You can draw shutters, strings of lights, roofs, anything you like. You can find inspiration on Pinterest. There are lots of designs there!
Place the baking paper
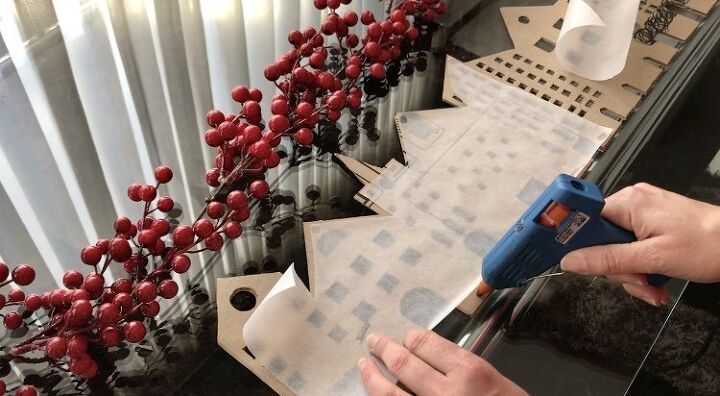
Now it’s time to place the baking paper. Find the spot where it should sit flush, and stick it to the cardboard with some drops of hot glue.
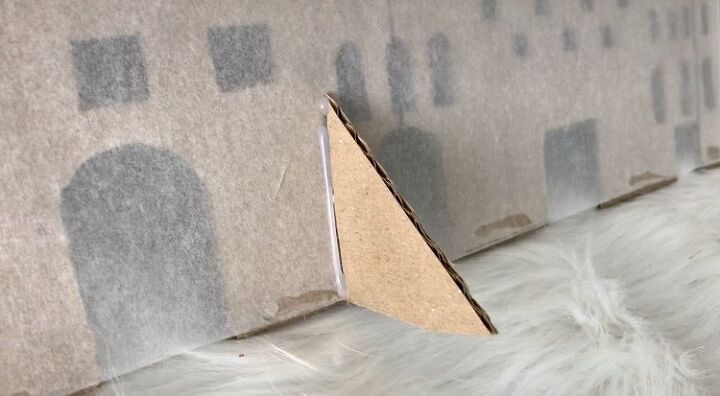
When you’re done, you need to take three pieces of cardboard and stick them with some hot glue behind at the very bottom of the cardboard so it stays straight and prevents it from falling.
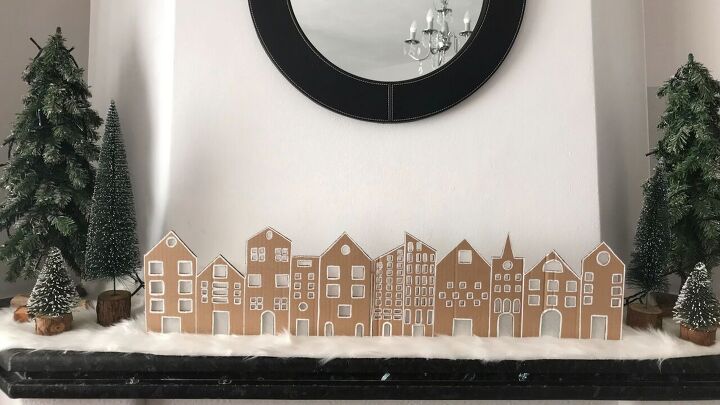
And this is our final product! Guys, I’m obsessed with how this DIY cardboard Christmas village turned out! My kids also! We can’t wait to be dark outside, switch off our ceiling lights and keep only the Christmas lights on and enjoy the ambiance while we’re watching a movie!
I hope I inspired you to make one, and if you’re gonna do it, post it on Instagram or my Facebook page so that I will be able to see it! See ya!
Resources for this project:
See all materials


Comments
Join the conversation
-
oh my....the fact that it is called a gingerbread village...I picture using beads and ribbon as "candies" and decorating it like you would a gingerbread house! LOL
-
So cute!!


Frequently asked questions
Have a question about this project?
Really creative! Looks really nice. I wonder if a nativity scene could be made like that? My daughter rescued a crazy cat that crawls on our shelves so I can’t put our ceramic one out for Christmas.