


Farmhouse Snowy Mini Tree
Making table top trees is a fun way to spread holiday decor throughout your home. This farmhouse snowy mini tree is not only easy to put together, it’s inexpensive, too. Using dollar store items, I transformed a green tinsel tree into this wintry decor piece.
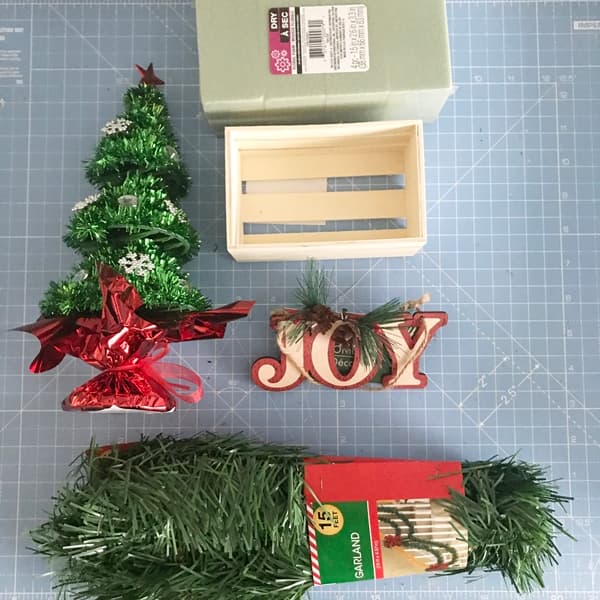
The tinsel tree, crate, garland, joy ornament, and floral foam were all purchased at Dollar Tree. The other items that I used I had on hand in my craft stash.
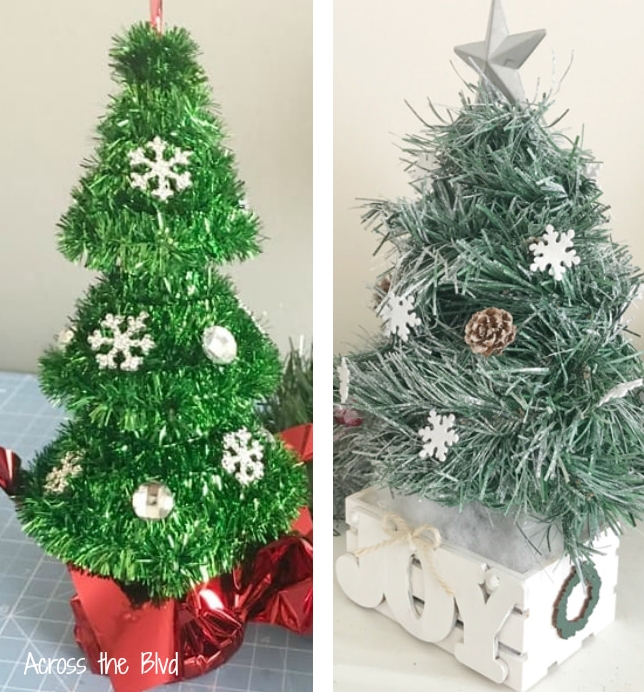
All I needed was a basic tree shape and I decided this sad little tinsel tree would work.
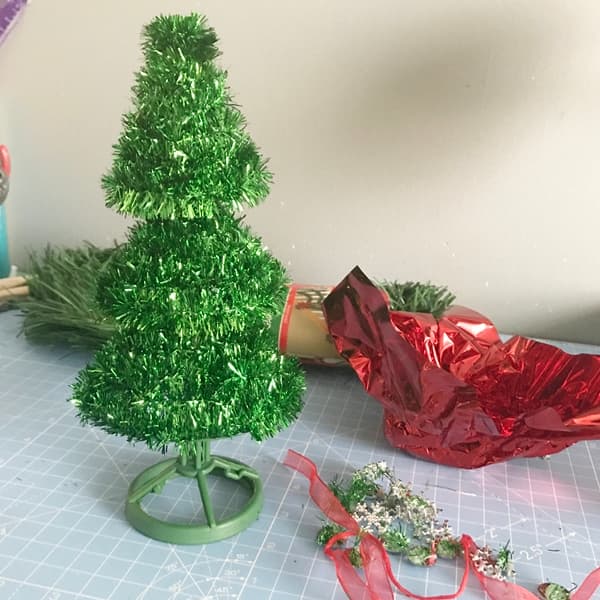
I started making my farmhouse snowy tree by deconstructing the tinsel tree. First, the red foil wrapper was removed. Next, I pulled off the silver snowflakes and red star. Pretty sad,isn’t it? It didn’t stay that way for long though.
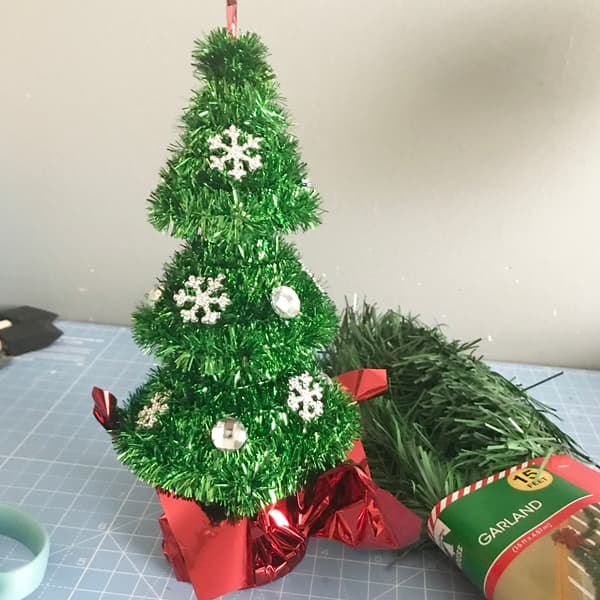
Using the dollar store garland, I tucked one end into the tinsel tree and added a bit of hot glue to hold it there.
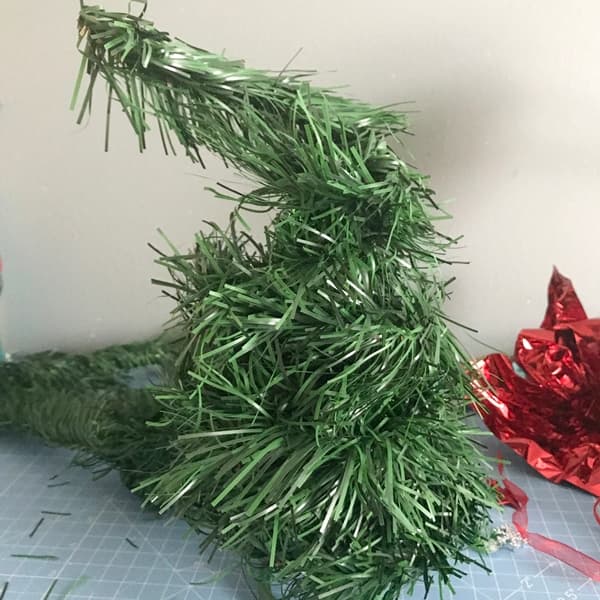
Once it was securely held, I continued wrapping the garland around the tinsel tree until I reached the top, then I started going back down, then up again until it was full enough. I trimmed off the extra garland.
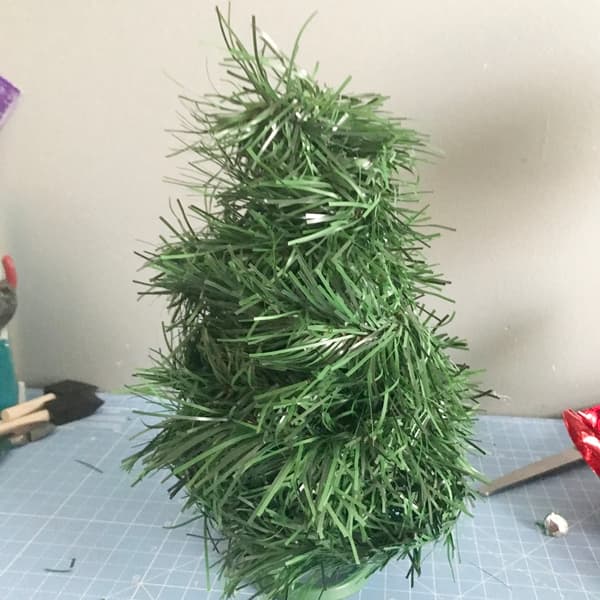
I followed the directions on a can of spray snow and sprayed the mini tree with it. I let it dry for a couple of hours and then gave it a second coat.

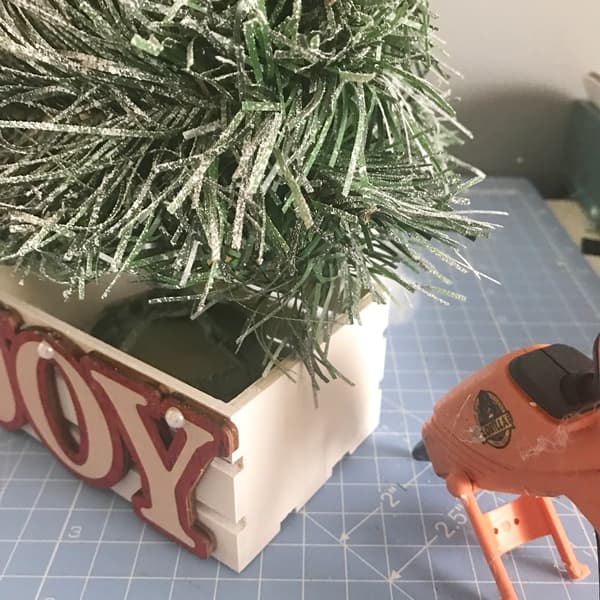
The small wood craft crate and the JOY ornament were other items I found at Dollar Tree. I painted the crate, removed the ribbon from the ornament, and hot glued it to the crate. I added a couple of beads to cover the holes in the ornament where the ribbon had been.
I added a piece of floral foam inside the crate to give the tree more support. The tree is glued to the foam block.
Using polyfil inside of the crate and letting it overflow a little gave more of the snowy look I wanted. I added some snowflake stickers to the tree.

I thought I was almost finished with the tree, but the more I looked at it, the more I didn’t like the red outline on the JOY ornament. I decided to paint it to go better with farmhouse styled decor. I added a small twine bow to the center.

I added a couple of wood craft wreaths to the sides of the crate and a metal star for the top of the tree. The star is glued to a piece of metal floral wire and then pushed inside the top of the tree.
For the finishing touch, I removed some mini pine cones that were attached to a floral stem and added small dots of hot glue to secure them to the tree.

I love comparing the before and after of this project. It was an easy craft that can be put together in about an hour plus additional time for the snow to dry. To see more easy craft ideas, I'd love to have you visit us at Across the Blvd!


Frequently asked questions
Have a question about this project?