


Wooden Santa Clauses!

You guys aren't ready for this one! I'm talking "Adorable Overload!" Like, more adorable than a baby panda, puppy, kitten and five chipmunks all sneezing together.
In this post, I will show you how to easily make wooden Santas.
"How easy Bryan?"
So easy, kids can make them! If you've ever met a kid...you'll know exactly what I'm talking about too. Kids can easily make these, but you'll need to cut the wood, sand, handle the super glue and pushpins....oh' jeez...put newspaper down everywhere for when they inevitably spill paint.
I think that's it. Yeah, they'll probably get boogers all over the paintbrushes too. OK, OK, these are so easy to make, kids can assist you making them or watch you make them or play their Switch in the other room.
Do you hate reading? I made a video for you buddy!
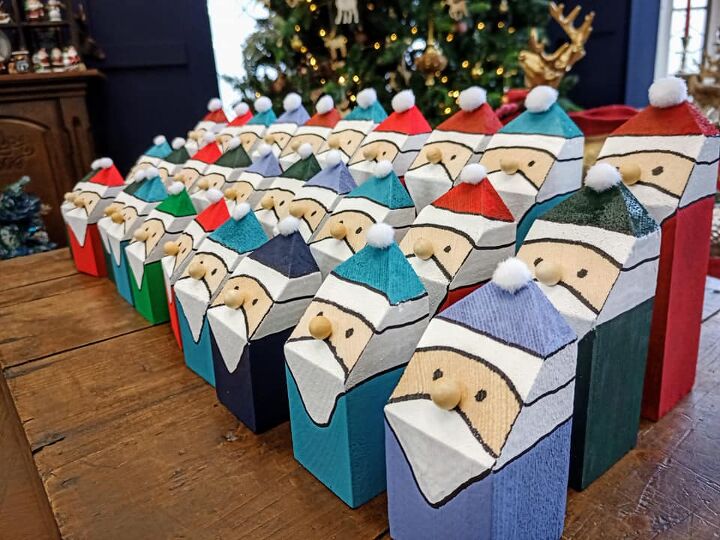
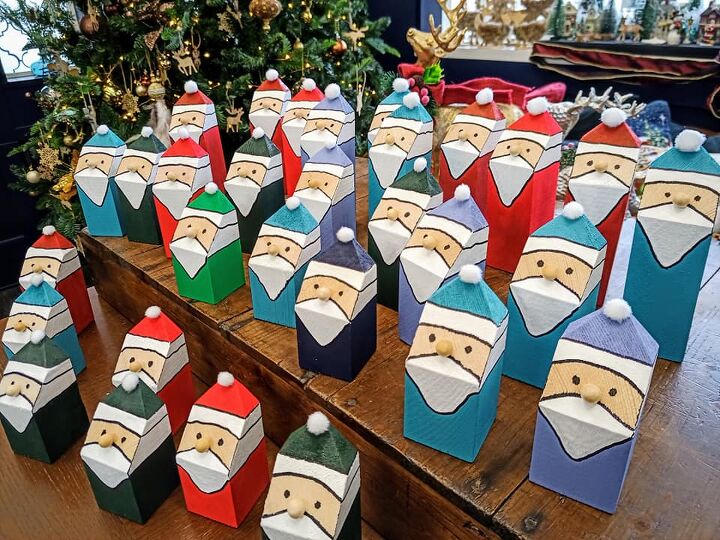
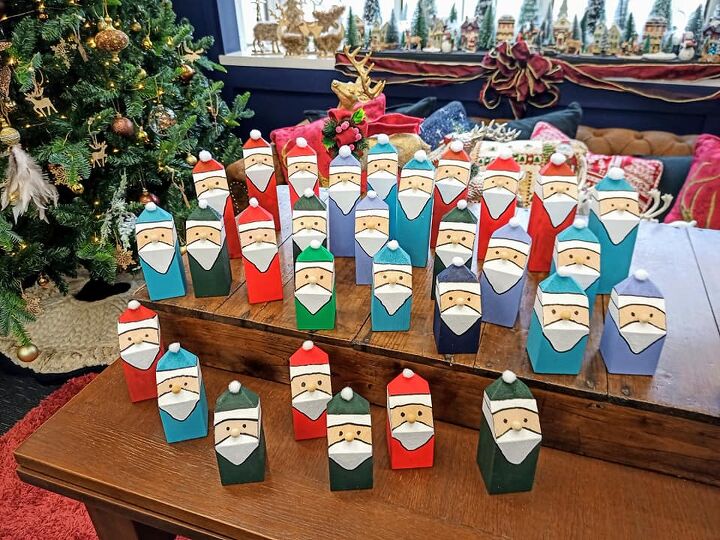
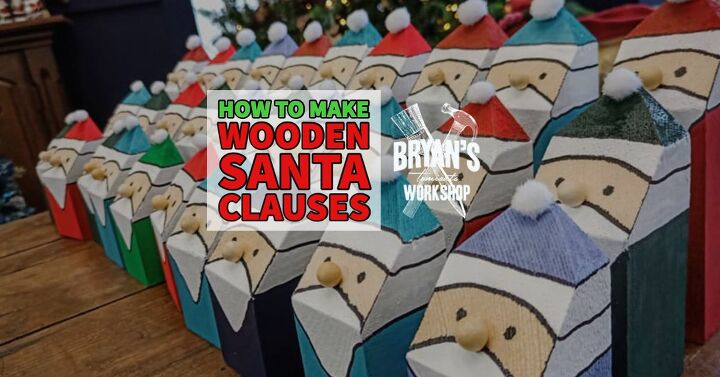
The finished Santas!
Take a hike sneezing baby panda!
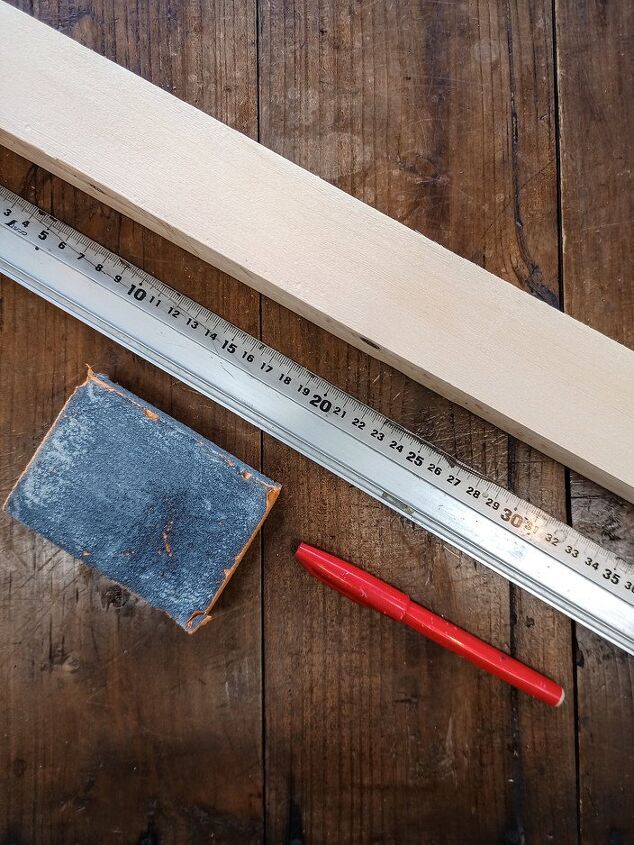
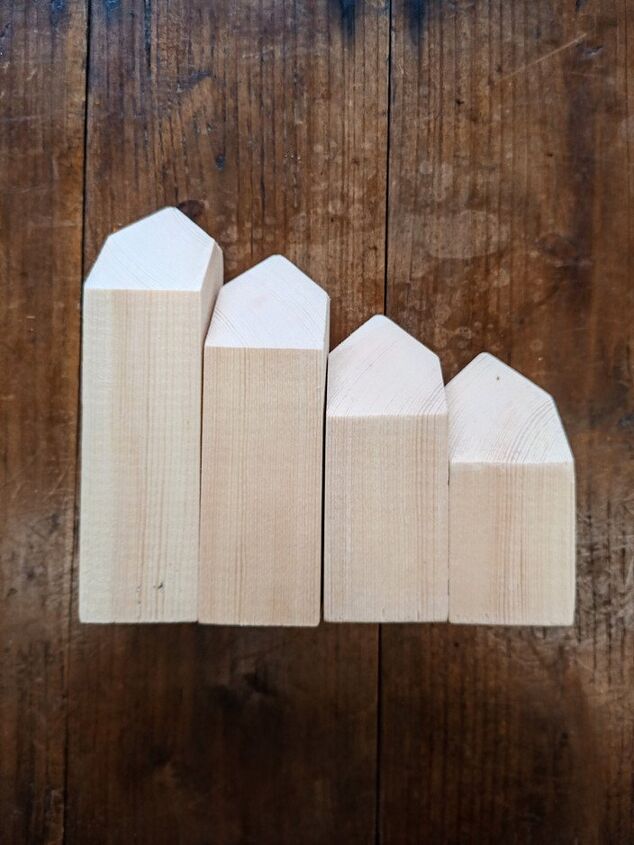
Cutting supplies
-Miter saw
-Square wood post. I used 45x45mm (about 2x2in).
-Ruler to measure the middle point.
-Marker to mark the middle point.
-Sanding sponge or sandpaper to clean up the cuts.
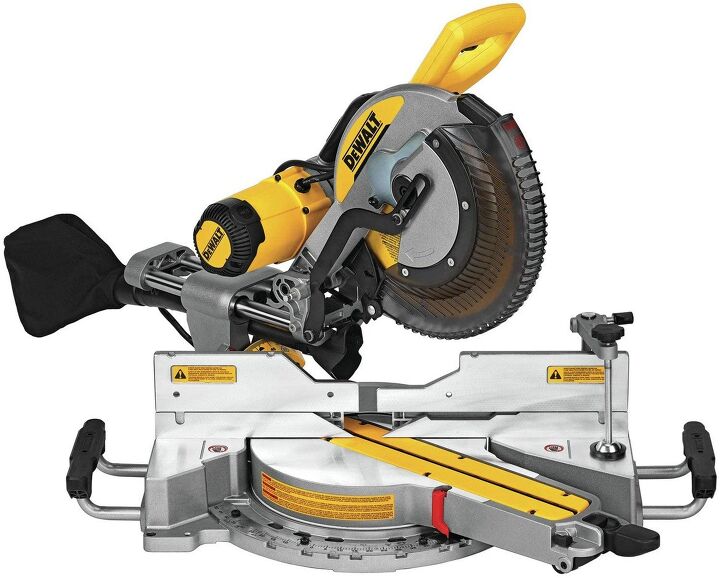
The only difficult part of this project is cutting the wood! I recommend a sliding compound miter saw and if you don't have one, it's a purchase you won't regret. Cheap ones are under $200.
The main difference between a sliding compound miter saw and a compound miter saw is the rail or rails on the sliding saw. These rails allow you to slide the saw back and forward as you cut. Easy peasy cuts!
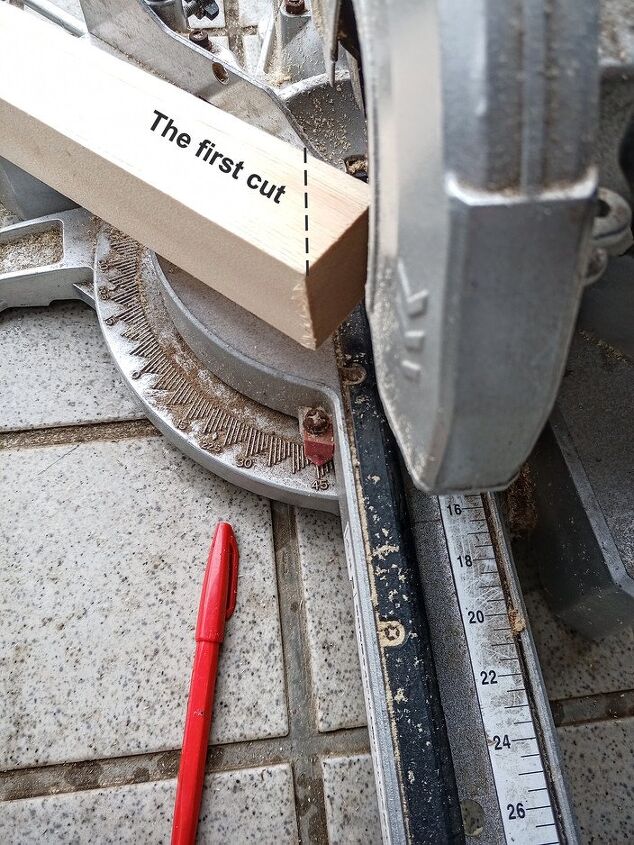
All cuts are 45 degrees!
Do you remember 98 Degrees from the 90's? C'mon, Nick Lachey was in it. Boyband from the 1990's. Well, they have nothing to do with this, so forget I said anything.

Use the ruler to mark the middle point. You can draw cutting guidelines too.

First cut!
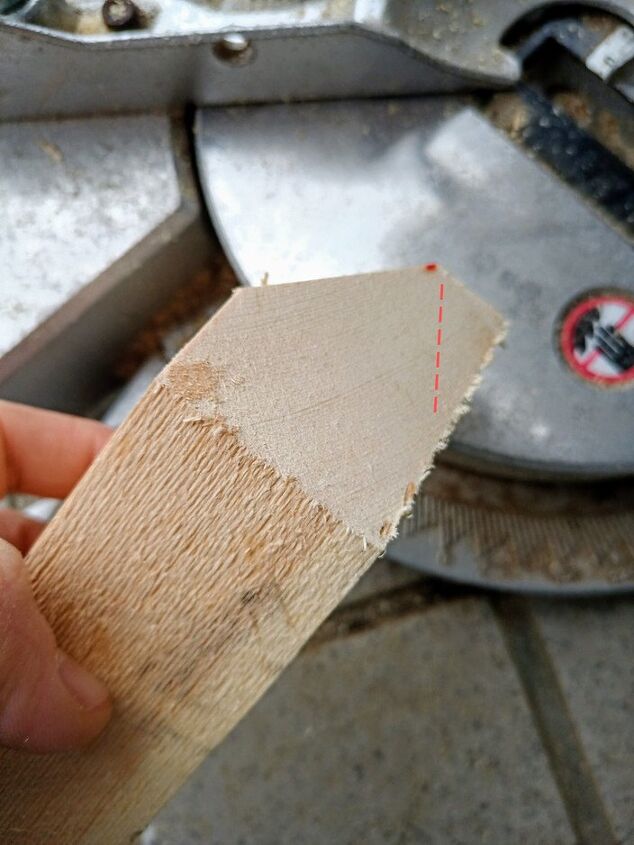
Second cut!
Kablamo!
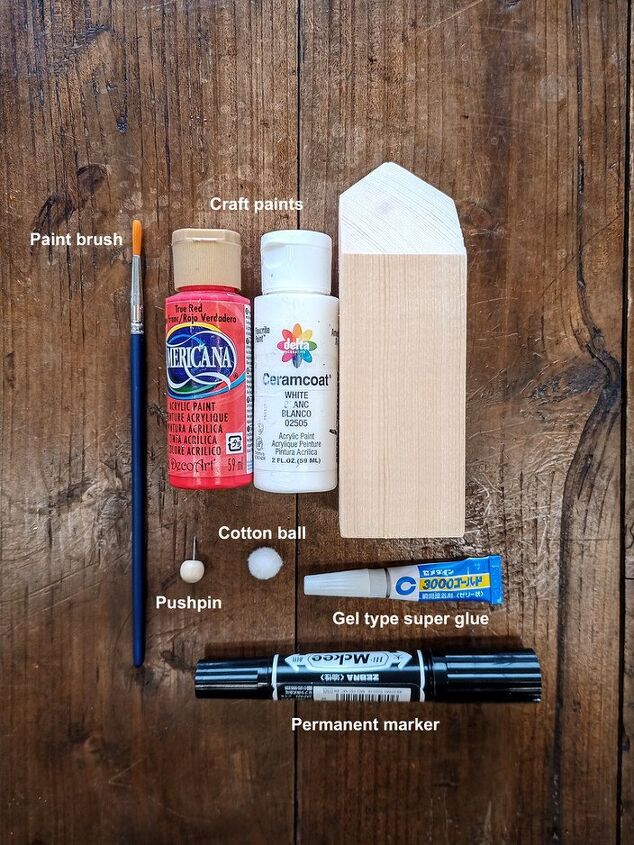
Painting supplies
-Paint brush
-Craft paint
-Pushpin
-Cotton ball
-Gel type super glue
A gel type super glue works better than a glue gun. Trust me! You should also put a bead of super glue behind the pushpin nose. Hey! stop looking at that glue gun!
It's cute pictures time!
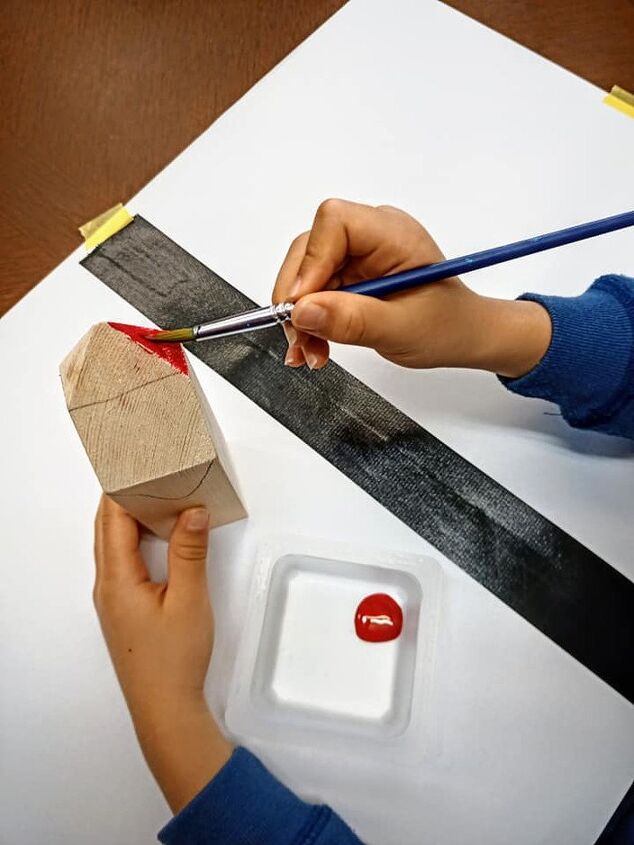
I hold seasonal workshops for kids and they made these last year.
What I've learned is:
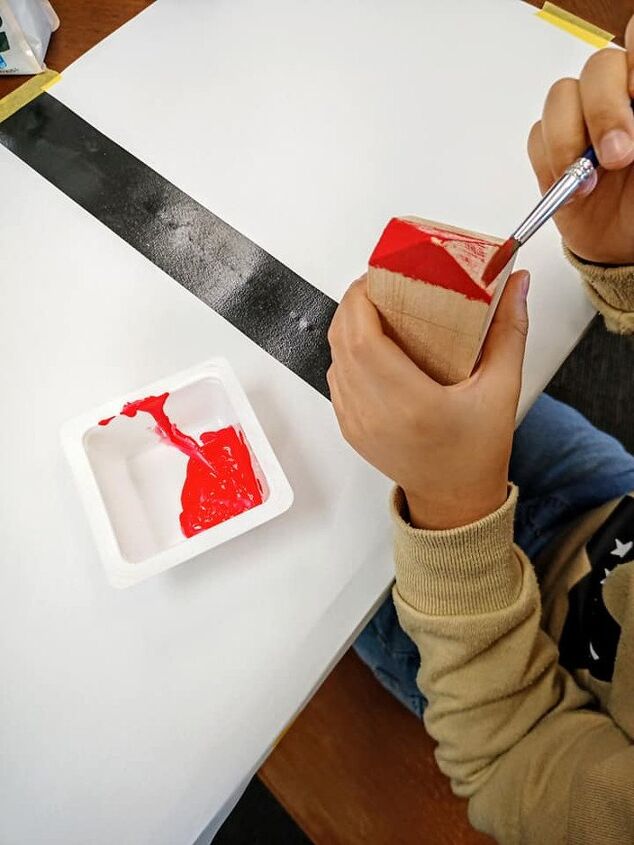
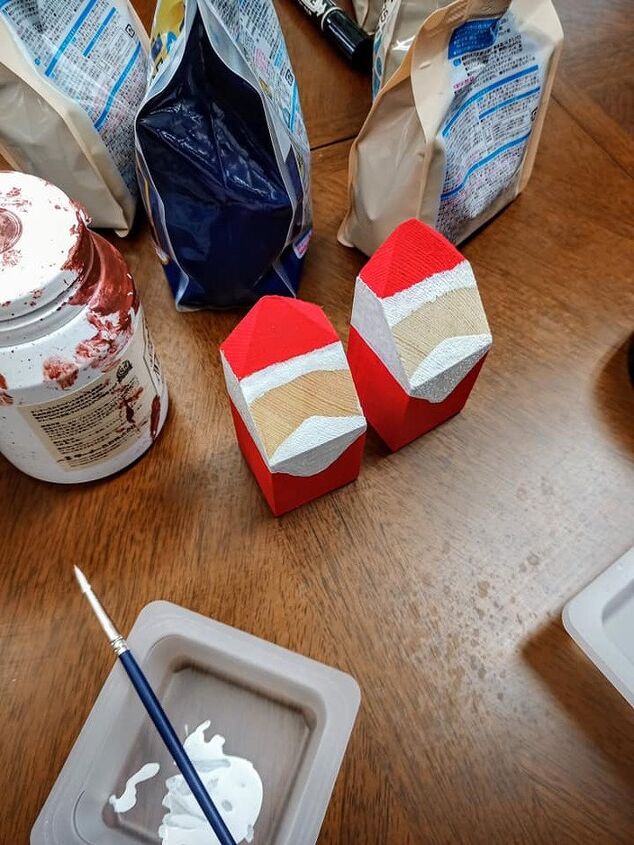
It's best to have kids outline the beard and hat with a pencil so they have an easier time painting. When the Santa is dry, have them draw a dot where the nose and eyes will be. Paint mistakes are easily erased with sandpaper, but the eyes are not, because the magic marker absorbs into the wood. It's better for adults to handle super glue and add the cotton ball on top. After applying a bead of the gel super glue on top, push the cotton ball down for a couple minutes, or until it's set. Do you remember when I was writing about 98 Degrees? Yeah, I didn't listen to that stuff or anything. Not even once! Never! Except for "Because Of You" on their album "98 Degrees and Rising," that I boug.....my sister bought and I never listened to it. EVER!
Hooray, painting!
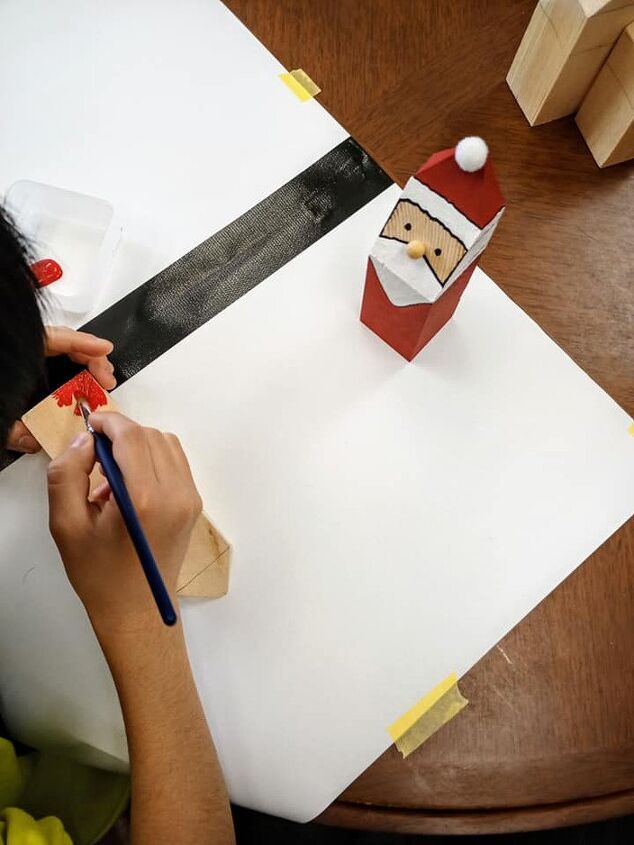
Use the permanent marker to outline.
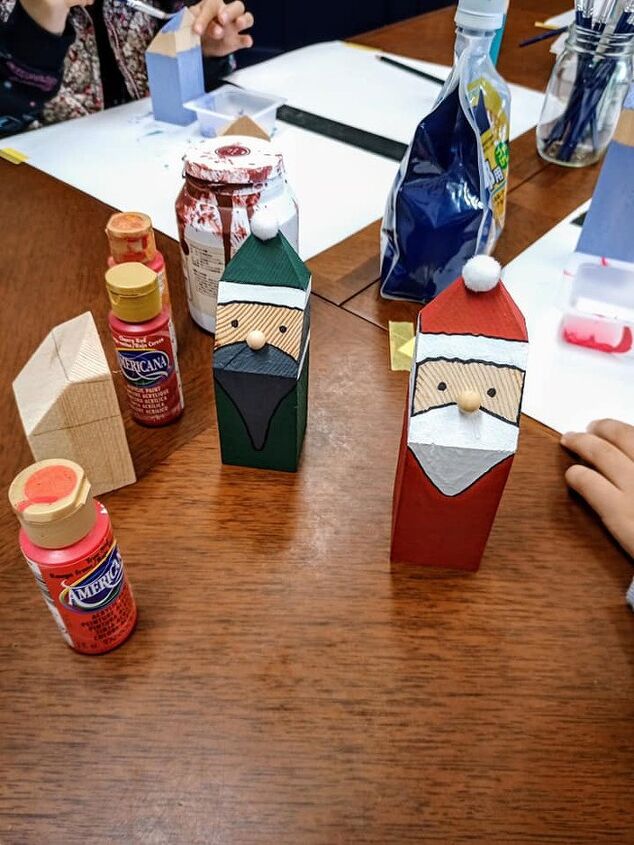
Two designs! I call them Santa and 2021 David Letterman.
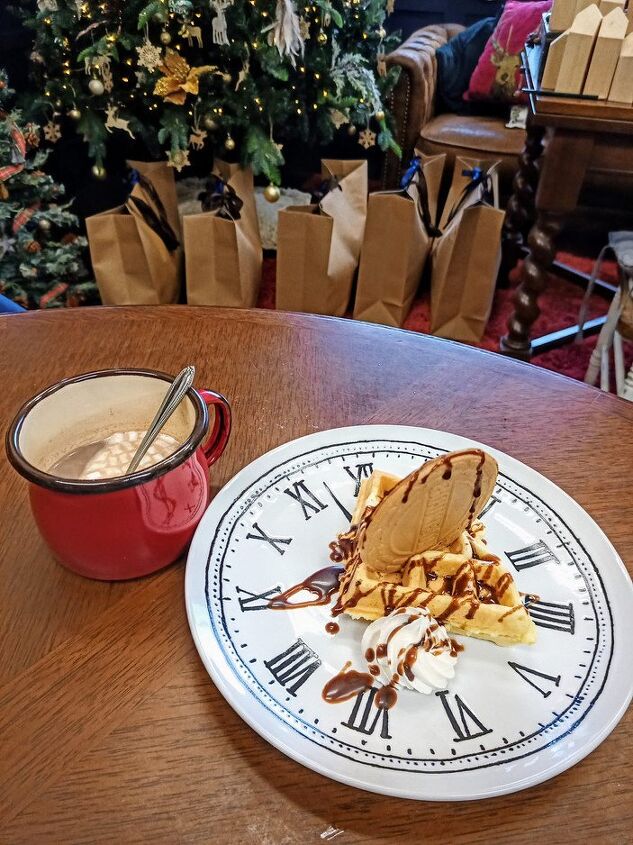
Snack time after craft time.
I'm on all of the social medias! Check me out on MySpace, AOL chat rooms, Vine and Tamagotchi.


Comments
Join the conversation
-
Love the plates !
-
Your Santas are adorable. A Cute way to decorate a mantle with some greenery or to add some whimsey to the kitchen or bathroom. Thanks for sharing.


Frequently asked questions
Have a question about this project?
How do I print it
I see this as school fund raiser, for kids by kids. So many schools have holiday craft shows why not sell students work too? Just a thought