


How to Flip Vintage Picture Frames Into a Tiered Jewelry Tray

I recycle lots of things especially picture frames, I create sea glass or pebble scenes onto them as you can see from my previous Hometalk posts. Last year I was given some old picture frames to reuse and when I saw amongst them two, oval, vintage frames... I just knew I had to create something special with them.
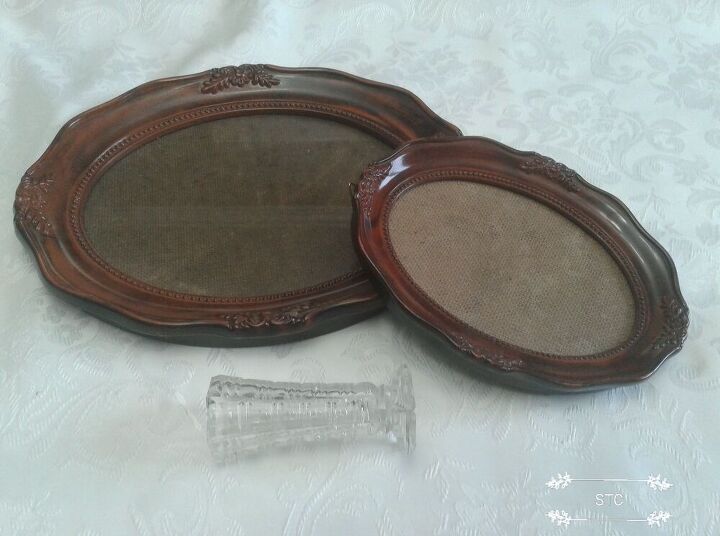
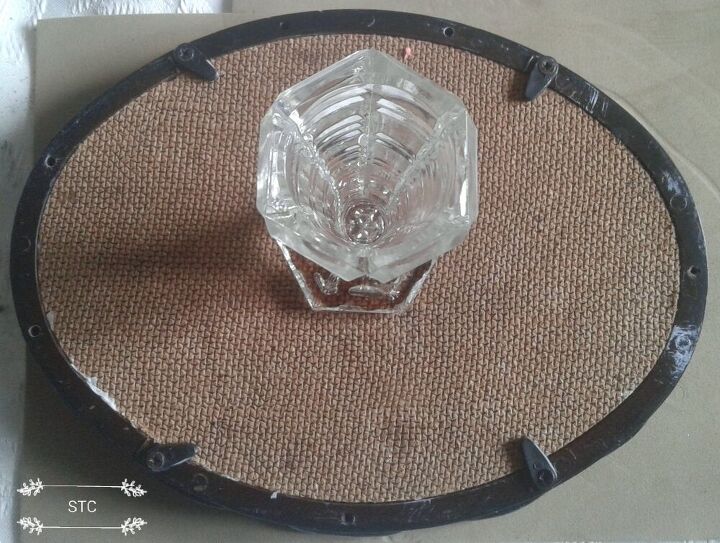
They were solid because of the fibre board backing and they were graduated in size so it was obvious to me to turn them into a tiered tray! I sourced a small flower bud vase to act as the pedestal and just like that I could see it coming to life.
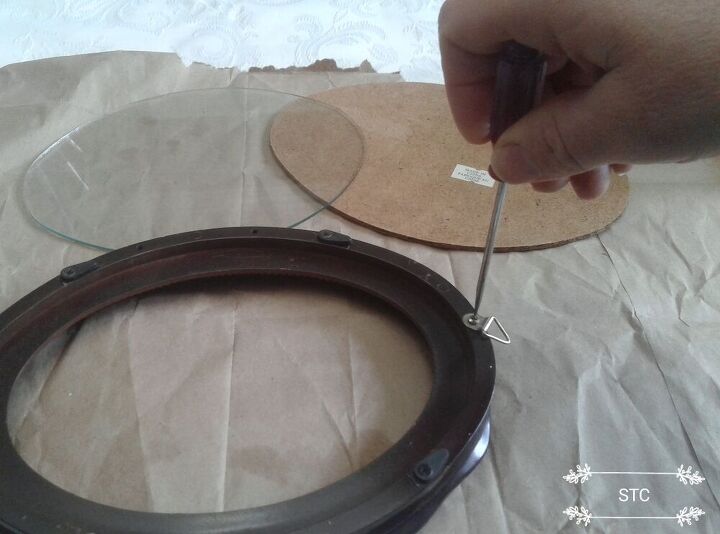
Preparation soon got underway once I had the idea planted in my head. I removed the hanging hardware, these ladies are going to be taking it easy and sitting from now on so I didn't need that anymore. The glass and backing simply popped out once I turned the clasps on the back, both pieces were set aside.
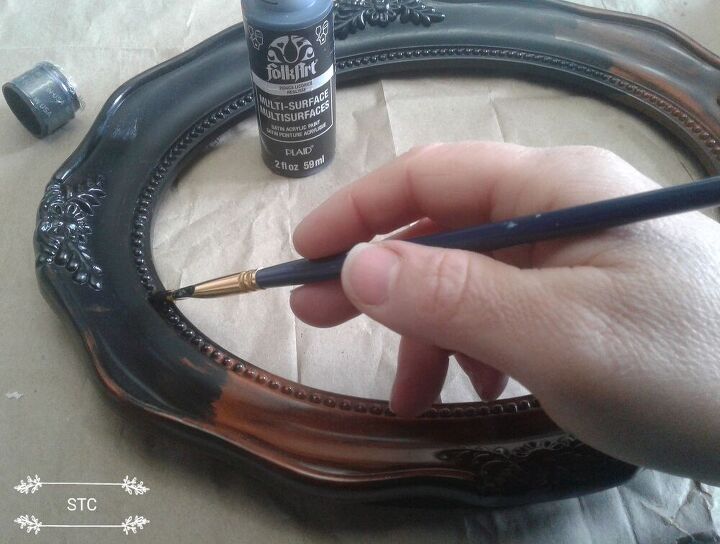
I was going for a classic look since these were vintage and black just seemed obvious to me. Before I began painting I cleaned the frames with a mild degreaser, most dish liquids have degreaser in them so sudsy dish water is perfect! My go to paint is the multi surface paint by Folk Art, I swear it must have glue into it because it "sticks" onto whatever I try it on!
One coat gave them great coverage but after an hour or so of dry time I applied the second coat to hide the brown underneath completely.
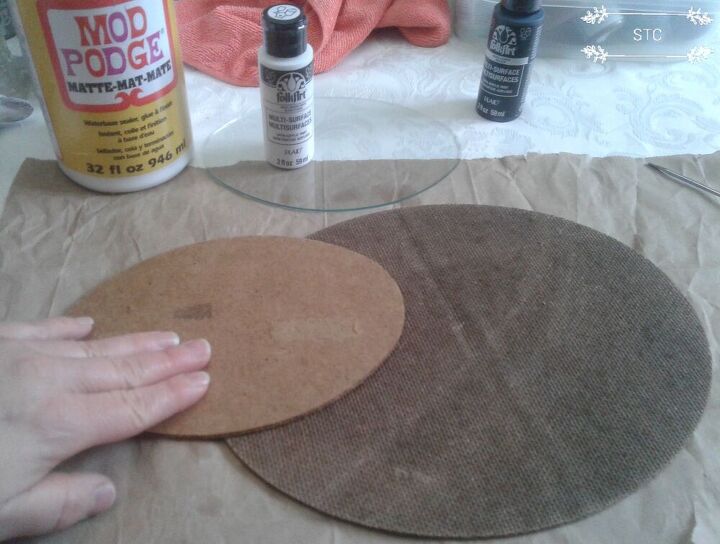
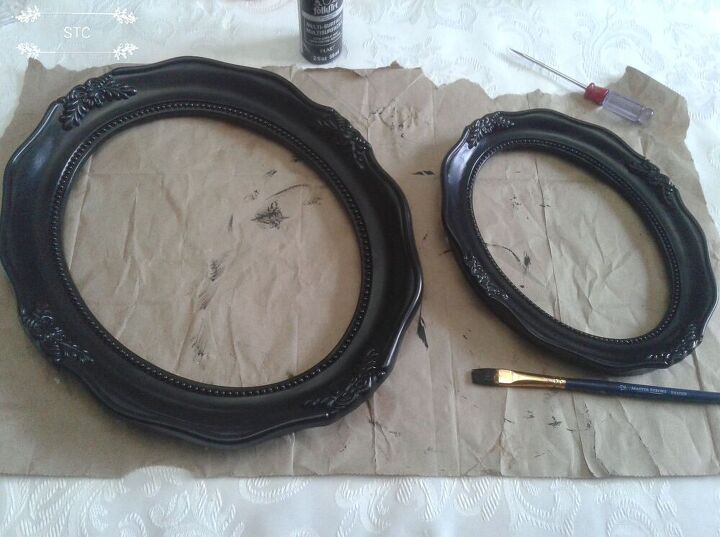
Next up was to give a makeover to the frame backings, I have one back up and one front up as they were bought originally. The two sides are vey different in texture so I took that into consideration.
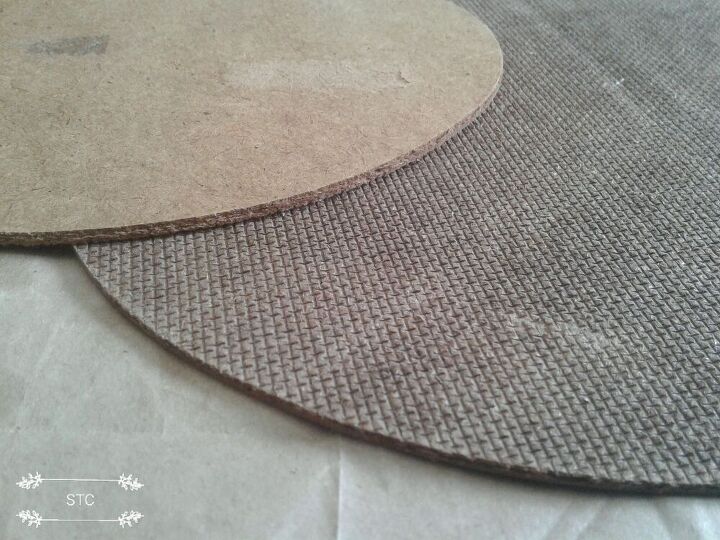
So you'll clearly see that one is smooth and one is super bumpy, I'll be working on the smooth side.
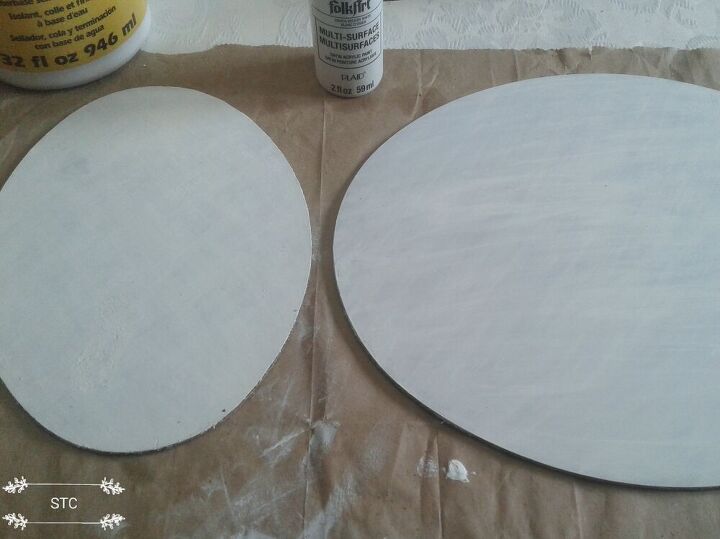
Now we all know the classic look is black and....white so with my Wicker White paint I painted both oval backings as with the frames to blot out the brown tones.

You see I am going to decoupage these napkins onto the backing and since their base coat is white I'd want the same color to show through underneath.
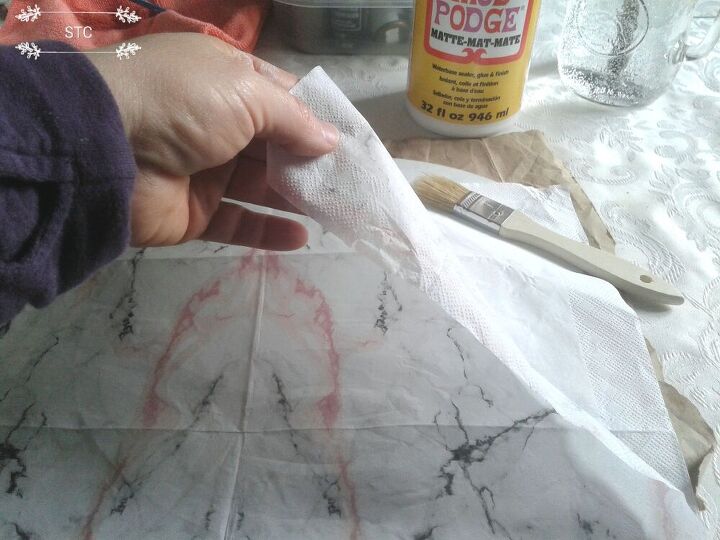
Since these napkins were 3 ply it meant two plain layers would need to be separated from the top patterned layer that I'd be using to decoupage with. I thought the white marble would add a sense of elegance to this project and keep it neutral in order to match most decor styles.
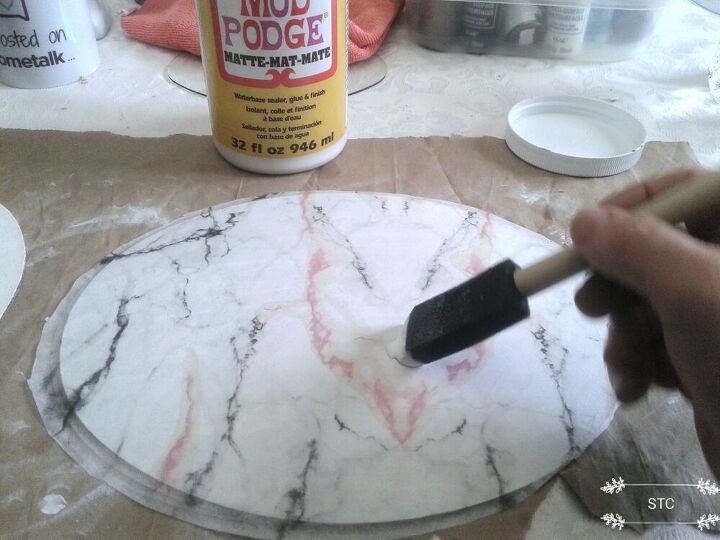
The decoupage process is to apply a layer of mod podge evenly over your surface, then gently and carefully place and smooth your napkin layer over top. Lastly another layer of mod podge gets spread over the napkin to seal and protect it. It can be tedious and sometimes frustrating but after a few tries it gets easier. If all goes wrinkly wrong as sometimes it does I simply wash off the glue and napkin before it dries and start over fresh again....it happens!
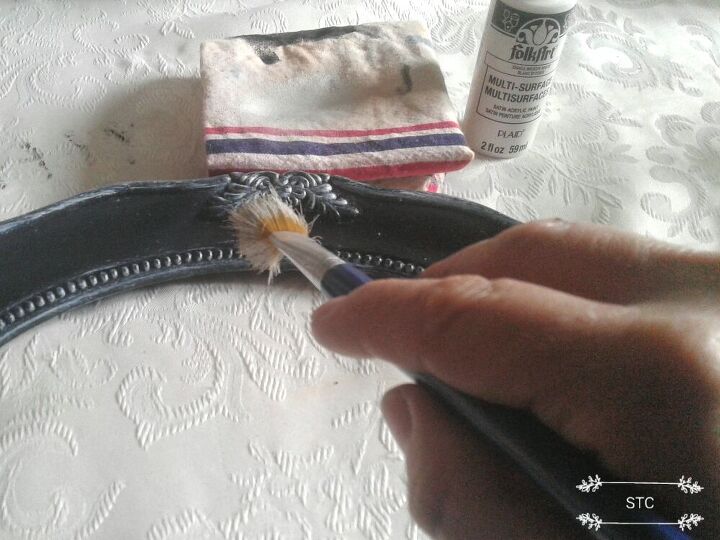
So while I waited for the napkins to dry I switched back to the frames to add in some highlights to the detailed parts. All I did was take a little paint onto my brush and smear most off in the rag above so that my brush was almost dry, this is why it's called the dry brushing technique. I focused on any raised or indented areas of the frame to highlight them with the white and make them pop and stand out against the black.
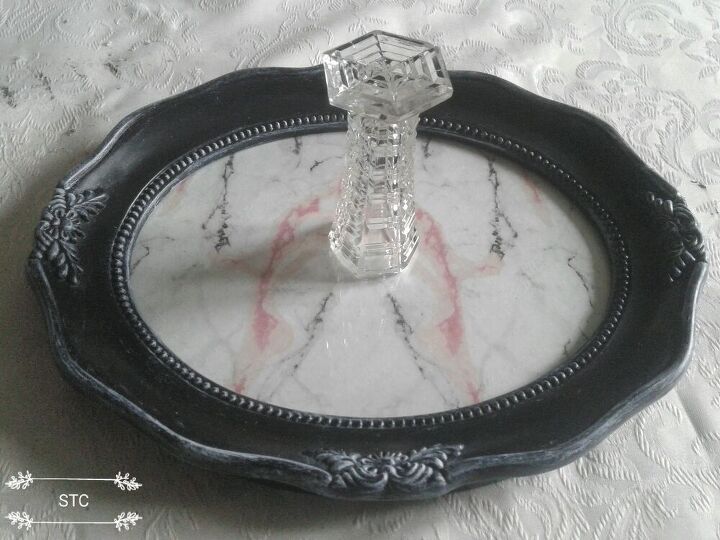
Once all of the parts were dry the frames were reassembled to allow me to work with them and figure out the vase placement for the pedestal.
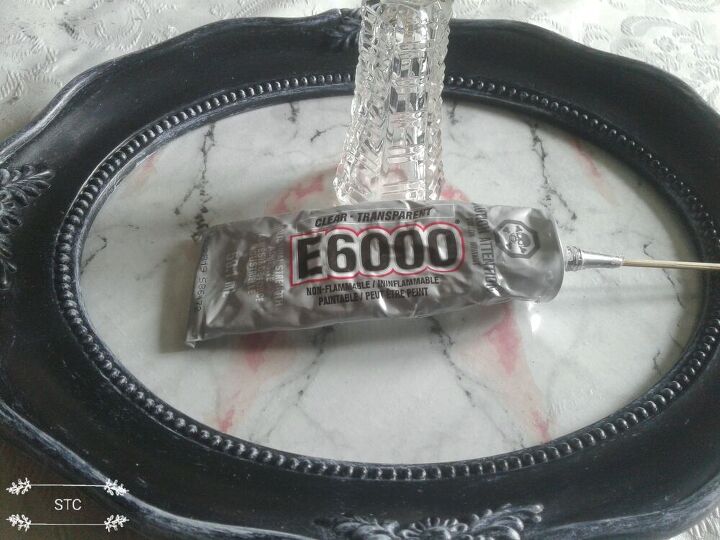
My wonderful go to glue for glass has always been E6000, the only peeve I have with it is wastage! As soon as you remove the screw on top the glue oozes out, so if you let it sit or don't rush your top back on there's excess flowing out! Then next time you go to twist the top off it's tightly glued on! My simple solution for this? I stuff a skewer stick into the hole as soon as I have enough product out for the task at hand and when I go to get more the stick simply gets pulled out with no fuss or muscle required!
To give my top tray more stability I glued it to the base of the vase which had a wider surface than the mouth of the vase for the frame to sit on.
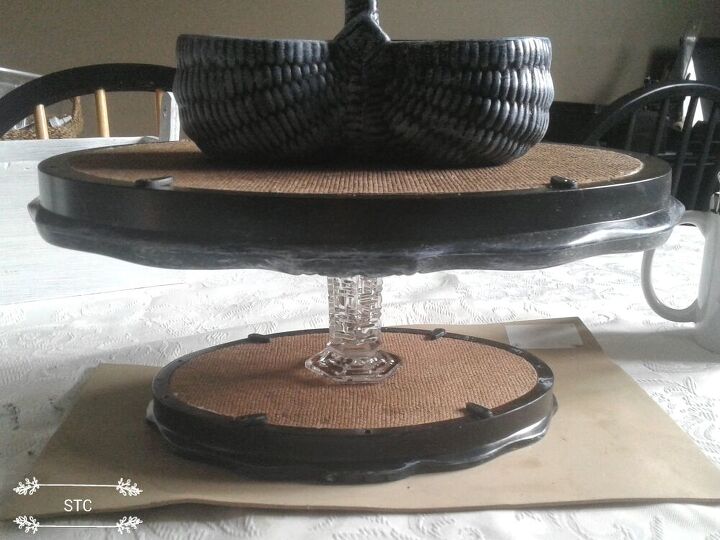
With soft foam acting as a cushion for the newly painted frame to sit on I stacked items onto the vase to add weight and secure the glue seal. I allowed the glue to dry a full 24 hours before I disturbed anything to ensure it had set up well.
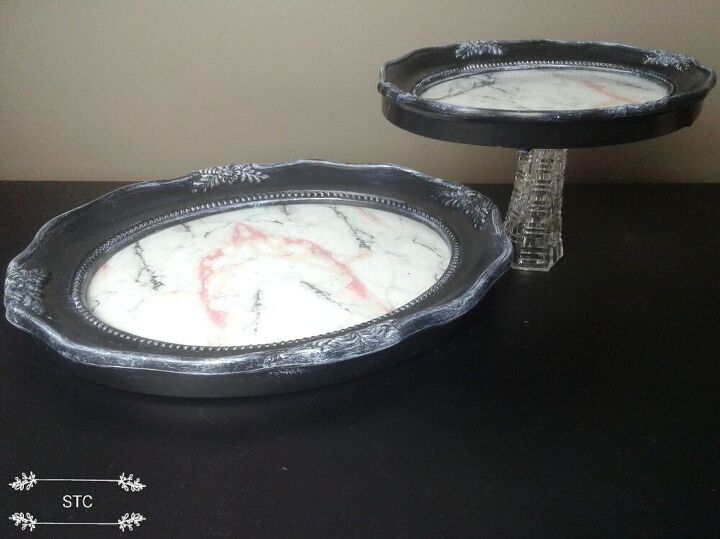
This is how I am leaving it with the bud vase only glued to the top frame. Why? Well glass being glass it gets dusty so I thought this would be better for cleaning was my first line of thought. Then after I stepped back and looked at it I thought that this could be another display option as a two piece set?

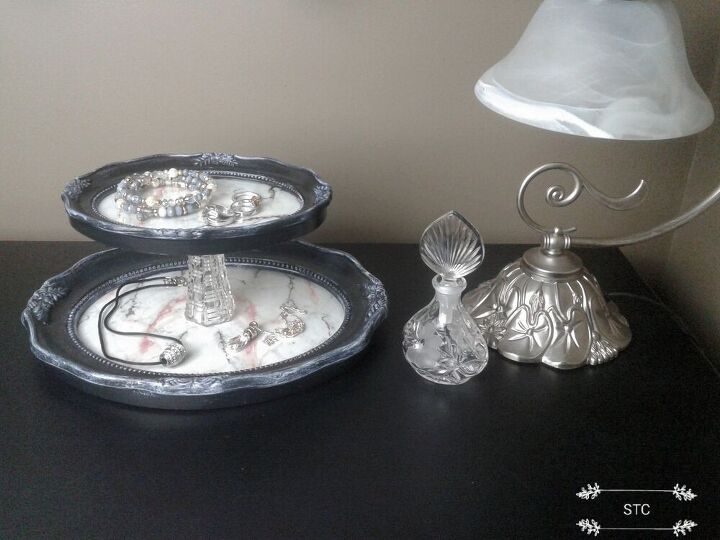
Here's the one you'll all fall in love with though, I know how folks are drawn to tiered trays and this looks more formal and finished too.
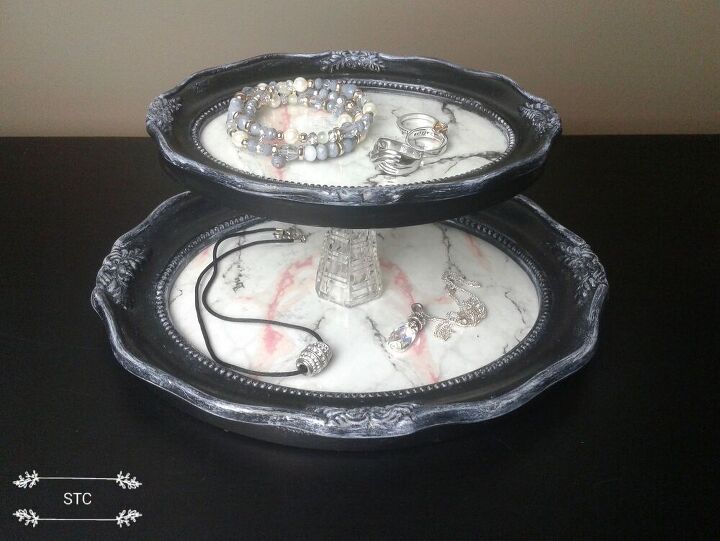
I thought of this being a beautiful place to rest your jewelry onto at the end of an evening, a fancy catch all. The options are open of course as to what each individual would like to display. It maybe small potted cactus or tufts of faux greenery, treasured finds from a vacation, lipsticks and lotions its left entirely up to the owners imagination.
Do you see now why I recycle picture frames? They have so much potential and the design and details of them point me as to what I can repurpose them into next. I'm so glad I was given the opportunity to share this project with you all and I'd like to think I may have even inspired a couple of you to try it as well. Thanks so much for checking in!
Resources for this project:
See all materials


Comments
Join the conversation
-
You made it look so easy and the finished tiered tray was beautiful! Thanks for posting, I’ll keep this in mind for the day I have materials that would be a good fit! 👍🏻👍🏻 Well done 🎉🤩
-
Brilliant idea. Thanks for sharing.


Frequently asked questions
Have a question about this project?