


Mirror Update

How I updated my bathroom without any major construction, and no demolition!
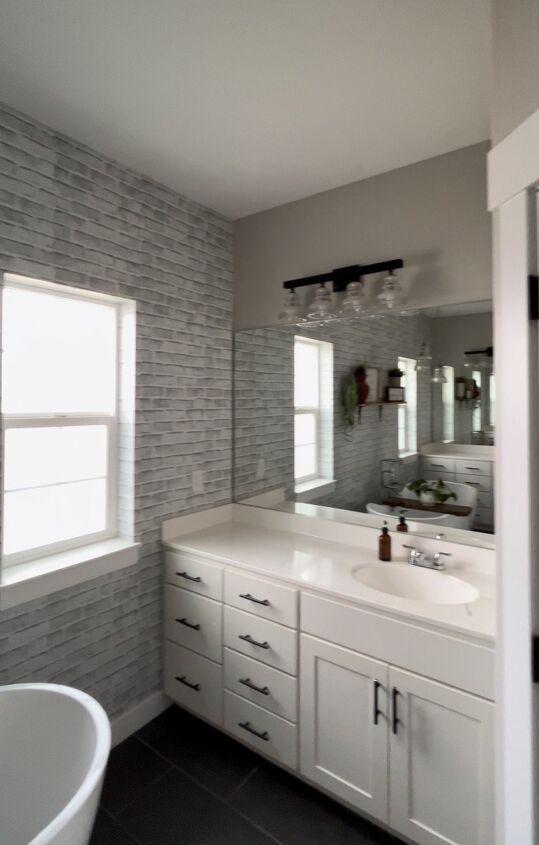
First off, this is a horrible picture and I know that 😆 it is a screen shot because I completely forgot to get a before pic! 🤦🏻♀️
Now here’s the thing… my bathroom wasn’t bad, honestly I loved my bathroom but now it could be better.
Now let’s get started, I went online and ordered some samples of these mirror mates.
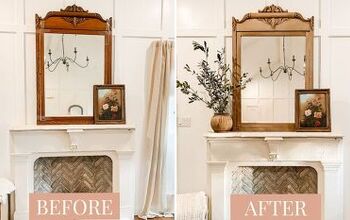
I fell in love with this beautiful black frame and so I went to the website and entered in my measurements and waited for the frames to show up.
That was the hardest part.
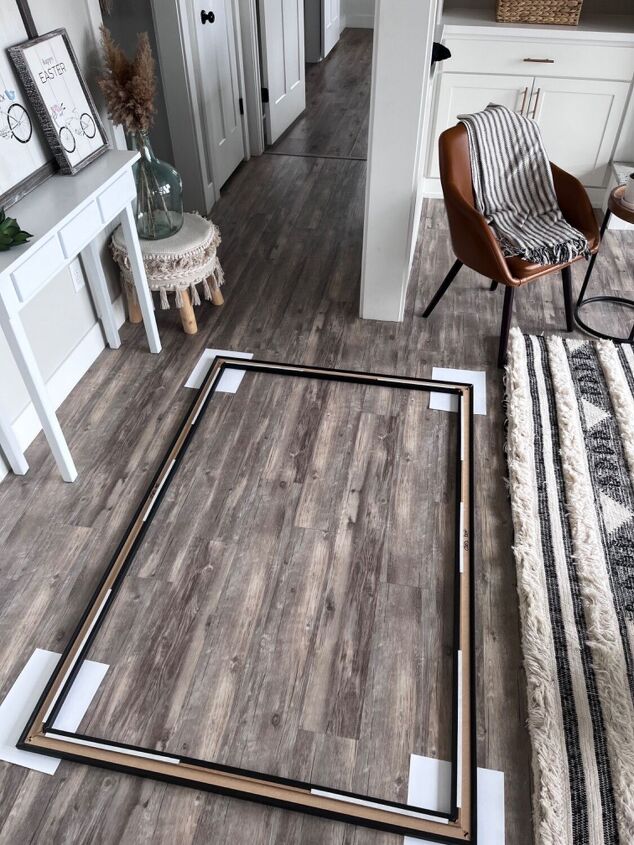
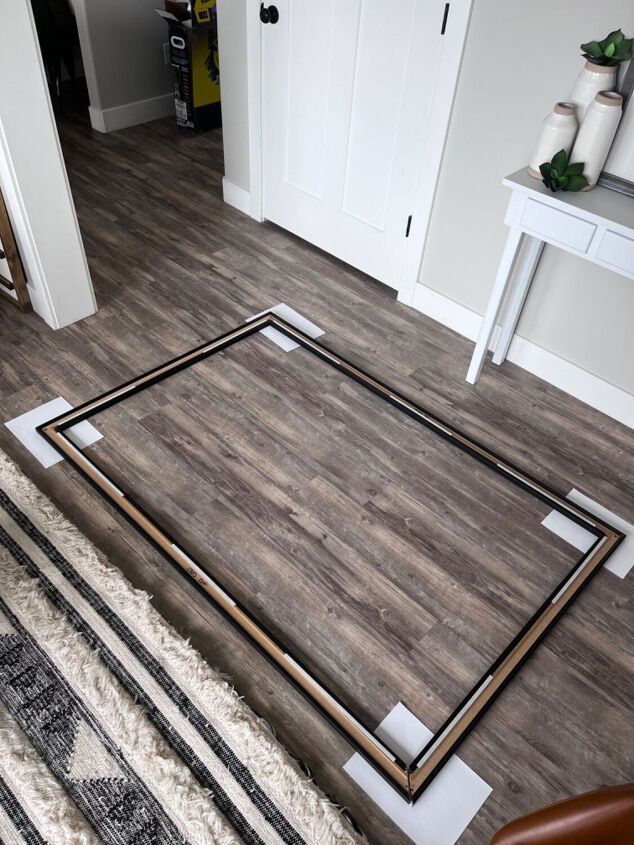
Once the frames got here, I opened up the packaging and placed the frame upside down on the floor with some paper under the corners to protect my flooring.
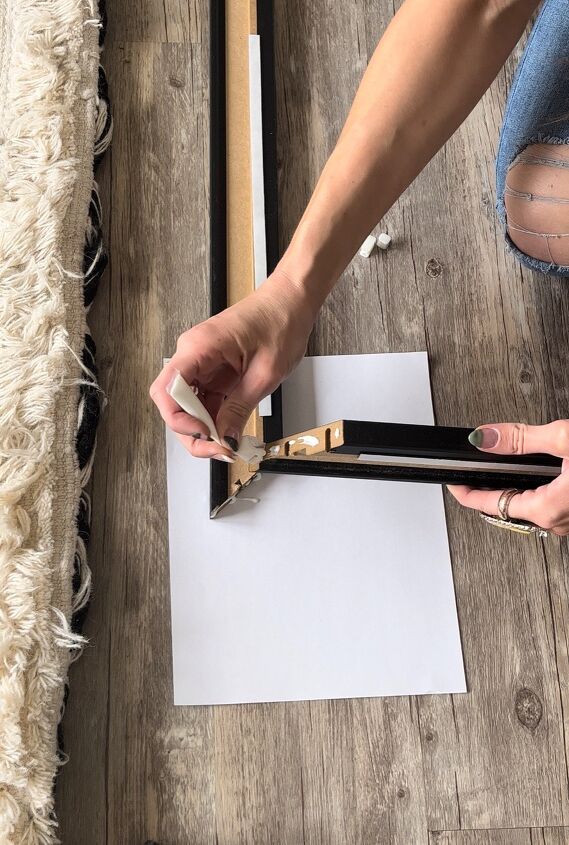
I then used the glue that came with the kit, and placed it on the inside of the corners.
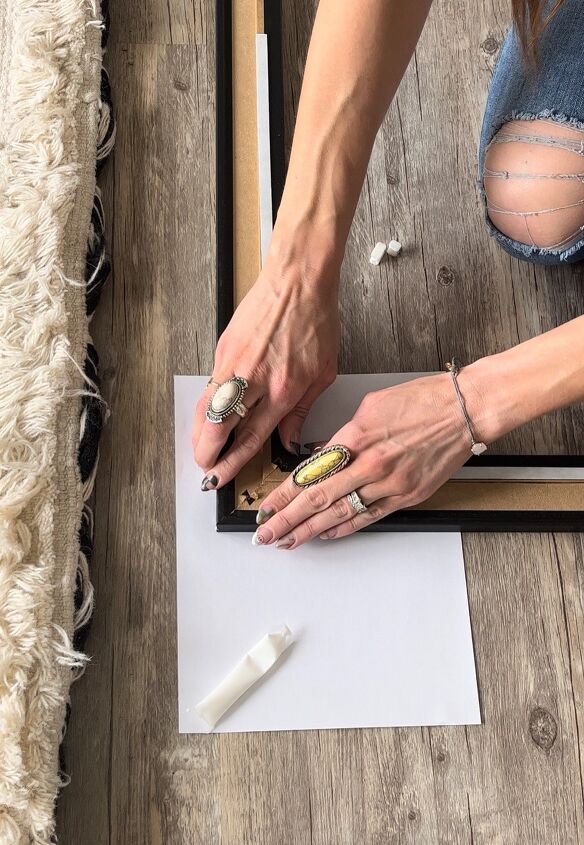
Press together.
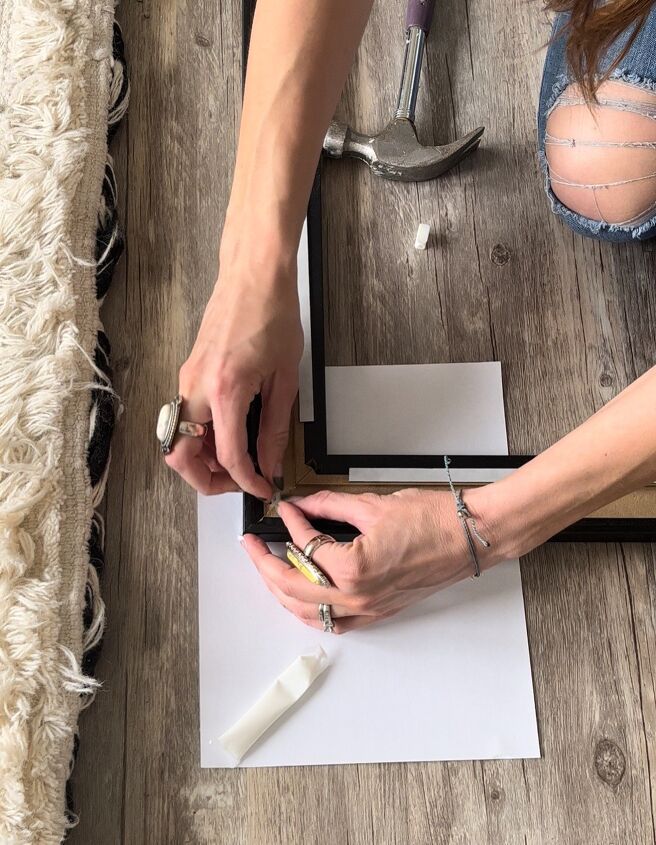
Then I took the inserts that came with the frame and placed it into the shorter piece in the corner.
Simply hammer this into place, and do the same for the next one.
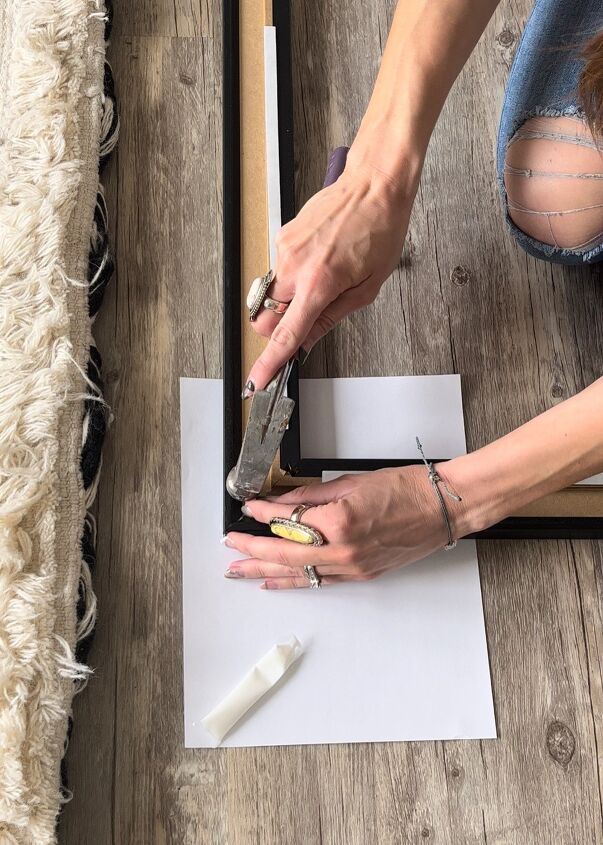
You will do these steps to all 4 corners of your frame.
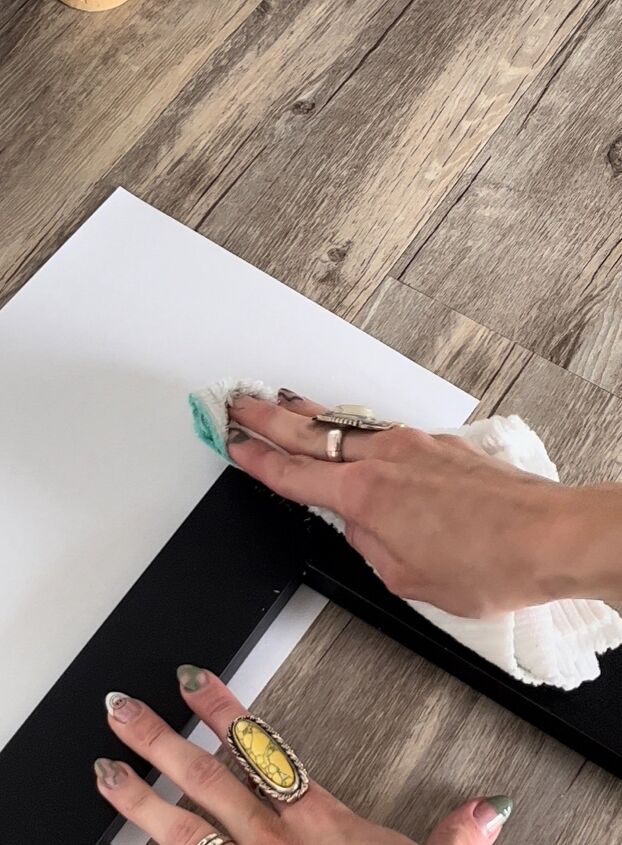
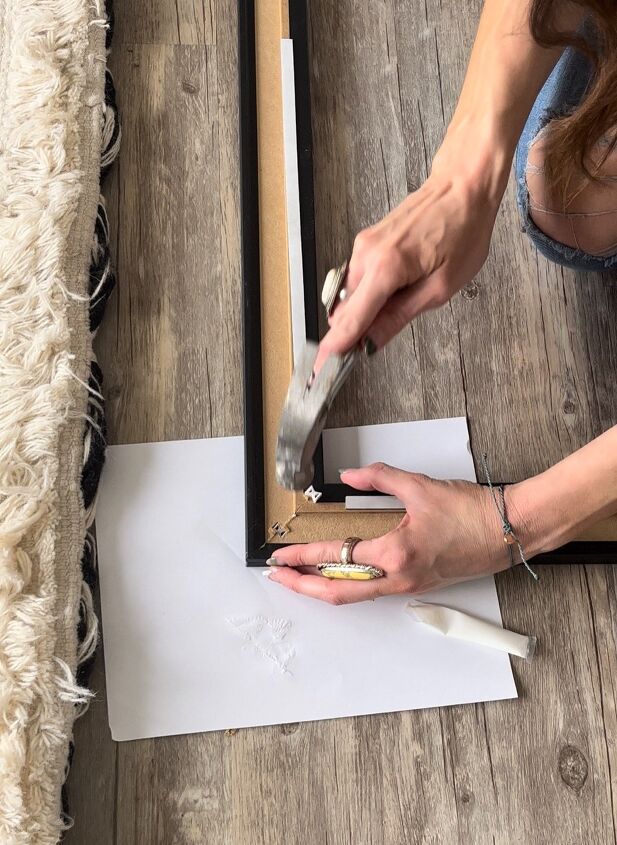
Once I have finished with those steps I flipped the frame over and wiped the glue residue clean with a damp rag.
Next up I cleaned my mirror and then went over the edge where the frame will go with rubbing alcohol and let dry completely for about 10 minutes.
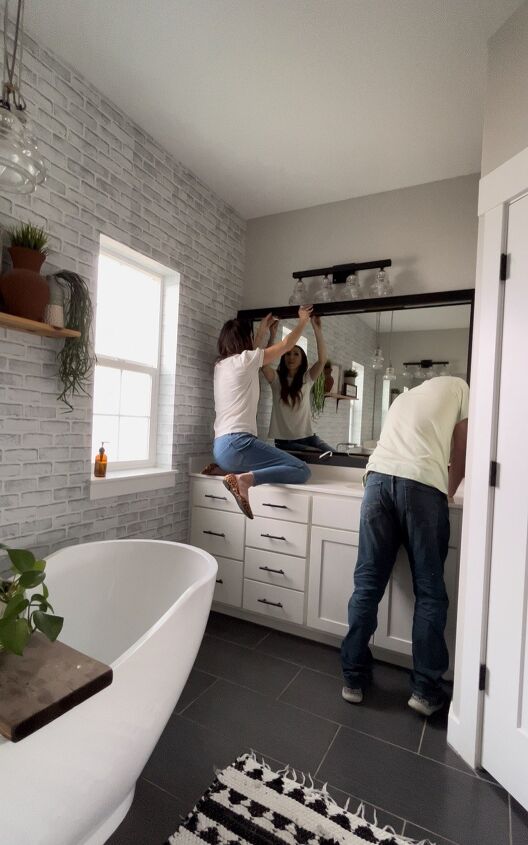
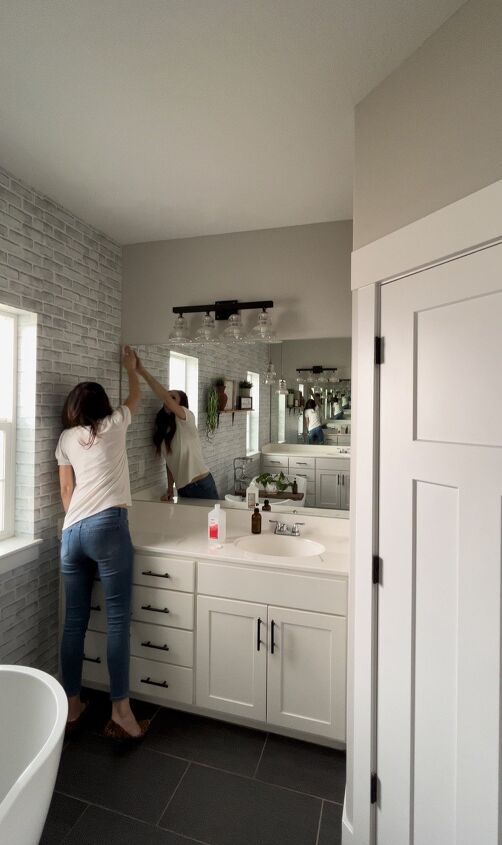
Now that everything has dried completely it is time to install, this frame comes with a self adhesive backing, I removed half of the backing and held up the frame into place to see if I liked it and to make sure it was leveled before pressing it firmly to the mirror and removing the remaining adhesive strip.
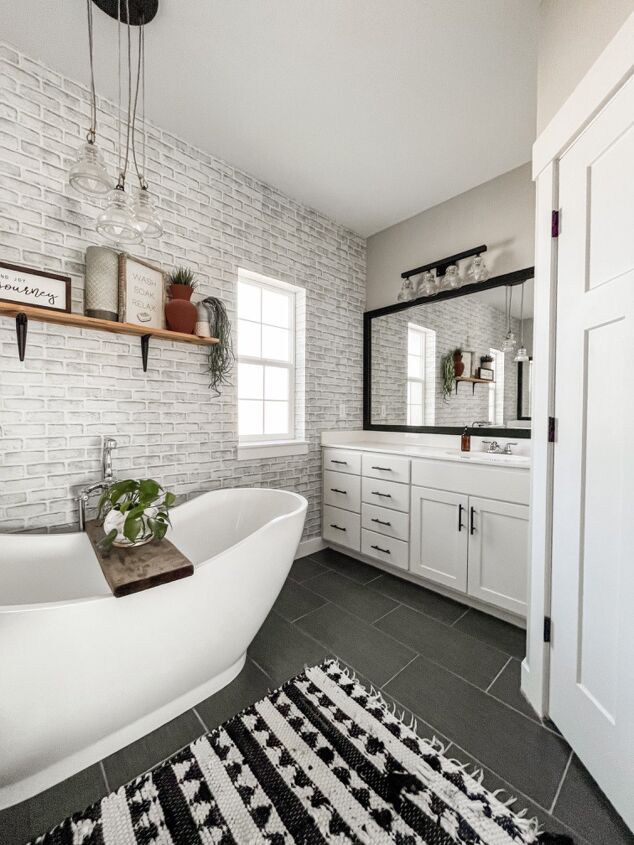
Like I said, my bathroom was fine before… But now it is fabulous.
My husband and I both agreed that it just looks complete 😂 like the mirrors weren’t finished before.
And it matches so well with the frames that I have painted.
check out more on Instagram at @briannabrowndesigns
and make sure to say that you saw me over here on hometalk
xoxo Brianna 🧡🧡🧡


Comments
Join the conversation
-
I’ve been wanting to do this to the huge, stuck to the wall mirror in the guest bathroom. But, despite knowing how to use a miter saw, I decided it would just be too much for me and hiring competent help would cost way too much.
so thank you so much for providing the info about this company that makes the frame to order and how simple it is to put it together and install. And, for a lot less than a carpenter/handyman would cost.
I’ve ordered a couple of samples and I am so appreciative. Thanks.
-
I’ve been contemplating doing this for over a year (bought my condo a year ago) but I’ve had reservations. (1) I agree with Christina that I’m not miter saw savvy 😁 (2) I don’t want to pay an arm /leg to have it done & (3) I’ve heard folk complain about the frame falling off due to the moisture/steam in the bathroom despite the fan. I’m going to try it anyway using the materials off the website. Thank you for the info & the courage to try it anyway. Maybe these materials might work better since it seems to be designed just for mirrors


Frequently asked questions
Have a question about this project?
I have been wanting to do this so much. Where did you go to get the frame? My mirror is glued to the wall and both are quite large but showing discolor at the bottom.
My mirrors are screwed in with little plastic clips. How would I get this look? Do need to glue the mirror to the wall and then frame around it?
What did you do with the clips that hold the mirror onto the wall? The frame would not lie flat without removing those.