Knock-off Metallic Mirror Frame

by
Janice Anderssen
(IC: blogger)
8 Materials
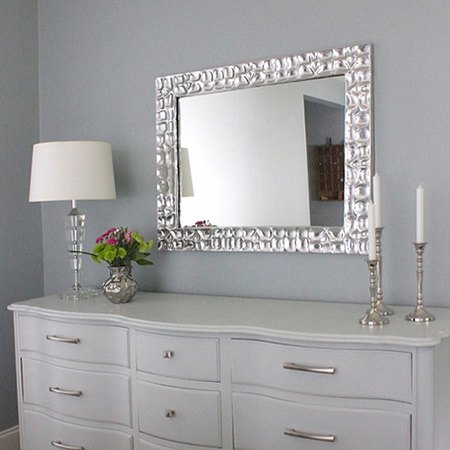
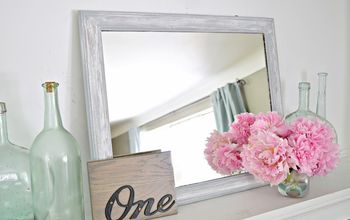
Megan at 'the homes I have made' transformed her bedroom with painted furniture and new accessories. What I found striking in this room setting is the metallic silver mirror. Bought for over $120 (R1000), you can easily make this beautiful mirror at a fraction of the cost with a few materials and supplies that can be found at your local hardware store
YOU WILL NEED:
1. The first step is the make the frame. There are various methods for making your own frames and I have explained several different frame options on the website. For this project I am making a very simple frame using 10mm thick PAR pine, but feel free to make a frame of your choice.
2. To mount the mirror you can cut a rebate at the back using a router and cutting bit. However, if you are using 10mm thick pine this is not thick enough to cut out a rebate and you will need to mount the mirror differently.
3. Mix up a thick paste using crack filler and wood glue. Start by adding the crack filler to a bucket and then add a small amount of water to wet. Now you can slowly add the wood filler to make a paste of thick consistency. You want a paste that is the consistency of whisked meringue. If the paste starts to thicken as you work, add a little more wood glue to loosen up.
4. Spread a thin layer of paste over the entire front of the frame and let this dry. Once the first coat is dry you can pile on a second layer. This is the layer that will add the finished effect.
5. Working in small sections at a time, apply the paste with the paint scraper and then quickly dip the wooden spoon in water and use to press and smooth to create ripples in the paste.
GOOD TO KNOW:
7. Let the plaster dry for a couple of hours but before it sets too hard, use a sharp craft knife to cut away any mess on the inside and outside edges. Sand this smooth with 120-grit sandpaper.
Unfortunately my local Builders didn't have the Rust-Oleum Metallic spray in stock, so I had to use Rust-Oleum Universal Satin Nickel. It didn't come out as shiny as the original, but I will re-spray once stock comes in and add the new pic to this page. Although to be honest, it does look stunning in real life - the photo doesn't do justice to the finished frame
Here is the same mirror after applying two coats of Rust-Oleum Speciality Metallic gold - much better and definitely a far shinier effect.
To finish off secure your mirror to the back of the frame. Screw in a couple of eye hooks and add the wire to hang onto the wall.
Enjoyed the project?

Want more details about this and other DIY projects? Check out my blog post!
Published July 7th, 2015 7:49 AM
Comments
Join the conversation
2 of 161 comments
-
 Morongoe Lekatsa
on Jul 26, 2020
Im definitely try this project! Thank you so much!
-
-










Frequently asked questions
Have a question about this project?
How are the outside edges of the frame finished? Are they coated with spackle, sanded and then painted?
The description says " Mix up a thick paste using crack filler and wood glue". Then further on says slowly add the wood filler. I'm confused as these are two different things.
Can you clarify please. Many thanks
Would it be possible to just do this directly on a mirror, add a few more layers of the "mud" to make it appear like a frame? Of course you'd have to tape off the shape of the mirror that you want left as the mirror. Just wondering if it would stick to the mirror or if you would need to have wood.