


DIY Stone Wall Accents

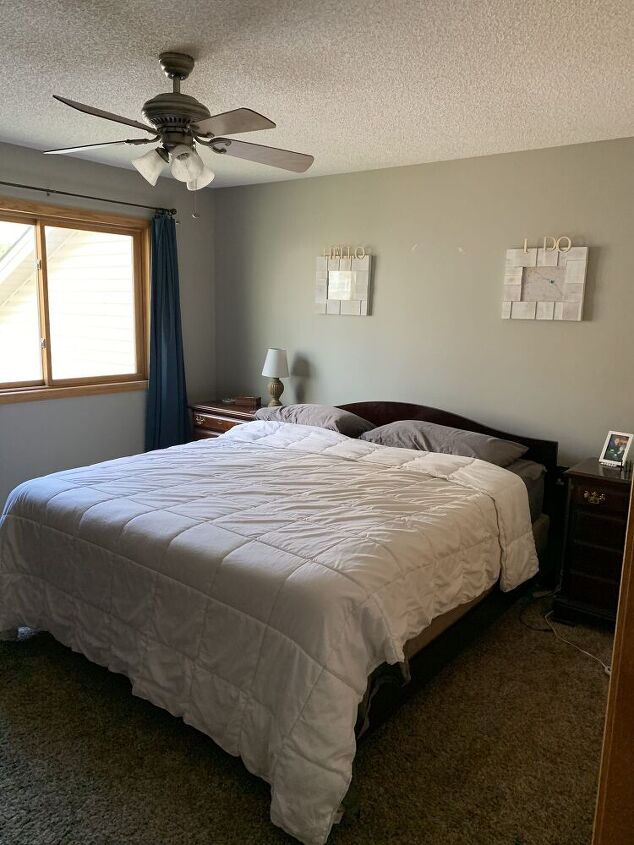
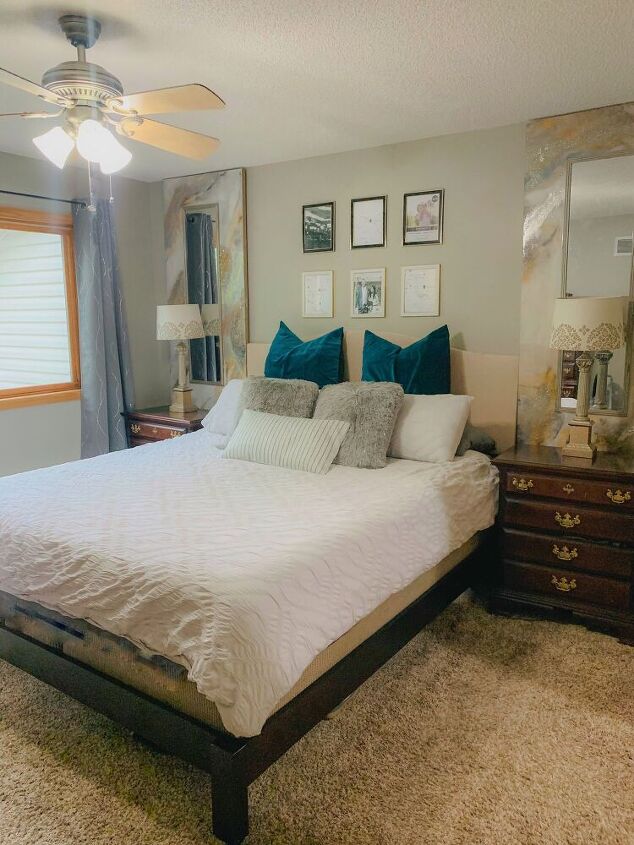
I have always admired glamorous and luxurious looking master bedrooms. I live in a pretty standard Midwestern home with a lot of golden oak...very traditional. I decided I wanted to upscale my master bedroom the best that I could with what I'm working with. I drew from this PIN for inspiration. I love the grand wall and the height of everything.Here's the clean slate:
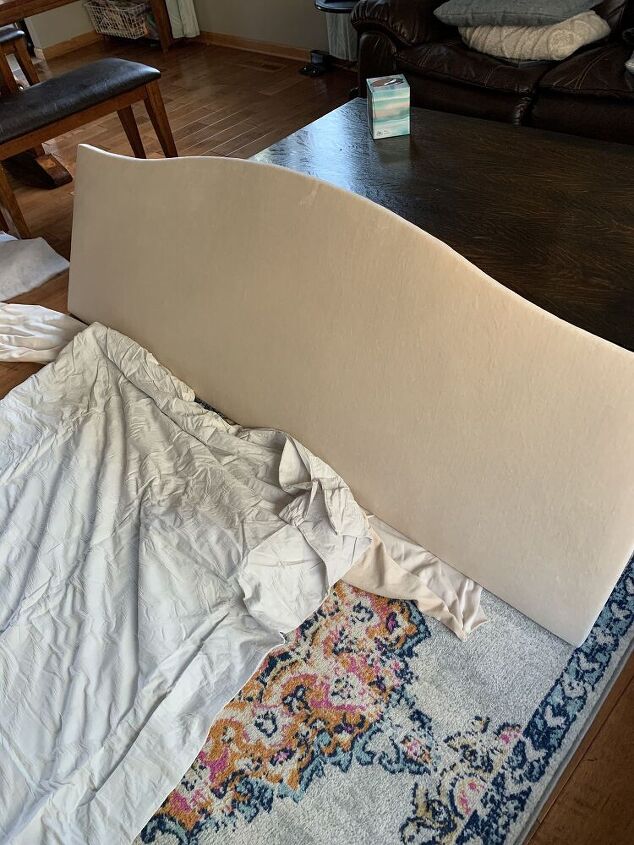
I have always wanted to raise the headboard so what was the first thing that I did. I unmounted the headboard and upholstered it with this free creamy velvet fabric that a friend was getting rid of.
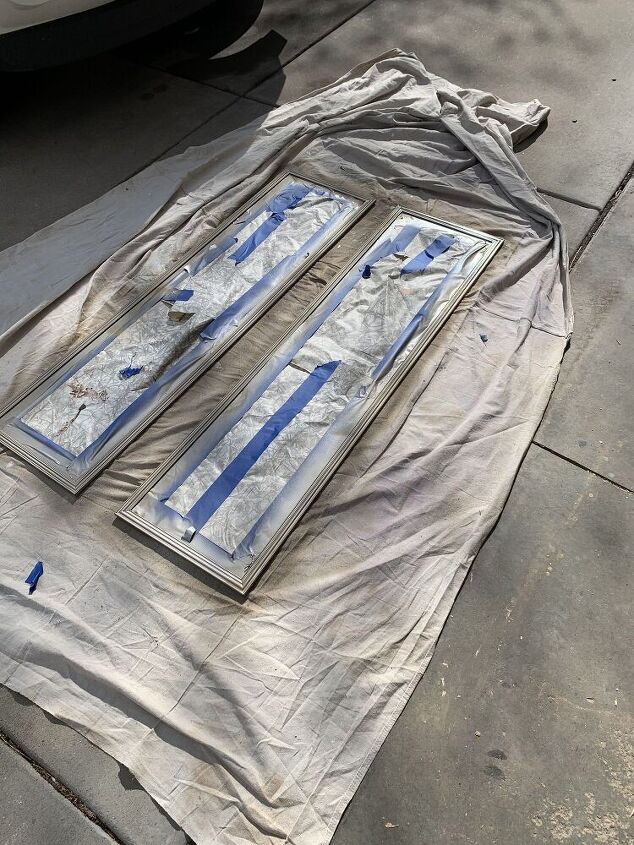
Now for the stunner. I can't raise my ceilings, but I can trick the eye. My parents put tall mirrors in their bathroom and it made a HUGE difference. So I found these tall body mirrors on Facebook Marketplace for $10. I spray painted the frame in a champagne gold
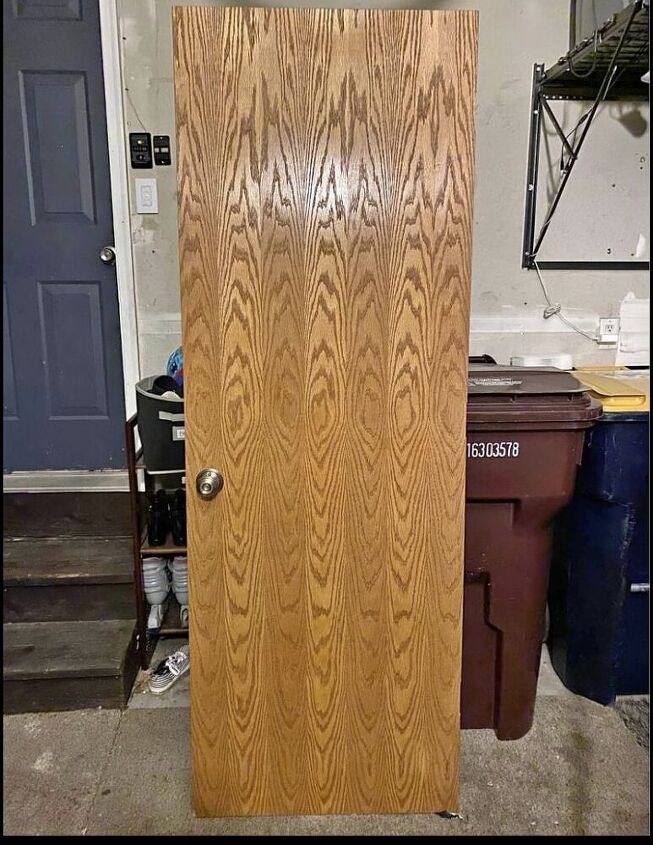
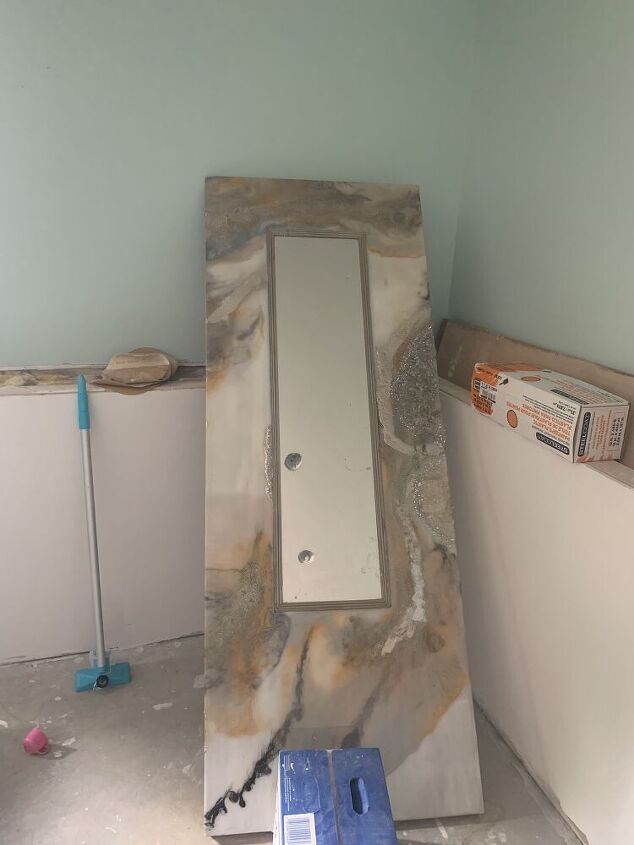
Now, if you looked at the inspiration PIN there is marble surrounding the bed. I knew that I wanted floor to ceiling Faux Marble ... but how... I decided to try my hand at Epoxy and create faux stone artwork using these Hollow Core Doors that I found for FREE on Facebook Marketplace. The doors are exactly the width that I needed to sit being my night stands and still reach the ceiling. They didn't reach all the way to the floor, but the stands hid that! I used gorilla glue to glue the mirrors to the doors with the bottom being just above where the night stand will start... Don't think I'm crazy yet... Keep going!
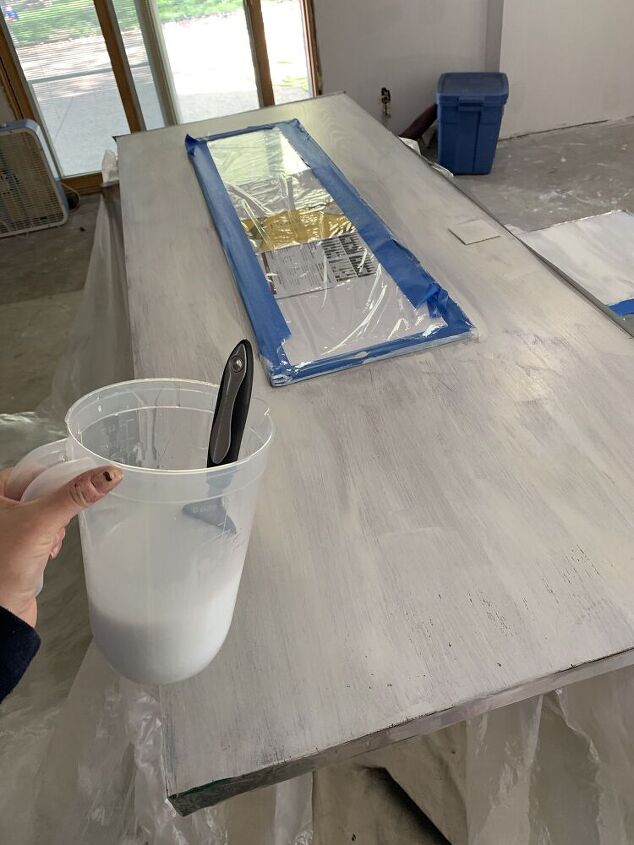
Next. I primed them both with a white primer. I mixed up epoxy and dyed it white, silver, gold, and black. The black was for the veins and the metallics for the swirls! I also mixed some silver and gold glitter for some sparkle!
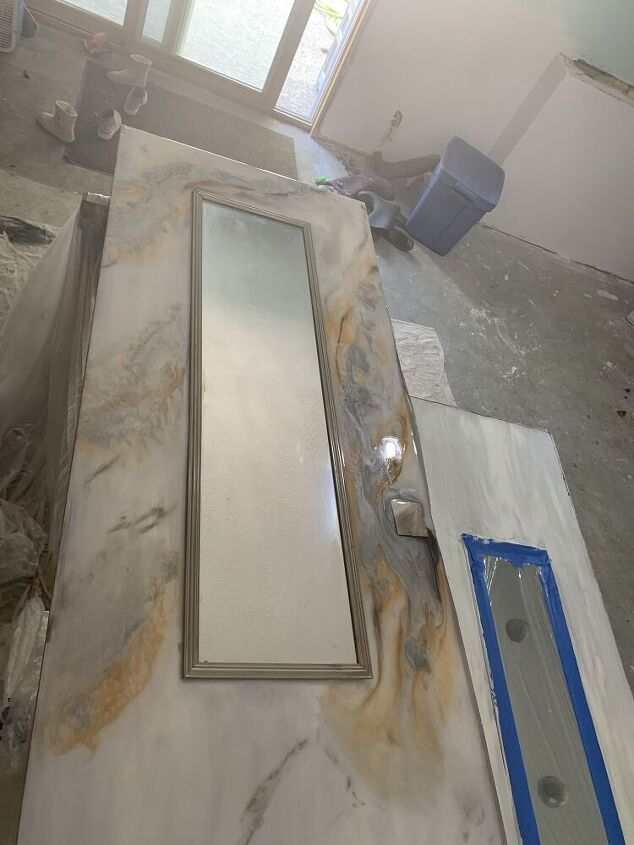
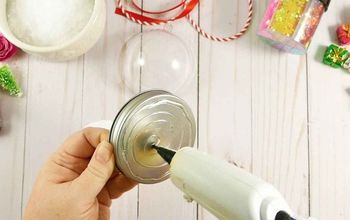
I thought that the clear cast would level off where I patched the door knob hole... BUT it didn't. This is my first time using casting resin and I did not think that through! You can see that square sticking out ... that's the door knob cover... In order to hide that I decided to add some Geode!
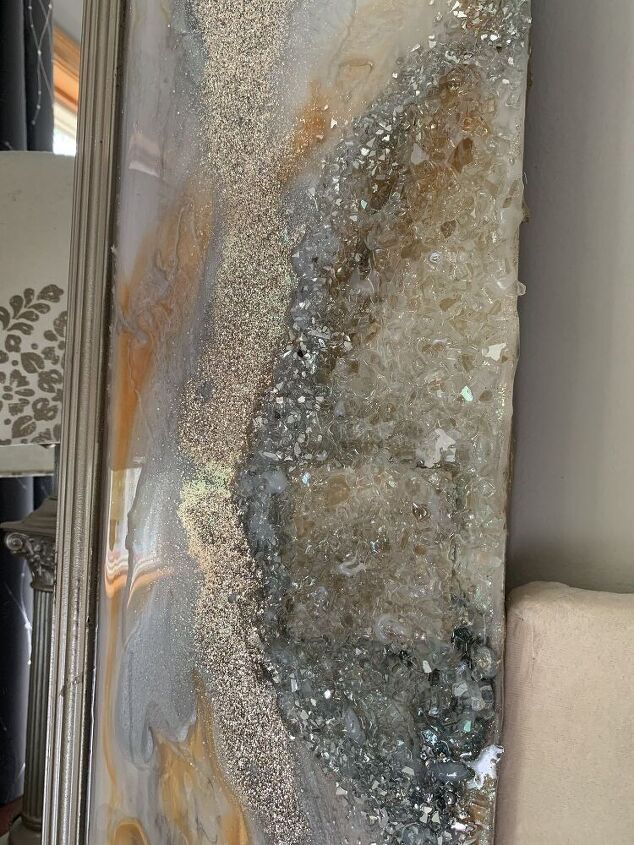
I just hot glued some crystals and then poured more clear cast over and let it set overnight.
You can see here on one of the doors I ran out of resin! That's Okay! It will be covered by the night stand!
I hung the finished doors and the headboard with a French cleat. 18 inch for the doors and a 40 inch for the headboard.And here's the final look! I love it.
Feels like a grown up room now :) I will be redoing my night stands soon. Stripping them to bare wood and adding crystal hardware! Stay tuned!Lamps are upcycled and I will do a separate post on how I brought those back to life. Frames are from the dollar tree. Here's a little before and after:
Resources for this project:
See all materials


Comments
Join the conversation
-
Very pretty! Not at all what I was expecting! Great job!!!
-
That is a stunning upgrade!
I must applaud your resin design.
You did a great job.
I think you should keep on doing that.
For others. For sale. For real.


Frequently asked questions
Have a question about this project?
Great job! Are you thinking of adding a bed skirt? Maybe a coordinating cream with backboard or a similar color pop that looks good with pillows?
Hi Amanda, What crystals did you use so pretty !!!
Did you think about painting the wall between the two panels a different color than the rest of the room? Maybe something darker to pick up one of the colors in the panels?