


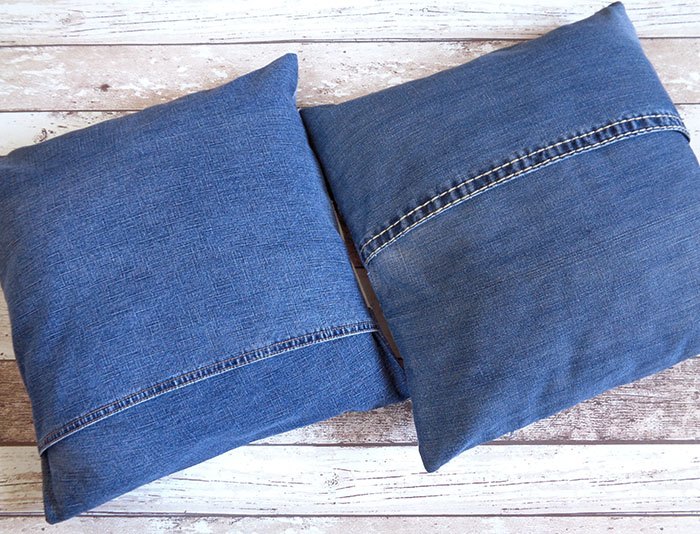
Throw Pillows Made From Old Jeans

A throw pillow or a sofa cushion has always been sewers favourite thing to make. It is easy and fast sewing project but it gives such a big refresh to a room.
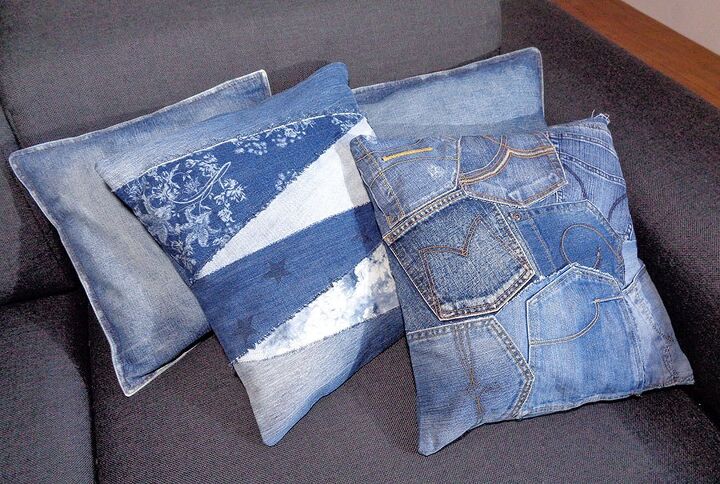
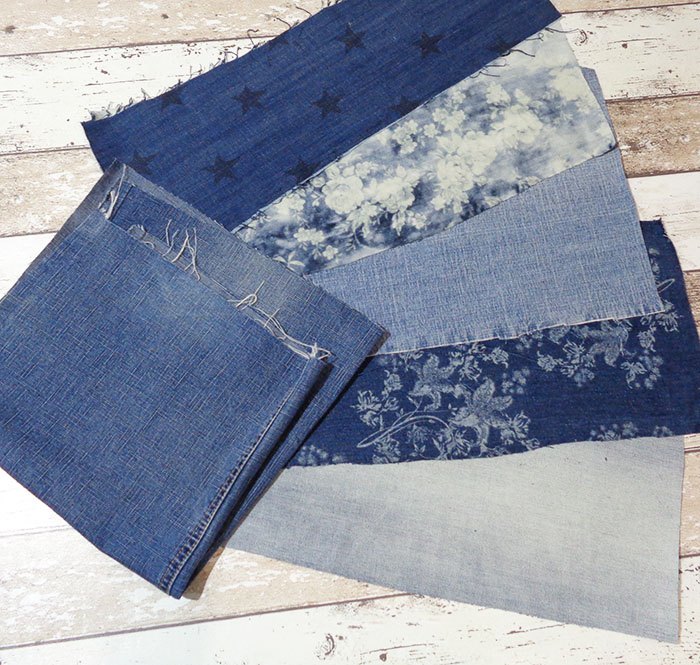
In the Denim Recycling School we make throw pillows with denim, of coarse. With denim alone there is still tons of different designs to try. It can make a great gift for someone. Very eco-friendly, inexpensive and quite fast to make.
Planning
Surely you already have some idea in your head of what kind of design you want to make. If you are using patchwork or pockets for the front, then you are safe with just one pair of jeans for the backing. Don’t rush to cut the jeans until you check the coolie way of making the back in the end of this article 😉
But what if you need to make both back and front with denim? You will find that there is not always enough denim in just two legs. You are very lucky if you have some large and wide jeans though.
Start with cutting some jeans legs off at the width of your future cushion, for instance 16″ (40cm) plus seam allowances = 17″ (43cm). If there will be not enough to build the height, think of using other jeans to add or even some other fabric for the whole back.
I strongly recommend to make a paper pattern of the exact size for the cushion straight from the start. Make it with newspaper or any paper big enough. When you have this on hand it makes it much easier to plan and lay your design.
Making the zigzag design for the front
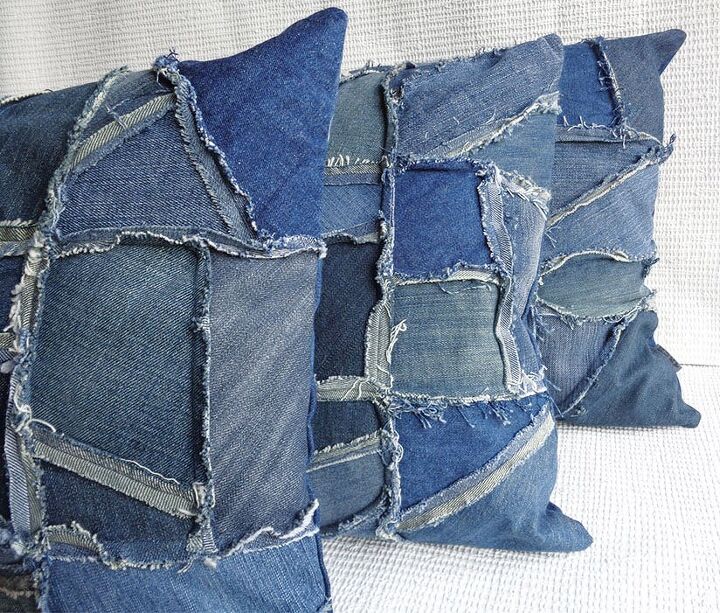
Making throw cushions is so much fun! There is so many ideas I can show you, but for now I have chosen one, which is very “jeans friendly” meaning it is easy to cut out from old jeans and the result is usually good looking.
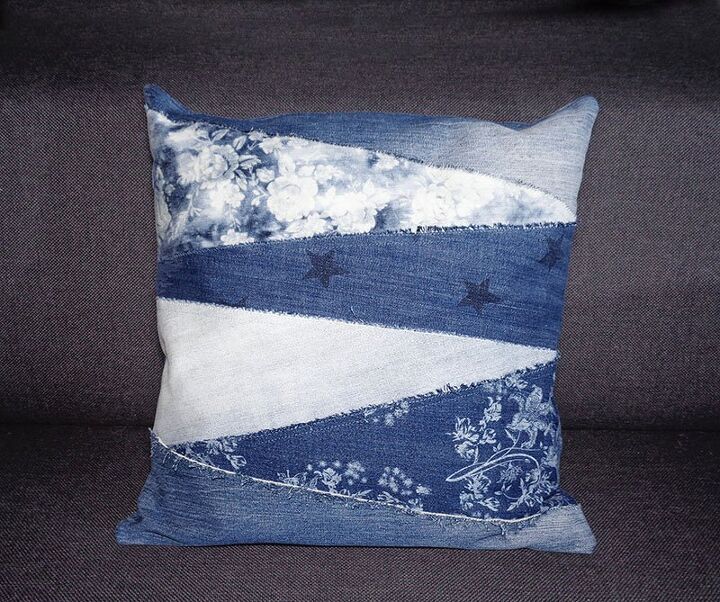
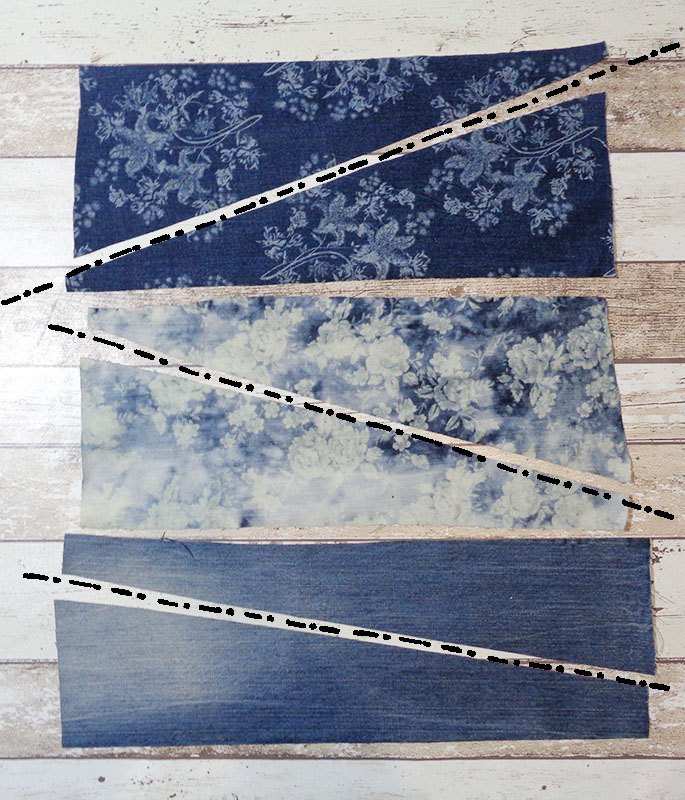
To make this pretty zigzag design you will need some pieces of jeans legs. Cut those off at minim 4″ (10cm) longer then your intended cushion size. So for the cushion 16″ (40cm) wide – cut the pieces of 20″ (50cm). The height of those rectangles – leave it as it is from seam to seam. In most cases you will need just 3 such rectangles.
Now cut each rectangle diagonally. It does not matter that some triangles will be fatter or longer than others, main thing to keep in mind here is that some of the diagonals should be cut opposite. In my case I have made 6 triangles – 4 cut the same and 2 – mirror-like. If you are using more that 6 triangles – watch out which diagonals you need to add, you will work it out when started laying.
Lay the top and the bottom piece in front of you first. Lay them at such distance from each other so that they make the height of your cushion. Then add the other triangles in between.
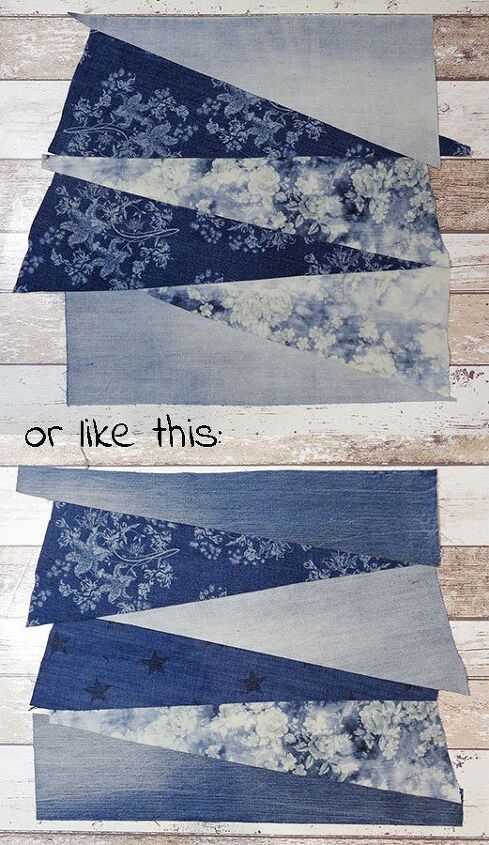
If you are sewing two pillows at the same time, you can mix and match the triangle pieces.
Main rules for this layout are:
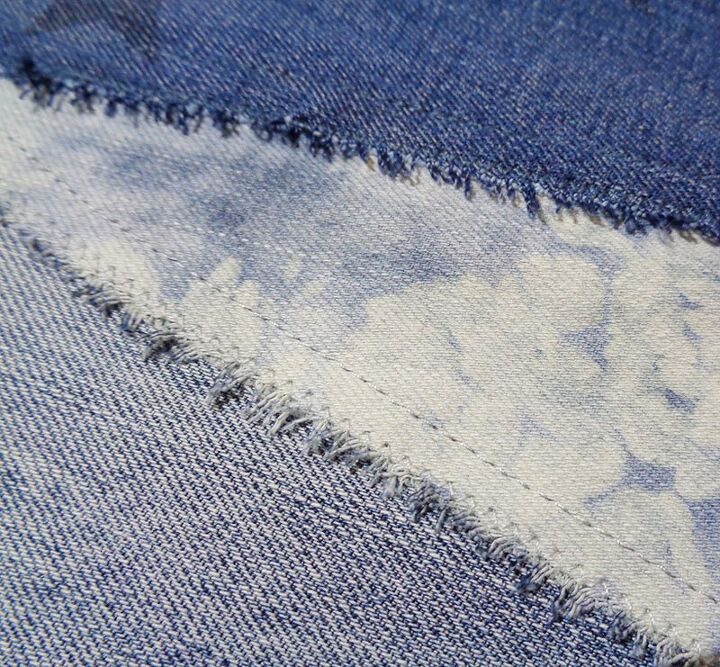
- Diagonal cut side of each triangle should be laid on top of another piece. It is important for further fraying (you will see further down). Diagonal cut edges always fray nicer than straight cuts. This is one of the points for this layout really – giving the whole design a bit of rough look.
- If your denim is very thin or simply to play it safe and easy make a base for this part of work (like in this crazy patchwork lesson >>>). Cut a square of the exact size for the cushion including seam allowances and lay everything on top of it. This way it is easier to fiddle with the pieces and it will come out stronger.
- Overlap enough to be able to sew on top along all edges for the pieces to stay together strong. Give minimum 1cm overlap.
- The pieces do not have be laid straight or even. Have fun with it! Keep them odd and untidy, it only adds character.
Sewing the pieces
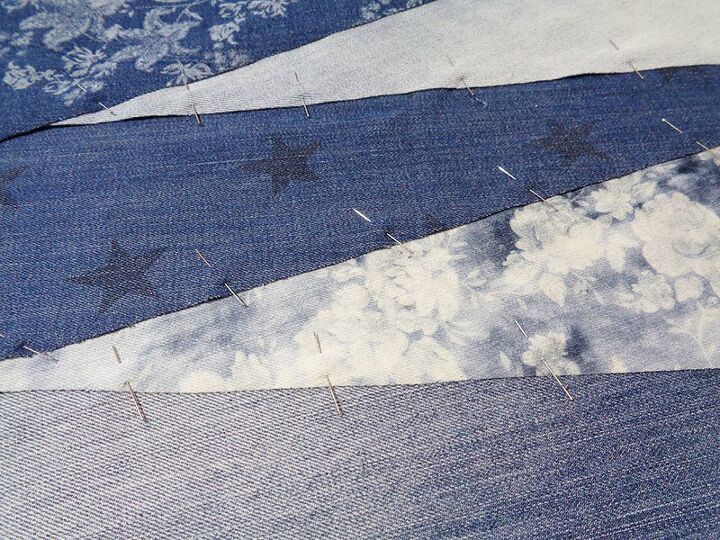
Pin in many places through all the layers. Sew along each edge twice – first with a straight stitch at a bout 1cm from the edge and then with a narrow zigzag right at the edge:
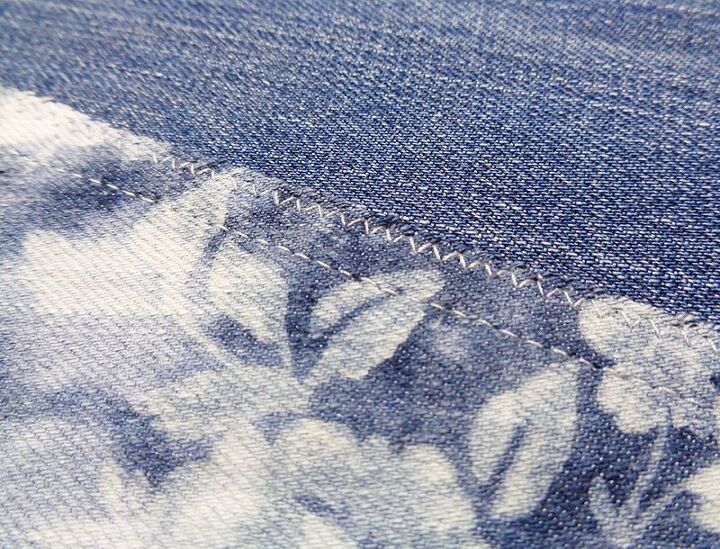
This is how nice each edge will fray after rubbing. You can rub with a wet cloth or even wash it in a washing machine. Wash after the whole cushion cover is complete.
Making the back
There are many different ways to make the back of a cushion. You might choose to inset a zipper or buttons for a closure or make it as an envelope. Internet is full of free advice about this topic. In this article I only would like to mention one different way of making the “envelope” option – by keeping the original jeans seam for some coolness 🙂
Cut the legs off appx 2″ (5cm) wider than your planned cushion size. Then cut along the seam leaving some denim for folding under. Minimum 1cm is enough to overlock with a zigzag stitch and fold under.

Zigzag the edge and fold under. Iron and stitch along to hold in place.
With another piece of denim – make a usual folded and stitched edge. So the two edges for your overlap are ready:
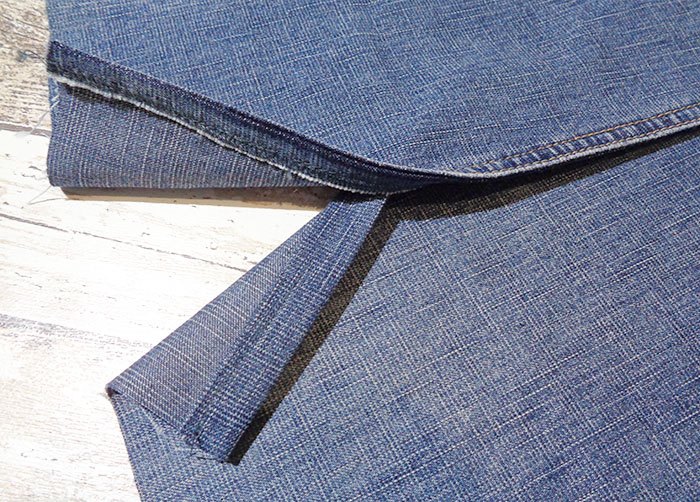
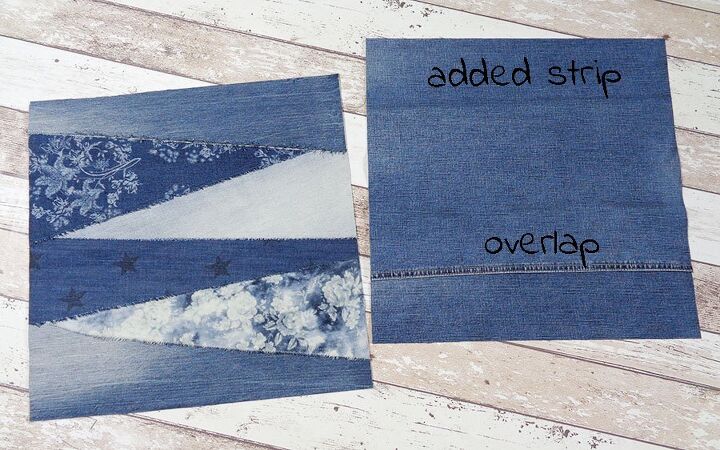
How large should we make the overlap? I have seen quite a few versions, but by my own trial I can see that overlap of 4″ (10cm) seems just perfect. Enough for the filling to slide in and stay hidden during use.
Overlap the two panels. Pin them together in a few places. You will see that there is most possibly is not enough height – simply level off the top edge and add a straight strip of denim at the top (stitch faces together, then iron open). I think having the overlap at the lower part of the cushion is better, but it will depend on the width of the denim legs you are using.
Try to keep the top and bottom edges parallel with the grain lines of denim – this just looks neater
Cut out the both parts, front and back, to the exact shape.
Finishing off
Pin both parts together facing each other. Pin, stitch twice with a seam allowance. Cut off the corners (optional) and overlock all way around. You can use a zigzag stitch for this.
Turn to the right side through the overlap. Be careful here – the pins for overlap are still there! Push out the sides and corners with your fingers and iron. Done!
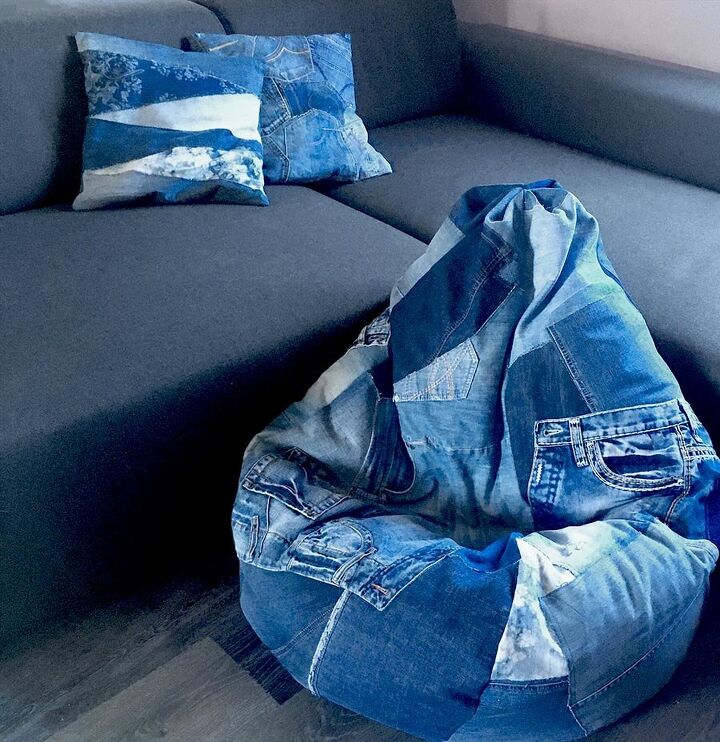
Looks especially great if you have some other denim accessories in your room!


Comments
Join the conversation
-
I made a California King sized quilt using old jeans, fuzzy blankets, and flannel sheets years ago and my daughter still has it.


Frequently asked questions
Have a question about this project?