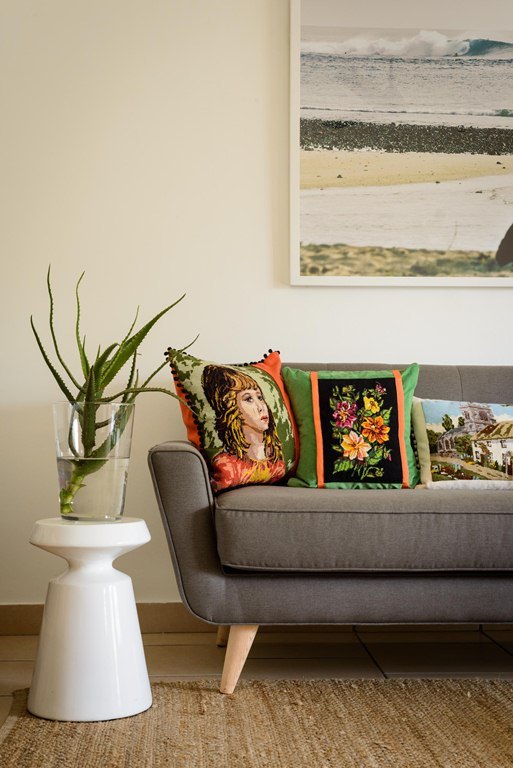
Upcycle Tapestries

SA Garden and Home
by SA Garden and Home
WHAT YOU'LL NEED:
An old tapestry piece - rummage through second-hand stores or your grandmother's garage to find one (these were often framed), a large piece of plain fabric for backing, trims such as buttons and ribbons, pins, a sewing machine and cotton (ordinary cotton is fine).
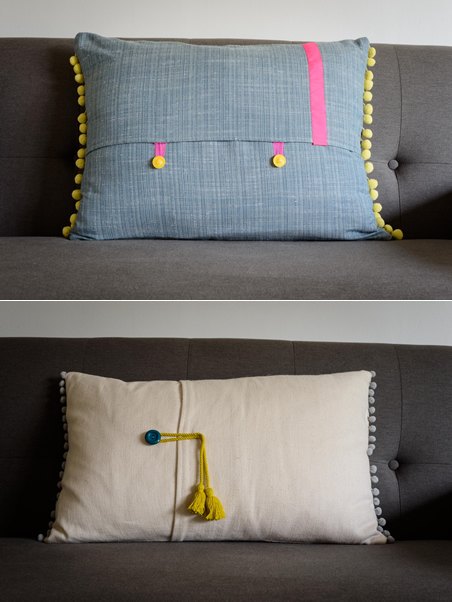
TO MAKE THE CUSHION:


1. Decide on a colour scheme and choose a backing fabric and trimmings that will enhance the shades in the tapestry you are hoping to emphasise. I chose a clashing colour scheme to give my cushion a more contemporary look.


2. If your tapestry is in a frame, remove it and cut off the old mesh canvas around the edges of the tapestry, making sure not to cut the tapestry at all as it will start to unravel.


3. Measure the piece as this will dictate the size and shape of your inner and backing fabric. If you prefer, use only part of the tapestry instead of the whole thing - even a small piece of tapestry on a plain or contrasting fabric will give a cushion an interesting focal point. If you do decide to use part of the tapestry, measure the piece you want and cut carefully.


4. I tend to opt for a pocket finish on the back as it's much easier than putting a zip in. For this you will need two pieces of your backing fabric cut to three quarters of the size of the tapestry (front panel). This ensures that there will be an overlap to hide the inner.


5. Neaten off one edge on each of the back panels by folding back and sewing. Once complete, you can tidy all edges on both the backing fabric pieces (back panels) and the front panel with a zigzag stich or an over-locker.


6. Place the undersides of the front panel and two backing panels facing each other so that when you sew them together the cushion is inside out. Ensure that the back panels are overlapping each other with the finished edges facing in towards the tapestry (done in step 5).


7. If you are adding a trim border, insert it now between the two layers. I used a pompon fringe; this needs to be facing inwards, placed on the sewing line so you don't see the flange.


8. Pin the fabric firmly in place and sew the cushion approximately 2cm from the edges.


9. Once sewn, turn the fabric inside out. The tapestry and the two back panels with the finished edges will be on the outside and the back panels should overlap to create a pocket where you can insert the inner. If you don't have the right size inner, remake an old feather pillow to fit inside the pocket.


10. Finish off the look of your cushion by hand sewing on the trimmings you chose. I like to make a feature of a button fastener using ribbon for a loop.
Frequently asked questions
Have a question about this project?
Comments
Join the conversation
Next