


A New Twist on an Old Jelly Jar

I have to admit that I love working with resin. Yes it can be messy and sticky but when it goes right, the results are beyond what you would expect.
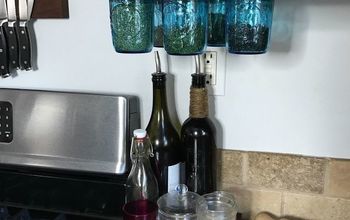
I love Blackburns jelly for two reasons; their jelly is incredible and you get to keep the cutest mason jar and use it for a cup. It holds 12 oz.
I've been collecting the jars for a while. No I don't eat as much jelly as this project would indicate. Ha ha.
You can use any jar, cup, or mug for this project. That's the best part. Half of your supplies can be found right around your house.
If you do not have a spinner, it does make this project very labor intensive. I will add some tips for those not using a spinner with the photos/videos.
Now I have become a resin snob of sorts. There are brands that are no consistent with the way they set up. It leads to all sorts of issues while curing. So I will name a brand that I use just due to having consistent results. If you do not follow the instructions all resin will have issues.
My only cost for this project is the resin as I was out when I started the jars. Again, you don't have to use the exact products I did and you will still get super results.
Find a jar, cup or mug and have fun.
I'm only giving this a cost of $50 due to wanting to show the start up cost including the spinner.
For starting up your cost will be on the higher side. Once you have a spinner and the resin the cost to make a cute container is just the cost of the container, paints, inks and glitter.
Spinners start at $20 and go into the $100s. The one I use was $20.
Resin is around $13. You can make about 40 containers, depending on size, with one set of resin.
Resin inks and pigments are all over Amazon and range from $12-$30 for a set. You can also use acrylic paints and spray paints with resin. Go crazy and be creative.
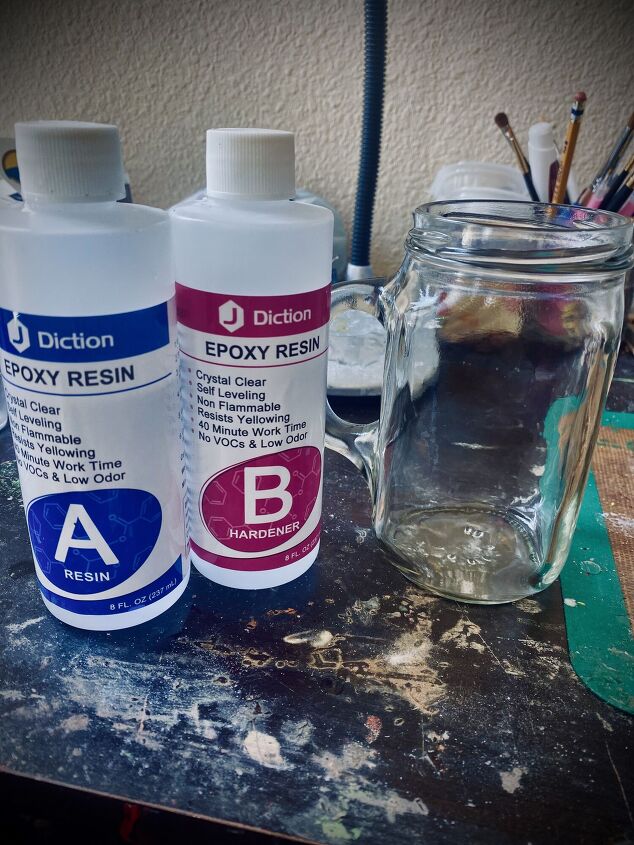
Here is the starting point. My little mason jar and my resin. You can get the resin on Amazon or even Hobby Lobby. I did clean the glass with rubbing alcohol to make sure all of the sticky residue from the label was completely gone.
When buying resin; make sure it is self leveling. it's a nightmare if it's not.
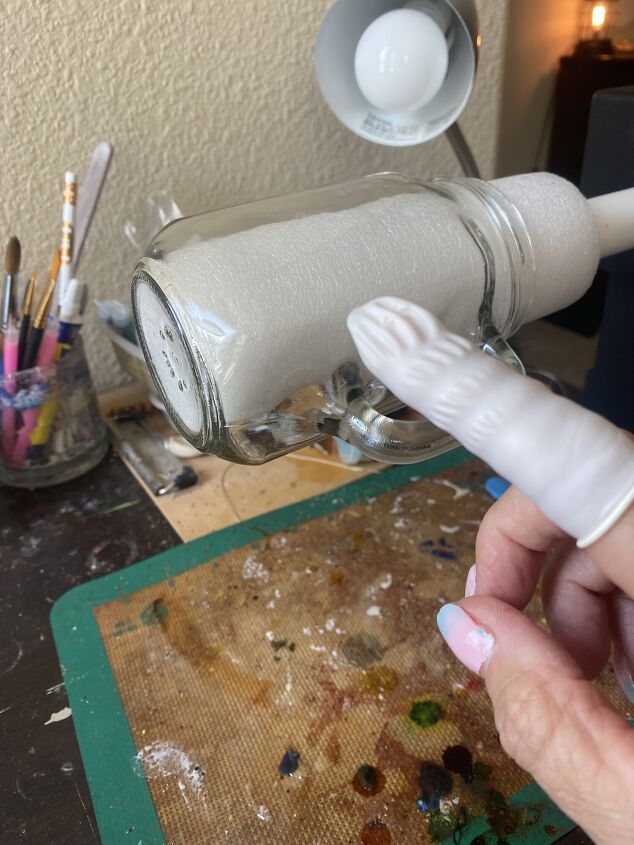
This is the spinner. I highly recommend one if you are going to do resin projects with cups, bottle, or jars. I also use finger gloves. If you have never used resin before, a full glove would be best. This can get messy. I also have a silicone sheet under the spinner to catch drops of resin.
Again the spinner you can get on Amazon. They are not terribly expensive.
I'm just using a standard latex type glove. Nothing fancy as you will just throw it away when you are done.
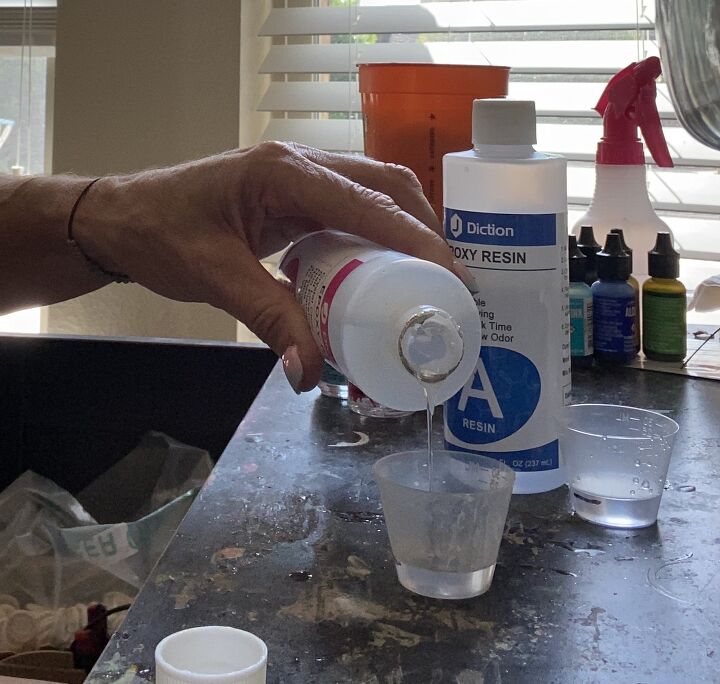
Once you know what you are going to do with your project; ie paints, inks, glitter, etc. You are ready to mix your resin. Follow the directions on the package. Not all resins mix the same way so make sure to read the instructions carefully. This resin does not need a heat source while mixing.
Once you have your correct measurements of parts A and B, and have mixed them together per the box instructions, you are ready to start your project.
When your resin is ready to start applying, turn on your spinner. You DON'T have to move fast. You have at least 30 minutes of work time with most resin. UV resin is completely different and is not used for a project like this.
You can either pour a little bit of resin on the jar and then spread it from top to bottom with your finger, or you can dip your finger in the resin and have a little more control of where you are placing it.
Since I am using alcohol inks for this project, the instructions are geared toward that product. I am happy to offer advice for other mediums.
Once you get the entire jar covered completely then you can start in with your decorating. Yes I do the handle too. It allows for the inks to spread all the way through the handle. My spinner has a squeak to it. Nothing the radio doesn't drown out.
I have not noticed any type of smell associated with resin. You will want to make sure the work area is free from pets..especially cats.. Yep, curiosity made the cat have to get his paws cleaned off. In the event that happens, I just used a cotton ball with a bit of rubbing alcohol. Got all the resin off and then followed up with soap and water. ( It was not fun)
This is the fun part. I just drip on the colors that I want and let them run and do their own thing. It makes every jar original.
If your want a more consistent pattern for all of your cups, I would suggest putting the ink into the resin and mixing it before putting it on the project. You can control where each color is placed doing it that way.
I didn't have orange ink so I had to make it in a separate container then drip it onto my jar.
Once you have all your ink on the project, you just let the resin do it's thing. It will continue to blend and mix the colors as it spins. It will need to spin at least 8 hours. Depending on the weather, it can require spinning over night. When the house is cold the resin takes longer to set up. I am looking into a heat lamp to see if that helps during the cooler months.
For anyone trying this without a spinner:
The project does become very labor and time intensive.
You will need a stand of some sort that will hold the container but not allow any part of it to touch the table. This will be the biggest challenge.
You will need to let your resin set for at least 15 minutes prior to putting it on the container. You will just put it on one side. A very very thin layer. Every 5 minutes you will need to rotate the container and add your resin. You will need to continue to rotate the container every 5 minutes until it is completely cured.
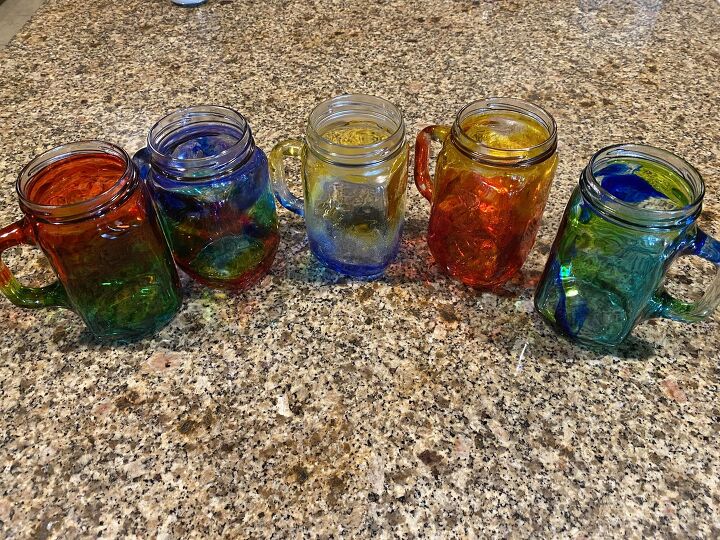
Here are the jars that I made. You can see the different designs.
The three on the left were made with the resin and the ink pre mixed in containers so I could control where I put the color. I added glitter to the one in the center. The two on the right are what it looks like when you just drop the ink onto the jar and let the resin do the work.
This just alcohol inks for these. You can use acrylic paints mixed with the resin for cool effects. You can spray paint your container and then mix glitter with your resin for a bit of sparkle. Use your imagination.
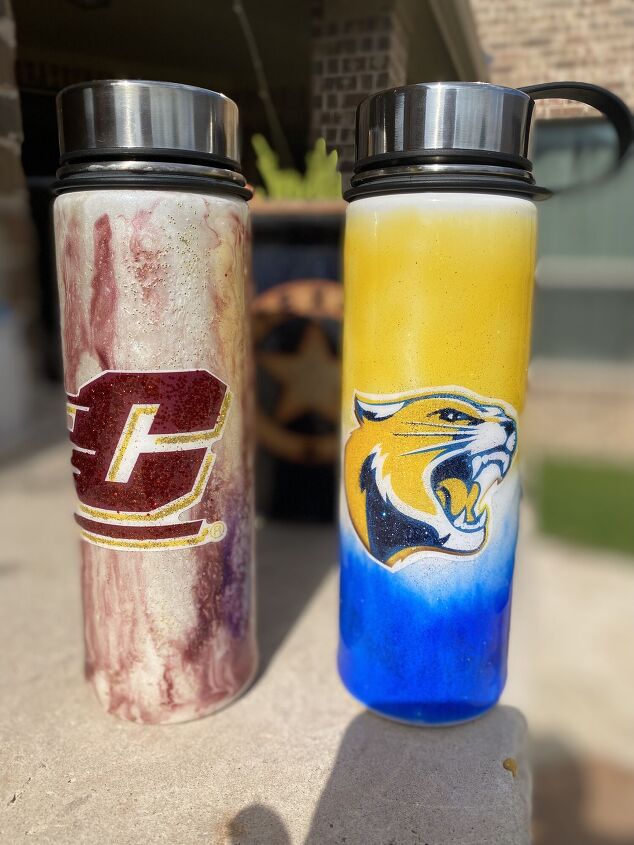
These are water bottles (insulated type) that I made for my boys colleges. Still the same resin. The one on. the left I used a pearl color for the entire bottle and then added the maroon to it while it was still setting. Just poured small lines of maroon and let the resin and the spinner do what it would. The one on the right was made exactly like above. It was a while bottle so I just mixed up some yellow, blue, and left one clear. Once the colors were on, I let the resin to it's thing.
I did have to make the stickers.
If you are going to add stickers or letting of any kind; let the base layer cure completely - 24 hours. Then place on the sticker/lettering and add another layer of clear resin. Let that spin and cure for 24 hours.
Comments
Join the conversation
-
It’s super fun. Once you get the hang of it you’ll find so many things you can do with resin. Have fun
-
Love this! Can you do this on vases?
Also I saw the kittie ears in your 2nd video😂 I've got 2 dogs and 5 cats so thank you for the heads up


Frequently asked questions
Have a question about this project?
Did you have to use a torch on heat gun to remove air bubbles?
Yes I plan on trying this project alone with other resin projects I've seen. I've never use resin. But all the projects I've seen are beautiful. Do you need a special torch on heat gun to remove air bubbles from the resin?