


Add Lamp Shade to Ceiling Fan

by
Nadine
2 Materials
$7
30 Minutes
Easy
Ceiling fans are necessary items here in Houston, Texas. But sometimes they are not the prettiest things to look at. The glass shades on my ceiling fan were dated. I wanted to update the fan for minimal cost. Here is what I used:
1. Lamp shade (already had)
2. Brown and tan ribbons (already had). I used fabric glue to attach the ribbons on top and bottom of lampshade.
3. Remove the old glass shades.
4. Unscrew that nut from the middle fan and add the two connectors (coupling and threated post. All are available in the lighting shop at Home Depot).
5. Connect longer chain to existing chain
6. Attach the drum shade and screw the nut to hold the shade in place.
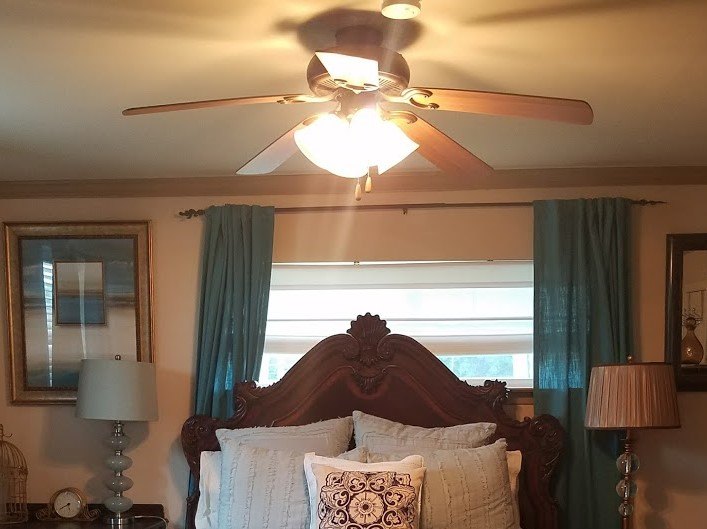
Old ceiling fan
First step is to remove the old glass shades(I hope to repurpose those later).
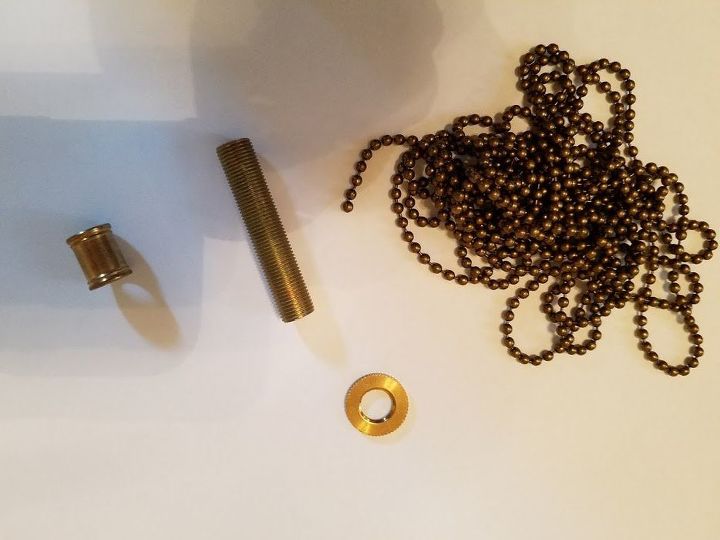
Lighting parts needed
Gather your supplies. 1 coupling, 1 threated post, 1 nut and 1 chain. The threated post comes in different lengths. I used 2 inches. You can use longer depending on your preference and the length of your lampshade. Also, you will definitely need a longer chain because once you add the lampshade, the existing chain will be too short. But be careful with the connectors for the chain, because they are very small and easy to lose.
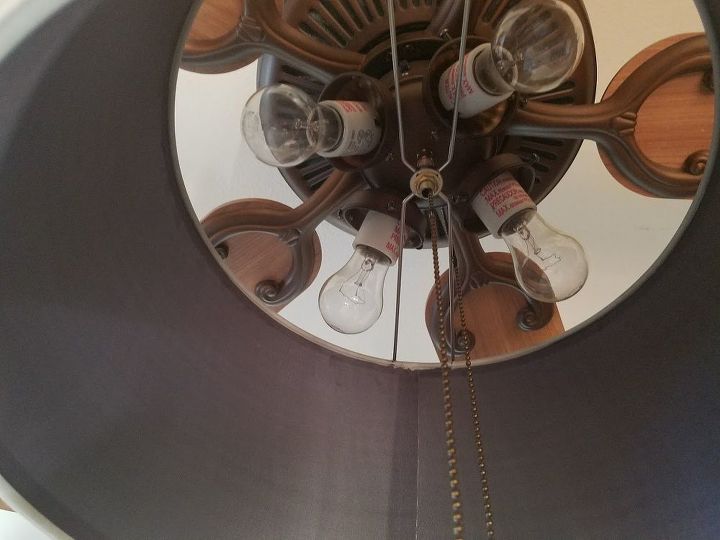
Shade attached to ceiling fan
Unscrew the nut from the middle of your ceiling fan. This was the most difficult part of the project for me because for some reason the nut was on there supper tight. I got it off, then screwed in the coupling and then the threated post. Make sure to pull the chain inside the coupling and the threated post.
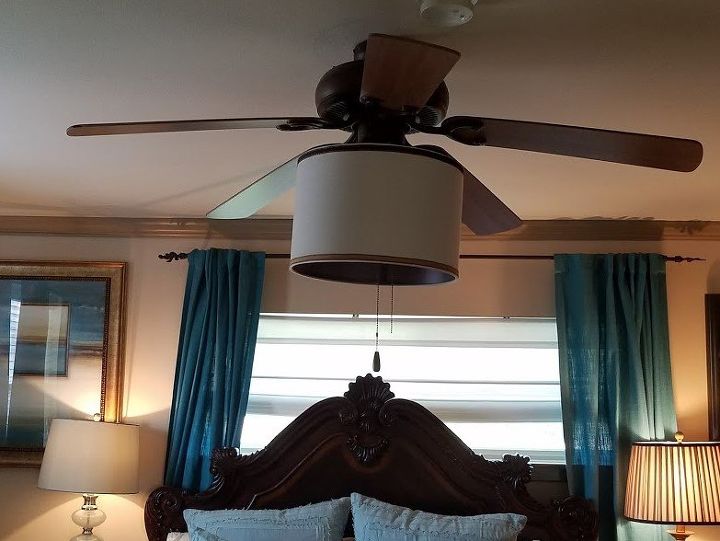
Ceiling fan with new shade
Insert your lamp shade and screw in the nut to hold it in place.
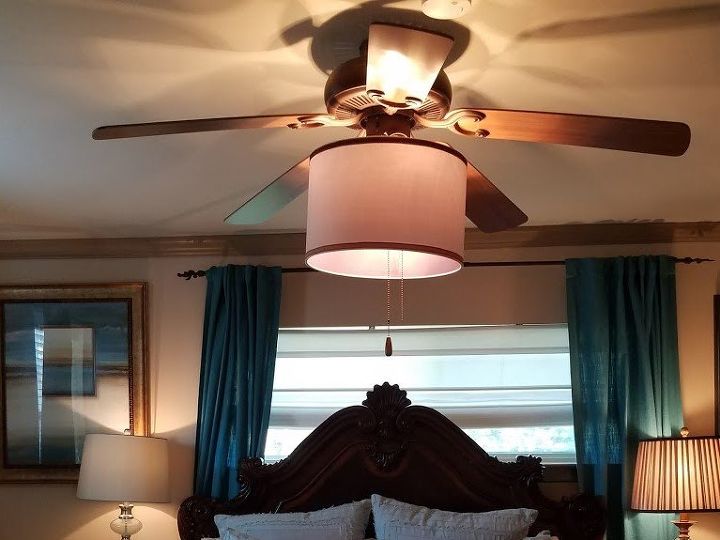
That is it. This is such an easy project. I can’t believe I lived with my old ceiling fan that long. I thought about replacing it many times but that didn’t make any sense since it ran great and it was just the glass shades that were dated. Also, the possibilities are endless for personalizing it. I have another shade that was not lined inside and thought about using it instead and spray painting the inside gold. So many options.
Resources for this project:


Any price and availability information displayed on [relevant Amazon Site(s), as applicable] at the time of purchase will apply to the purchase of this product.
Hometalk may collect a small share of sales from the links on this page.More info
Comments
Join the conversation
4 of 32 comments
-
I used the small shades that clamped to the light bulbs.
-
Love this idea. I hate the glass shades, but I am wondering what the dimensions of the lamp shade is you used? I've seen such cute ones at the Bargain House in my small town and it's so many sizes to choose from.
- See 1 previous


Frequently asked questions
Have a question about this project?