


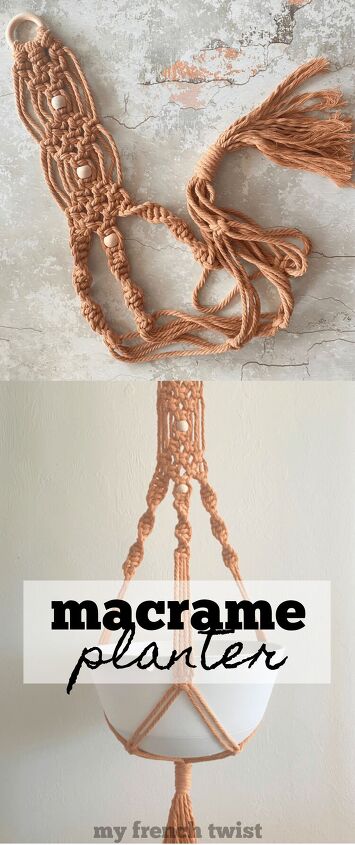
Apricot Macramé Planter
If you’re looking for a macramé project that doesn’t require a huge quantity of rope or time, then you’re going to love this tutorial. This hanging macramé planter, made with apricot cording and embellished with wooden beads, is adorable. But more importantly, it’s easy to make!
(This post may contain affiliate links; as an Amazon associate I earn from qualifying purchases. See disclosure here.)
supplies needed:
- 5 mm macramé rope – 31 yards
- wooden beads
- wooden ring
- painter’s tape
- scissors
preparation
Cut 6 pieces of rope, each measuring 15 feet. Wrap all ends of cut pieces with painter’s tape to prevent fraying while working. Cut an extra piece of rope measuring 3 feet (for making the Wrapped Knot at the end.)
lark’s head knots
Using two pieces of rope held side by side, tie onto a wooden ring using a Lark’s Head Knot. With two more pieces, make a second Lark’s Head Knot; and with two more pieces make a third.
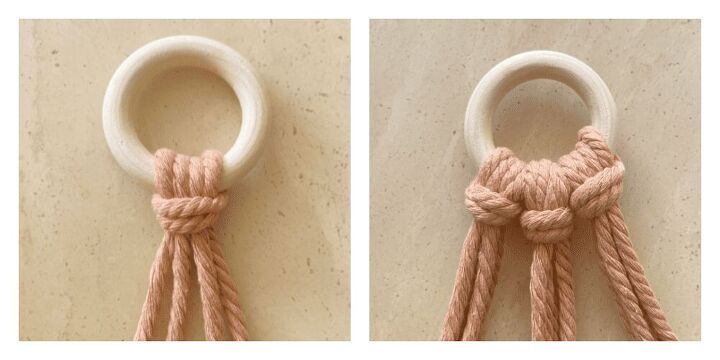
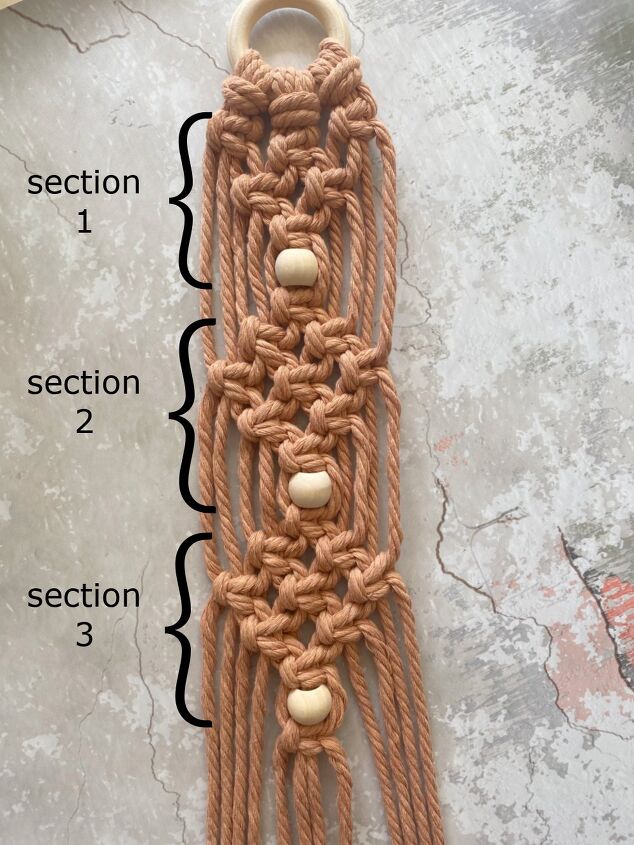
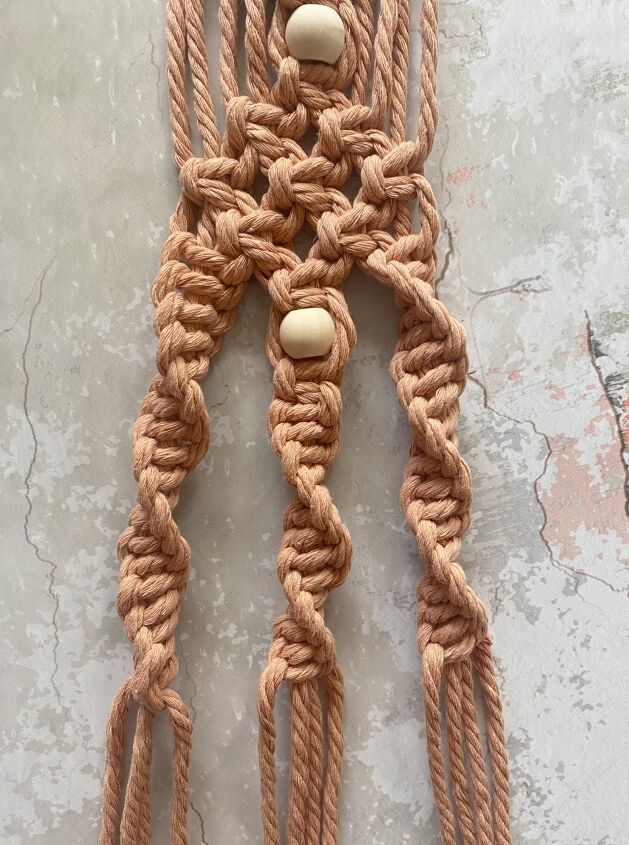
Row 1: Underneath each Lark’s Head Knot, make a Square Knot.
Row 2: Next, create a row of two Alternating Square Knots.
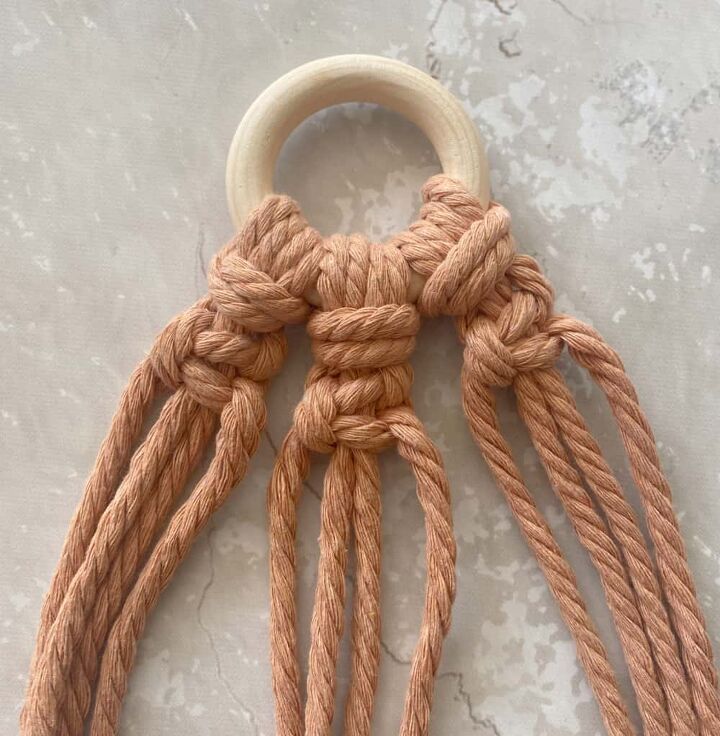
Row 3: Beneath the two previous Square Knots, make a single Alternating Square Knot, using the four middle cords.
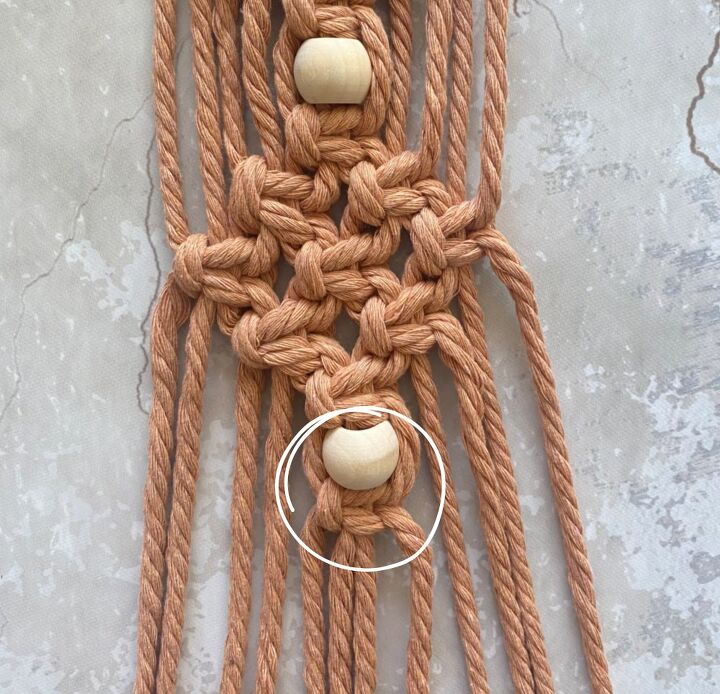
Now, just beneath that Square Knot, thread a wooden bead onto the two middle cords. Then, tie another Square Knot just below the bead, to keep it in place.
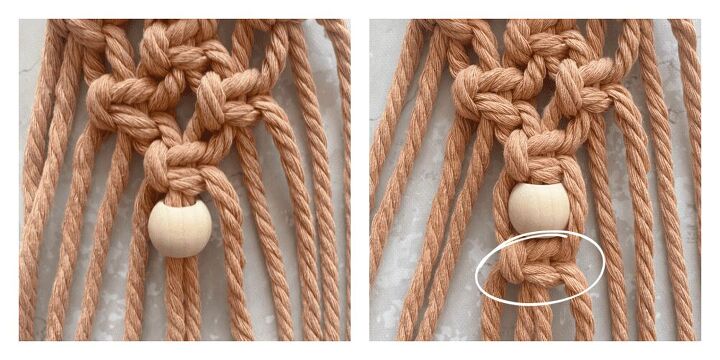
Row 4: Create two Alternating Square Knots.
Row 5: Create three more Alternating Square Knots.
Row 6: Make two Alternating Square Knots.
Row 7: Make one Alternating Square Knot.
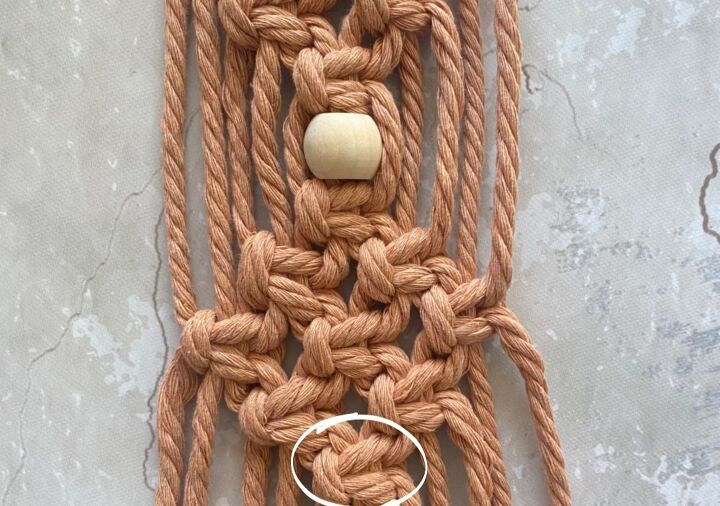
Once again, thread a bead onto the two middle cords, then tie a Square Knot beneath it to keep it in place.
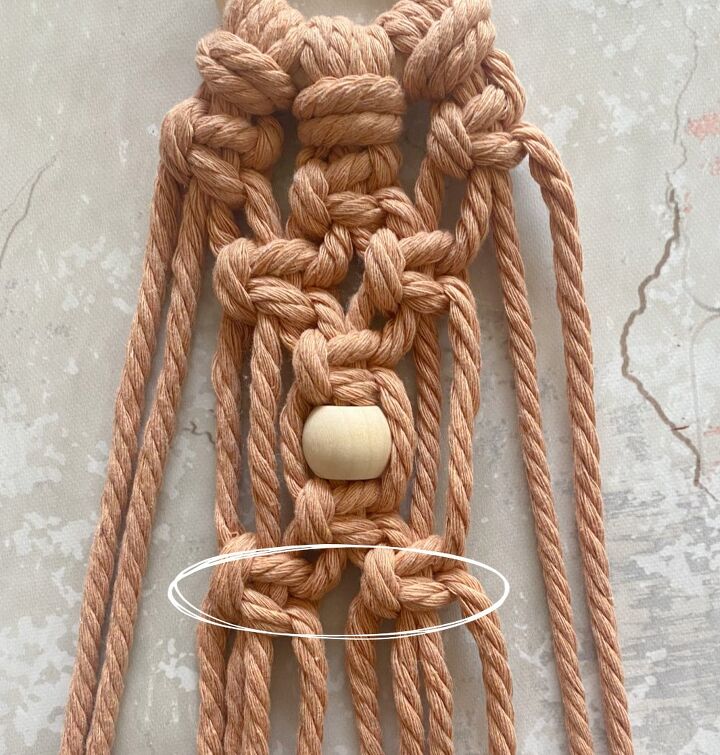
For section 3, repeat section 2.
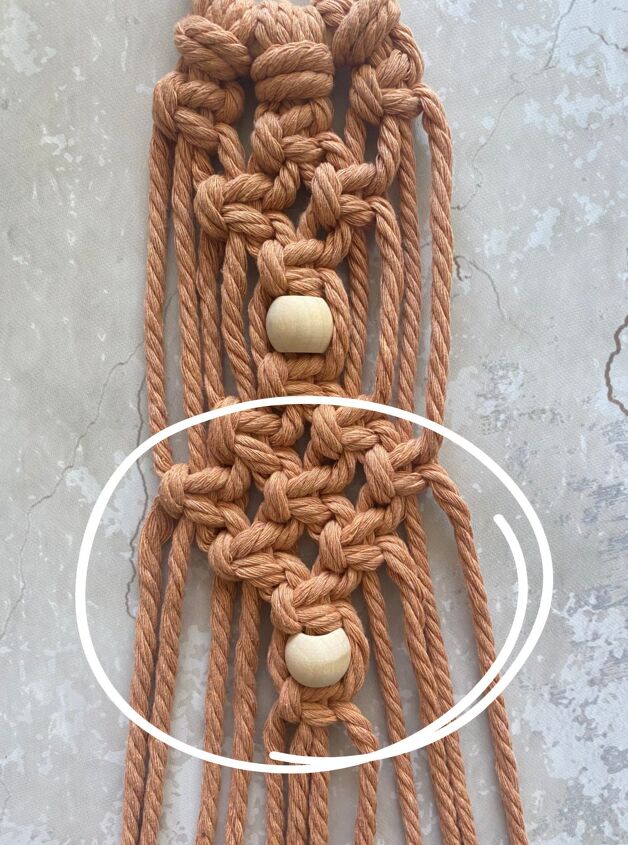
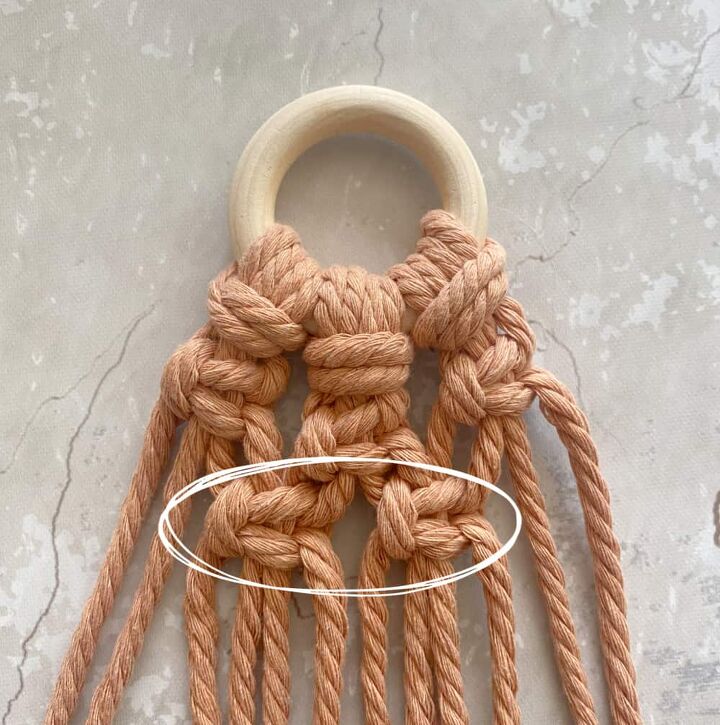
Your planter should now look like the photo below.
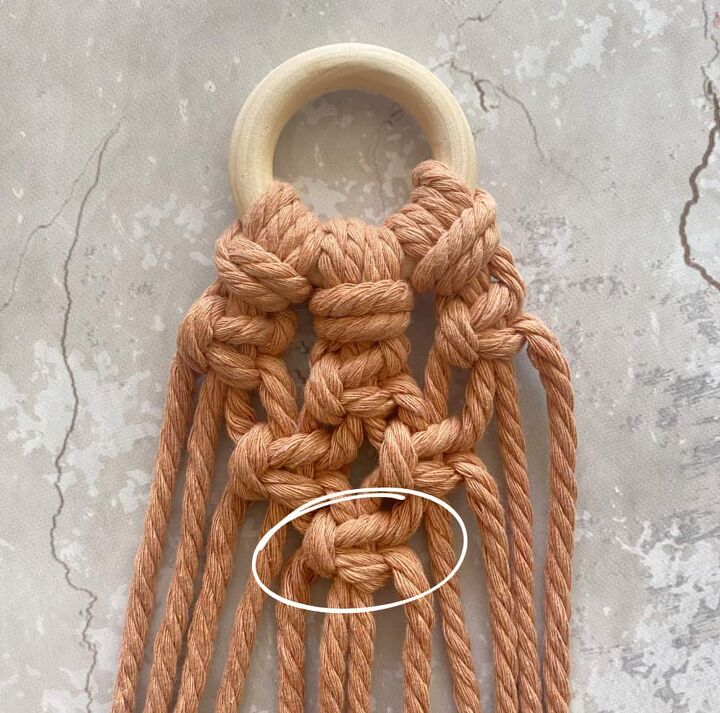
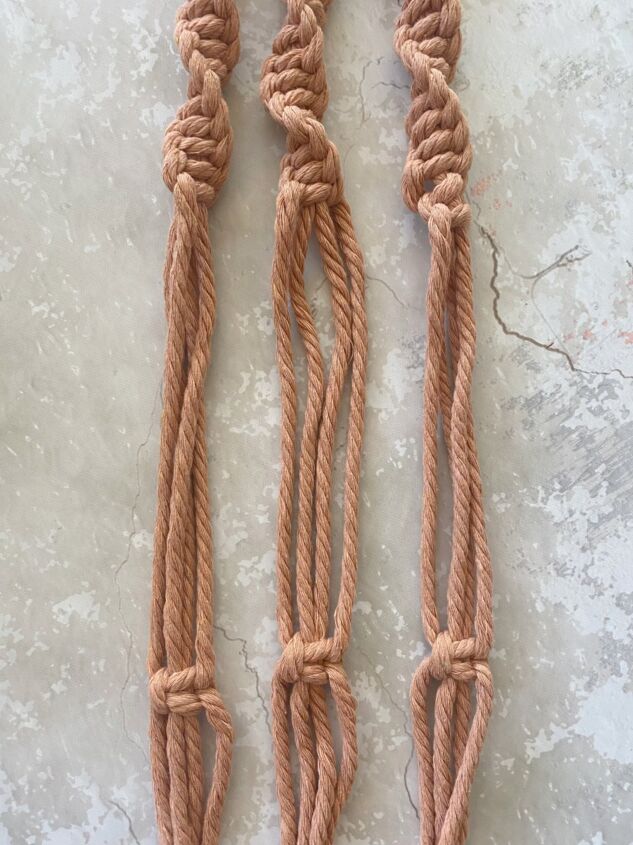
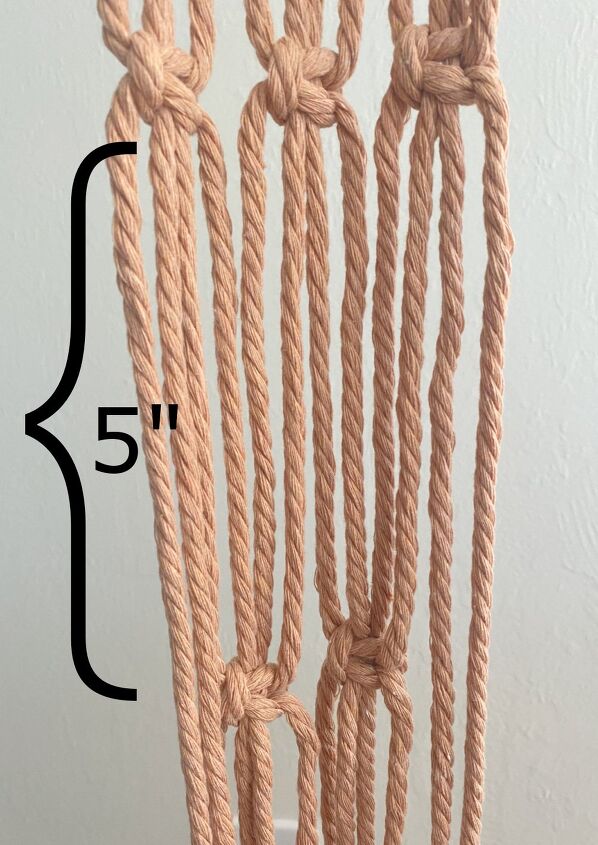
With the first four cords from the left, make a chain of Half Square Spiral Knots. See this video to learn this technique. Extend the chain until it is approximately 5 inches long. Now repeat this process using the four cords from the right.
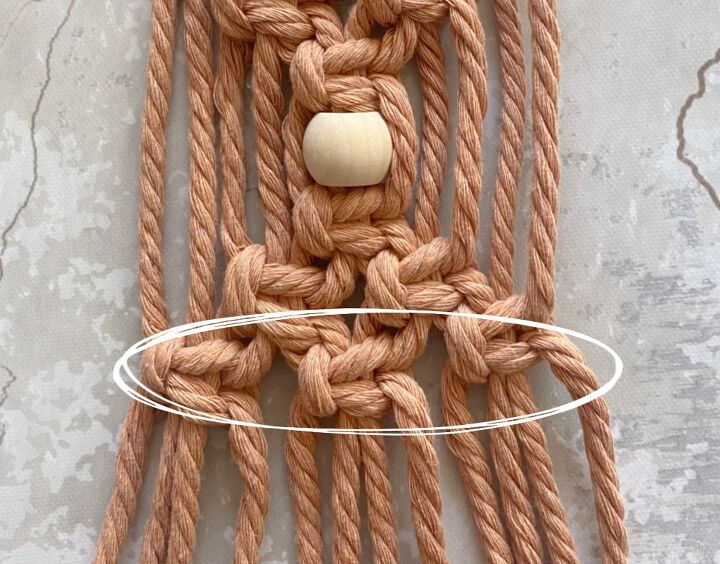
Make a third chain of Half Square Spiral Knots using the four middle cords (just below the wooden bead.) End all three chains at an even point.
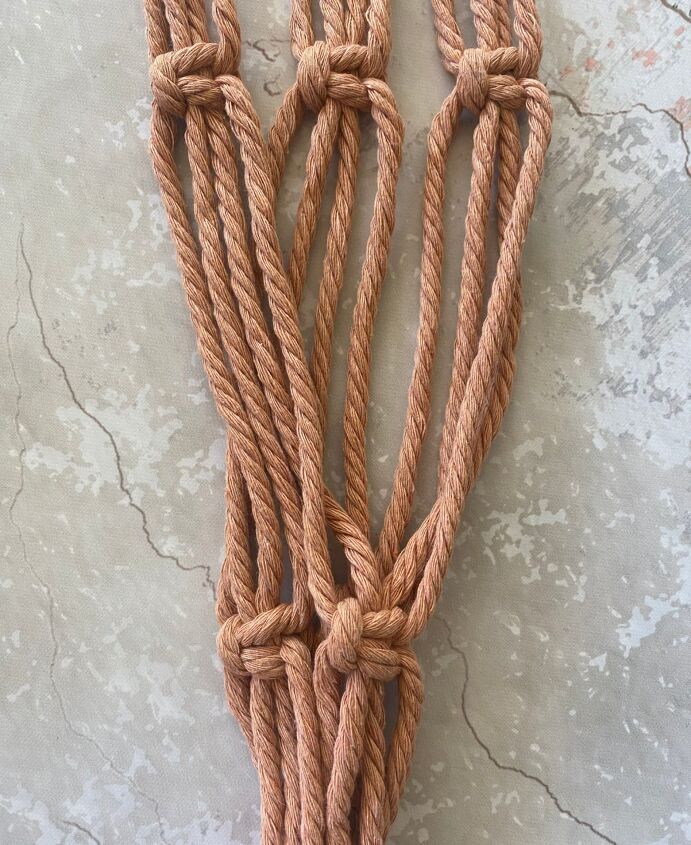
To create the bottom of the planter, about 6 inches down from the end of the spiral chains, make a row of three Square Knots.
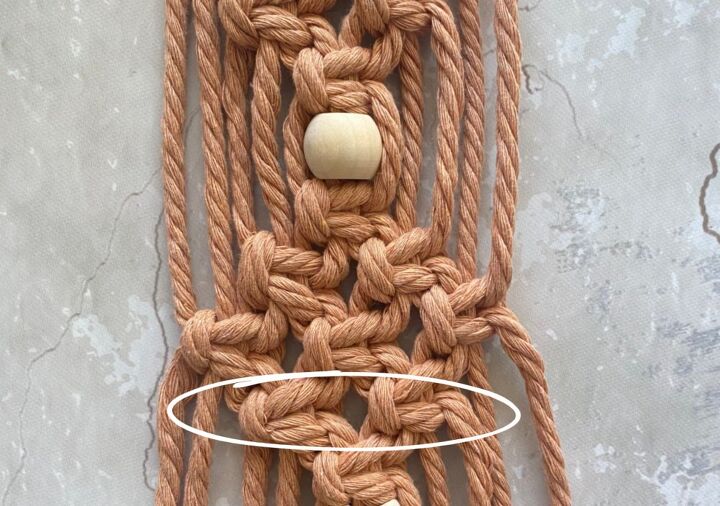
Then, about 5 inches down from that row, create two Alternating Square Knots, as show below.
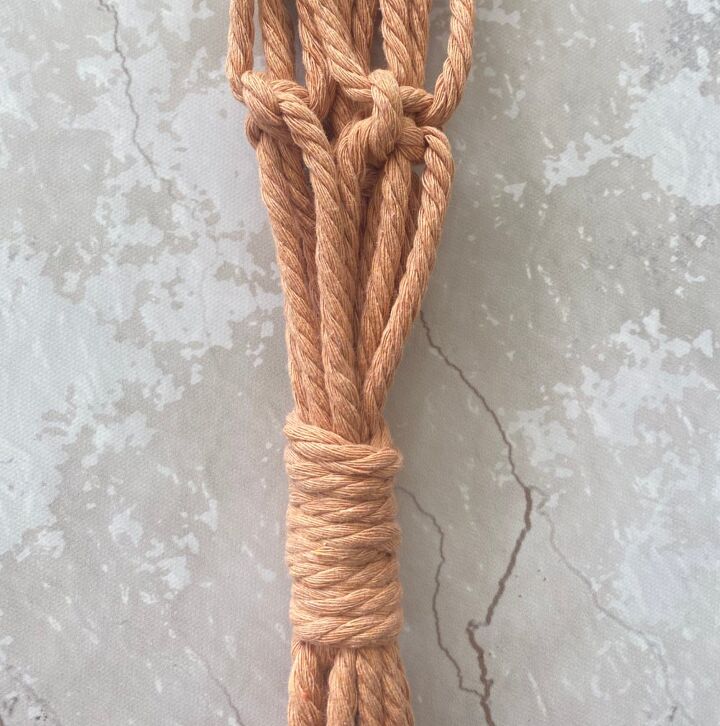
Using the two loose cords from each side, create a third Square Knot. This completes this row and begins to form a circular shape for the “basket” that will hold a flower pot.
Skip down about 3 more inches and tie a Wrapped Knot. Trim the loose cords evenly to create a tassel. Fray the tassel if desired. Enjoy your new macramé planter!
The biggest compliment is a little share – pin the photo below!


Comments
Join the conversation
-
Okay - I'm taking this as my sign to finally try making my own macrame planter holder. So cute!


Frequently asked questions
Have a question about this project?