


Cheap DIY Decor for Your Home That Looks Amazing
We are always looking for ideas to add character to our home. And what’s better than cheap DIY decor for your home?!
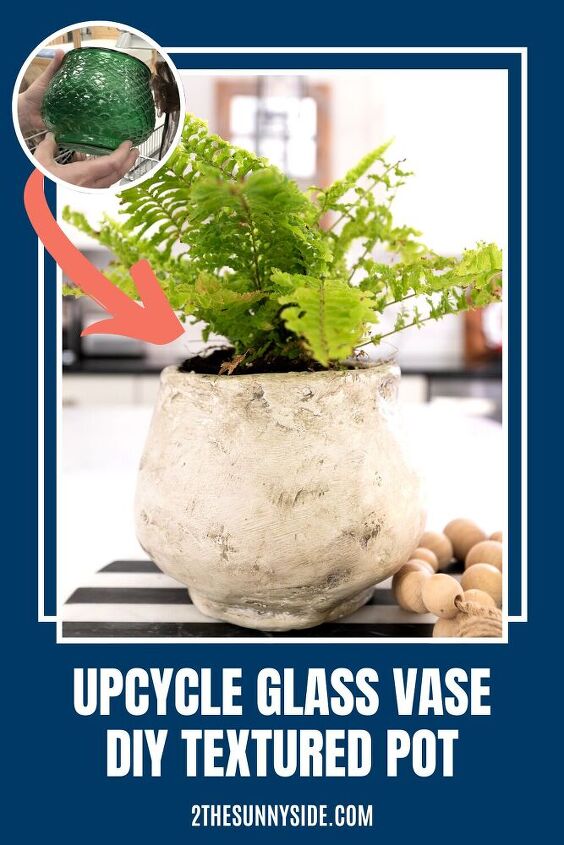
While we’ve created a few textured vases or pots, however we’ve received several requests to create a pot using the same technique we used on the repurposed thrifted bunny with a weathered stone look.
Our goal is to provide you, our viewer ideas and techniques you’d like to see.
With this in mind, we are sharing how we transformed a thrifted glass vase into a vintage looking pot that is reminiscent of that Pottery Barn style we love.
Sharing is caring!
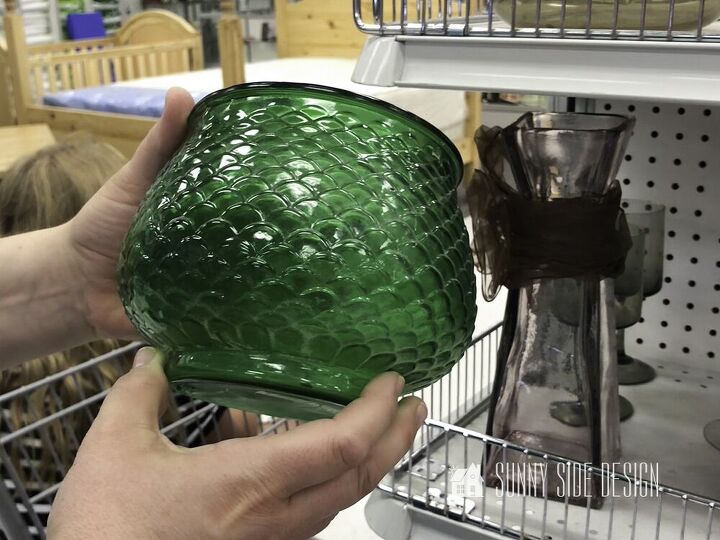
First of all you’ll need a vase or pot as your base for this DIY decor for your home.
With that in mind, we went to our favorite thrift store and found this green glass vase, or it may be a vintage candle holder.
Clearly, we loved the shape and knew it would make a fantastic pot.
This post contains affiliate links for your shopping convenience. We earn a small commission from qualifying purchases at no additional cost to you. For our full disclosure click here.
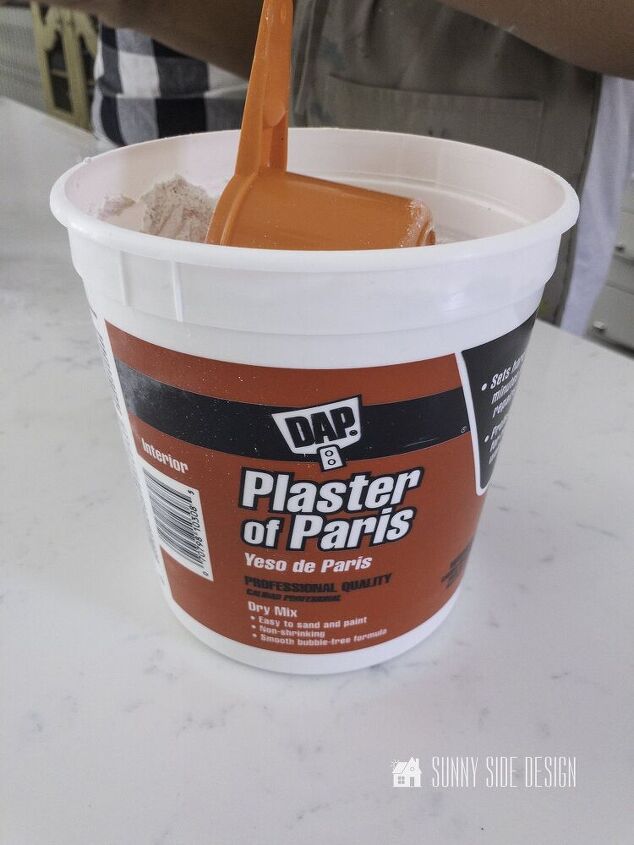
Second, you’ll need plaster. We picked ours up at Michaels.
In addition, you’ll need a container and stir stick for mixing.
One more thing you’ll need is paint.
First check your stash of leftover paint.
Actually, I rummaged through my container of paint samples and found a white that was perfect.
Then, for the shading paint colors I used the following:
Behr Garden Wall
Ceramcoat Hammered Iron
Folkart Medium Grey
Really any grey or brown paint will work for the shading of the pot.
Let’s dive in and start this DIY decor for your home.
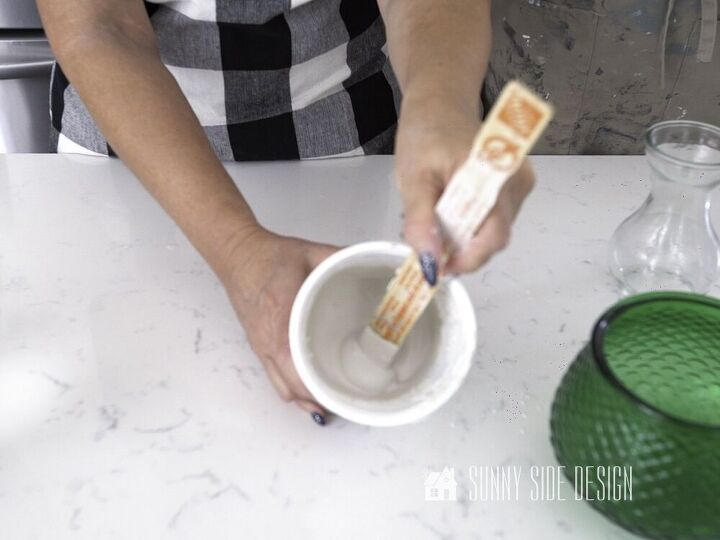
When working with plaster, you always want to add the powder to the water.
In fact, if you add the water to the powder, it heats up and thickens and drys quicker.
The water needs to be between 40-50 degrees.
So, we placed ice cubes in our container of water to keep it cool enough.
The plaster is mixed 2 to 1, 1 part water to 2 parts plaster.
One more tip, only mix enough plaster that you can use in 10 minutes.
After 10 minutes it will start to thicken up and you will not be able to manipulate it.
First, we placed 1/2 c. cold water in our mixing container.
To that we added 1 c. of plaster.
Stir well, and make sure there are no lumps.
In general the plaster should be thick enough to hold its shape, but also thin enough to spread on the surface of your container.
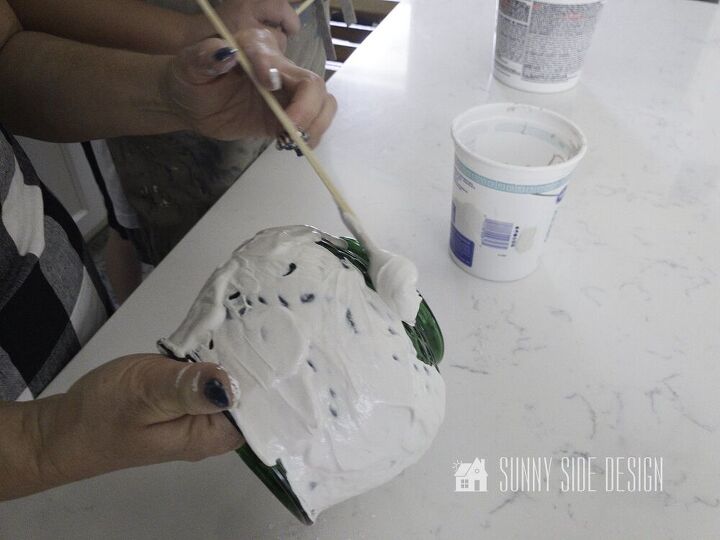
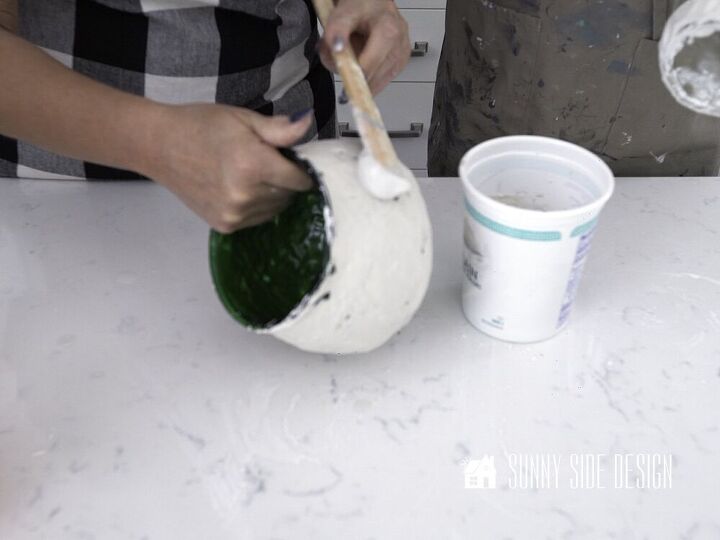
At this time begin spreading the plaster onto the surface of your vase or pot.
I used the stir stick to apply the plaster to the pot.
You can also use a putty knife or even a spoon to apply the plaster.
Cover the entire surface from the rim to the lower edge.
I did not place plaster on the bottom of the pot.
Also don’t worry if some of the glass or vase surface is not covered.
It will all be covered when the second coat is applied.
Our DIY home decor is starting to take shape!
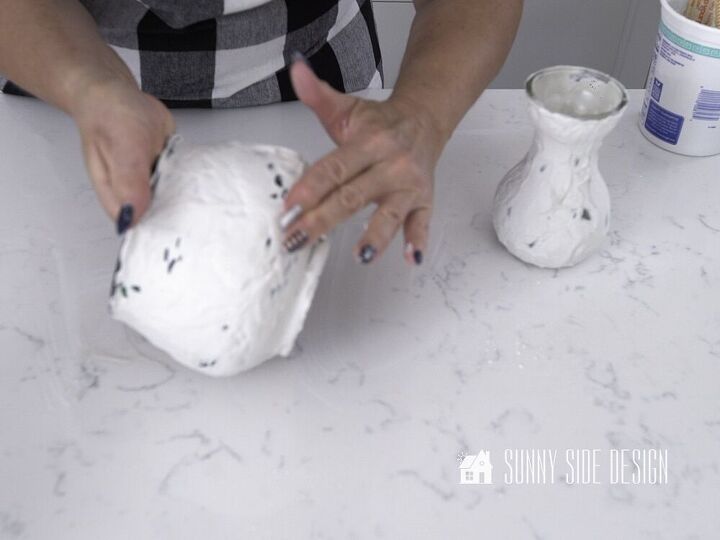
Once the surface is covered with one coat, use your fingers to smooth out some of the marks from applying the plaster.
Let dry.
In about 20-30 minutes it will be dry enough to apply the second coat.
For the second coat mix another batch of plaster, making it slightly thicker.
To do this, I added about an extra tablespoon of powder.
Add is slowly, so you don’t add too much.
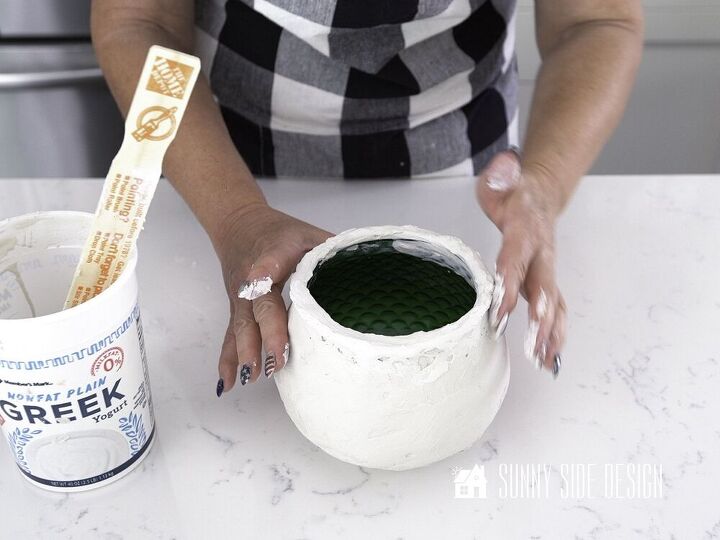
At this time, spread the second coat of plaster over the entire surface, from the rim to the lower edge.
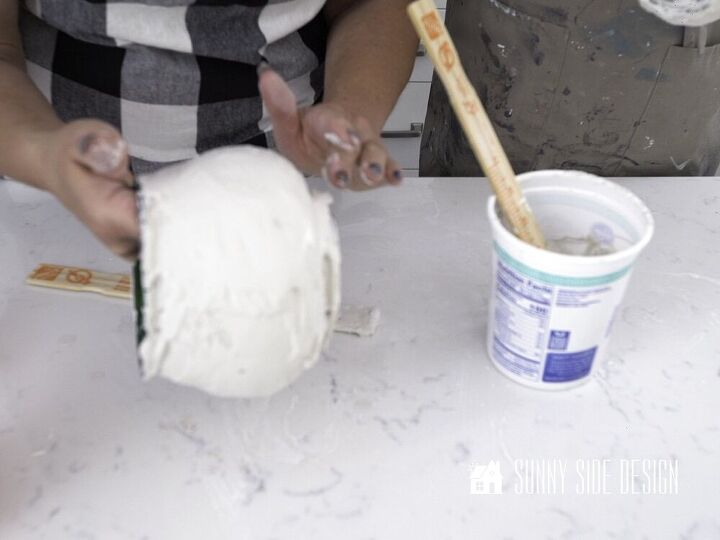
In my experience, you just need to get your hands dirty with this project.
Once again, smooth out the plaster with your fingers.
You’ll want to remove tool marks from applying the plaster, but leave dimples and divots in the plaster surface.
This will help to create a sense of age for your DIY textured pot, creating a unique decor piece for your home.
Let’s stay connected!
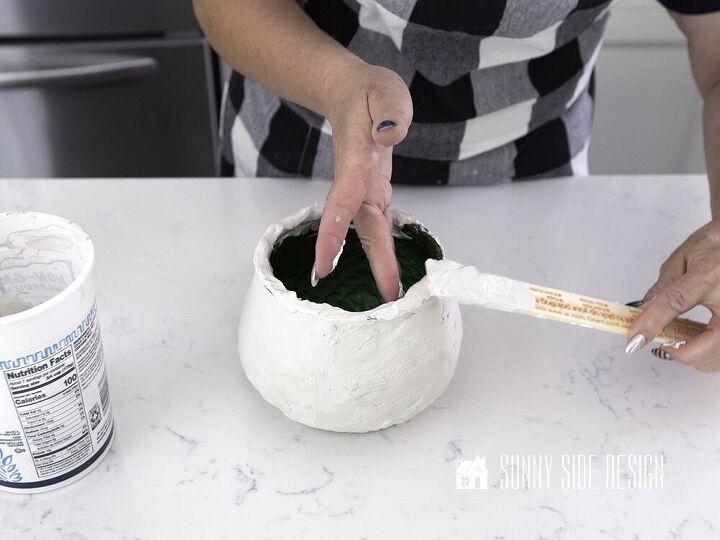
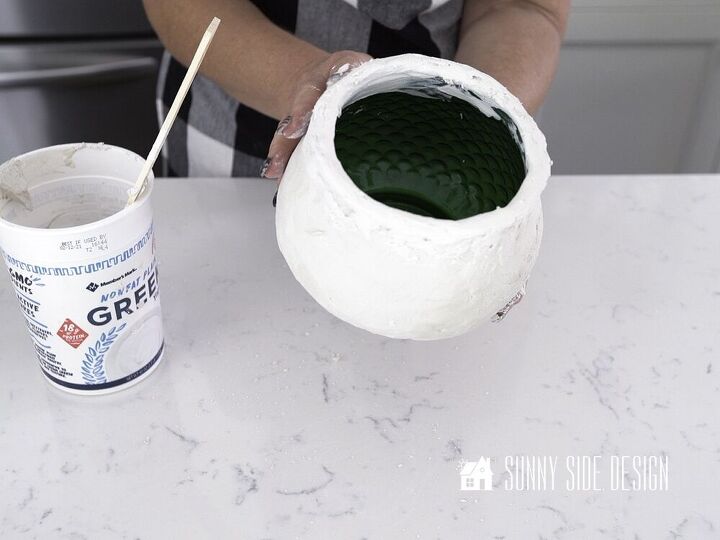
Let the second coat dry before adding the rim to the pot.
I think it’s easier to create the rim of the pot once the plaster has dried.
Again mix up a little more plaster.
You’ll also want to make this mixture a little thicker.
About the same consistency as the second coat.
First, dab the plaster around the rim of the vase or pot.
Then begin to shape the rim with your fingers.
There’s no need to stress if your pot is a little lopsided or imperfect.
In fact, that will just add to the character of the textured pot and help it look like a handmade piece.
Finally, let the textured plaster pot dry completely.
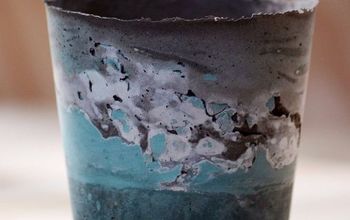
This is what it will look like once the pot is dry.
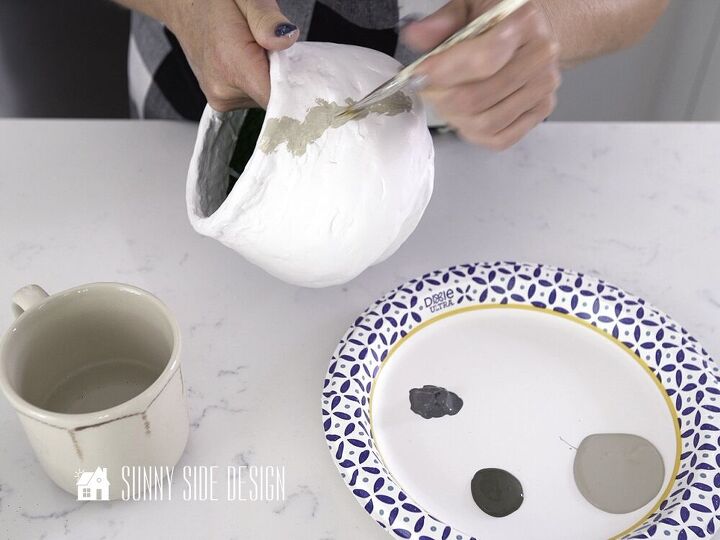
First I painted the entire plaster surface with a coat of white paint.
You can paint it white, tan, grey, whatever you want the base color to be.
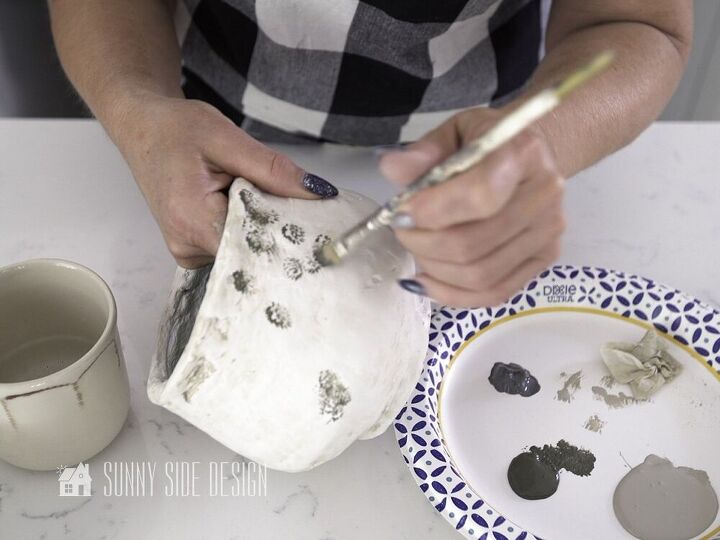
Next I began to add layers of different shades of grey paint.
The first color I used was the lightest shade of grey paint I had, Behr Garden wall.
Using an old paint brush I dabbed on the paint, following some of the cracks and divots in the plaster surface.
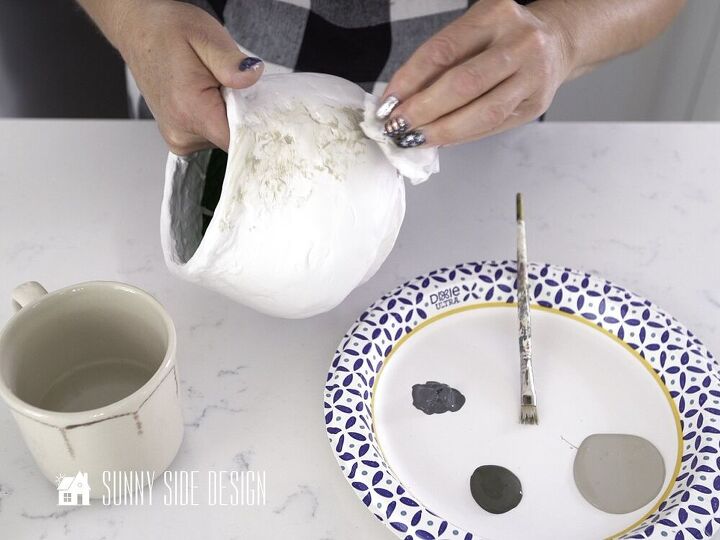
Next, I used a damp coffee filter to blend the grey paint, leaving remnants of the paint in the crevices.
Continue dabbing on more paint and blending all around the pot.

This is what my textured pot looked like after the first shading coat.
At this time, dab on the next color, a darker grey called Hammered Iron.
This time I focused on applying the paint into the divots.
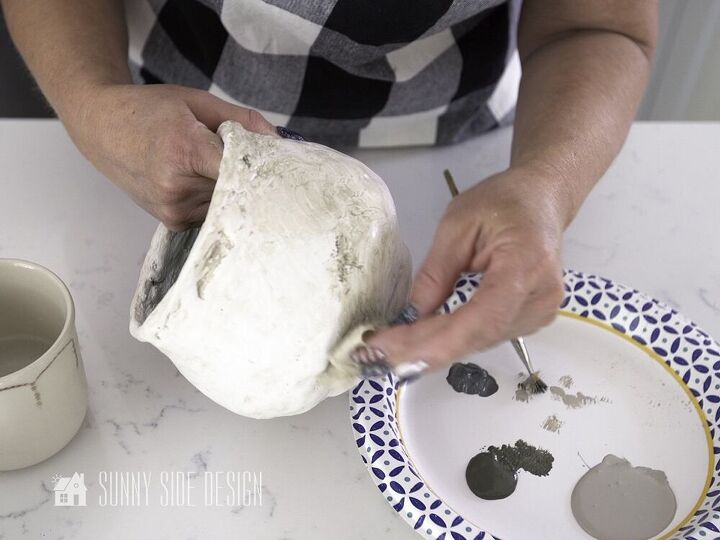
Again, blending the color with a damp coffee filter.
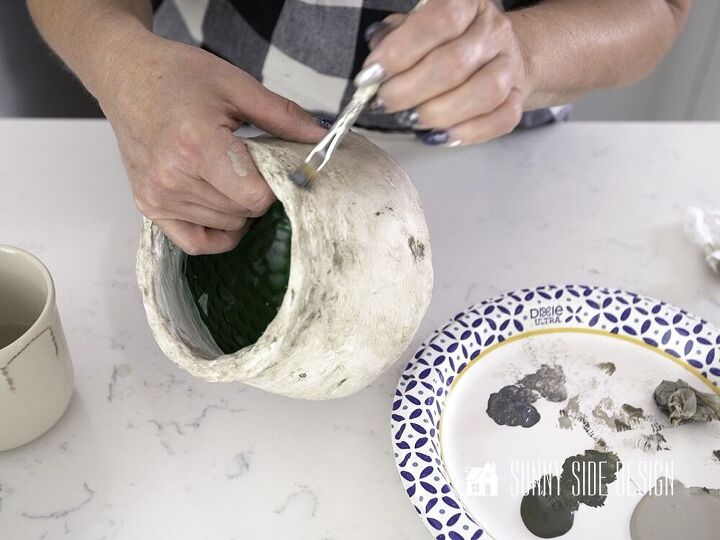
Last but not least, add the final darker grey.
For this layer of paint, I applied it in less places, focusing again on the divots.
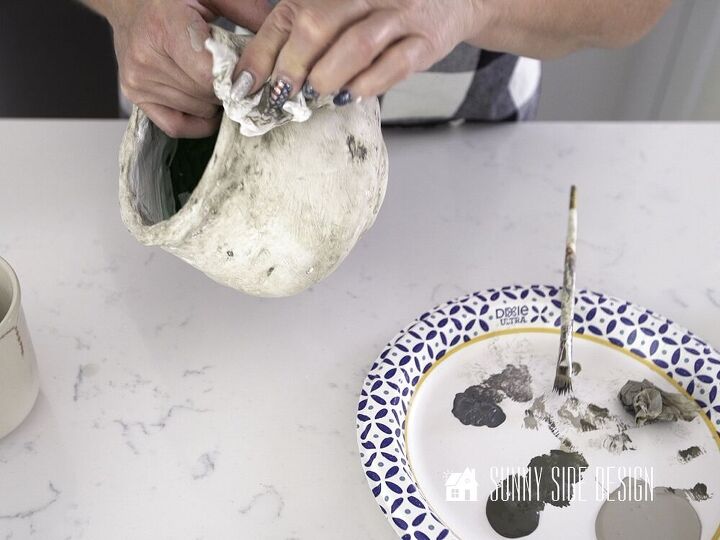
Blend again with a coffee filter.
And that’s it!
Really this is an easy DIY technique that will add character to your home.
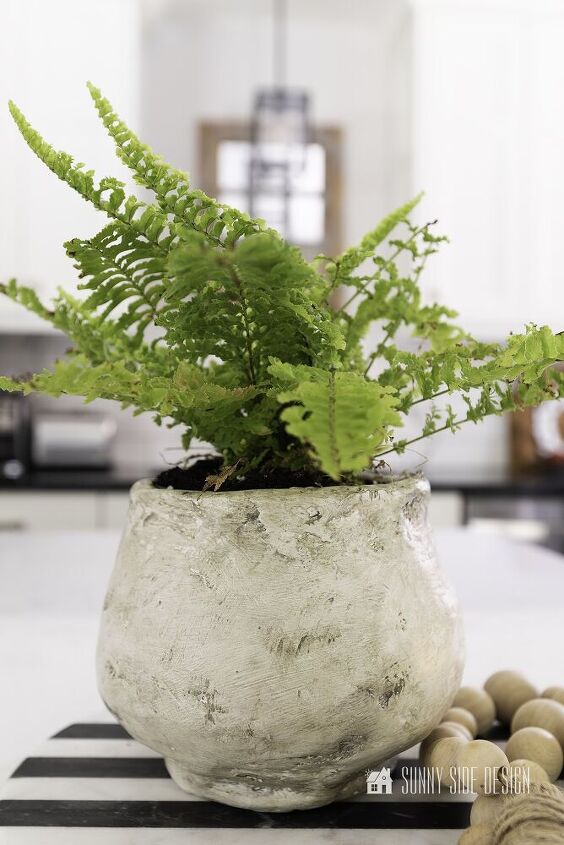
Just take a look at the final results.
Certainly this textured pot would be perfect for a DIY flower arrangement.
Once I put my plant into my textured pot, I couldn’t decided were to place it.

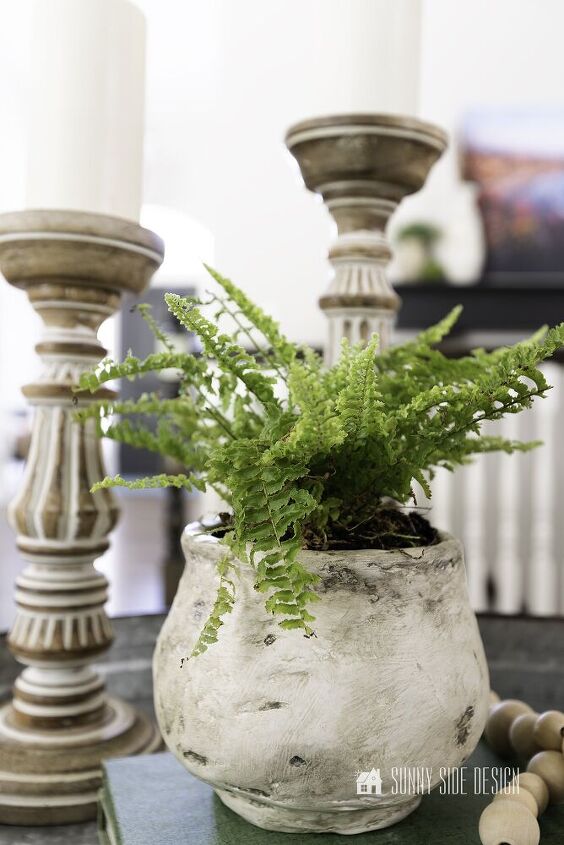
Although I loved the way it looked on the kitchen counter, it also was the perfect DIY decor for the coffee table too.
Obviously, it’s so versatile and would also fit right in with my home decor on my fireplace mantle.
Please leave us a comment and let us know if this is a project you’d like to try.
Certainly, it’s a cheap way to add some fun DIY decor for your home.
If you’re new here, WELCOME! We love having new readers and friends!
Please say hi and tell us a little bit about yourself.
You can learn more about us here.
Remember, to let us know if you’d like to see a particular project on our blog.
We love hearing from you.
Please subscribe to our free newsletter so you don’t miss any inspiration for your home.
Please PIN and save for later, and share with your friends! Sharing helps grow our following!
Thanks for stopping by and as always here at Sunny Side Design
WE HOPE TO BRING YOUR HOME TO THE SUNNY SIDE OF THE STREET!
Be sure to follow us on Pinterest for even more home decor and DIY ideas.
To see what we are working on before it’s on our blog, follow us on Instagram.
You can also find our video tutorials on our YouTube channel.

Resources for this project:
See all materials


Comments
Join the conversation
-
This is so cute, I'm going to have to give this a try. Thank you for sharing.
-
Very pretty and your instructions were spot on. Love it.


Frequently asked questions
Have a question about this project?
If using live plant, how did u drill holes in the glass without breaking. If not, I gather it's silk flowers/plants?
I have seen several different approaches to this same desired end, and I think yours is the best outcome that I have seen! The others have looked, well, diy! LoL Yous looks like real pottery! I will definitely be trying this! I like bright colors, though. Is this something I can do? Thank you for anyone who has advice! 🌈😊💕🌻✌️🕊️
Is there something besides plaster of Paris, that would add dimension?