


DIY Kitchen Towel Scarf
One thing that annoys everyone while they’re doing some kitchen work is having to go back and forth to a kitchen towel every time their hands need wiping. And if you decide to avoid that by wearing a towel on your shoulder, you’ll end up with a permanently moist shoulder, or a series of squats because the rag will keep slipping off the shoulder and onto the floor.
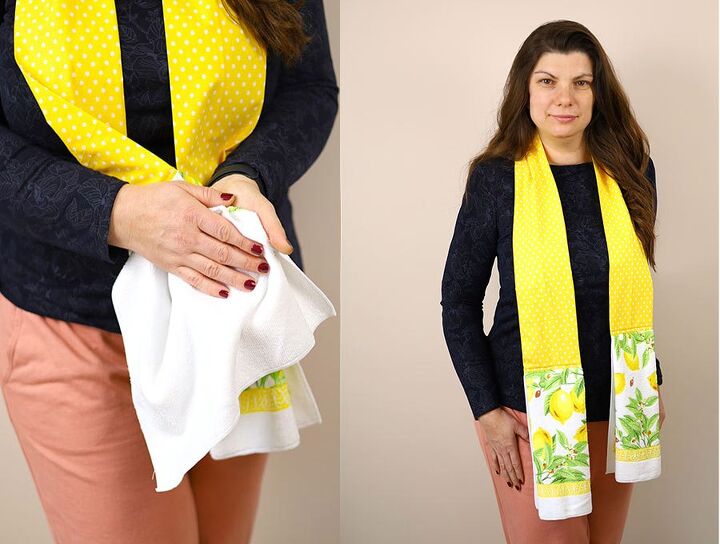
Now you can forget about those annoyances with this DIY kitchen scarf! It won’t slip off since it goes over your neck, and it won’t dampen your clothes because the ends you wipe your hands on won’t touch you! Bet you want to make it right now, so here come the instructions.
Prepare the towel
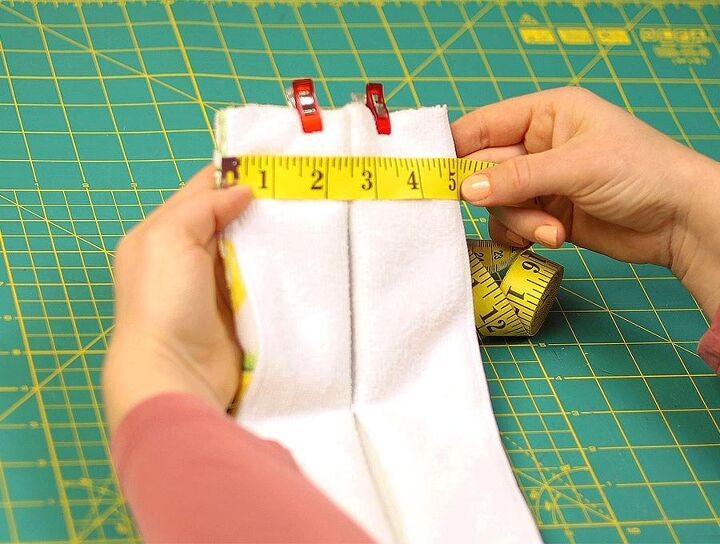
Cut the old towel in half and mark the middle on each piece. Split those middles vertically in three equal sections and mark them. Fold the upper edge down to match the first mark below the center mark. Fold the same edge back up so all three marks on the top half of the towel align.
Fold the two bottom-most thirds up to the top edge of the towel. Fold the same edge back down so all three marks on the bottom half of the towel align. Make sure the wrong sides are facing up at this point and pin it all in place. Repeat with the other piece.
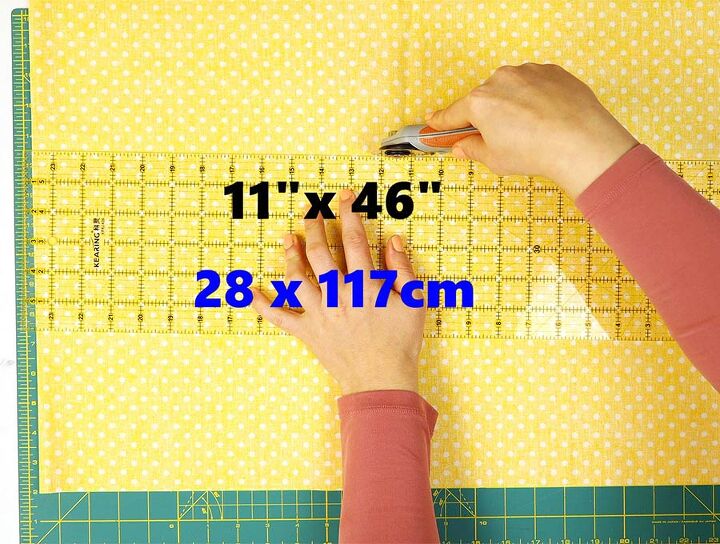
Cut the fabric
Measure each towel piece from one fold to the other, double it, and add an extra inch to those measurements. Cut out a piece of fabric 46 inches long and as wide as your previous measurement.
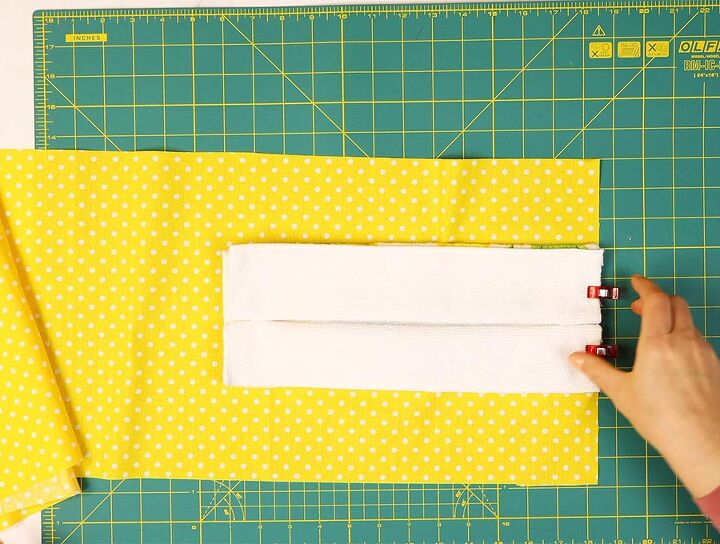
Assemble the scarf
Set the towel pieces on each end of the scarf with their wrong sides up. Center them and align their short edges with the fabric piece's short edges.
Stitch the towels in place with a one-inch seam allowance along the edges you aligned.
Fold the base fabric piece’s long edges over the towel and stitch them along the short edges, but only for an inch from both the top and the bottom. You’ll notice that the folded sections overlap a bit at the middle of the scarf, that will be the future seam allowance.
Finish the towel scarf
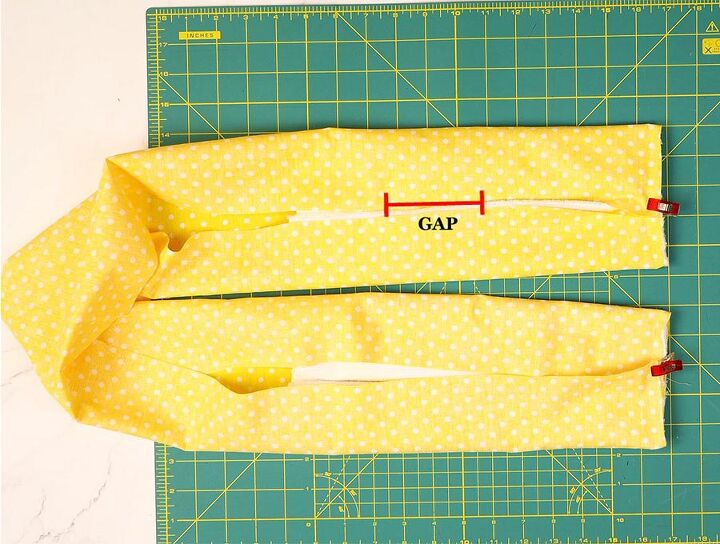
Sew the scarf closed along the seam allowance, going from one end of the scarf to the other. Leave a short gap unstitched to turn the scarf later on.
Stitch across each short edge, with a 3/8 inch seam allowance.
Press the center seam with your iron and turn the scarf inside out through the gap. Press the entire scarf and sew the gap closed.
Topstitch the edges where the towels start with a quarter-inch seam allowance, reinforcing the stitch at its beginning and ending. Go over both of those with a single seam.
You’re ready for your next culinary endeavors with dry and clean hands guaranteed thanks to this handy DIY kitchen boa scarf ! Make a few of these for your friends and family members who love to cook, they’ll appreciate the gift. And check out our other articles as well, you’ll probably find a lot of stuff you’d like to sew.

Comments
Join the conversation
-
What a great idea!!! I also have the same troubles you do while in the kitchen. I am definitely going to make a couple of these “boa towels” Thank you for such a great idea.👏🏻👏🏻👏🏻👏🏻👏🏻
-
Absolutely genius!!!! I’m always wiping my hands on the sides of my clothes ~ you are a genius, because I LOVE scarves and I’m always wiping my hands on something ~ thank you so much for sharing your ingenuity!!! ♥️


Frequently asked questions
Have a question about this project?