


Easy Crafts to Do at Home: Yarn Art
If you enjoy easy crafts to do at home, this yarn art is for you. It’s simple and loosely mimics satin stitch embroidery. The best part about this DIY is that there are so many different possibilities. Therefore, we hope this is just a jumping off point for what you do.
For instance, could you stitch a letter on multiple framed pieces to spell out a seasonal word? Use a variety of different colored yarns. Add embellishments onto the yarn like jingle bells or faux leaves. Rather than caned webbing, could you embroider onto a woven basket or placemat. Lastly, could you make a design on the caned webbing of a chair. I’d love to hear your ideas in our comment section found at the end of this post.
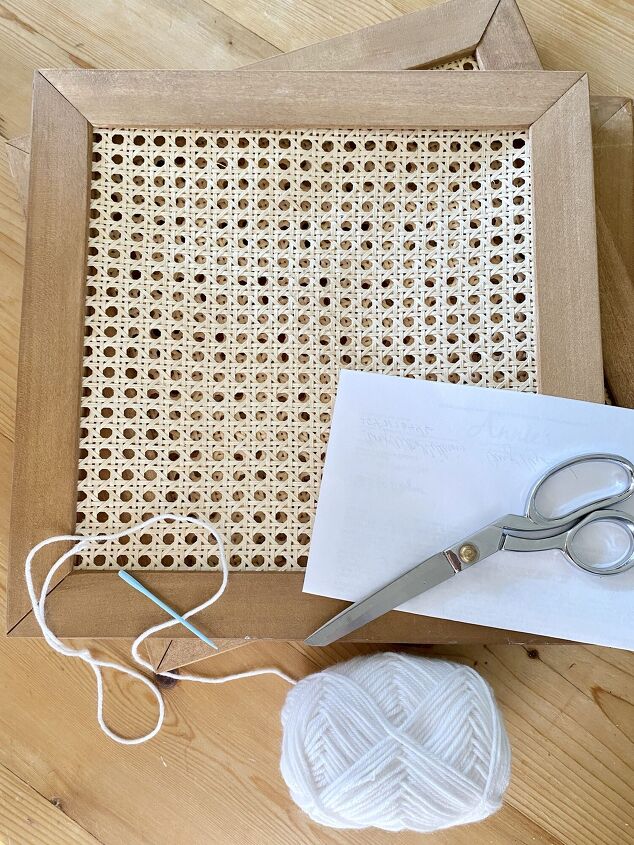
Whatever you choose to do, these simple supplies and steps will get you started. For this project, we used our handmade cane placemats featured in our exclusive Decor Box. However, you can place any kind of similar woven material into a frame or embroidery hoop.
- Framed cane webbing or other woven material
- Embroidery needle
- Yarn – any color
- Scissors
- Paper
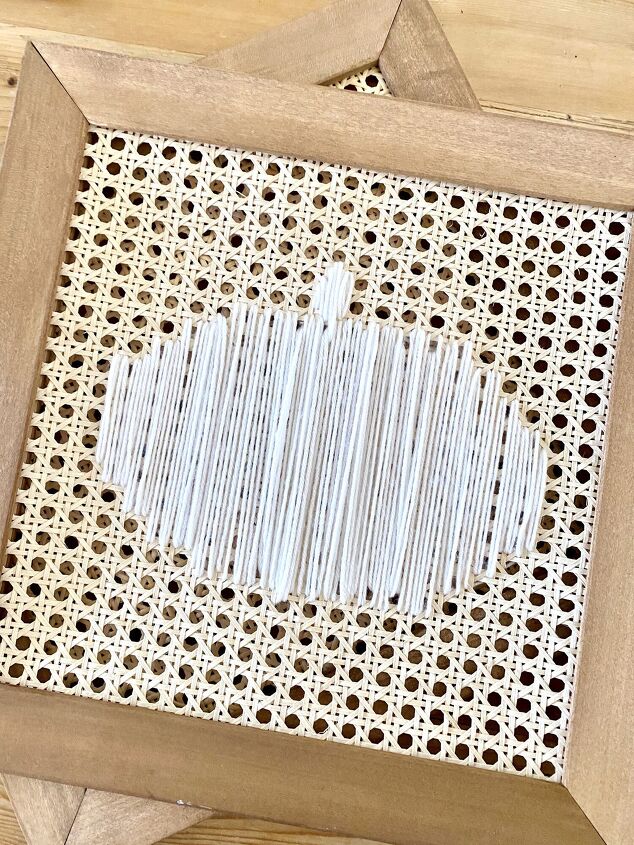
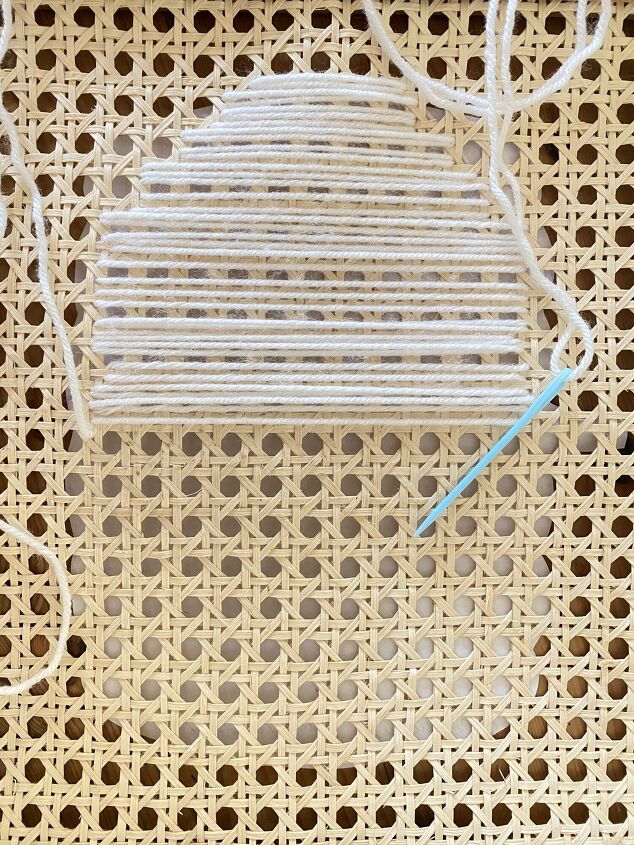
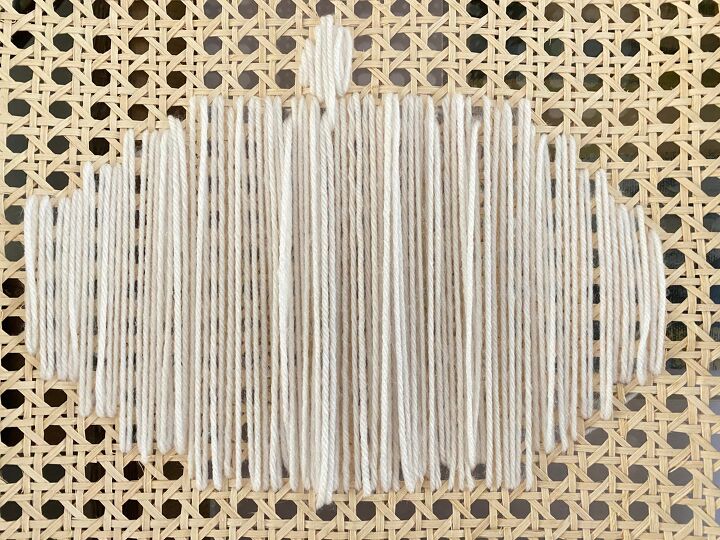
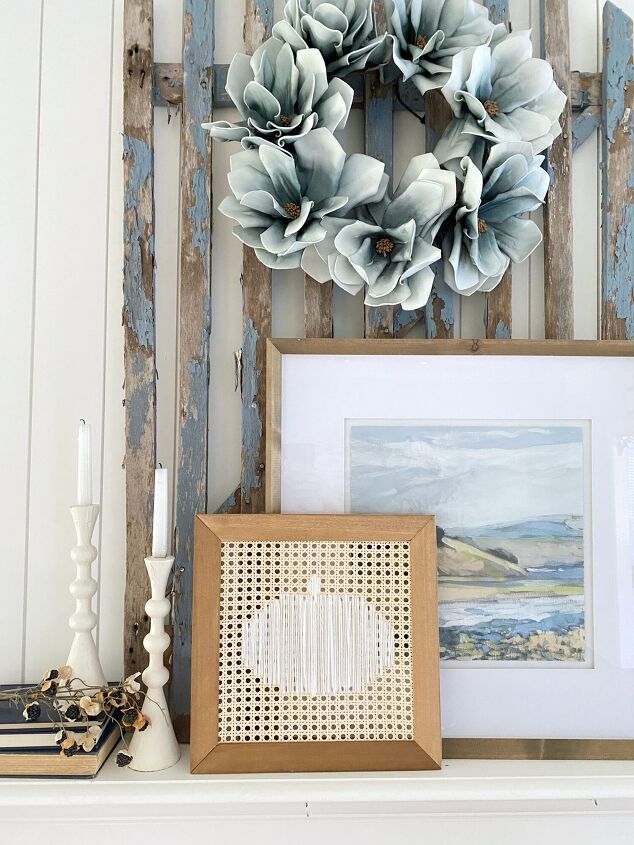
Choose a simple motif to embroider onto the woven material. For Fall, a leaf, acorn or pumpkin will create an easily recognizable shape. In addition, you can use one or more colors of yarn.
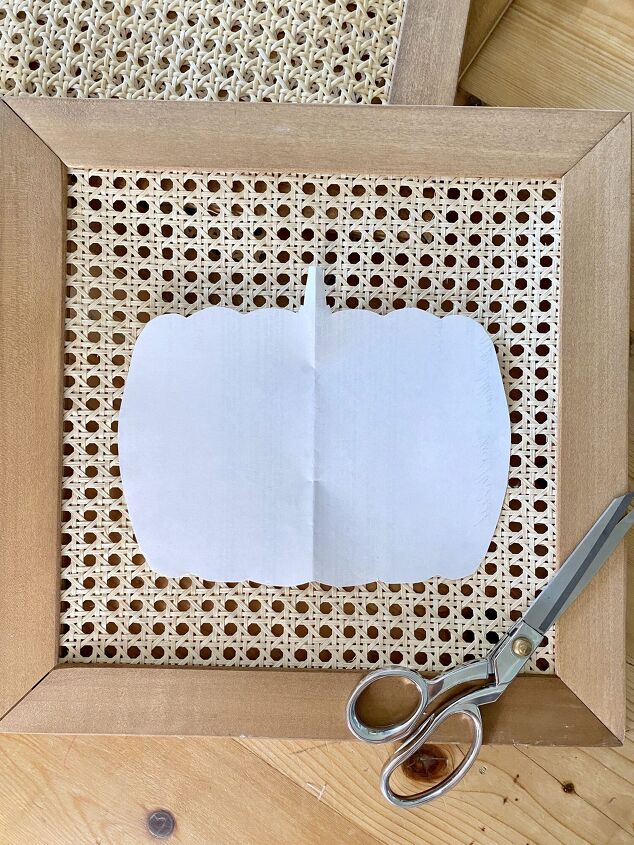
- First, print or draw any desired shape onto paper. Then, cut out the shape to use as a template.
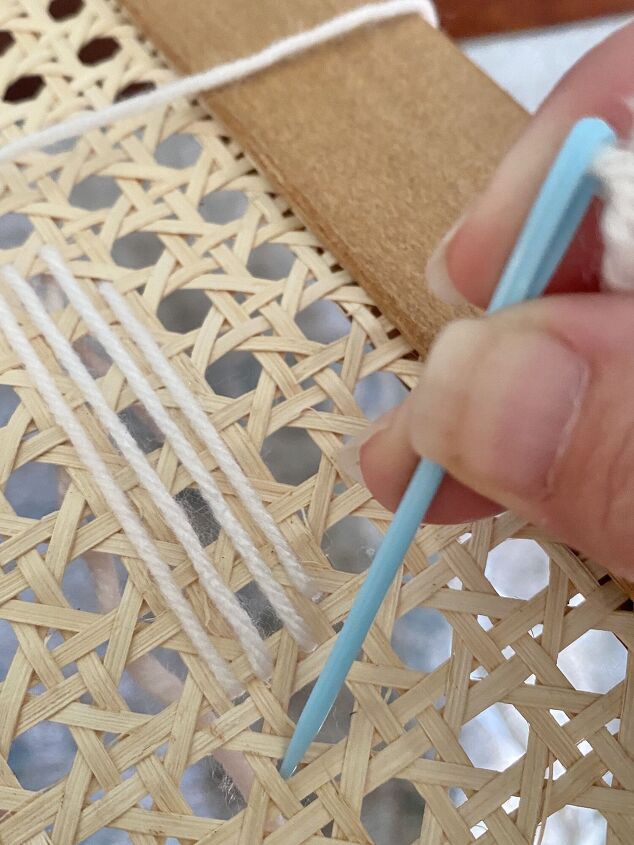
- Thread the embroidery needle with yarn, tying a knot in the end. Double thread to fill in the design quicker.
- Pull the needle from the back of the woven material to the front using the paper underneath to act as a guide for the shape you wish to create. Keep looping the yarn in and out of the holes of the woven material.
- The back of the frame will be where you start and stop each stitch. Therefore, tie a knot in the yarn on the back of the woven material. The back side may appear a little messy with knots.
Tip: For symmetrical designs, count the spaces between the frame and template to determine where to stitch the other side. In addition, the caned webbing is basically a grid. Therefore, you simply follow the grid once the first half of the design is complete.

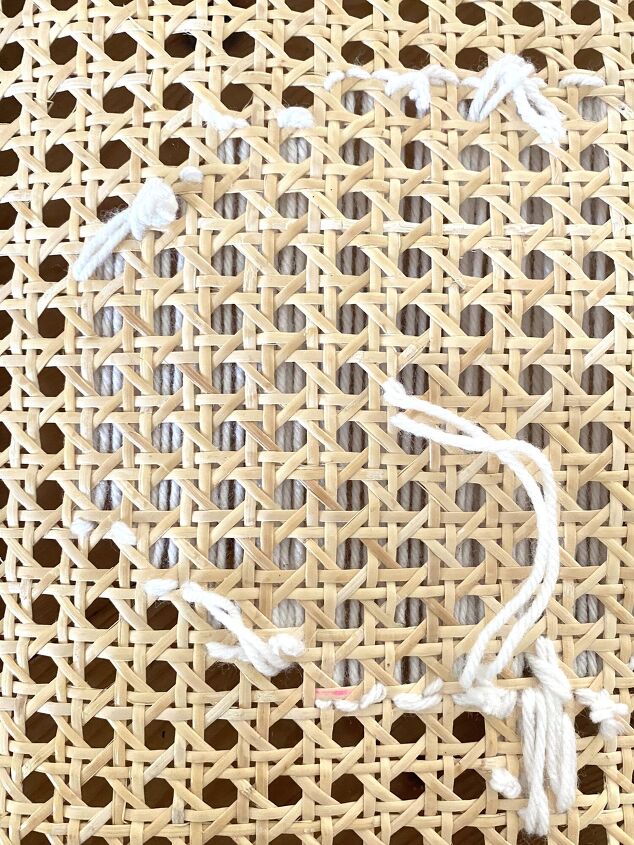
This yarn art can easily be changed for each new season. First, cut the yarn to remove. Then, restart with a blank canvas. For example, stitch a Christmas tree for the holidays or a flower for the Spring.
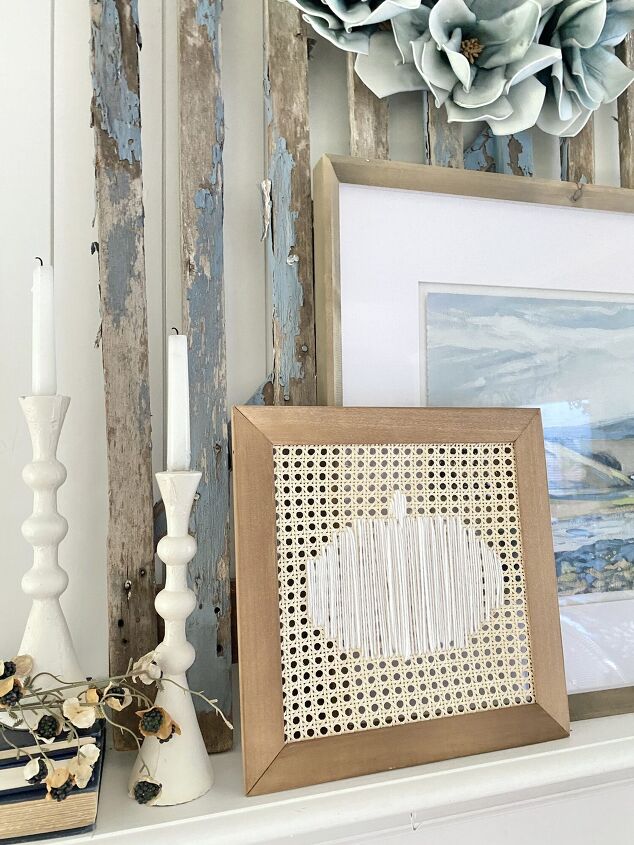
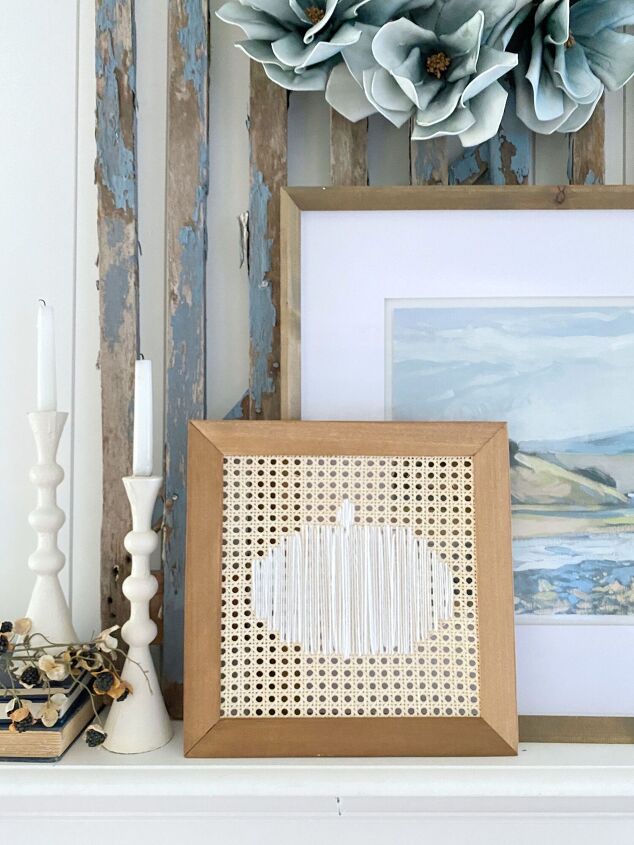
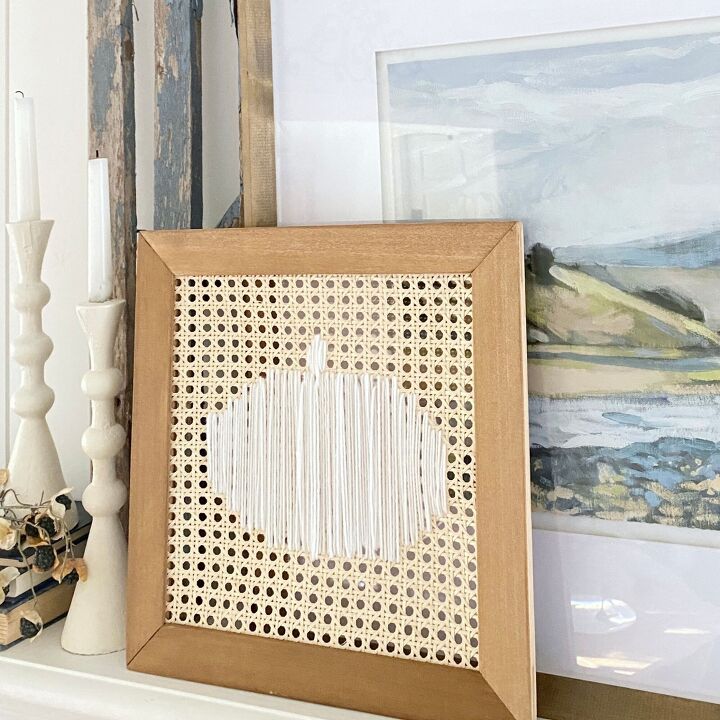
This yarn art looks beautiful layered over artwork on the fireplace mantle.
Love easy crafts to do at home? Read how we made decorative acorns from plastic eggs, jute and paint. Or, check out a few of Grandma Norma’s favorite embroidery stitches to add handmade details to store bought tea towels. Lastly, follow us on social media to catch our instructional video. We are on Pinterest and Instagram.


Frequently asked questions
Have a question about this project?