


From Cabinet Door To Farmhouse Style Decor

Have I ever mentioned that I teach cabinet painting workshops? Well, I do. And, I am fortunate to have a friend who remodels kitchens & bathrooms & gives me doors that he tears out of remodeling jobs.
The doors he gave me from a recent project were a little more special. He was remodeling the kitchen of another friend, Terry, in the house she inherited from her sweet mother.Most of the doors will be used for classes. However, there are some little doors that are the perfect size for home decor. The one I used for this project is only 11" x 11".
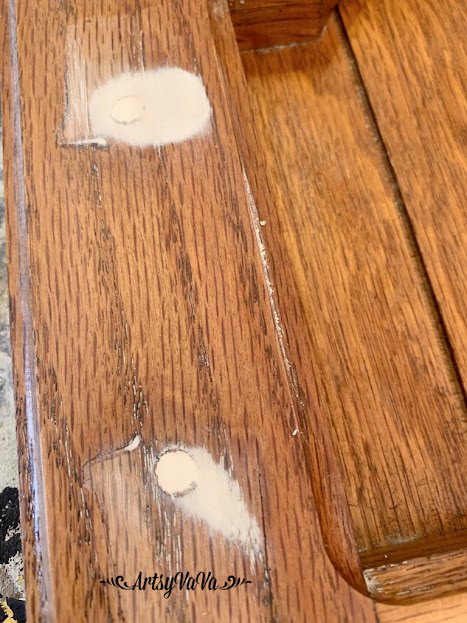
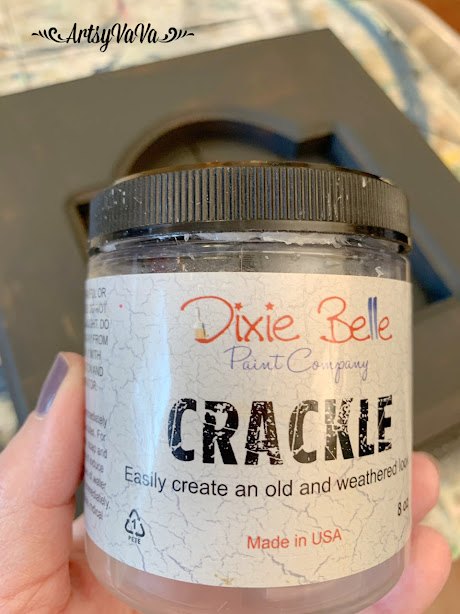
I cleaned the door well with White Lightening from the Dixie Belle Paint Company to remove any greasy residue. I rinsed well with water afterwards. I filled the holes where the handles had been with Dixie Belle's Mud. I let the mud dry overnight, then sanded it smooth.
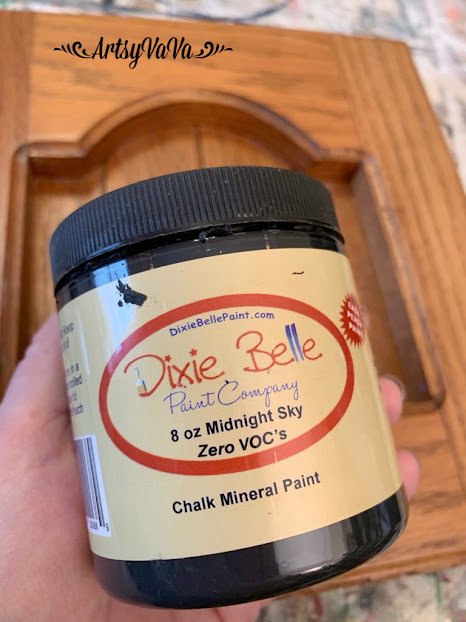
I painted the door with the color Midnight Sky.
Because I planned on doing a crackle finish on the door, I didn't worry about perfect coverage of the Midnight Sky & only did one coat.
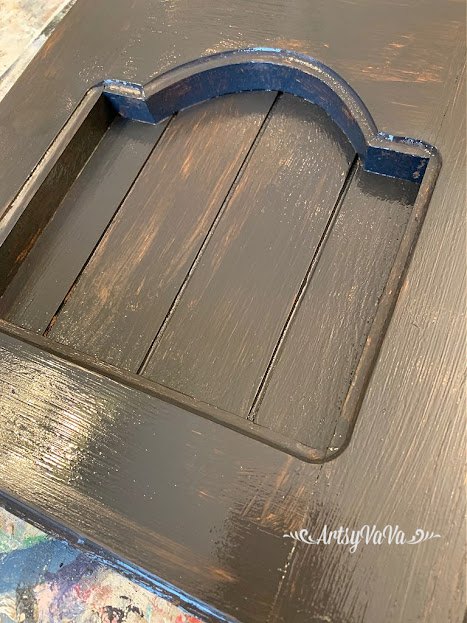
Once the paint was dry, I used a brush to apply crackle medium.
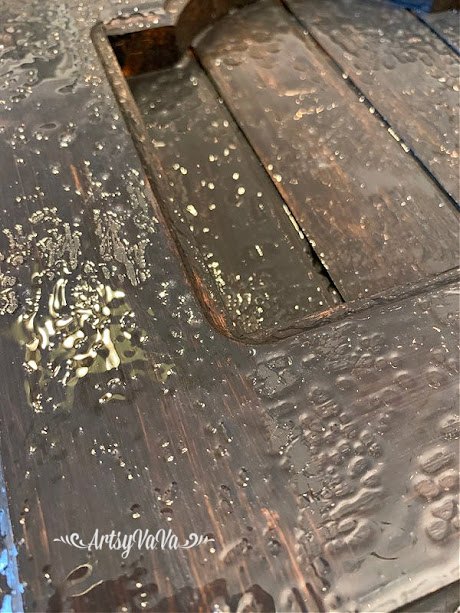
The crackle medium will quickly begin to "shrink" & look uneven. Don't worry...that's what it's supposed to do. So, don't overwork it trying to get an even finish.I set the door aside to allow the crackle to dry overnight.
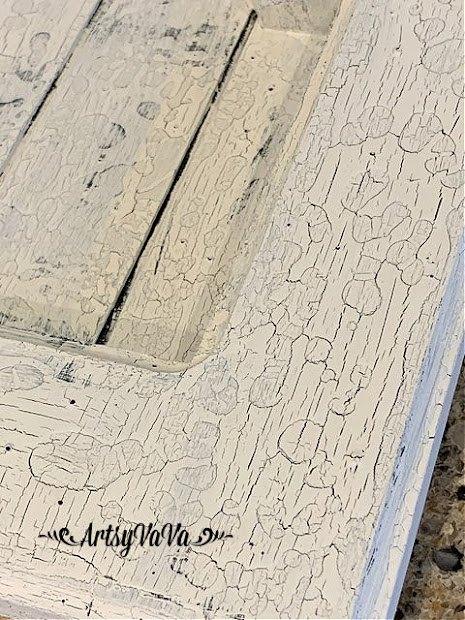
The next day I painted a coat of the color, Fluff, over the crackle. The cracking of the paint starts to happen quickly, so you can't overwork the paint. I made sure not to go back & forth with my brush.
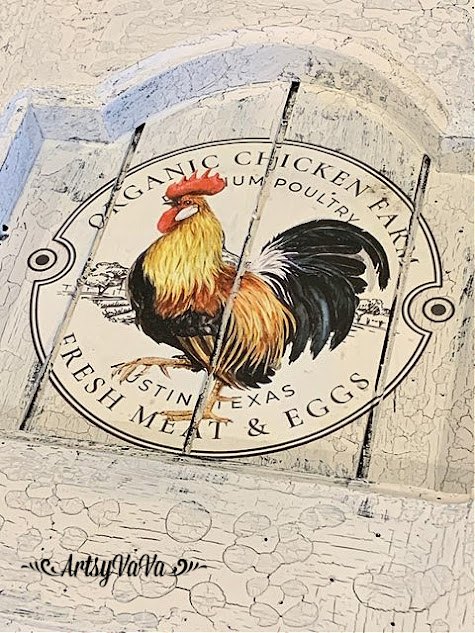
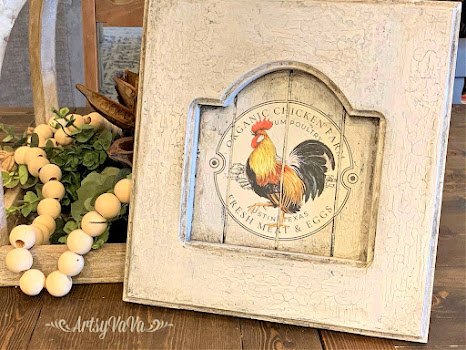
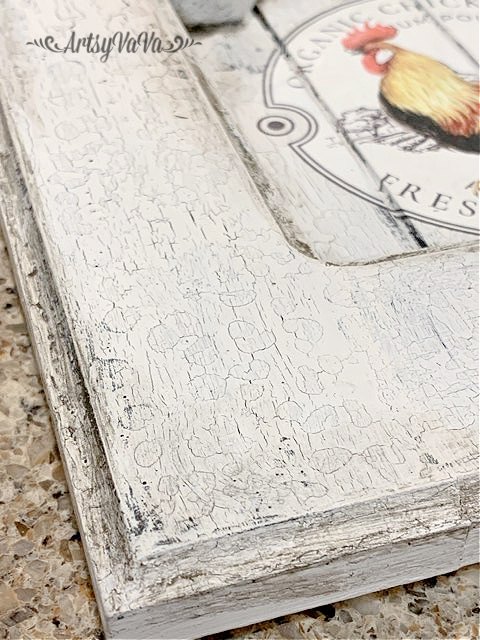
Once the paint was dry, I added a cute little transfer from Re*design With Prima.The crackle finish gives an aged, chippy look, however, I felt like the door looked a little too clean. I wanted to dirty it up a bit.
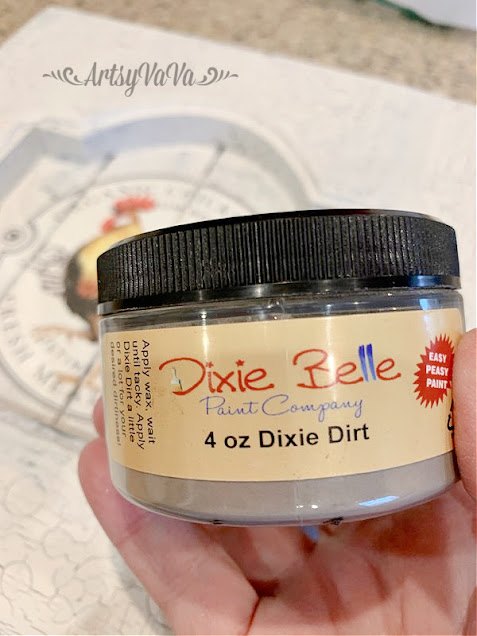
I could have aged the door with a colored glaze or wax, but I chose to put a little dirt on it... Dixie Dirt, that is. To me, this give it a more authentic dirty look.
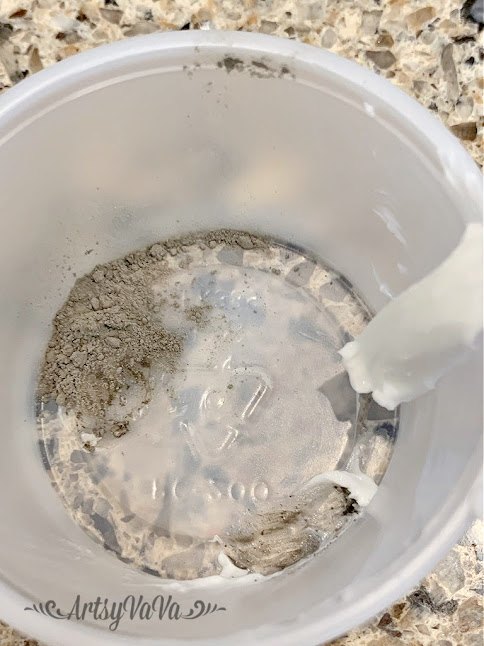
I put a little Dixie Dirt & a little clear wax into a small, disposable cup. A little goes a long way.
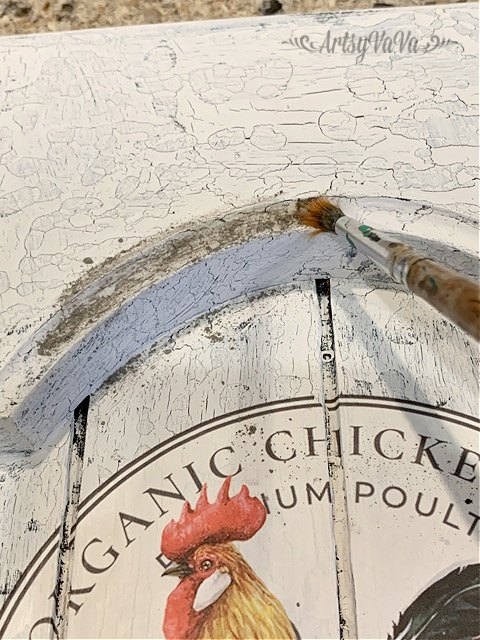
I dipped a small, stiff, artist brush into the wax, then into the dirt. The dirt is a powder & needs the wax to stick to the door. I added the dirt to all the recessed areas & crevices.
I used a rag to wipe away anywhere that I felt had too much dirt.
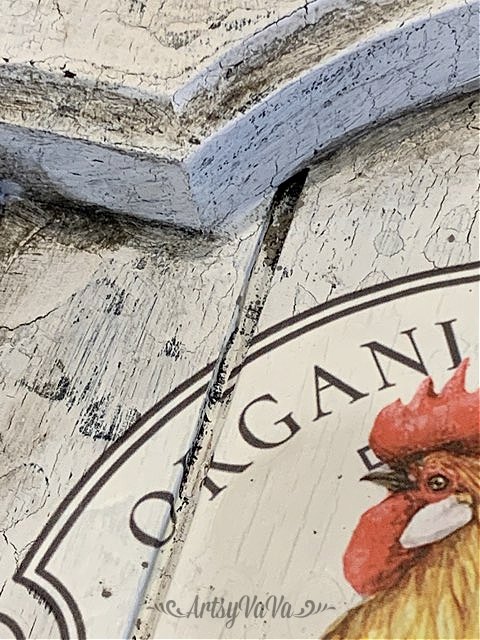
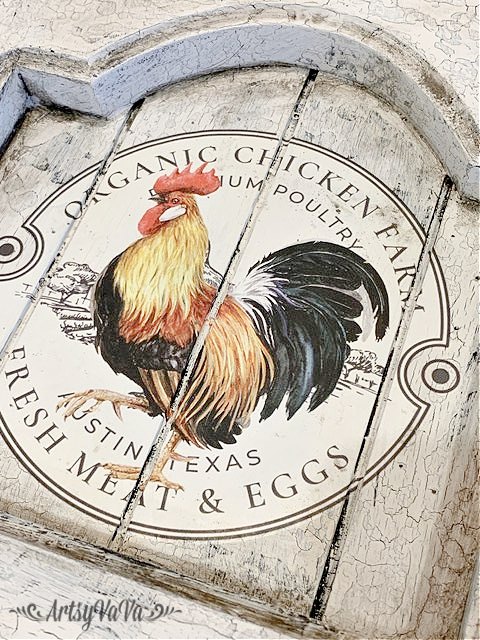
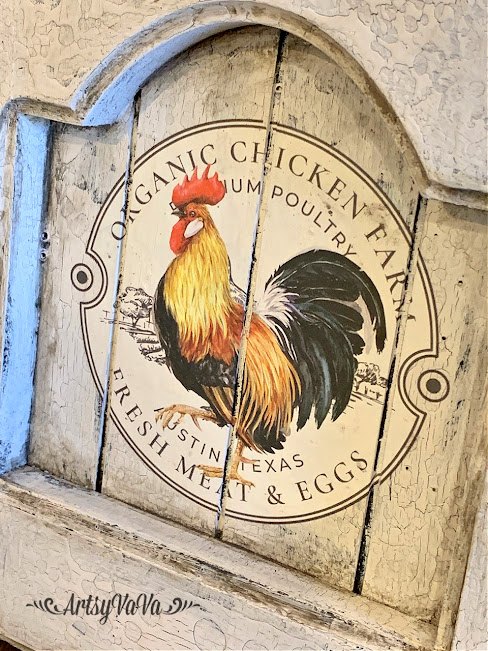
The dirt added the perfect amount of grunge.
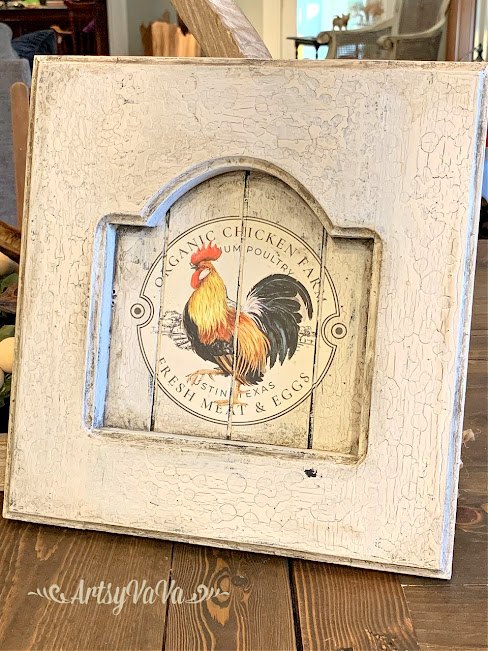
I gave the door back to Terry & it now sits on a bakers rack in the kitchen from where it originated.
Please note: The total time listed for this project does not include overnight drying time. Cost reflects the small amount of each product used.
Resources for this project:
See all materials


Comments
Join the conversation
-
This turned out well. Love the chicken.
-
Awesome!


Frequently asked questions
Have a question about this project?
that came out awesome! Did the cabinet door already have the cut out?