


HOW TO MAKE A WOODEN VILLAGE
Hi there sweet friend! Welcome to my Blog!
This is where I hope to inspire you to create beautiful things for your home, for gifts, or just for your soul! There’s nothing like the feeling of creating something beautiful with your own hands and we are ALL creative! Today I want to share with you how to make your own wooden village! If you prefer a video version, you can see one here!
Have you seen what you can do with simple pieces of wood? You can make your own wooden village with cut wood pieces or store bought houses. This was a project I had WAY too much fun with! The possibilities are truly endless! Here’s what I used!
SOURCE LIST
- Wood – Lowe’s
- Wooden craft houses
- DIY paint
- DIY wax
- Paint brushes
- IOD moulds
- IOD transfers
- Air Dry clay
- Wooden pots
- Embossing medium
- Corn starch
- Putty knife
- Titebond glue
STEP 1: PICK OUT A HOUSE AND COLORS OF PAINT
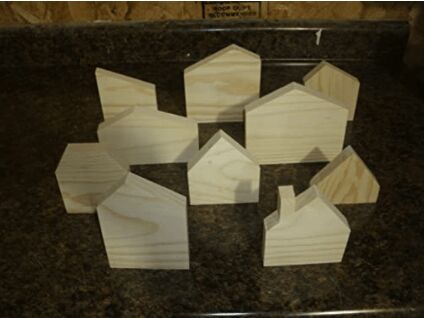
So first, you need your wooden house. It’s fun if you can cut your own wood into varying shapes and heights! My husband cut several for me and it’s possible that you could get them cut where ever you purchase the wood. If not, you can find several unfinished craft houses at your local craft store or Amazon! If you’re making several for a village, pick out 3-4 paint colors that you want to use. I used DIY paint which is a clay based chalk paint. It’s all natural and highly pigmented and covers just about everything without priming!
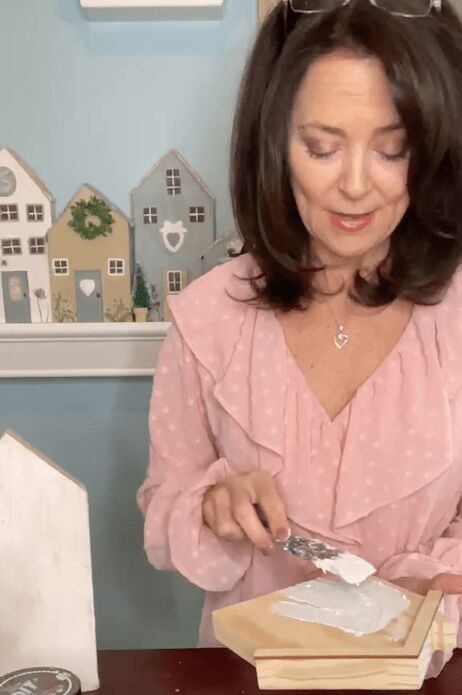
STEP 2: SPREAD EMBOSSING MEDIUM
Let’s start with spreading Embossing medium on your house! This isn’t necessary, but I love the texture that it adds! Using a putty knife, just spread it on like you were icing a cake! If you do this step, you’ll need to let this dry before painting. While waiting, you can go ahead to Step 3 and make your rooftop!
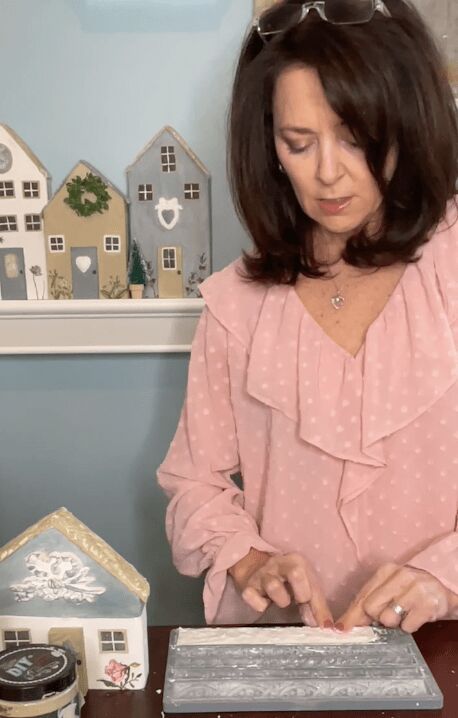
STEP 3: EMBELLISH ROOFTOP
I used the Trimmings 2 mould from Iron Orchid Designs. The shortest “trim” works well for this because it’s a good width and length! The detail is really pretty on this one too! Using a little paint brush, brush a little corn starch in the mould before adding the air dry clay. Press the clay into the mould, remove any excess with your thumb, then bend mould and release the clay image.
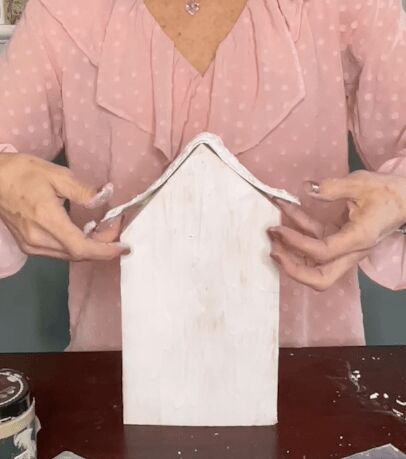
Glue it down immediately after removing from mould and let dry. (Note: you can speed this up a little by drying with a heat gun.)
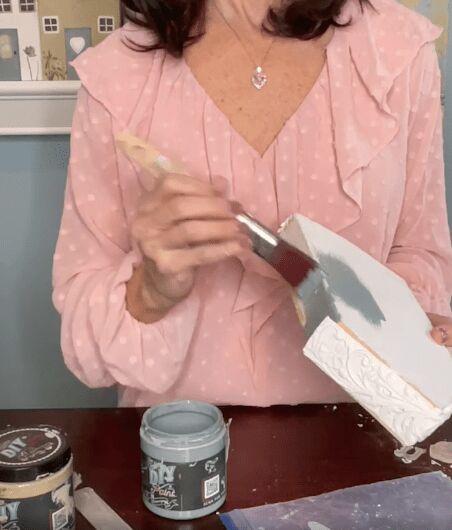
STEP 4: PAINT
Choose your paint color and paint your house. I used a different paint color for the roof and door.
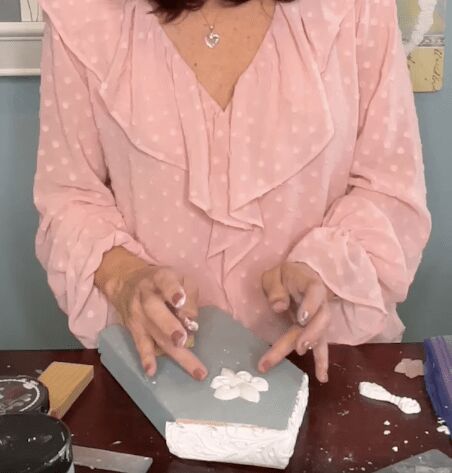
STEP 5: EMBELLISH
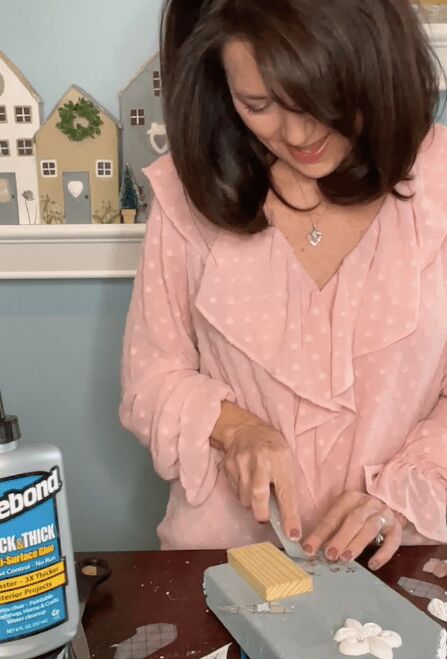
Here’s where it gets fun! There are just so many things you can do! For the door, I used a little piece of wood, then added different moulds here and there, as well as small floral transfers! Something else that’s really cute are the little wooden flower pots! Press a little clay into the pot and stick an artificial flower in it! So cute
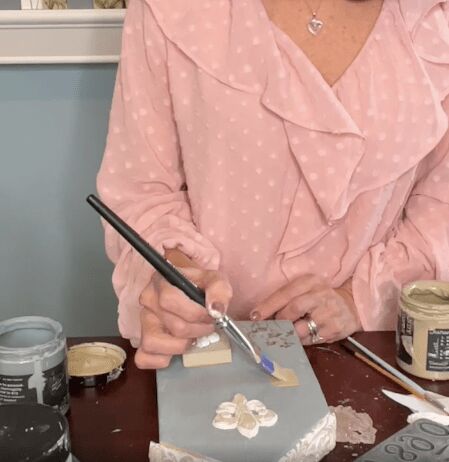
Here I'm adding a few floral transfers!
STEP 6: SEAL
To seal my houses, I used clear wax by DIY. Just brush it on and let dry. For more dimension, you could add a colored wax as well. You could also use a polycrylic.

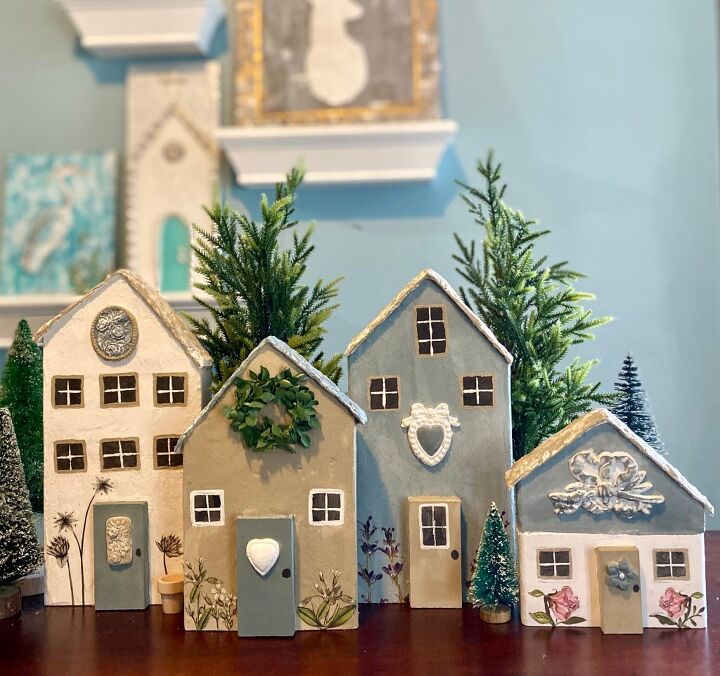
I just love how they turned out! What do you think? Will you try it?
You could do themed villages to match your decor or decorate for different seasons!
I did this whole process on a FACEBOOK LIVE and you can catch that here!
LET ME KNOW IF YOU TRY IT. FEEL FREE TO ASK ANY QUESTIONS YOU MAY HAVE…I ALWAYS LOVE HEARING FROM YOU. IT MAKES MY DAY!
If you have a passion for creating but struggle with overwhelm or confidence, I can help! Check out my monthly group called Creative Junkies! I would love to have you join me and several other Creatives just like yourself!
Happy Creating friends!
XOXO Joanie


Frequently asked questions
Have a question about this project?
How to make a wooden cover for my glass stove?