


How to Make DIY Milkglass
I’m not really sure when my love for vintage started, but when I figured out how to turn ordinary clear glass into a DIY hobnail milk glass project, it was magic! This simple tutorial will show you how to make your own milk glass with the hobnail pattern using inexpensive Dollar Tree supplies. Before you know it, you’ll be wanting to add this look to everything like me.
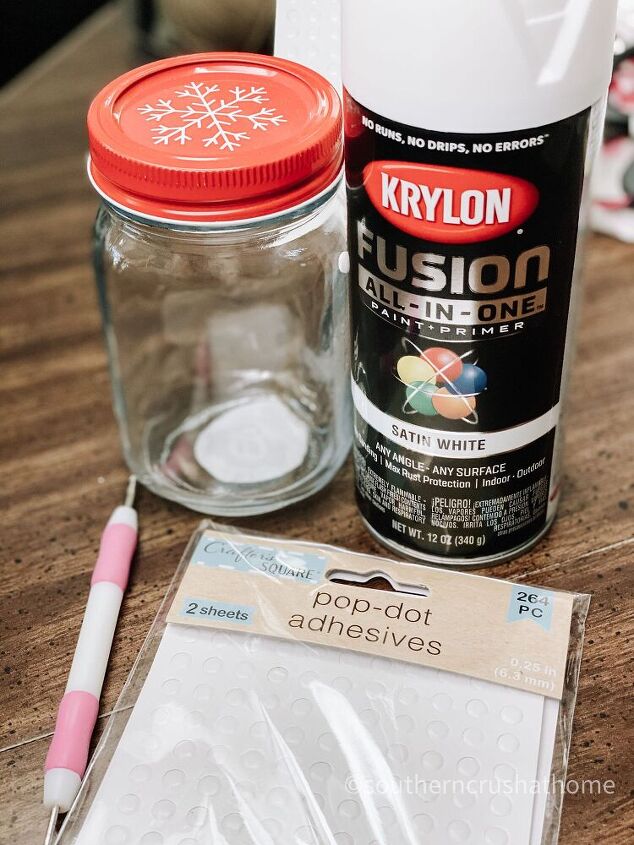
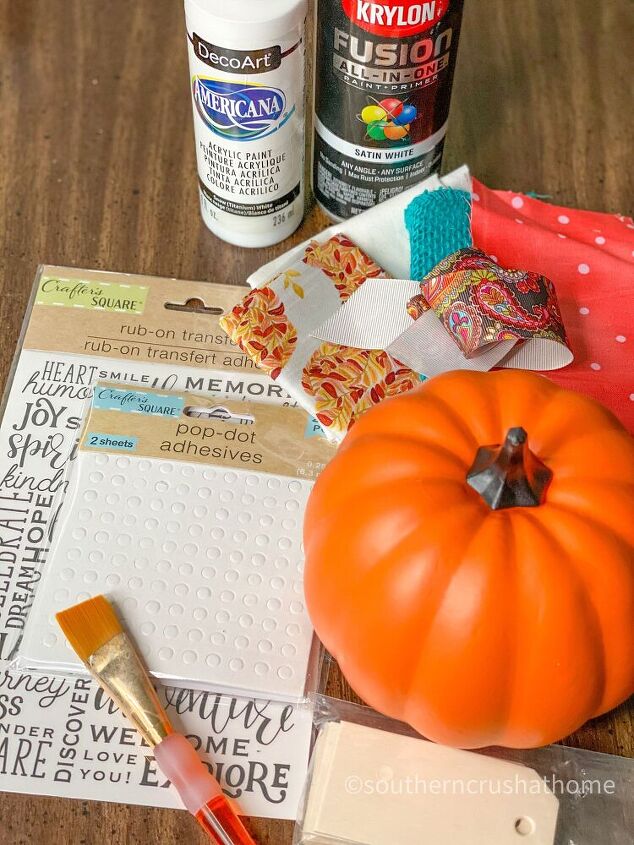
The supplies for this project are so simple and easy to find. The jar came from a dollar store, I already had the paint, and the pop dot adhesives were from the Dollar Tree.
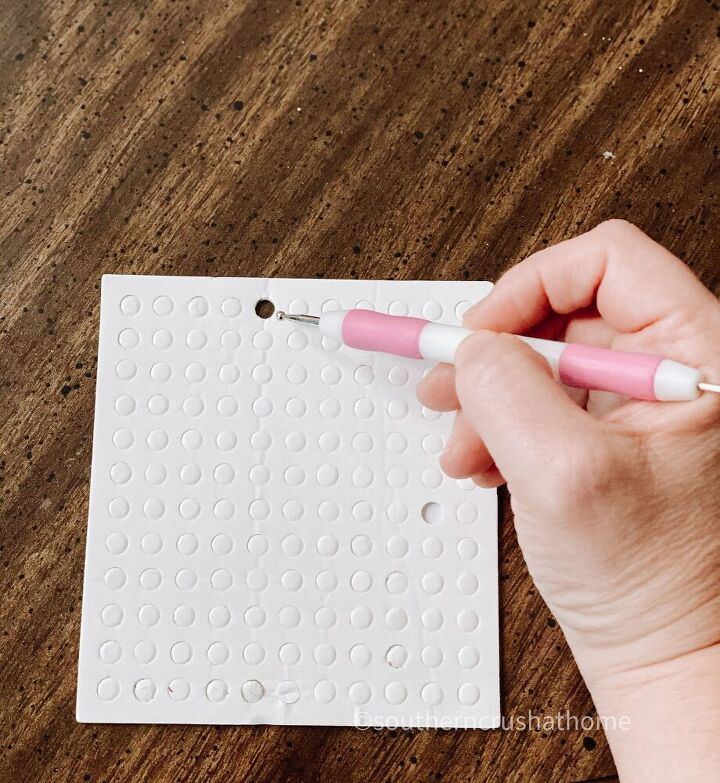
QUICK TIP: Use a stylus to help you manipulate the little pop dot adhesives. Poke your stylus through each hole to remove one pop dot adhesive at at time.
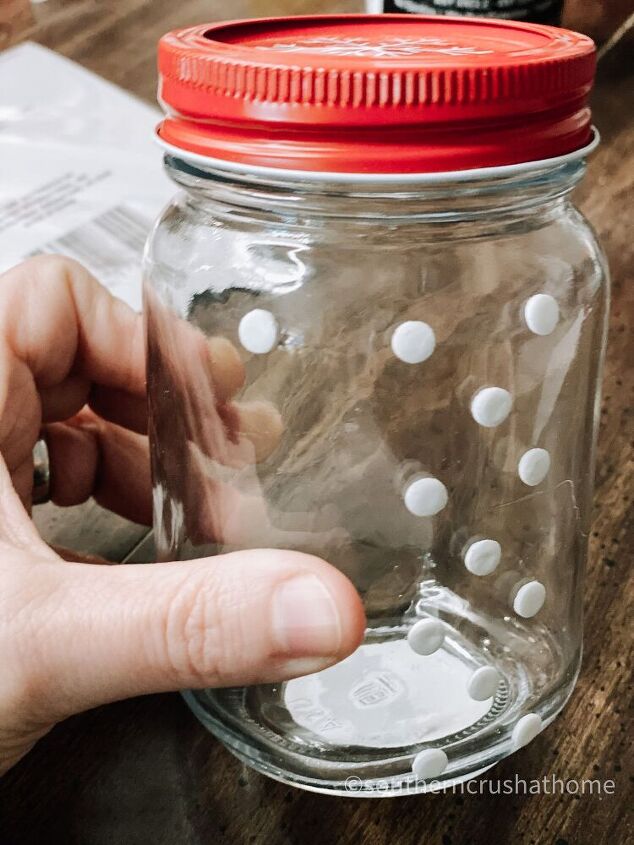
Pop Dot Adhesives are like little stickers. Apply them to your jar one at a time in a triangular pattern as shown above.

Spray paint the exterior of the glass jar over the pop dots.
This can be done before applying the pop dots if you prefer. However, be sure to let the paint dry thoroughly prior to adding the dots if you choose to paint first.
Quick Tip: try using an old cardboard box to catch any overspray when painting.
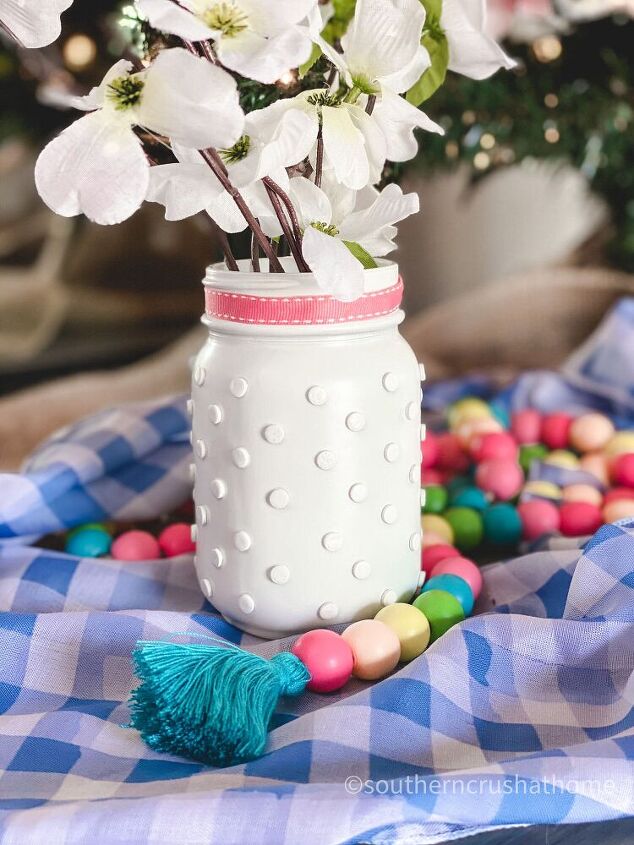
I love how this turned out all decorated with a pink ribbon! How about you?
It was so fun and easy to do, that I did it on another project for Fall!
You won't believe how it turned out!
It's unbelievable the transformation this pumpkin makes from orange to milkglass!
I promise it's addicting and you'll be applying this technique to everything you can find around the house.
If you like pumpkins like I do, you may like some of these PUMPKIN PRINTABLES here in my Printable Library.
Resources for this project:
See all materials


Frequently asked questions
Have a question about this project?