


How to Upcycle a Glass Jar | Easy Lamp Project

Have you wondered how to upcycle a glass jar that you found while you were out thrifting? Let me give you an easy idea that is functional for your home!
our vendor locations
You might not know this but we are vendors in two locations in our little state of Delaware. One shop is in Greenwood, Delaware (Wilderlove Handmade and Vintage) and the other is in Milton, Delaware (The Mercantile at Milton.)
Obviously, I frequent both of these stores as I bring inventory in and out of our spots.
And, yes, I shop at both of these stores! In fact, when I take my monthly vendor turn at The Mercantile, I like to shop while I am helping customers!
Just kidding….sorta. 🙂
It all comes with the job! Woohoo for shopping and working at the same time!
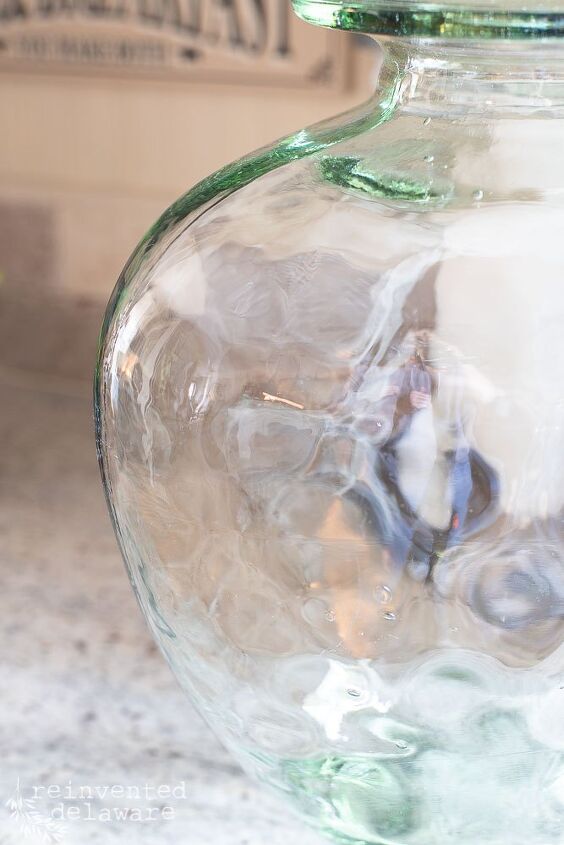
thrifted glass jar
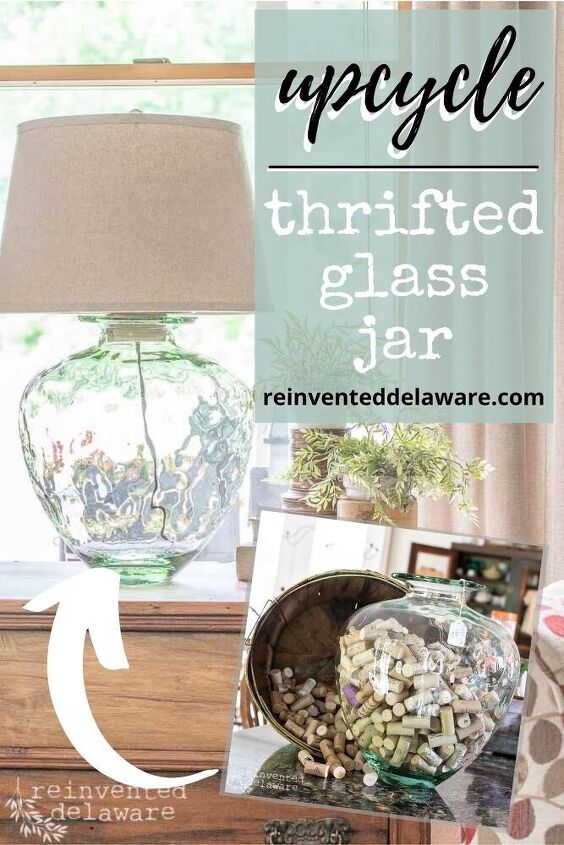
It was my turn at the Mercantile and that’s when I came across this gorgeous green glass jar.
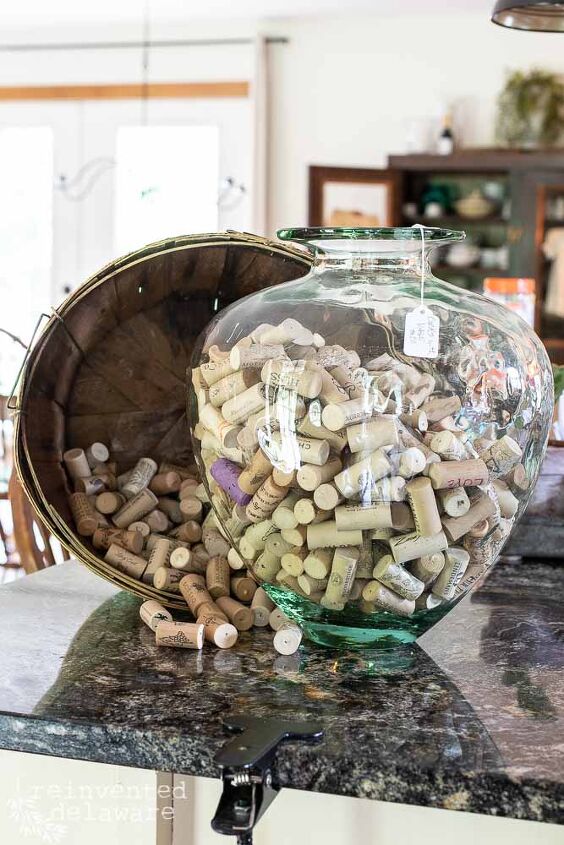
It was filled to the brim with wine corks.
But that isn’t what interested me.
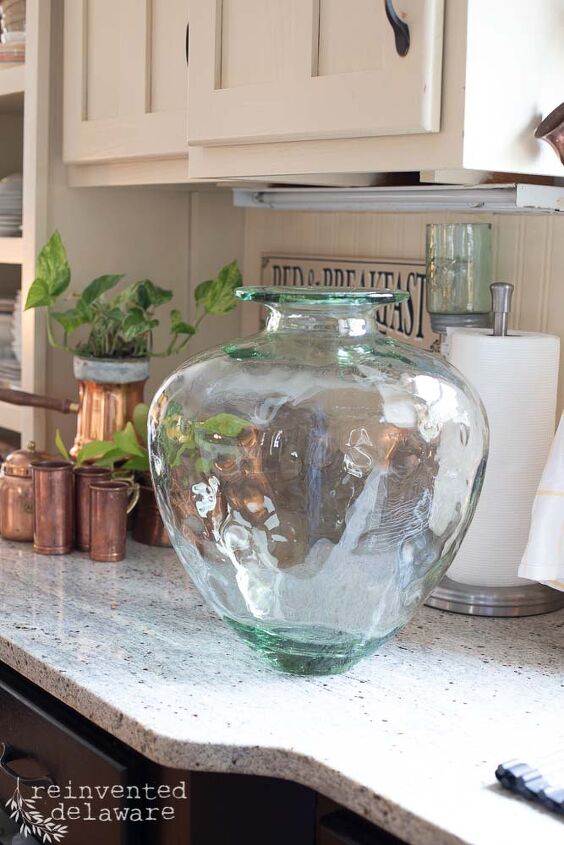
It was the glass. I kinda have a thing for glassware. Especially antique, vintage or just plain old glass.
The thick glass especially has such a beauty to it.
what can I do with a glass jar?
And this glass jar did not dissapoint.
But what could I do with it?? I couldn’t justify the purchase without coming up with an idea of how to upcycle this glass jar. I really only try to purchase items when I have a use for them.
And this glass jar had no use unless I could find a way to upcycle it.
how to upcycle glass jars
Another green glass jar had a lamp fixture sitting on top of it at The Mercantile. The hardware of the lamp was attached to a wood disc and wasn’t really secured very well.
But that got me to thinking. Could we improve on this idea?
Of course, we could! So I bought the glass jar filled with wine corks and left the other glass jar. Honestly, I might go back and get the other glass jar and fix the hardware on it!
glass jar upcycle ideas
As soon as I got home that day from taking my monthly vendor turn at The Mercantile, I started telling my hubby about the other lamp and my idea for this upcycled project.
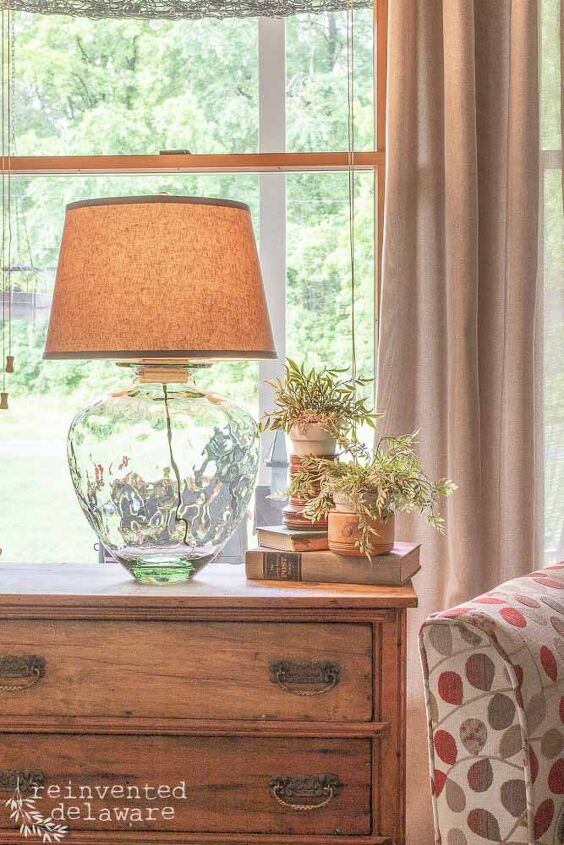
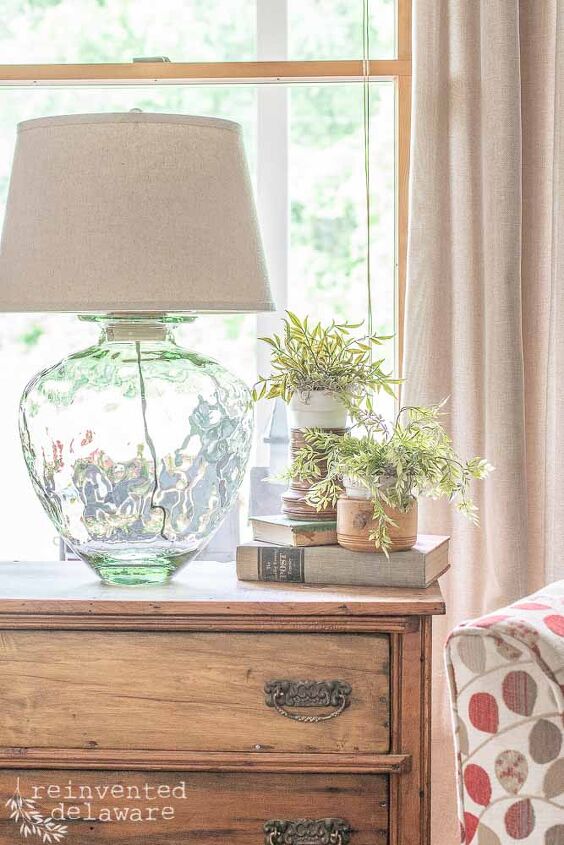
That night, he headed out to his workshop and about two hours later came back with the finished upcycled glass jar lamp!
There are no in-process photos because he got to work on the project with such focus that he didn’t think to snap any pictures.
Honestly, I didn’t seriously think about sharing this project until I saw the finished lamp and then I knew I had to show you!
supplies to upcycle glass jar into a lamp
Here is a quick list of the supplies we used for this upcycle project:
- hot soapy water
- diamond-tipped drill bit ( also called Carbide Tip) large enough for the cord
- power drill
- spray bottle of water
- a small chunk of wood (you could use a purchased wood disc)
- leftover lamp parts including shade and harp
- basic electrical knowledge
- safety glasses & gloves
thanks for shopping my links!
He drilled a hole in the glass jar near the bottom with the diamond-tipped specialty bit very slowly while keeping the area damp with the spray bottle.
I cannot stress enough to TAKE YOUR TIME!! This step is slow and steady and in the end, will be worth it. The glass can obviously break so wear safety glasses and gloves.
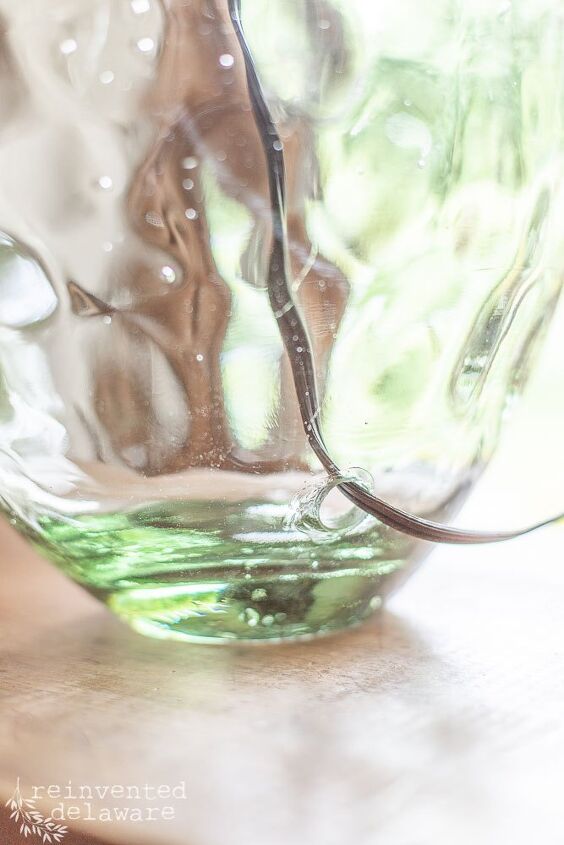
**Hubby has drilled glass many times before so he is experienced with this process. Please take all the logical precautions when doing this type of project!!
steps to upcycle glass jar into a lamp
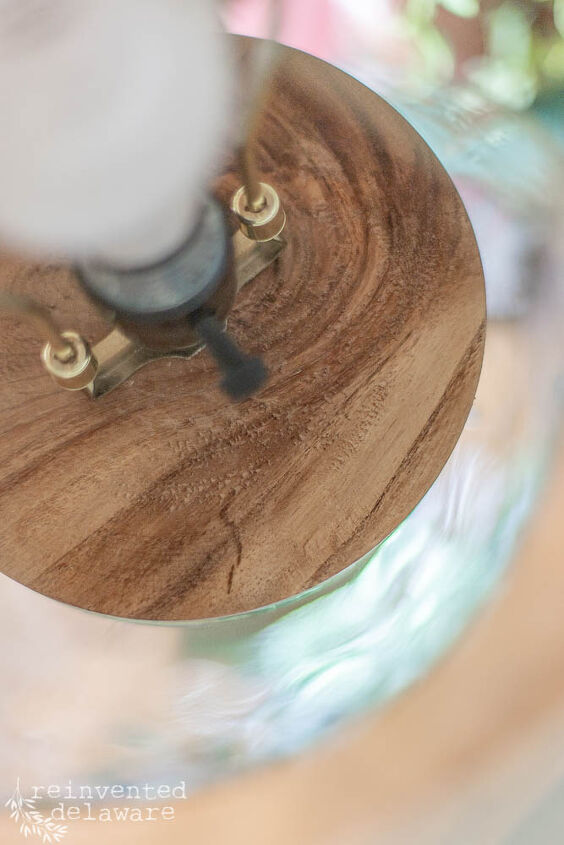
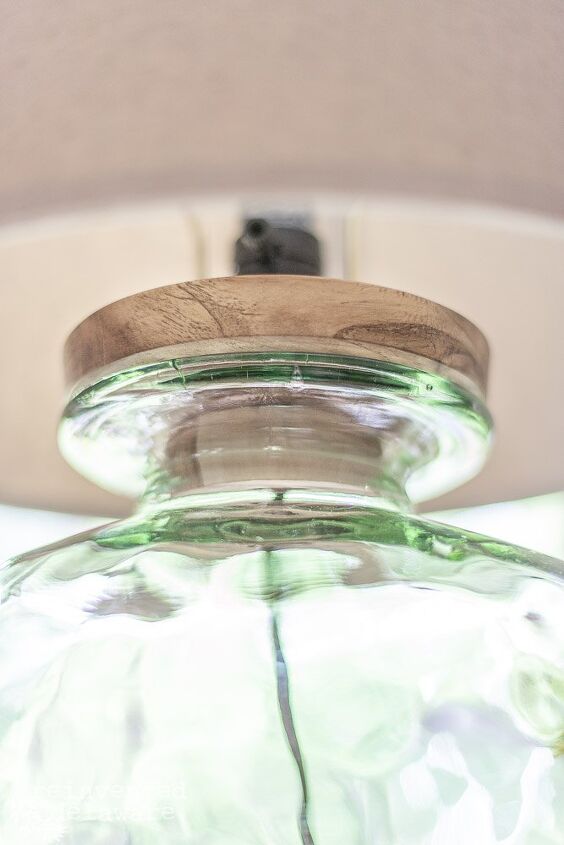
He hand-turned a chunk of wood on his woodturning lathe into a disc that would fit on top of the glass jar for the base. He even turned the piece that would fit into the neck of the jar to create a snug fit.
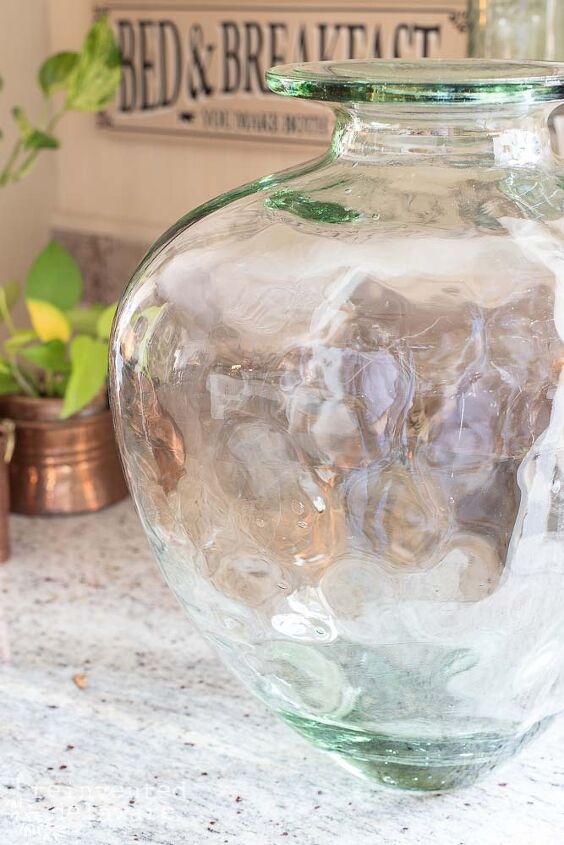
Then he drilled a hole in the center of the disc that would accommodate the neck of the lamp socket. Look closely at the neck of the jar and you will see what I mean.
Seriously, if I had pictures this would be easier to write! Explaining the steps is harder that it seems. We will do another similar project soon and include pictures and maybe even a video!
Next, he cut the plug-in part of the cord off so that he could insert the cord through the hole. And then he threaded the cord through the hole in the wood disc, then out through the hole cut in the glass.
Lastly, he reattached the plug to the cord. Remember, he completely understands how electrical things work so there is no danger of an electrical problem occurring!
Once he was finished, he took it all apart and I thoroughly washed it with hot soapy water. Drilling glass leaves a powdery residue. Hot soapy waters removes it easily!
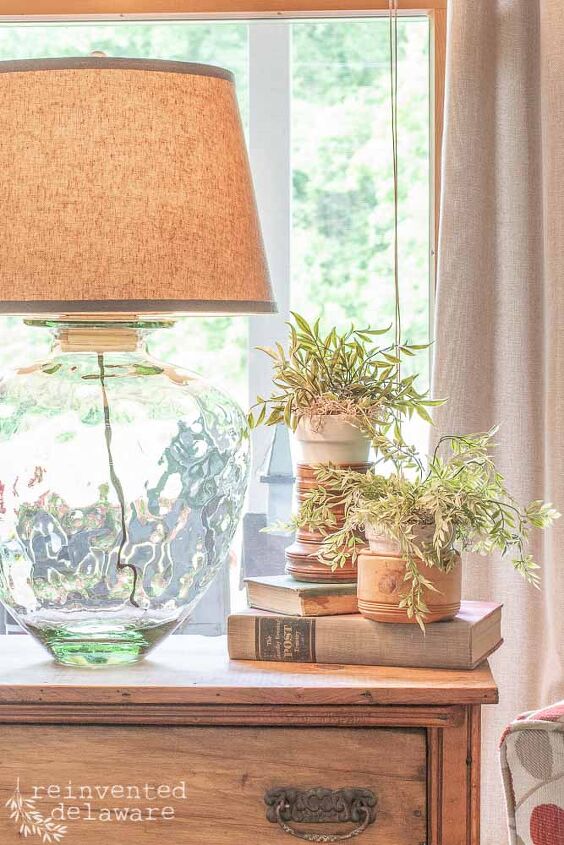
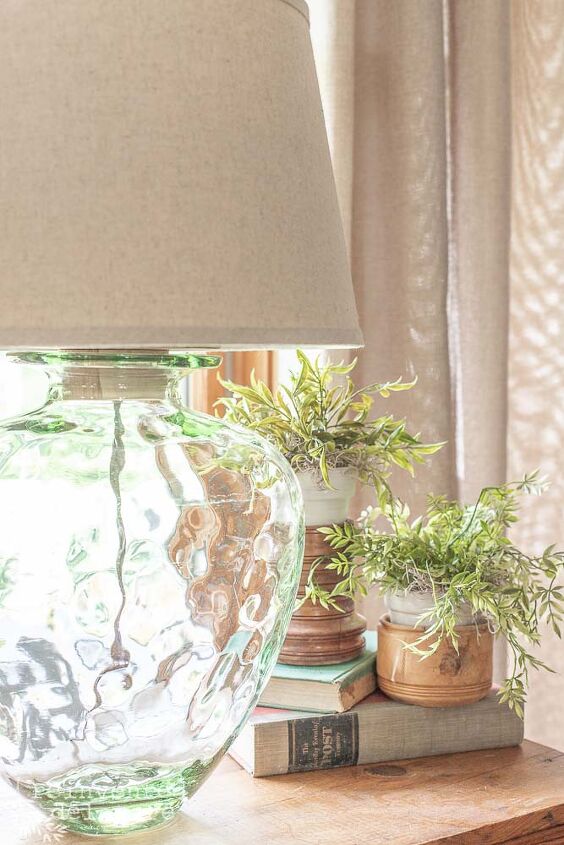
Didn’t it turn out so pretty?? The lamp that I used the electrical parts from, including the shade, came from one of our lamps that I thought looked tired.
Let me know your thoughts about this upcycled glass jar project!
thanks for stopping by!
We would love you to join our journey over on Instagram and Facebook! You can also find more inspiration on our Pinterest page! We’re always pinning fresh ideas!
Looking for a few budget-friendly ways to update any room in your home? Sign up below and I’ll send you my top five ideas!
Until next time…

Comments
Join the conversation
-
It looks fantastic!!! Thanks for sharing your hubby did a great job! I love it


Frequently asked questions
Have a question about this project?