Large Paper Wall Flowers

Julien K., Hometalk Team
by Julien K., Hometalk Team
6 Materials
$12
30 Minutes
Easy
Are you wondering what to do with that empty space on your wall? We've got a great solution for you. Why not try these gorgeous paper flowers? They can be created in any size, style or color. We promise they'll pretty up your home in no-time!


We want to help you DIY, so some of the materials in this post are linked to sellers. Just so you know, Hometalk may collect a small share of sales from the links on this page.
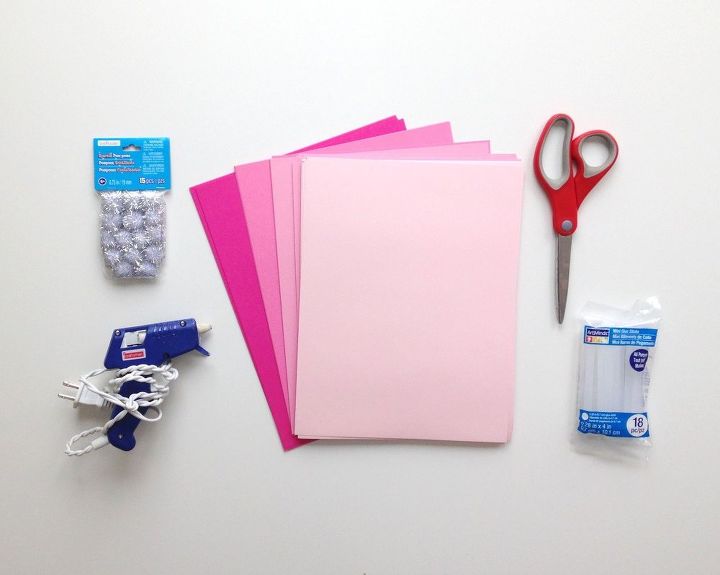
SUPPLIES:


- Cardstock (approx. 30 sheets for a large flower)


- Pom Poms (medium)


- Hot Glue Gun


- Hot Glue Sticks


- Scissors


- 3M Command Strips (for hanging - one per flower)
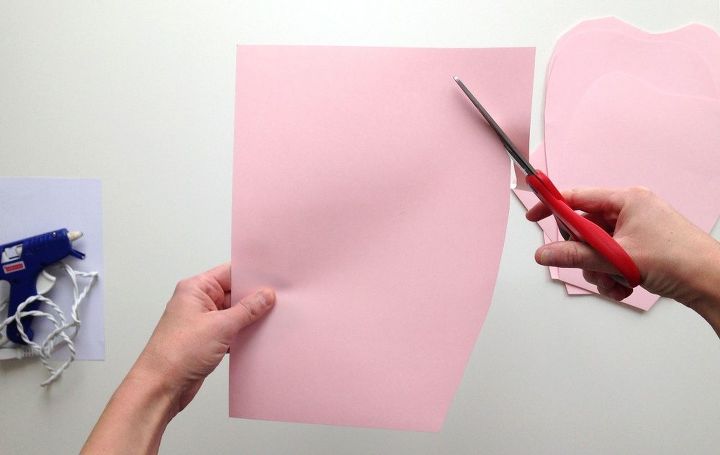
Step 1: Cut out large-sized petals.


Take your first sheet of 8 1/2"x11" cardstock and cut out a large petal shape. I love these pink colors I got on Amazon, but purples or blues, or any color you like, will work for this. Continue doing this for 7 sheets of cardstock. You want your petals to fit the entire sheet of paper. Do not worry about making them look the same. Irregular petals will make your flower look more realistic!
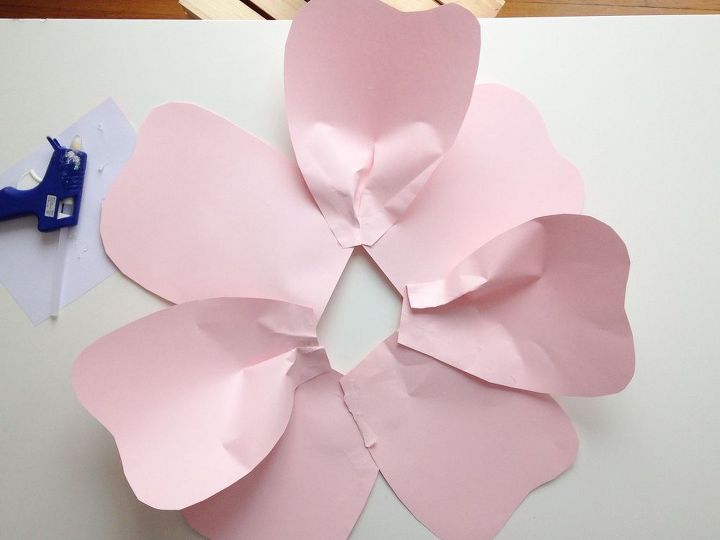
Step 2: Glue your large-sized petals together.


One by one, glue your petals to each other, creating a circular shape. This will be the base of your flower. Some petals can lay flat, whereas others can be pinched in the center (before gluing) to create a three dimensional look. This will be your base of the flower.
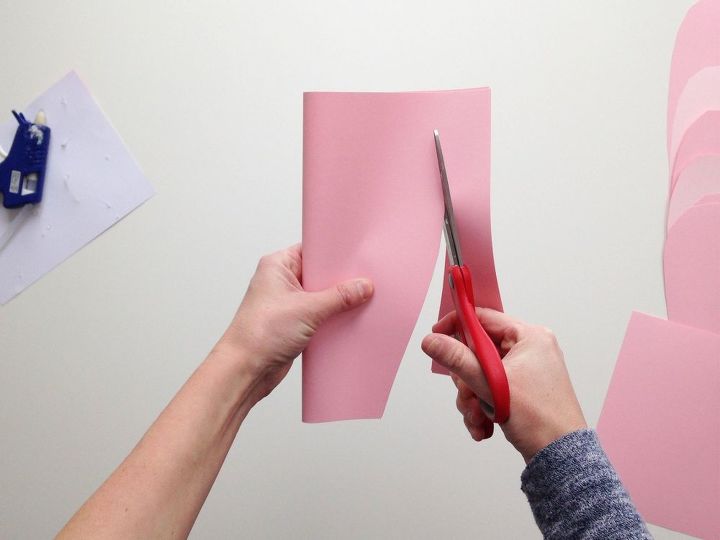
Step 3: Add your medium-sized petals.


Count out approximately 8 pieces of cardstock. Fold one sheet in half and cut out your next set of petals. Be sure to make these slightly smaller than your first set. I used cardstock that was a shade darker than my first petals to create a more realistic look like the center of a real flower, which is why I love this collection. Continue cutting until you have 8-10 medium sized petals.
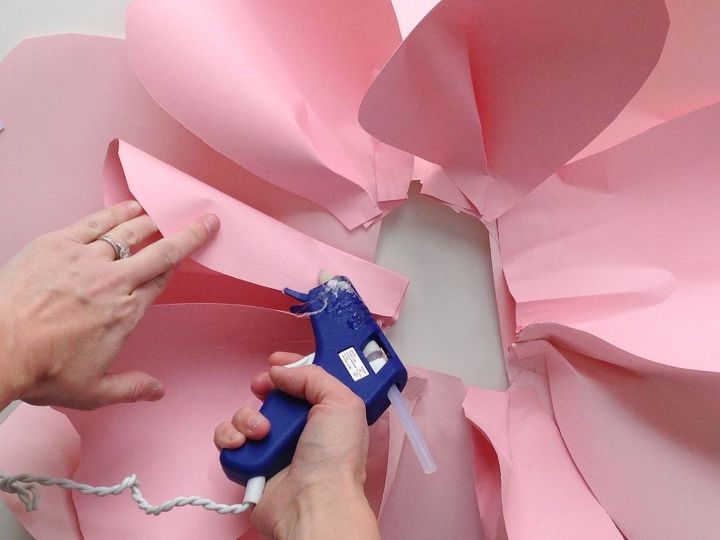
Step 4: Glue your next row of petals onto the base.


Take your medium sized petals and glue them to the center of the base one-by-one. Use the same method as you did with the large sized petals. Pinch some petals in the center to create the 3 dimensional look.
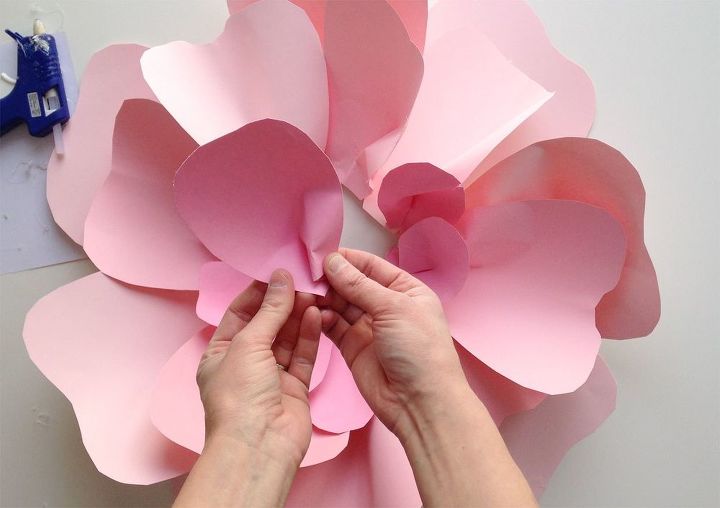
Step 5: Add your small-sized petals.


Using cardstock that is slightly darker than your medium-sized petals, fold one sheet into fours. Cut out a smaller petal shape. You should have 4 petals from one piece of cardstock. You want to cut out approximately 10 small petals. Glue your smaller petals in the same method you used with the larger petals to your flower base. Again, don't forget to pinch these petals for a realistic 3 dimensional look. This is KEY!
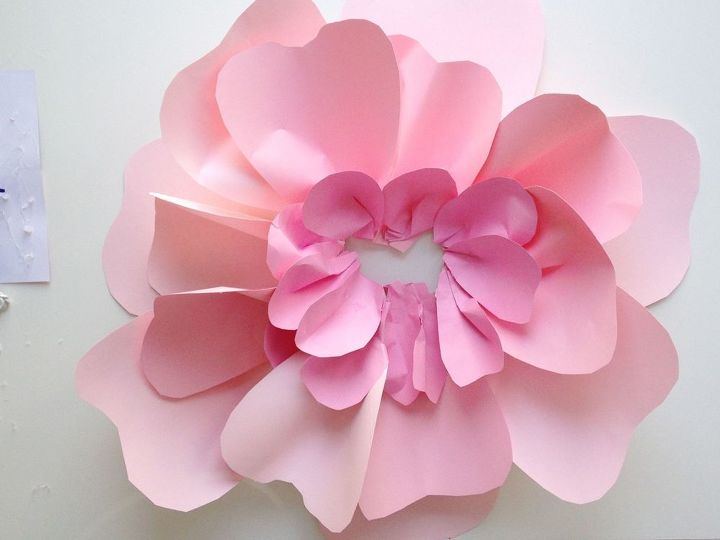
After all of your petals have been glued on, your flower should look similar to this.
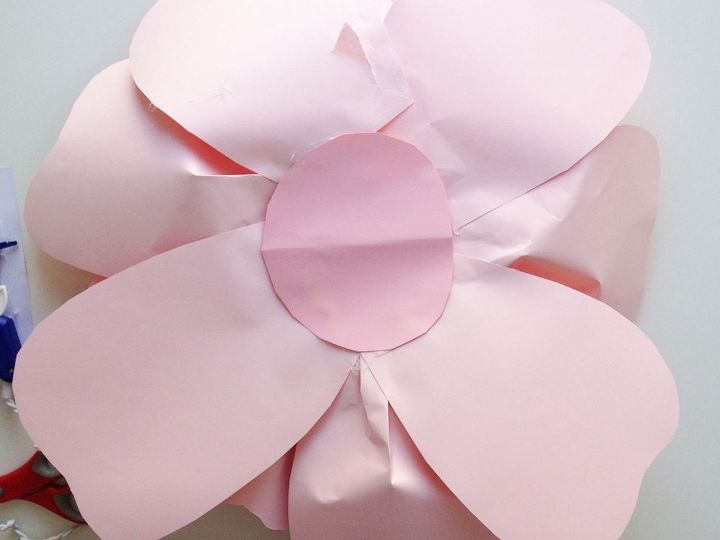
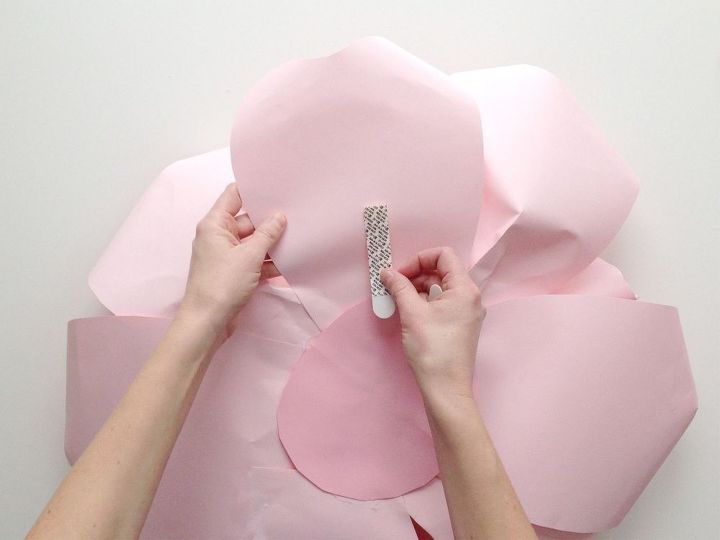
Step 6: Cover the hole.


Flip your flower base over to it's backside. Cut out a circle large enough to cover the space that was left. Don't worry if it's not perfect. This part won't be visible.
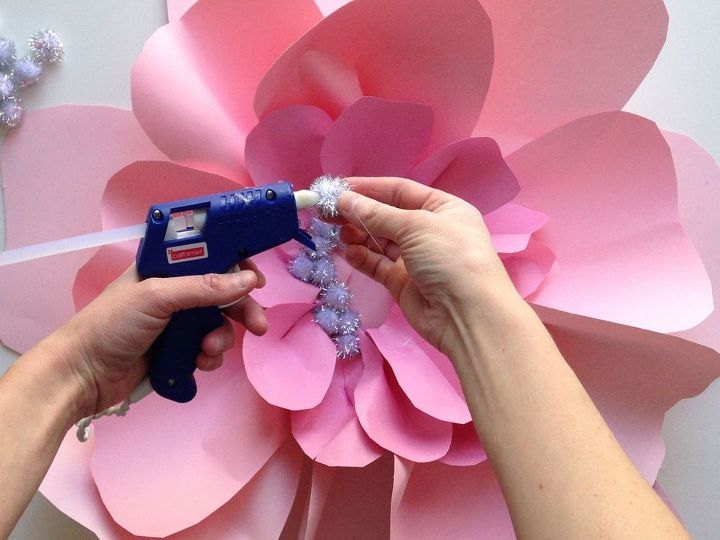
Step 7: Create your pom pom center.


Flip your flower back to it's front side. Using your hot glue gun, begin gluing your pom poms in the center of your flower, covering of any of the open areas.
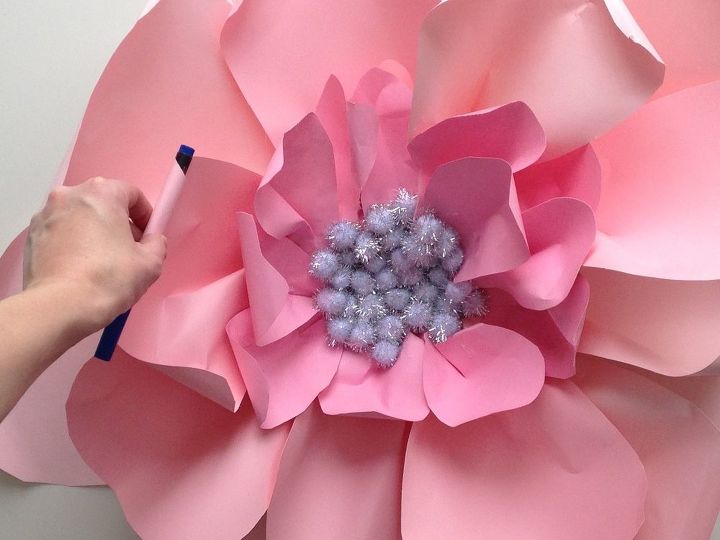
Step 8: Curl up the edges.


Using a round edge like a pen or a pencil, curl up the edge of each petal inward. Do this to all of the petals - large, medium and small.
Step 9: Hang it!


Flip your flower to it's backside and attach a 3M command strip. Follow the instructions of the strip to ensure you adhere to the correct side to the flower.


These 3M command strips are great! Not only are they able to hold the weight of these bulky flowers, but they are easily removable. Say goodbye to peeled paint and ugly marks on your walls. I would highly recommend these for renters who need to take things off their walls upon move-out.
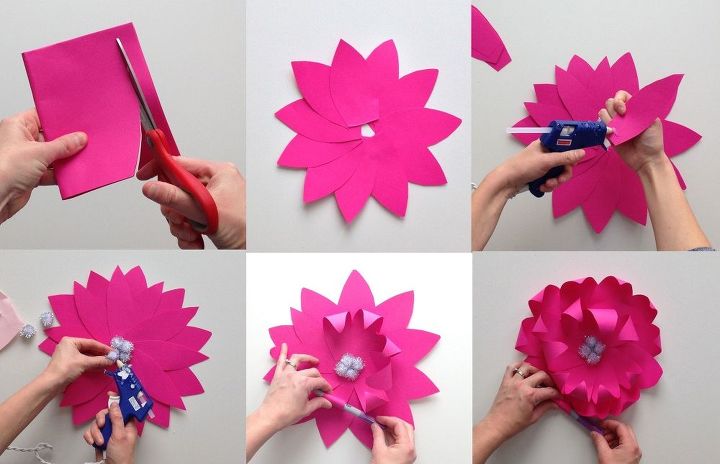
MEDIUM FLOWER: The possibilities are endless when creating flowers. Have fun with it and create your own combinations. This is a simple style using the same methods as above.


For this version, cut out 11 medium sized petals. This is a thinner shape (more like an oval) with a pointy tip. After gluing them together, cut out 10 slightly smaller versions of the same style petal. Next, glue those down to the base. Add a few pom poms to the center, and curl up the edges. Ta-da! You've completed a second flower in no time at all!
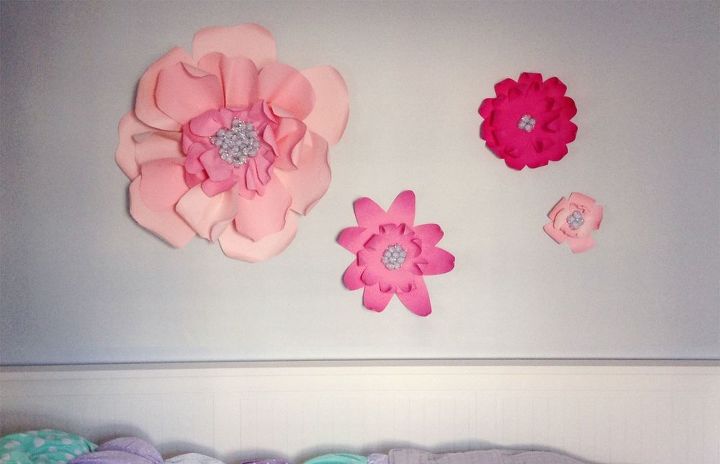
Wow! How easy was that? You can create a variety of different styles of flowers in all sorts of shapes, colors and sizes. The sky is the limit! I decided to hang a pattern of different flowers above my daughters daybed in her favorite shades of pink. I think they have such a fun and playful look - don't you? I can't wait to see what you come up with!
Suggested materials:
  • Cardstock   (Amazon)
  • Glue Gun   (Dollar Tree (on-hand))
  • Hot Glue Sticks   (Michaels)
See all materials
Frequently asked questions
Have a question about this project?
Comments
Join the conversation
3 of 20 comments
Next