


Making a Simple Lamp From Dollar Tree Items

As I recently discovered, making a simple lamp is easy. There’s no wiring involved and the lamp is ready to use in about ten minutes.
The whole idea for this project began with an item I found in Dollar Tree’s party supply section. In fact, everything I used here is from Dollar Tree, with the exception of the remote control puck light that I found at Dollarama.
Here’s how to make a simple lamp using Dollar Tree items. I think you’ll agree that it’s easy-to-do and useful, as well as pretty.
Supplies Used:
- Two 4-inch glass candlesticks
- 1 small round glass bowl (approx. 4″ tall)
- 1 round, fluted plastic bowl
- 1 remote-control puck light (Dollarama)
- Gorilla Glue or E6000
- craft paint (optional)
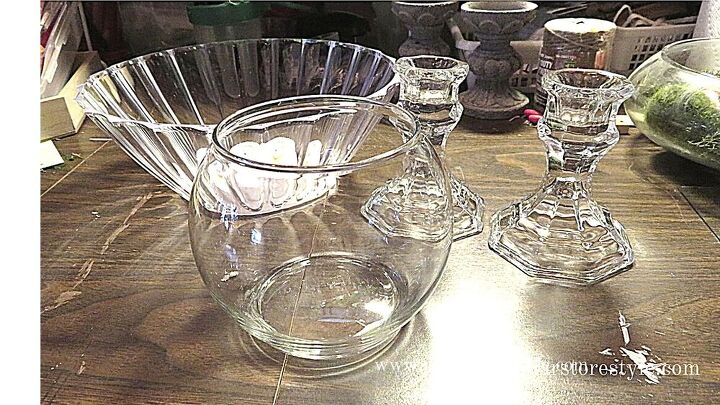
You can usually find all of these items at Dollar Tree. The fluted plastic bowl can be found in the party section there. When I saw it, I immediately thought it would make a great lampshade.
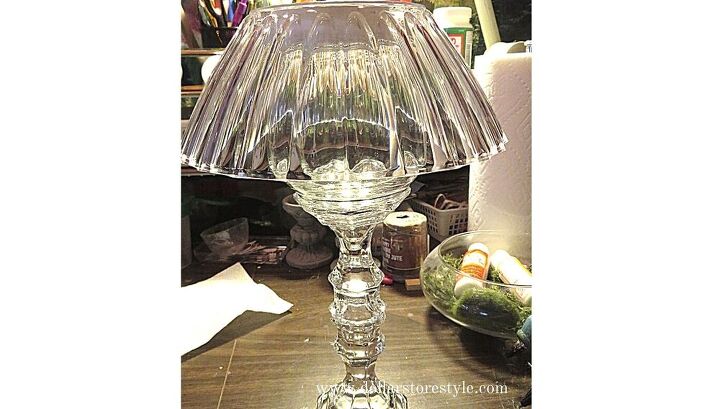
Glue Candlesticks Together
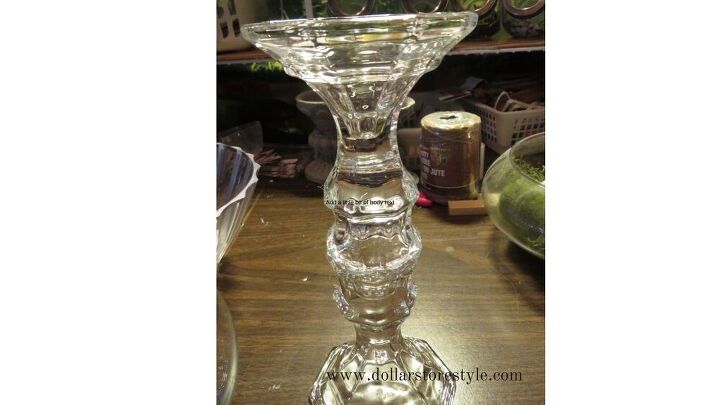
Glue the two candlesticks together so that the wide parts are on the bottom and at the top. This will form the base of the lamp and give it a pleasing shape.
Glue Bowl on Top
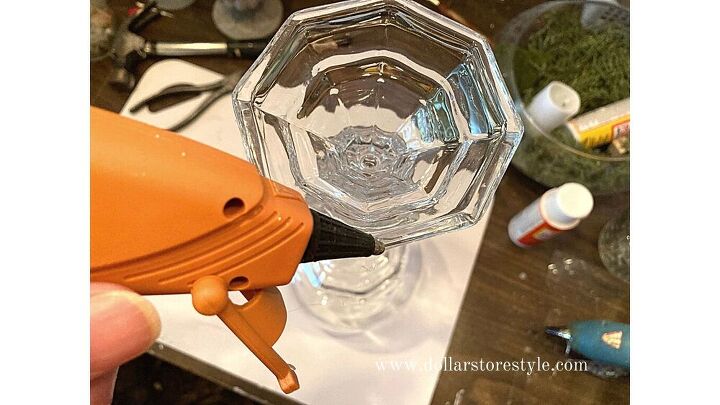
Add a generous amount of glue around the outside edge on the top of the lamp base. I used Gorilla Glue hot glue for this project.
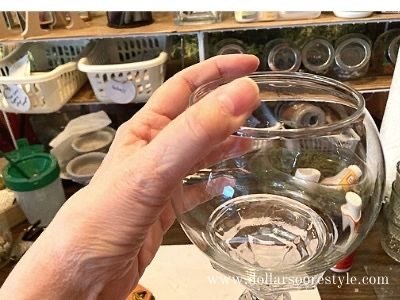
Then add the small bowl to the top.
Attach Puck Light
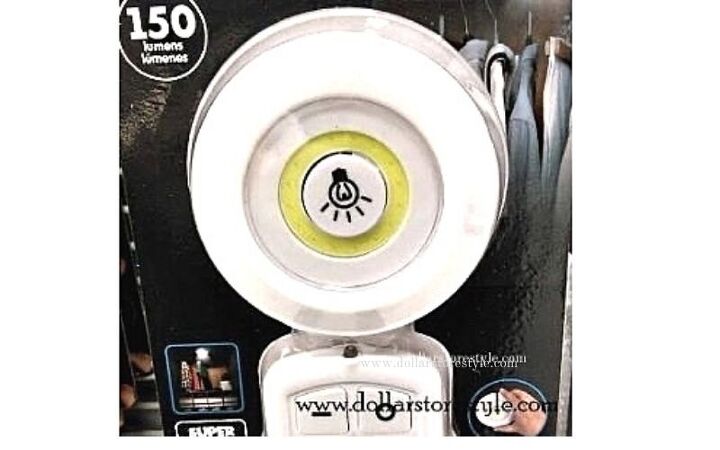
This is the puck light I used. These lights are battery-operated and are very bright. They make great additions under kitchen cupboards where you could use a bit more light.
It comes with a remote control, which is perfect for use with this lamp. If you haven’t got access to a Dollarama, you can find similar puck lights with the same style of remote on Amazon.
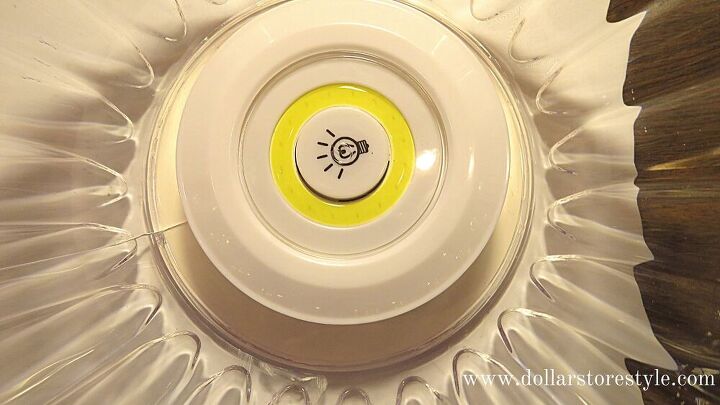
The puck light has a peel and stick backing and fits perfectly inside the fluted bowl.
Paint to Hide Puck Light
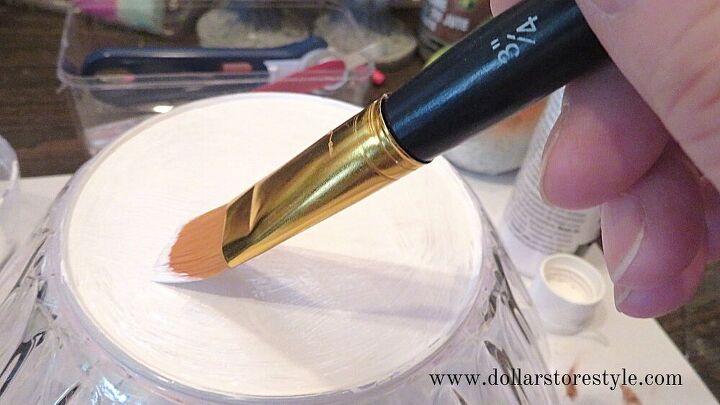
As I didn’t want to see the back of the puck light every time I looked at the lamp, I decided to paint the outside bottom of the bowl. I used an acrylic paint and gave this section two coats.
You can, of course, paint the entire lampshade or, indeed, the whole lamp, if you so choose, but I liked the crystal-like way it looked without paint.
Benefits of a Remote
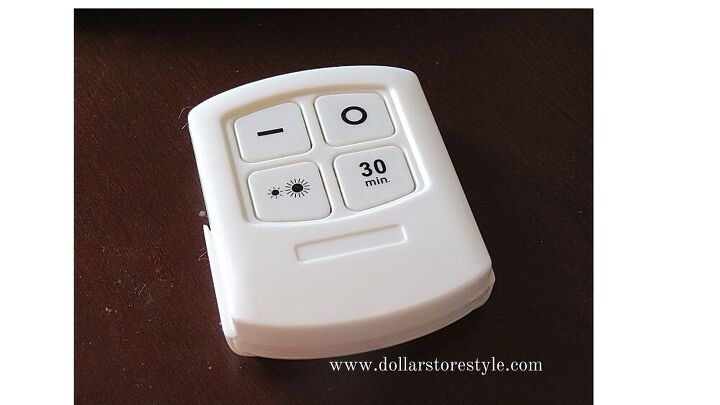
The remote control makes turning the lamp on and off very easy. You can, of course, use the puck light by pushing the middle on and off, like any other puck light. However, the remote gives you the options of a 30 minute timer and two brightness settings.
The remote also comes with a peel-and-stick holder that you can attach to a wall or other surface, if you choose.
The Finished Lamp
The finished table lamp is about 12-inches tall. Without the lampshade, you could burn a candle in the bowl or use a battery-operated candle with the shade.
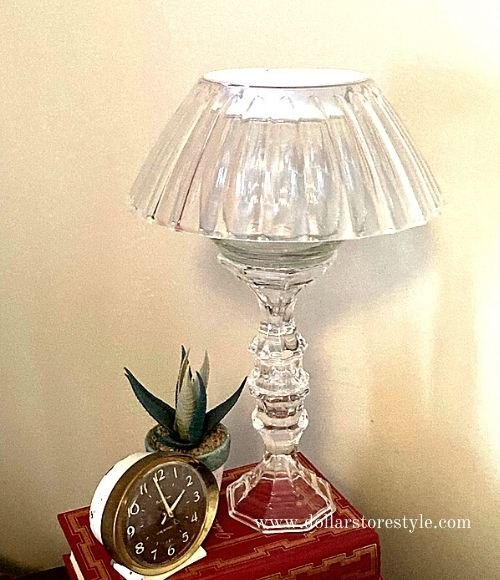
I love the way my new table lamp looks. It was so easy to put together and it’s proving very useful as my new bed-side lamp. You can’t read by it’s light, (I listen to audio books anyway), but it gives off plenty of light while I’m getting ready for bed and when I need to get up in the night.
I think I’ll make another one of these little table lamps for the table beside the front door. The builders of the house I rent didn’t see fit to add an electrical outlet there so this would be a perfect solution!
Resources for this project:
See all materials


Comments
Join the conversation
-
Very nice! So creative.
-
I'm impressed! Can't wait to make one!! Thanks for the inspiration.


Frequently asked questions
Have a question about this project?
Do you glue the fluted bowl down on top? If you do, how do you change the batteries?