


Thrift Store Wood Salad Bowl Makeover
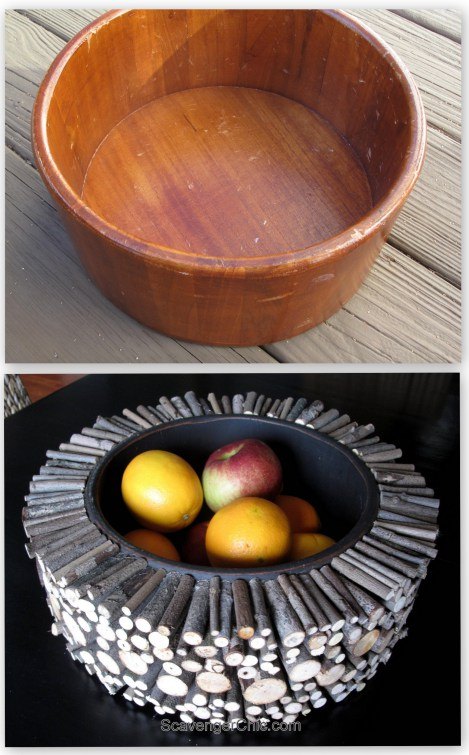
I have a fantastic project for you today. While this may look like a plain old ordinary salad bowl. It's not...it has unbelievable hidden potential. And if you're looking for that unique one of a kind perfect gift, it could be that too.
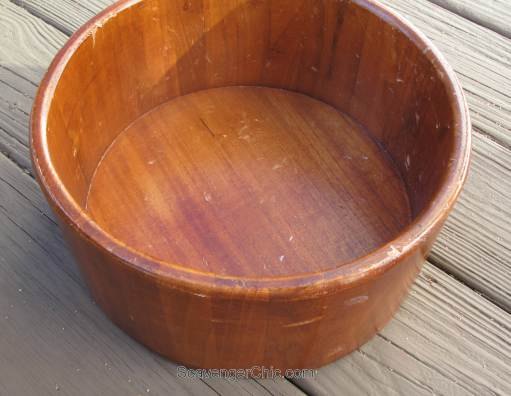
This project starts with a plain wooden salad bowl from a local thrift store. I absolutely love when I have a project in mind and I find what I’m looking for (the salad bowl) at the very first place I look.
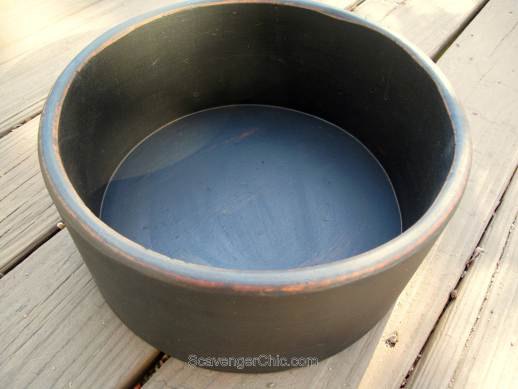
Before my salad bowl's extreme makeover, it got the chalk paint treatment. A layer of black chalk paint, followed by a light sanding on the edges and a final coat of antique wax.
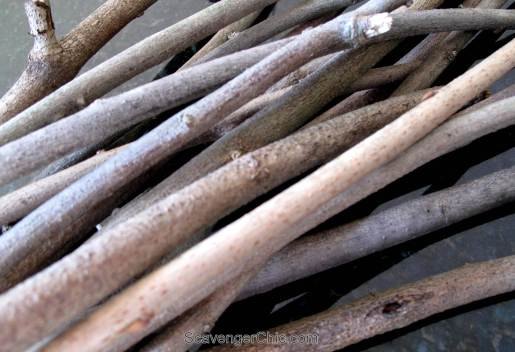
Now he's ready for his extreme makeover. Gather up a good supply of sticks, the less bumps and knots the better. Most of my sticks were cut from my wisteria vine. When I asked my husband to trim our wisteria away from the surrounding trees, he got a tad carried away and I was left with a huge pile of wisteria vines. I guess I need to thank him now.
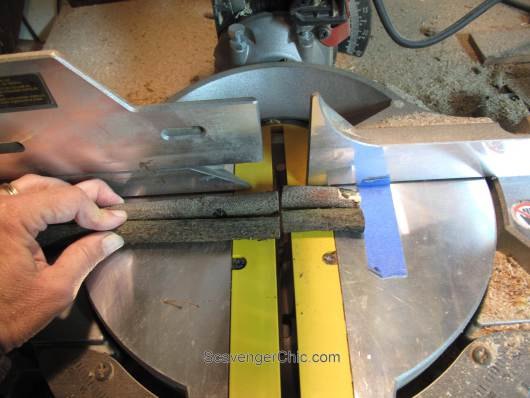
Trim all of your sticks to the same height. I found it easiest to cut the sticks on a chop saw cutting several at a time and using tape to show exactly how long each stick should be. Mine were two inches.
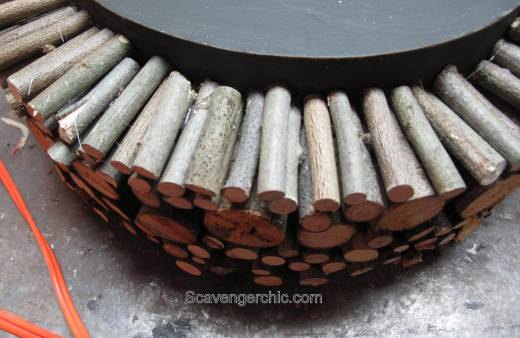
I started to use builders adhesive to attach the sticks but I could only work in one small area at a time, the sticks started to slide and the glue was extremely noticeable since it was white.
While this looks really time consuming, it only took a few hours. Most of that time was the chopping, gluing the sticks on goes super quick.

Want more details about this and other DIY projects? Check out my blog post!
Comments
Join the conversation
2 of 49 comments
-
So making this ! Tsk for the share!!!
-
Great look. Have a suggestion. Try Loctite construction adhesive. It adheres immediately but allows time to move around. I have found hot glue falls apart in about one season on so many items. Also try E-6000. It comes in white and clear and holds very well even outdoors. I was thinking about this as a planter.


Frequently asked questions
Have a question about this project?
I never “ wood” have thought to do this with a wooden bowl ! Kudos to you ! That would be a perfect centerpiece bowl for a cabin/ ski lodge !