


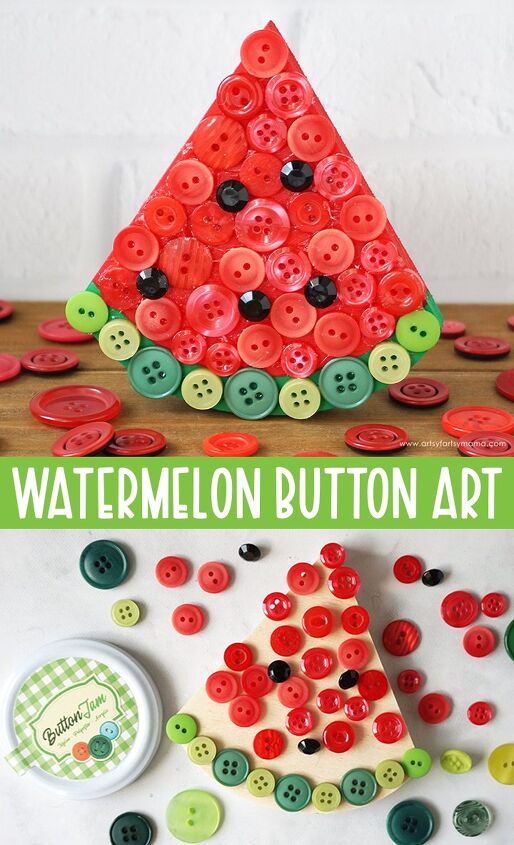
Watermelon Button Art
Add a "slice" of color to your summer decor with handmade Watermelon Button Art!
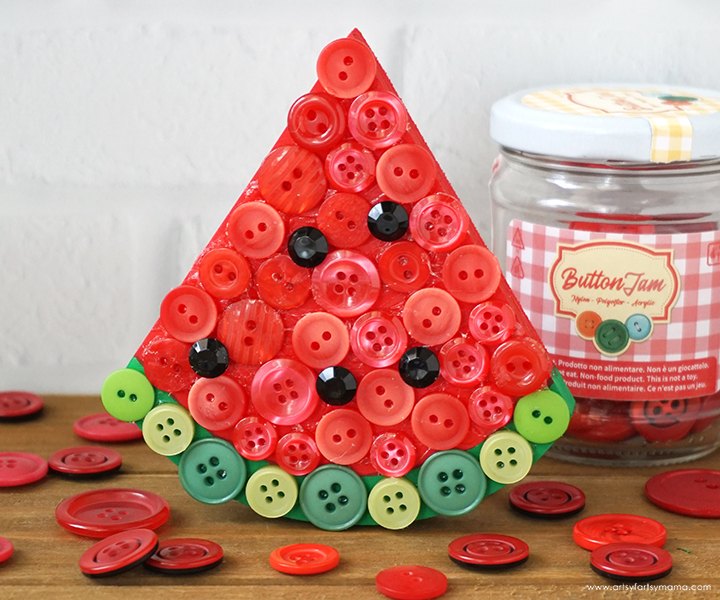
Summer's almost here, and I'm ready for it! One of my favorite things about summer is watermelon. I love eating it, and also love using it in summer projects. This Watermelon Button Art is a simple and quick project to make, and all you need is some wood, paint, and buttons. Not only does this watermelon project add a fun pop of color to your summer decor, but it is a great way to use up your button collection!
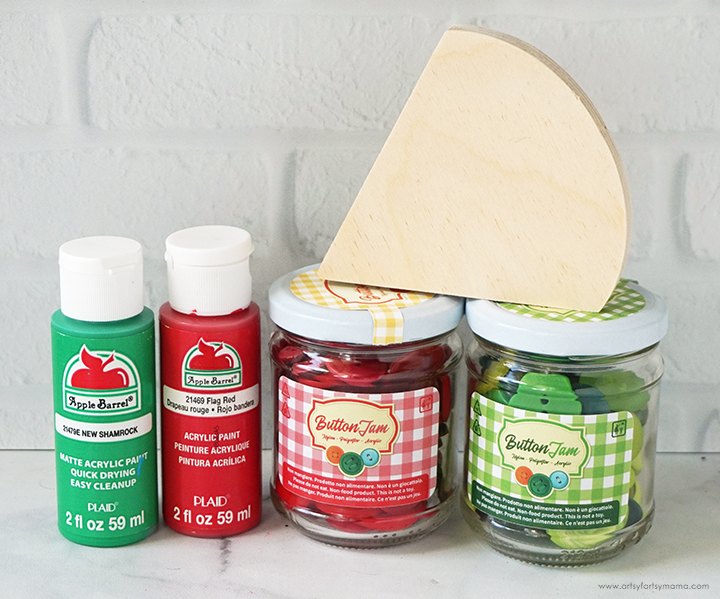
To make your own Watermelon Button Art, you will need these supplies:
- Wood Watermelon Slice
- Acrylic Paint - red, green
- Button Jam Button Mixes - red, green, black
- Clear Adhesive
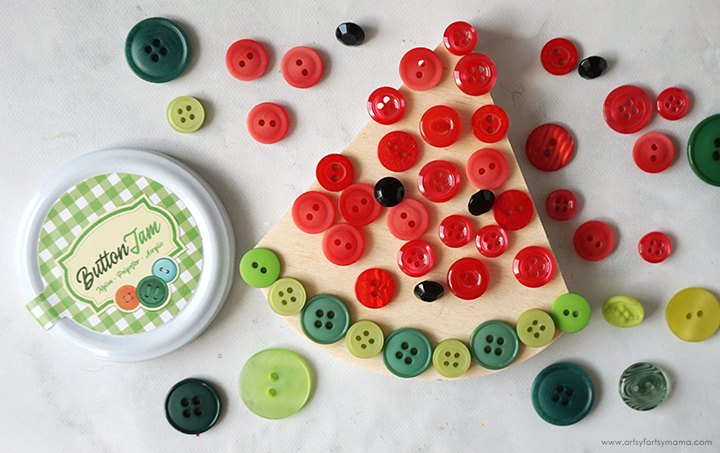
Before adding paint or adhesive, pour out some green, red, and a few black buttons. Arrange them on the wood watermelon slice to decide which buttons you want to use and how they will all fit. Once you have everything how you like it, get rid of the buttons that won't be used in the project. I also recommend taking a photo of the buttons in place. This is helpful to refer to when putting the buttons on later.
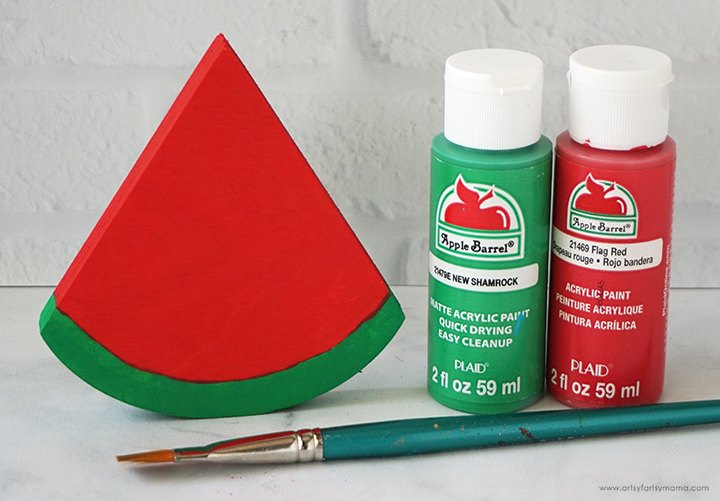
Use a small paintbrush add a line of green paint at the bottom of the watermelon. Use one of your smaller green buttons to determine the size of the line. Paint the rest of the watermelon with red acrylic paint. Because the color will only be seen peeking between the buttons, you will only need one coat of paint. Let the paint dry completely before moving on to the next step.
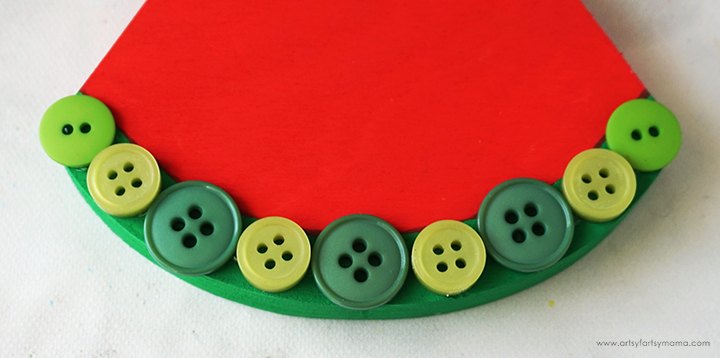
Apply a thin line of adhesive along the green portion of the watermelon. The adhesive will show through the button holes, so make sure that your adhesive is clear. Place the buttons, one at a time, over the adhesive and press them down gently. The adhesive takes a little bit of time to set, so there's time to make adjustments if needed.
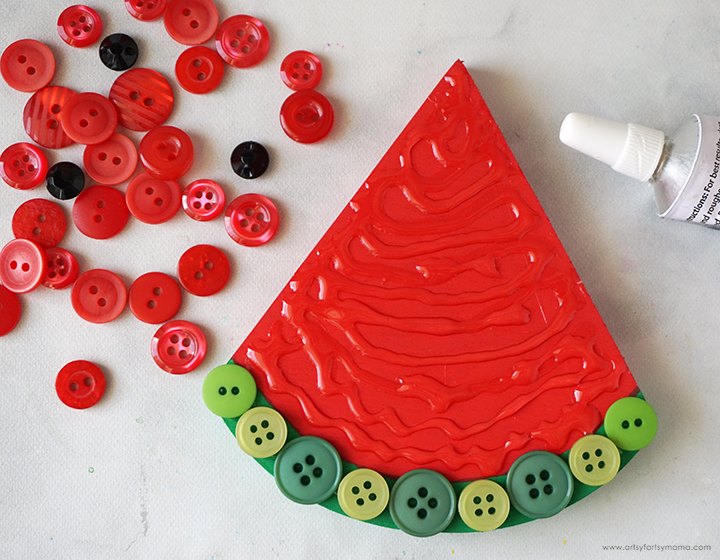
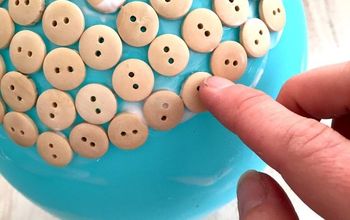
Next, it's time to place the red buttons onto the watermelon! You can apply adhesive to the wood all at once, or add it on a line at a time. Do what makes you feel comfortable. Place the red buttons on one at a time and gently press them into place. Once the red buttons are in place, fit the black buttons into any empty spaces. Alternatively, you could put black buttons on top of red ones.
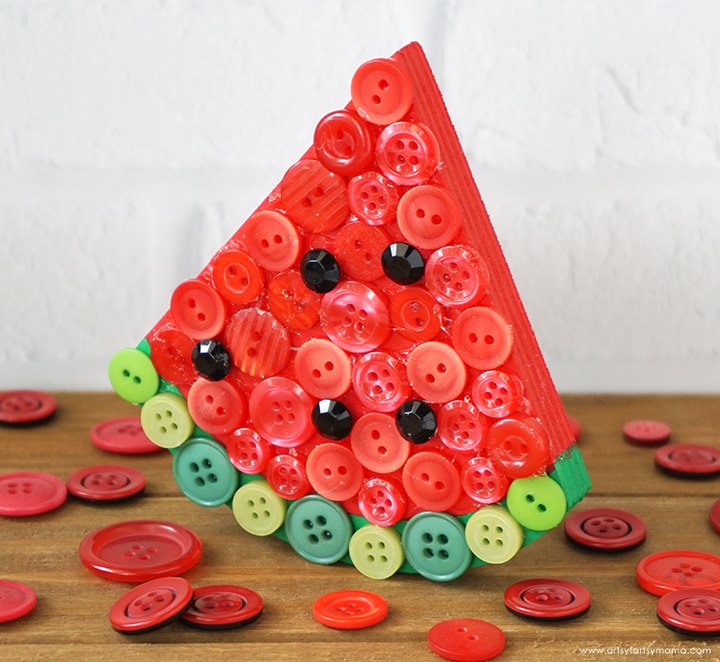
Let the adhesive dry completely (refer to package directions), and then the button-adorned watermelon is ready to put on display! This is such a simple and quick craft for a summer afternoon, and can be completed by practically anyone. I love how bright and colorful this watermelon is, and how it looks on my shelf with other summer decor.
As always, I would love to see your creations! Leave me a comment, or tag a photo on Facebook, Twitter, or Instagram!
Don't forget to Pin, Like, and Share!
Resources for this project:
See all materials


Comments
Join the conversation
-
ADORABLE!
-
I like the fact that it is quick and easy. My husband can cut me watermelon slices out of scrap wood that he has, and I have buttons, paint and adhesive. It is also a project which takes very little time. Plus one could make several and give some away to friends.


Frequently asked questions
Have a question about this project?
Perhaps by "right way" Flipturn simply meant that since the 'canvas' is already a cut shape (limited) and the buttons are color grouped, you end up with a version of the idea you had in mind even with kids doing it their way? You could, of course, dump out all manor or colors and let the kids 'do their' thing which would be fun too.