


$15 DIY Modern and Temporary Wallpaper Accent Wall

by
Michaell
3 Materials
$15
3 Hours
Easy
I'm a renter. There's a lot of advantages to renting, like, I can call my landlord when the plumbing acts up; but knowing the decorative work I do will not only be under appreciated, but also a strike against my chances of getting my deposit back has caused me to make different decisions on decor.
I very much wanted this $125 wallpaper I found and wanted to use on an accent wall for my bathroom. I kept looking at it over and over again! I knew there had to be a better temporary solution, so I put my blogger cap on, studied these wallpapers, and went to work!
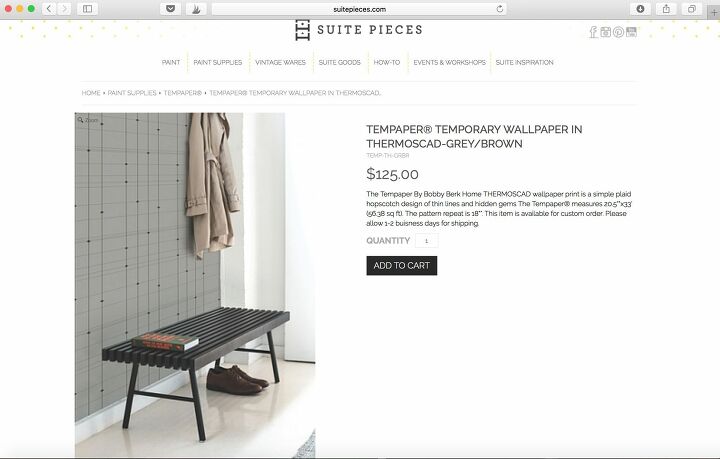
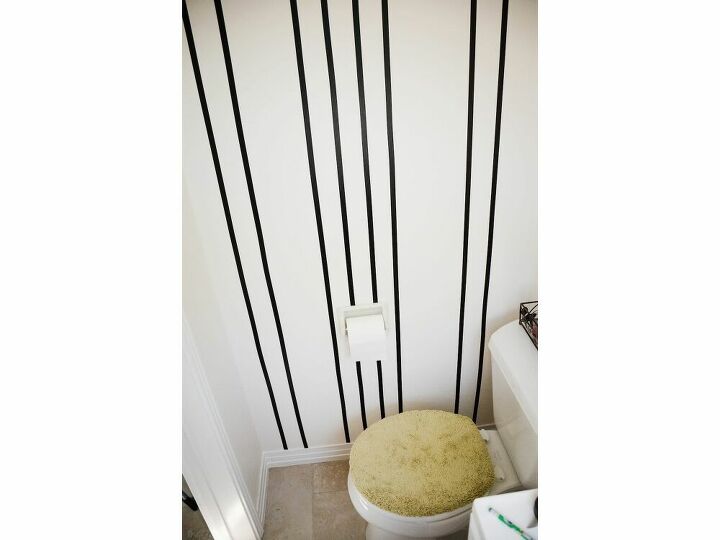
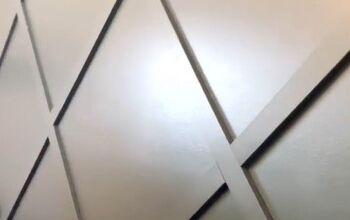
Example #1
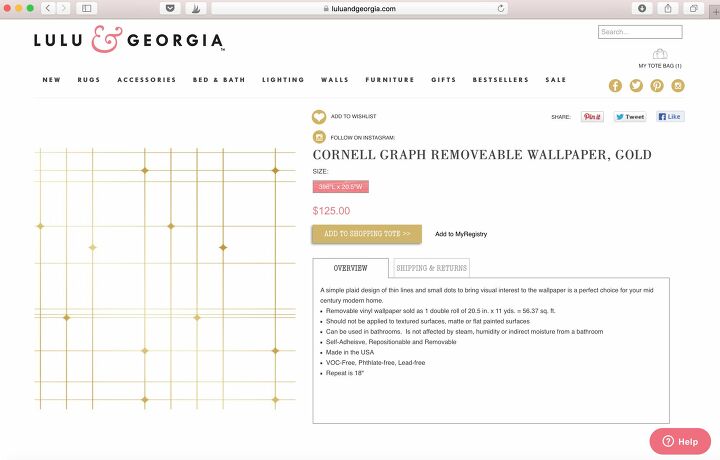
Love the cross between a graph and plaid on this one!
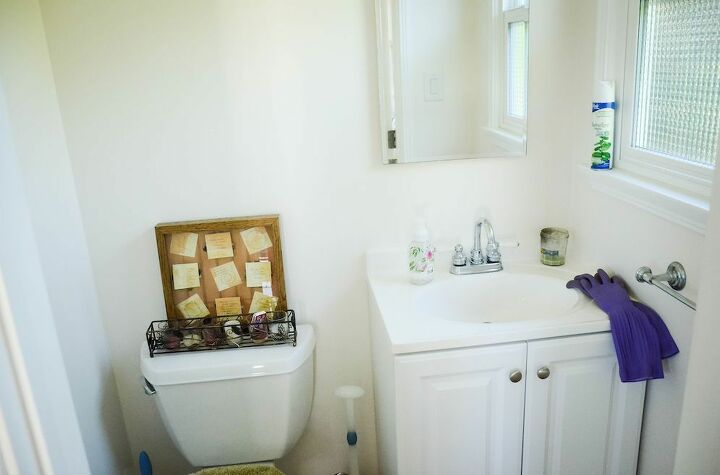
What my blank canvas looked like
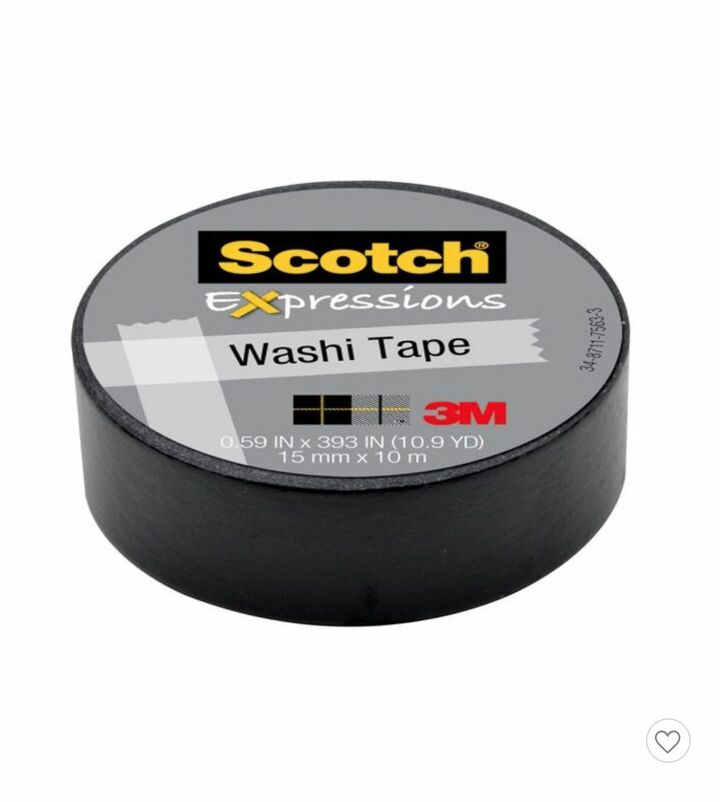
Enter: Black Washi Tape!!
As with most DIY projects when you're working with what you have, you will have to do some of your own measurements based on your walls, so don't be afraid to change it up!
- You could modify this project with just stripes, mini plus signs, channels like Kelly Wearstler, or really anything you want–for a fraction of the price. This project cost me a total of $15 and just a couple hours of my time.
- Step 1: Measure your wall and find your wall's center.
- *For my wall, I wanted my center to be my built in toilet paper holder; but a good way to do this is to measure your wall in inches, and divide by 2. This will be your center.
- Step 2: Since my Washi tape was 2 inches wide, I eyeballed that I wanted about 1" from each side of my wall's center for my first 2 washi tape vertical lines. I used my pencil and marked where each washi tape would be positioned.
- Note before you start laying down washi tape--I put marks vertically where my tape should go all up and down the wall. This helped me keep my washi tape straight. I did this for every stripe.
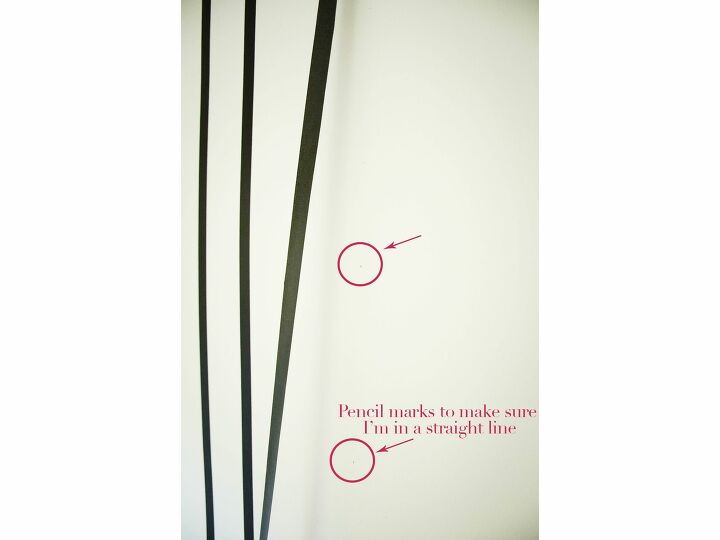
Step 3: Create the first direction pattern (vertical). I used the format 4 - 2 - 4 -2 for the first direction of stripes until my wall was covered. For my wall, I did 3 inches in between each stripe, and 8 inches between each grouping of stripes.
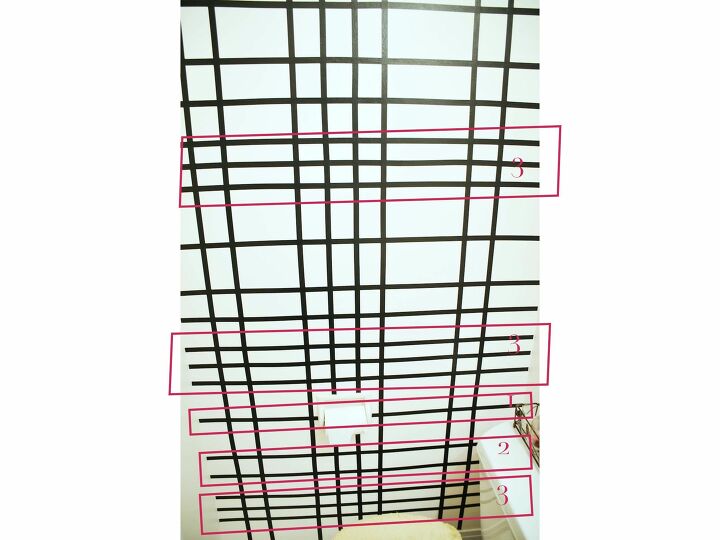
Step 4: Once your wall is covered in vertical lines, you'll do the same process, but start at the bottom or top. Now you'll space your stripes with even spacing in the pattern 3 - 2 - 1 - 3 -2 - 1
- As far as how far apart my spacing goes, I maintained 2" in between each stripe and eyeballed between each grouping of stripes. For the stripe grouping, I did 6" from the bottom then laid the grouping of 3 stripes, then 4" for the 2 stripe grouping, then 6" , then started over with a 6" space before the grouping of 3 again.
- If you wanted to be exact, I would do your first set of [3 - 2 - 1] grouping, then measure the distance all the way up the wall for where each grouping should begin.

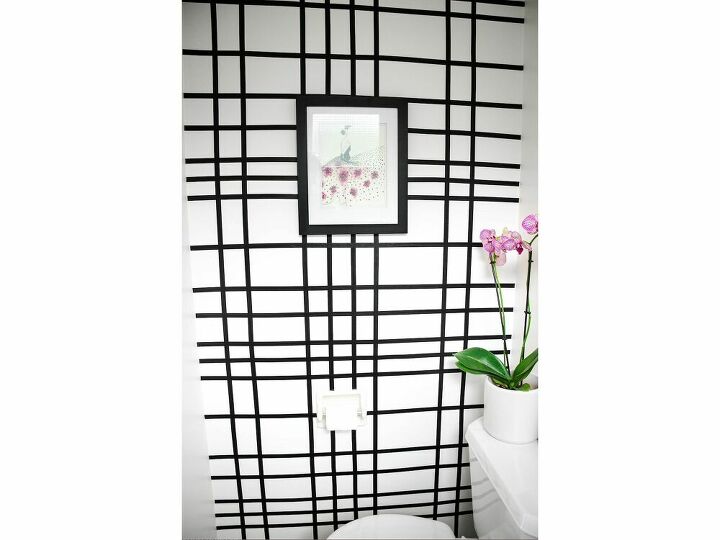
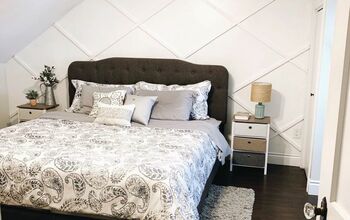
So happy my white powder bathroom has some personality now! Can't wait to see what you do with this idea. Jan2020DIYContest
Resources for this project:


Any price and availability information displayed on [relevant Amazon Site(s), as applicable] at the time of purchase will apply to the purchase of this product.
Hometalk may collect a small share of sales from the links on this page.More info
Want more details about this and other DIY projects? Check out my blog post!
Comments
Join the conversation
5 of 18 comments
-
Genius!! Loved how this turned out!
-
I've not worked with Washi tape. Will steam from the shower loosen it I we time?


Frequently asked questions
Have a question about this project?
Will it be easily removable without damaging the wall?
WILl this peel off the wall easily without damaging it?