


A Wallhanging That’s Not Macrame

I remember macrame as being popular during the 70’s. Today, it’s enjoying a resurgence in popularity, and many crafters are making wallhangings and other crafts using this technique. I don’t dislike macrame, but it’s something that’s associated with boho design and that’s simply not my style.
In my search for an alternative wallhanging that fills the same amount of space as a large macrame piece, I was inspired to go with something nature-inspired.
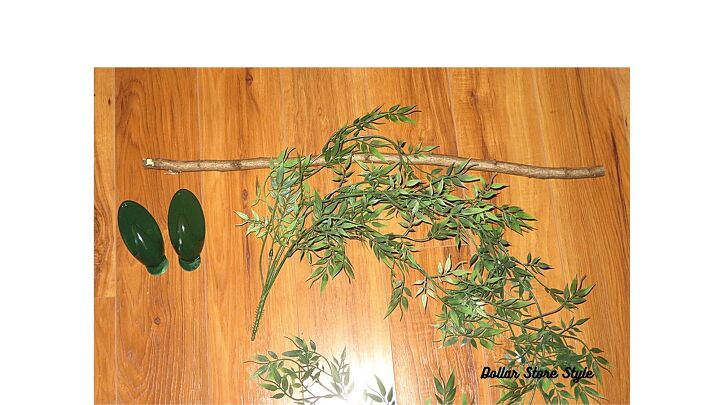
Here’s What I Used:
- 5 – 6 long hanging greenery stems (Dollarama)
- small tree branch or large dowel (approx. 1/4-inches thick)
- two large removable wall hooks (Dollarama)
- wire cutters
- spray paint (optional)
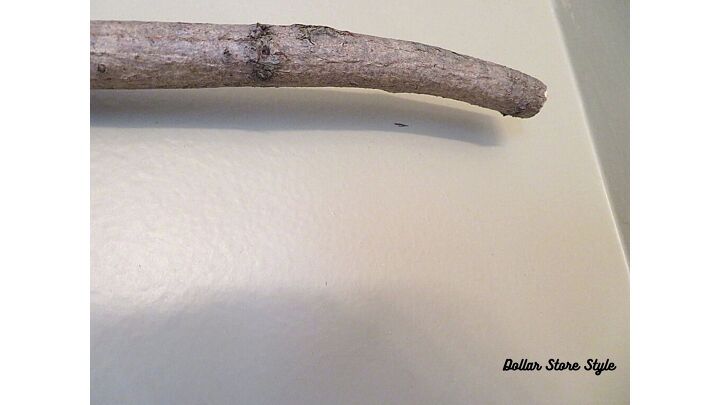
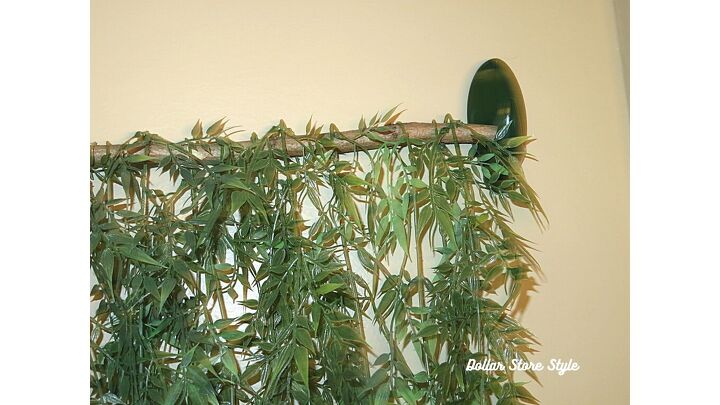
I found this tree branch in my local park where the Works Department was cutting back some trees and bushes along a path. I took it home and cut it down to the appropriate size for my purpose, in this case, 26-inches long.
These leaf stems are about 40-inches long at their longest point.
I spray painted the plain white hooks green. On reflection, I think brown would have been a better choice, but it’s not that important overall.
Location, Location, Location

The wall behind the toilet in my powder room is where I wanted to put the wallhanging. It measures about 33-inches wide. Measure and cut your branch or dowel to the size you need for your wall space.
Placement of Removable Hooks
I held my branch up against the wall to the height I wanted and made a mark in the approximate spots where the two hooks should be placed. Better advice is to use a measuring tape to be sure your hooks end up evenly spaced within your wall space.
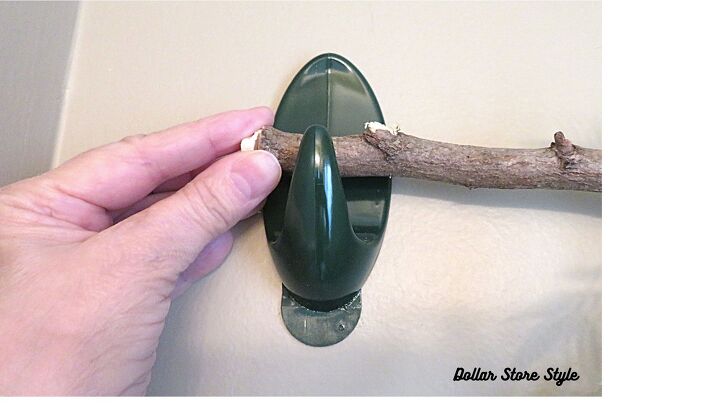
Place the two hooks on the wall and rest each end of the branch in them.
Separate the Leaf Lengths
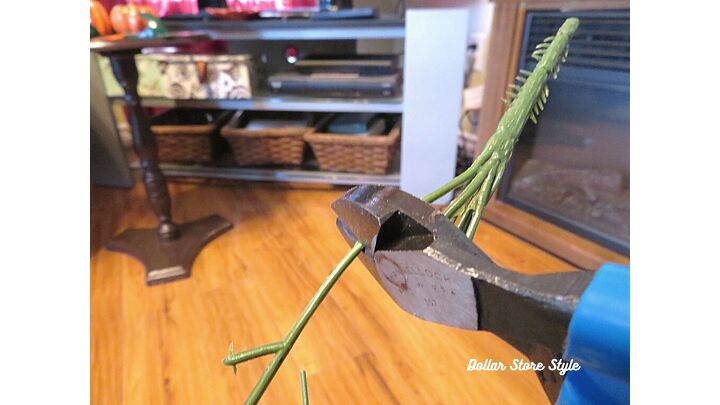
Use the wire cutters to separate each length of leaves from the main stems.
Hang the Greenery
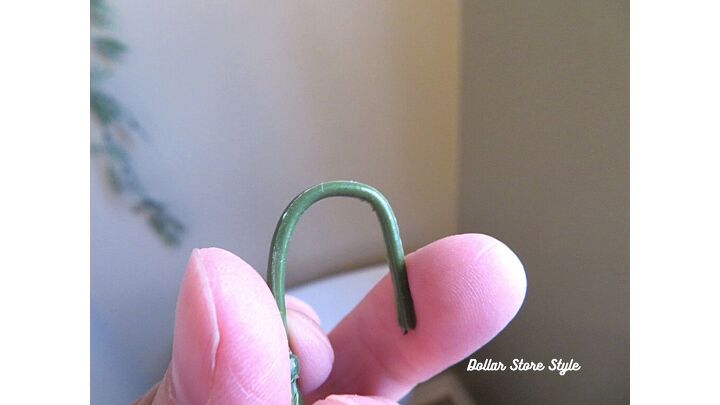
No glue needed! These floral lengths are wired at the ends. Simply bend the cut end into a hook and hang it over the branch!
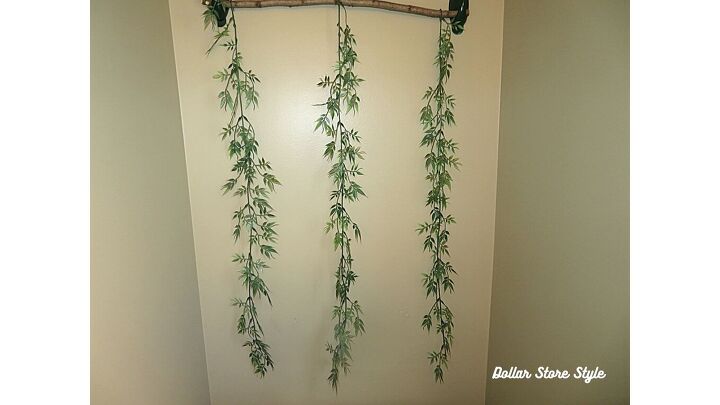
I used three of the longest pieces I could find and placed one on each end and one in the middle to start.
Fill in the Gaps
Then I just kept adding more leaf lengths until I was satisfied with the way my alternative wallhanging looked. I think I decided, at this point, to remove a few of them. It all depends on what looks good to you.
The Finished Wallhanging
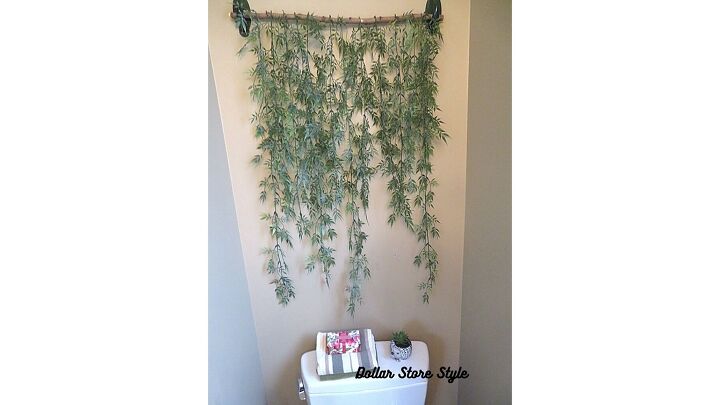
The finished wallhanging! It fills this blank space very well, suits my penchant for all things natural and can be further decorated as you please. Drape it with lights, use clip-on flowers to match whatever season we’re in or just leave it plain.
Click the link below to see more Home Decor ideas.
***
If you enjoyed this post, subscribed to the Dollar Store Style Newsletter. Every month, you’ll get a brand new decorating project, a Quick Tip, my choice for a Find of the Week and much more!
Resources for this project:
See all materials


Comments
Join the conversation
-
Very nice idea.
-
Ah, did you know that that you have stepped into GenZ Tiktok world with this one. Only theirs is always fake.😄


Frequently asked questions
Have a question about this project?