


DIY Pottery Barn Knock Off Barn Quilt
So, I usually work off a big to-do list of projects and try to stay focused on finishing the things I really need to do around my house. BUT, sometimes I just have to stop everything and work on a new DIY because I just can't stop thinking about it. That's what absolutely happened with this wood wall art project.
I saw this Barn Quilt style wall art in the Christmas Pottery Barn mailing. They sell this Barn Quilt all year for $399. But since it's red and white it fit in perfectly with the Christmas products. Seeing that big, beautiful wooden barn quilt in those pictures stopped me in my 'DIY to-do list' tracks. I totally obsessed over that wall art for 2 weeks before deciding I absolutely had to build it.
The best part is that this build can be done with just about $20 worth of lumber. Yay. Happy dancing all over the garage.
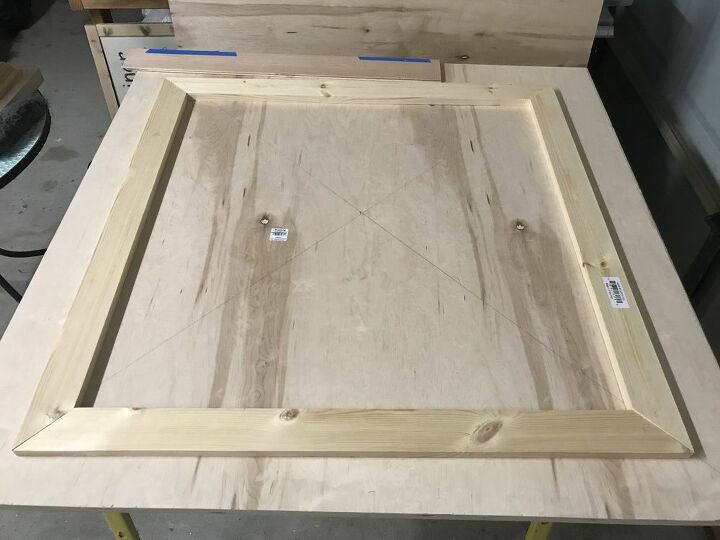
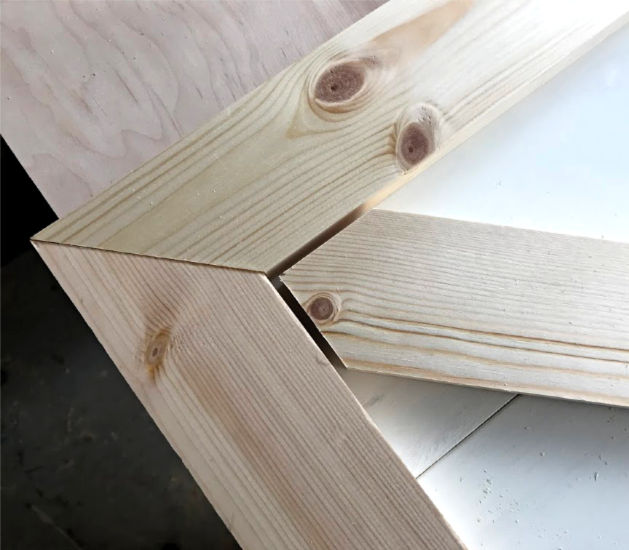
This build is easy enough for beginner woodworkers. Start by cutting 4 - 3' long 1x3 common pine or whiteboard boards. Use 45-degree cuts on your Miter Saw for pretty corners.
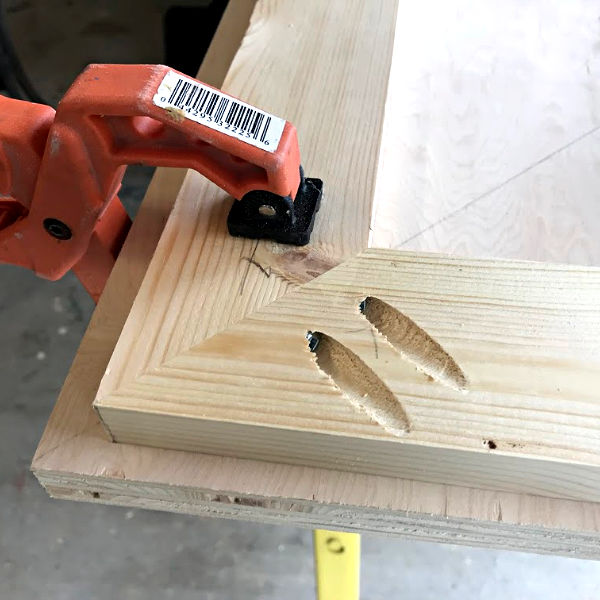
Each end of 2 of those 3' long boards needs 2 kreg jig pocket holes. Then glue and screw the corners together, using clamps to keep everything lined up.
USE WOOD FILLER in the joints once the glue dries, then sand smooth with 150-grit (or similar) sandpaper.
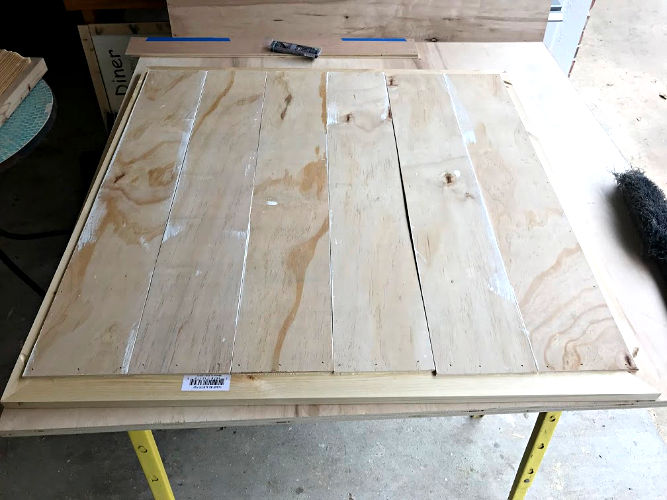
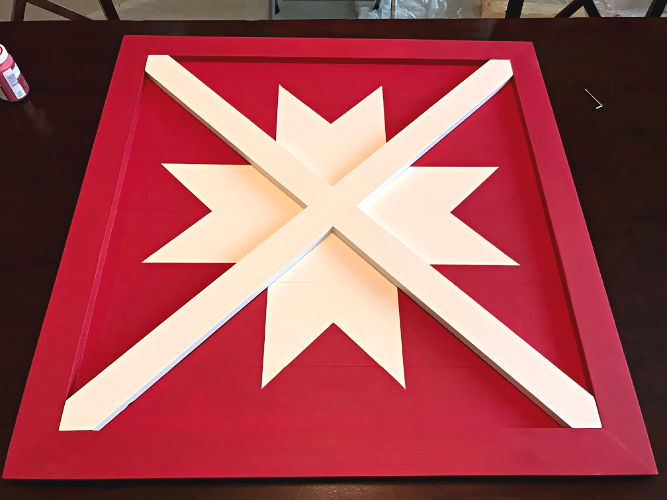
Add 1/4" thick plywood strips to the back of the frame with glue and brad nails. I cut mine 5 3/4" wide. Cutting them in strips just adds extra detail and more character. You can also vary the widths or go for a completely smooth back. It's up to you.
I used paintable caulk in all of those grooves for a more polished look, then painted the backing with primer.
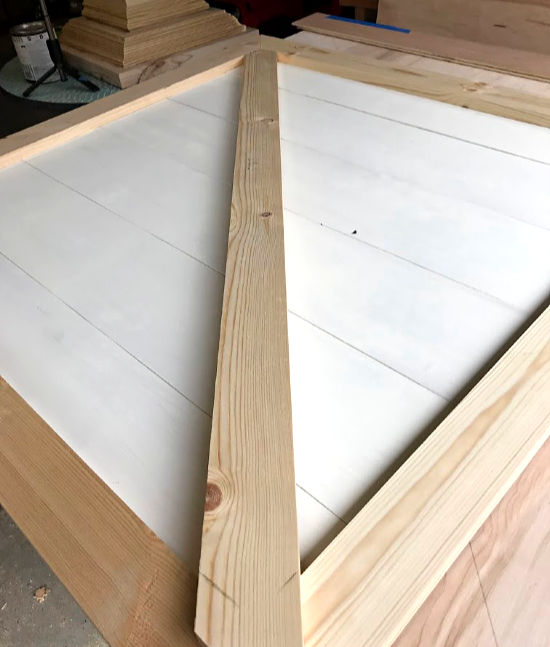
I also cut and joined 3 - 1x3 boards to make an X for the wall art. Putting the board over the built frame and marking my cut lines with a pencil made cutting the X easier for me. Just make sure everything is centered as you mark.
Use glue and pocket holes to join your X. You can see more pictures and tips for this build on my site, here.
Make sure the X fits, but do not attach it. It's much easier to draw and paint the star pattern without the X in place.
You can see here how the X ends should be cut centered on the corner.
I don't really know how to explain drawing this barn star in words. I feel like it would be complicated and confusing. So, I made a video that shows exactly how I did it. And, it was actually pretty easy and fast to draw. So, please watch the video if you are going to do this build.
ONE TIP that might help you visualize this is to divide the design into 3 rows of 3 perfectly equal blocks. The 4 corners are all red blocks, the 4 center blocks on each side are white blocks with a red triangle cut out. Did that help? If not, watch the video. I promise it will make it easy for you to draw.
So, draw the design, based on the video with pencil over your primed plywood. Then, use painters tape to block off the white star (that's in the video above too). Paint the edges of the painters tape with the white paint to prevent the red from bleeding under it. Once dry, paint 3 or 4 coats of red to get an even red finish everywhere. When that dries, carefully peel off the painters tape. Then use a flat edge foam brush to finish painting the white star. Be careful, to keep the lines crisp.
Now prime that X with white before attaching it to the completely painted barn art with glue and brad nails from the back. Use paintable caulk where the X meets the square frame for a cleaner look. Then use painters tape to tape off the pattern on the X and use the same process as above to paint the X. You can see me taping and painting the X in the video above too.
Finally, once all of the paint looks perfect and crisp, apply a non-yellowing sealer like a natural wax or water-based polycrylic.
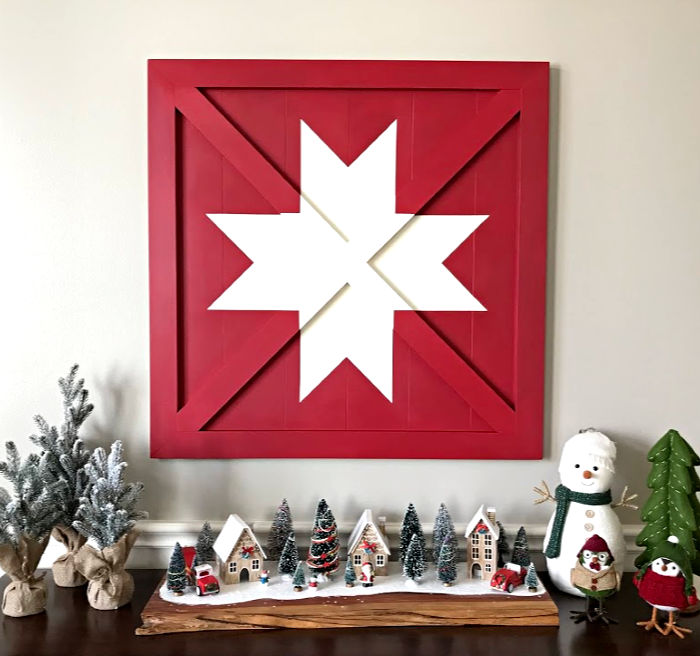
I'm so happy to have this beautiful piece in my home. And, even more happy that I built it for just a fraction of what Pottery Barn sells it for. :)
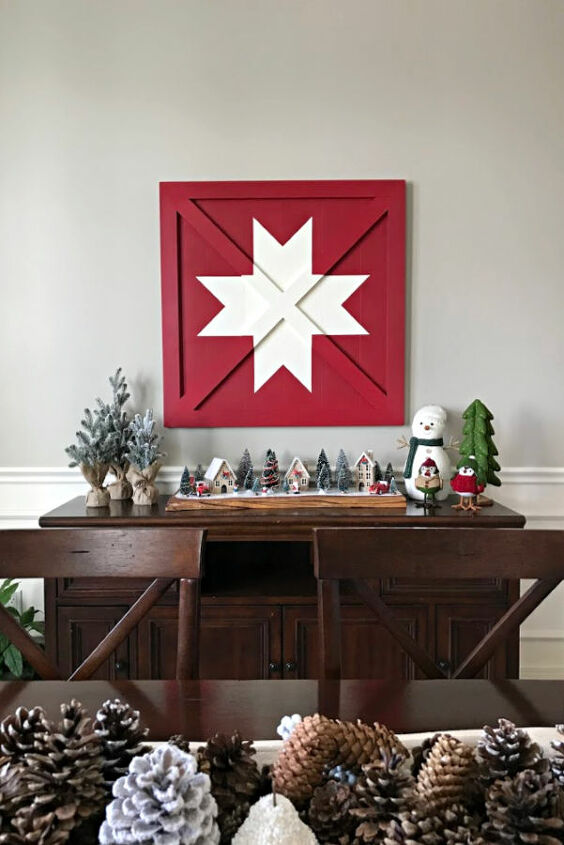
Looks great with my Christmas decor, but it'll be hanging the rest of the year in our playroom where I already used that beautiful red on the play kitchen and kids desk I built.
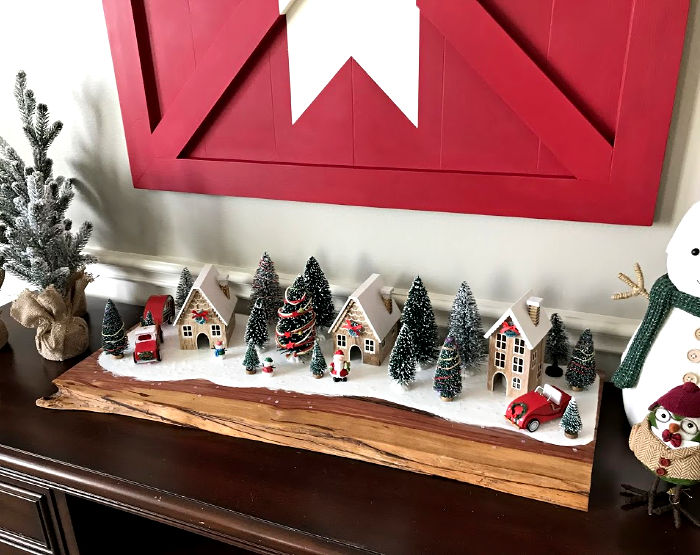
Side note: I love this fun Christmas Table decor I made last week too. You can find the tutorial for it on my site too.
Resources for this project:
See all materials


Frequently asked questions
Have a question about this project?
How heavy was it finished?