


DIY Vintage Farmhouse Wall Art - 804 Sycamore
DIY Vintage Farmhouse Wall Art
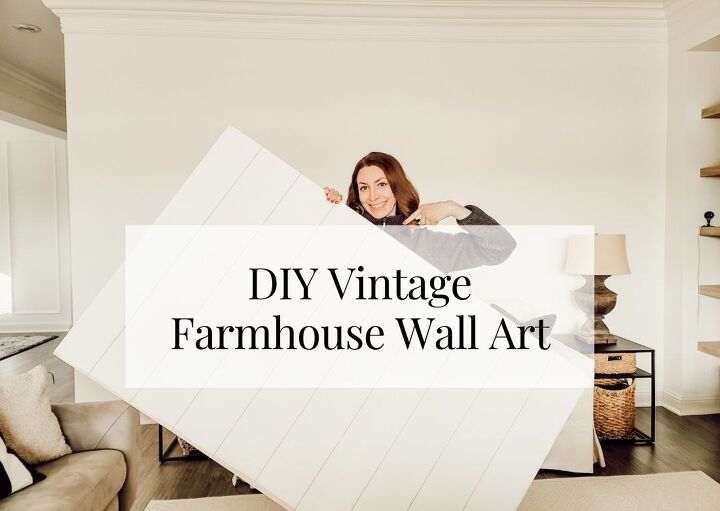
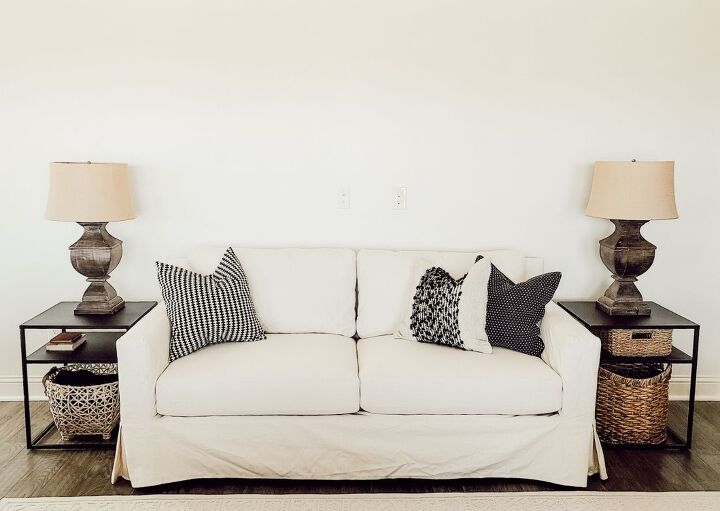
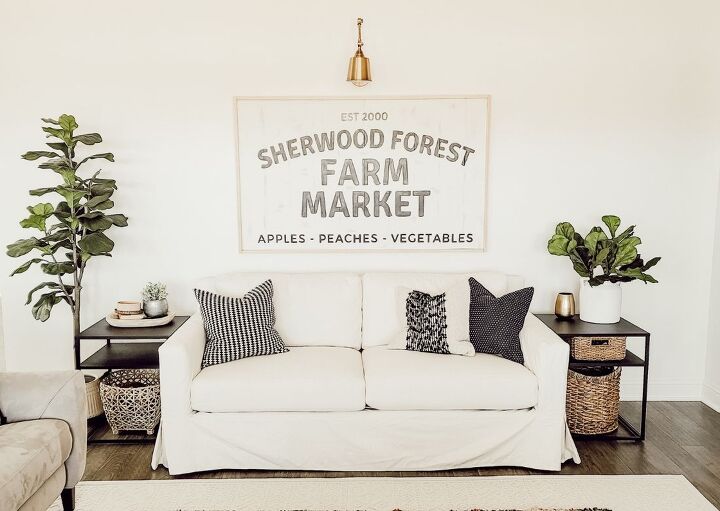
What’s above your sofa? If you have a large wall to decorate above your sofa, you know how difficult it can be finding something large enough or fitting for the space. This space is far from finished, but it’s getting closer with my DIY vintage farmhouse wall art! I’ve tried a few things above the sofa, and I’m sure I’ll try a few more, but this simple look with a large vintage inspired piece is definitely my style. I cannot wait to explain how I got this vertical shiplap look, without planks or a Sharpie marker. My husband had his doubts when I told him what I was doing, but it worked like a charm and perfectly for this DIY.
In
OK, first things first, this DIY vintage farmhouse wall art project can be completely customized for your style. My sign is 5 feet wide by 3 feet tall. Just check out my video and the instructions below and then think about customizing the size, colors, and image. I recreated the image after seeing some wall art at one of my favorite vintage shops, 417 Vintage Market & Supply Co, in Branson Missouri. The price tag was $200 so I decided to use the scrap wood in my garage and create my own. You can use any thickness of plywood, but the thinner the plywood, the lighter the entire piece. You will also need a projector unless you can draw the typography. Here’s the video showing all the steps, start to finish. Be sure to notice that the wall sconce is not hardwired – there are links to the lighting below.
DIY Vintage Farmhouse Wall Art – Video
DIY Vintage Farmhouse Wall Art – Tutorial
To get started, gather your supplies and tools, you can be flexible and use what you have on hand.
- Determine the width and height of your wall art
- Measure and mark the desired size onto the plywood
- You can cut the plywood at this point (I actually primed my plywood because I had primer out already)
- If you want shiplap lines (vertical or horizontal), measure and mark the lines
- Use a Dremel tool to drill an indent over the shiplap lines – be sure to use a straight edge and move quickly to keep the Dremel moving
- Paint the plywood the background color (black, white, and cream are my favorites)
- Create your background image using Canva, use my image, or find one online. As long as you don’t sell the wall art and there’s no copywrite it’s fine to use for your own purposes
- Set up the projector, project the image onto the plywood, trace your image using a pencil
- Use paint or a Sharpie paint marker to fill in your traced image – allow to fully dry
- Use an orbital, palm, or sponge sander to add age and worn spots over the entire piece – I vacuumed off the saw dust at the end
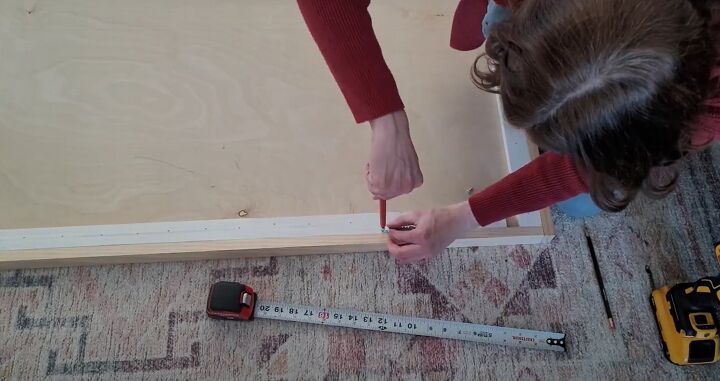
- Measure, cut, and nail scrap boards to the backside of the plywood perfectly lined up along the edge – this is what you will attach the frame to
- Measure, cut, and nail frame boards around the edge. You can do fancy 45-degree cuts or just square corners like I did. One of my boards was a smidge short, but I used it instead of buying a new board – it’s hardly noticeable and adds the vintage style~
- Add hanging hardware, and hang
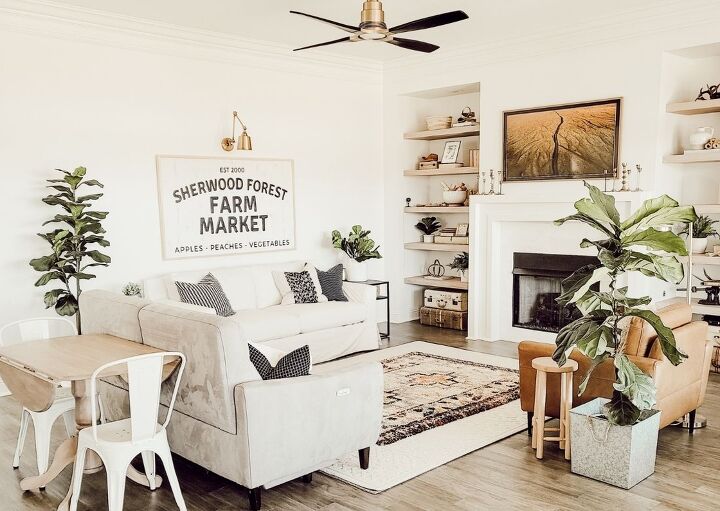
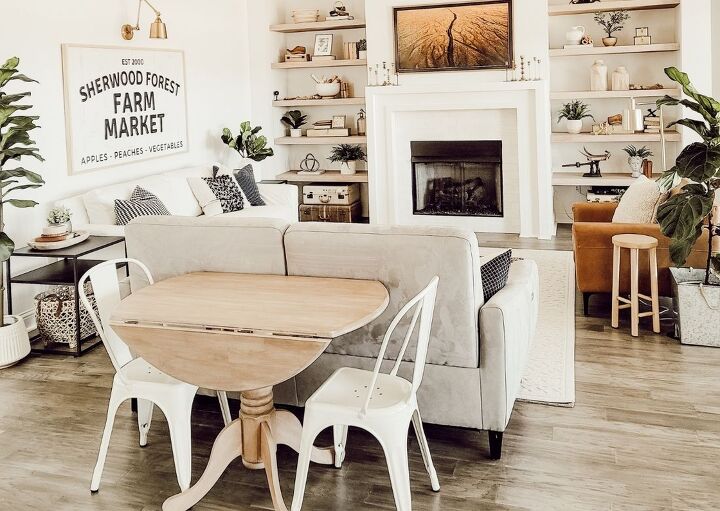
This DIY vintage farmhouse wall art was so much fun to make and watch my vision come to life. Like I mentioned earlier, I have more plans for this space so be sure to subscribe to my blog, get your free shelf styling eBook, and one email a week with DIY or decorating ideas. I’ve also included a few photos of how I decorated above the sofa leading up to this DIY wall art.
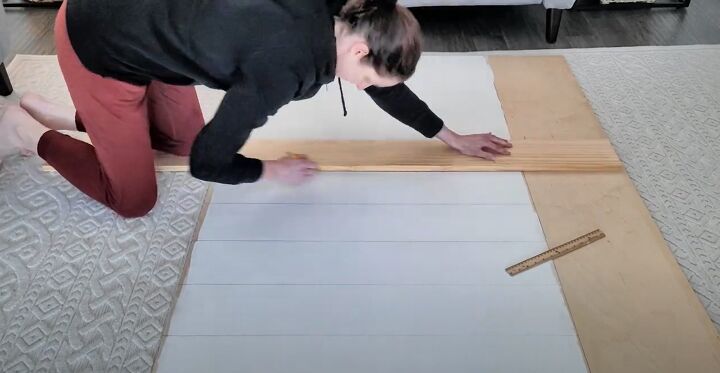
If you want shiplap lines, draw even horizontal or vertical lines on 1/4" plywood. I also drew perimeter cut lines the exact size I wanted my vintage wall sign to be.

Then I used my Dremel and a straight edge to carve out my shiplap looking lines. It's subtle but did the trick and added character and texture to the overall sign.
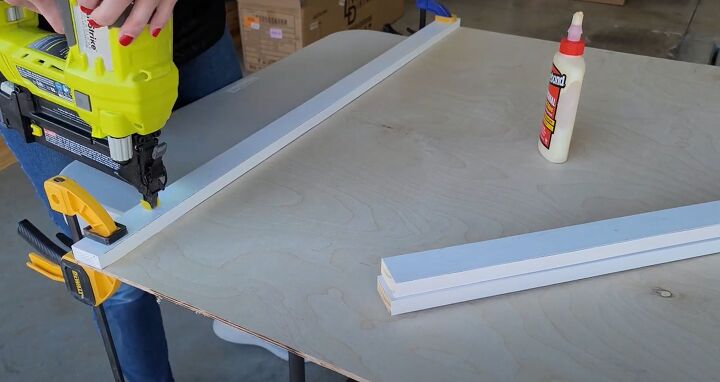
Use scrap boards on the back side to add stability and thickness to add a frame later on. Use wood glue and brad nails.
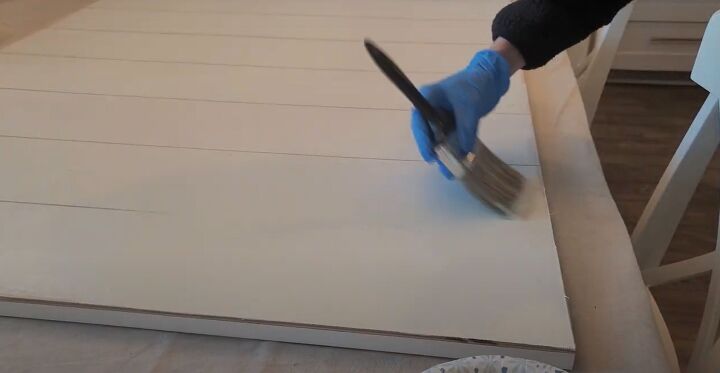
Prime the front side of the sign. I used two coats of chalk paint with a little bit of water added because I wanted a vintage look and I will be sanding spots off later on.
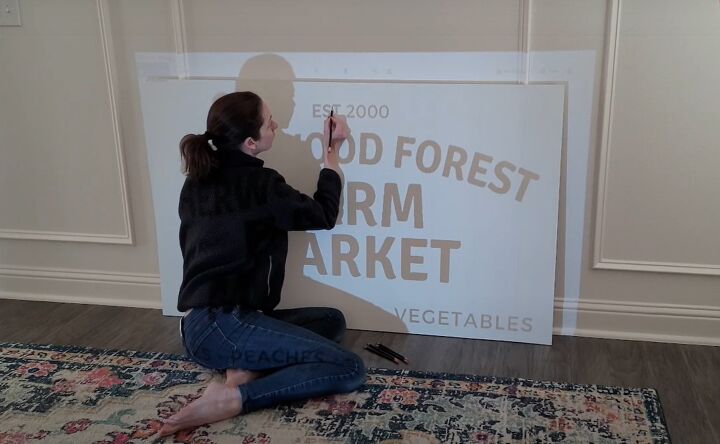
You can find the image I used for my sign on my blog (804sycamore.com) or you can create your own sign on canva.com, or find something online. Then just project it onto your plywood and trace with a pencil.
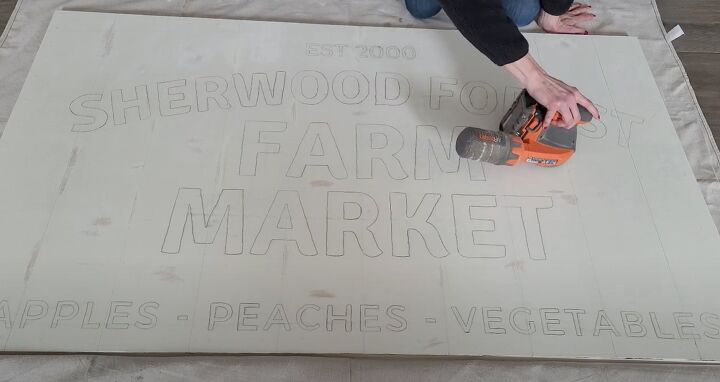
Now that I can see where my image is, I can sand worn marks around the entire sign to give it that vintage farmhouse look.

I just used craft acrylic paint to paint on my sign. A Sharpie paint pen was used for the small characters.
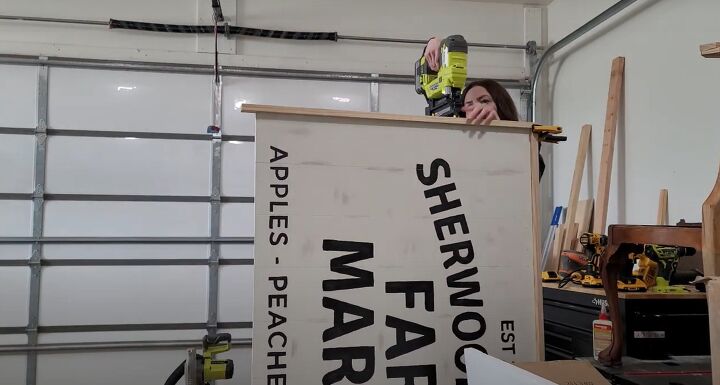
I used 1x2 pine boards to create the outer frame. Use wood glue and plenty of brad nails. I didn't patch the holes or stain the frame because I liked the natual wood look.
Add hanging hardware to the back making sure it can withstand the weight of your sign.


Frequently asked questions
Have a question about this project?