


How To DIY a Shiplap Wall the Easy Way!
How To DIY a Shiplap Wall the Easy Way
Welcome to week 2 of the Spring 2021 One Room Challenge! If you’re new here, WELCOME! You can learn more about us here.
This coastal inspired Jack & Jill bath is officially underway. Without a doubt we’ve been busy painting this space and installing our DIY shiplap walls. As a reminder from our design plan unveiled during week 1, each side of the bathroom will have a navy shiplap accent wall behind the vanities.
Remember you can easily navigate through each week of this coastal inspired bathroom project.
-1st week: The Design Plan
-2nd week: you are here!
-3rd week: How to tile a shower like a pro, even if you’re not.
This post contains affiliate links for your convenience. As an Amazon Associate I earn from qualifying purchases. See our disclosure for details.
Of course we all know what shiplap is thanks to the iconic stars of HGTV’s Fixer Upper, Chip and Joanna Gaines, whom we would happily claim as personal friends.
Undoubtedly the years following the highly successful TV series, shiplap has become a common household word. Not to mention DIYers alike have flooded the internet with a variety of tutorials and how to videos to share how even the beginning DIYer can install shiplap (whether it’s the real deal or a faux shiplap) in their own home.
If you’ve been following along for a while, you know that we learned a lot through our mistakes installing our shiplap ceiling in the basement. So this time, we did things a little differently to save ourselves a ton of extra work and time!
Now, there are obviously many different ways to install and paint shiplap. In this post we’ll focus on the tips we used to make this process go more smoothly. Be sure to take notes so you can avoid making these common mistakes yourself!
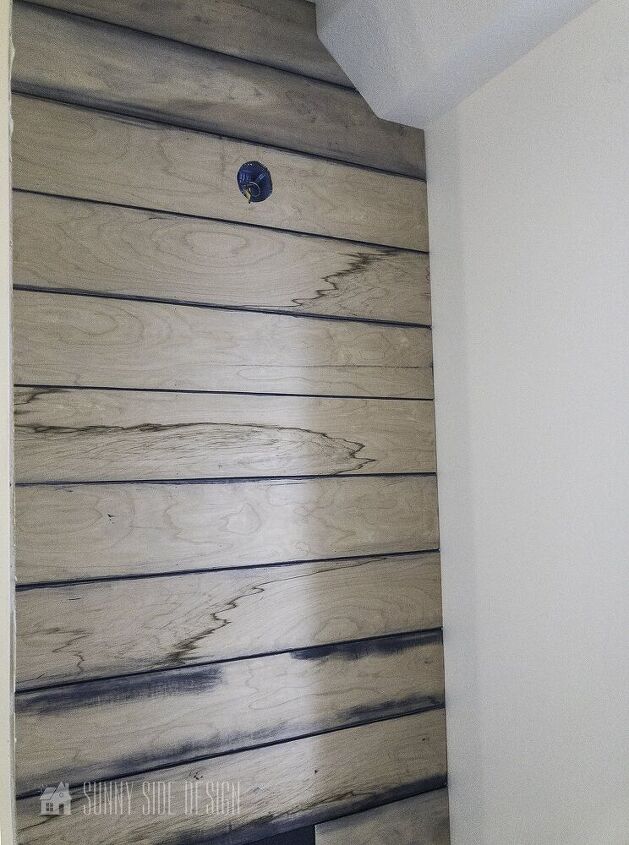
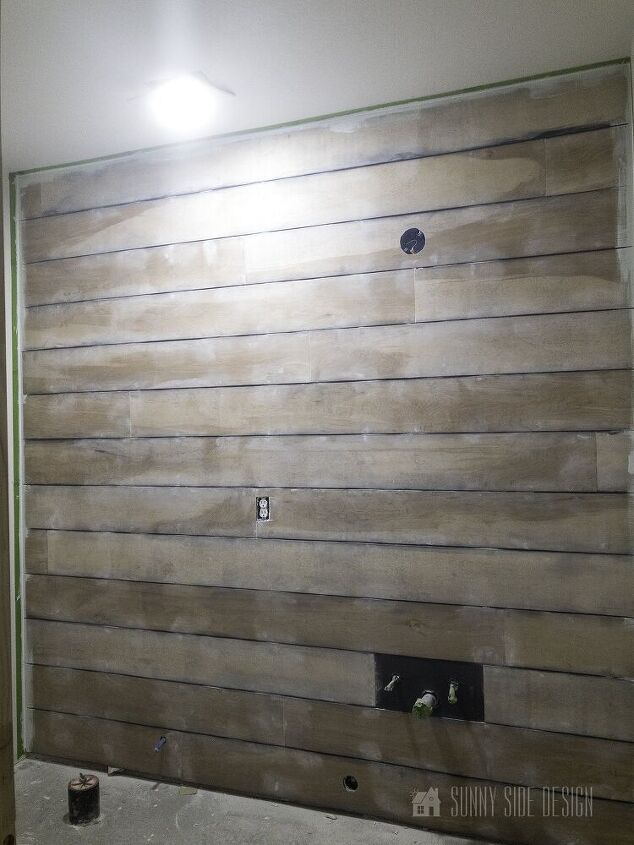
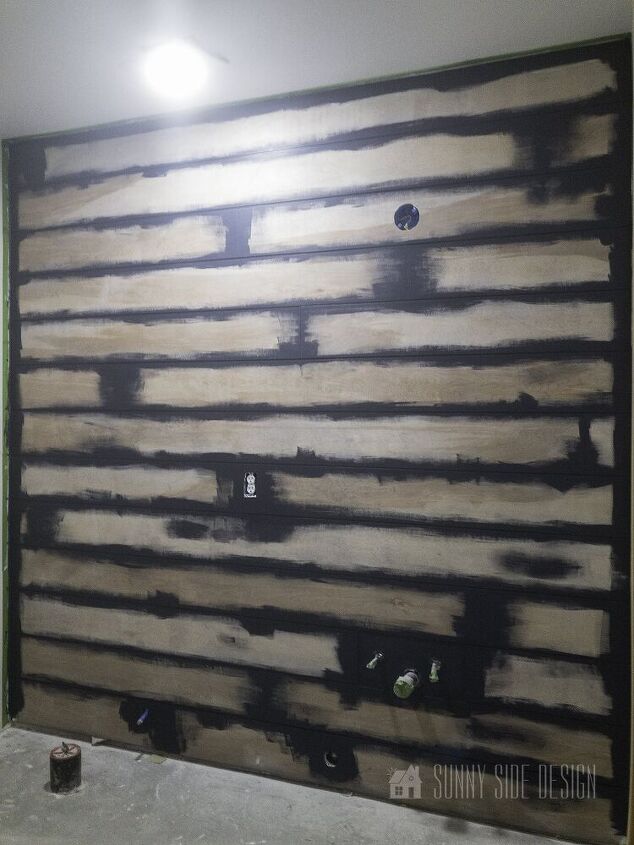
Actually the most challenging part of completing our shiplap ceiling was applying paint in the grooves. Certainly, multiple factors played into this. However, this time we opted to paint the wall before installing the shiplap.
Initially, I wrestled with the thought of wasting paint since we were going to cover up the majority of the wall. On the other hand, I knew it would be much quicker to paint the wall itself rather than trying to paint inside the small grooves afterward.
Overall, I’m grateful for taking this preliminary step! It only took 15 minutes to completely paint both walls. And yes, while it may be a wasteful use of paint, it was most definitely worth the time it saved in the long run!

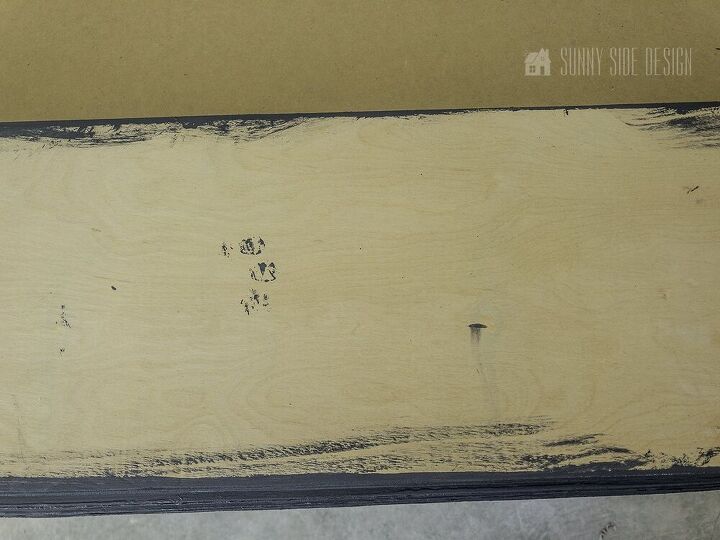
Additionally, we chose to paint the edges of each shiplap board prior to installation as well. Again this step only took a matter of minutes to complete and was well worth it in my opinion.
To easily do this, stack the shiplap boards on top of one another and paint them all at the same time. More importantly, after you have painted the edges, carefully look at each individual board and smooth out any areas where the paint may have pooled. If this step is avoided you’ll find ridges of dried paint you’ll have to sand smooth later.
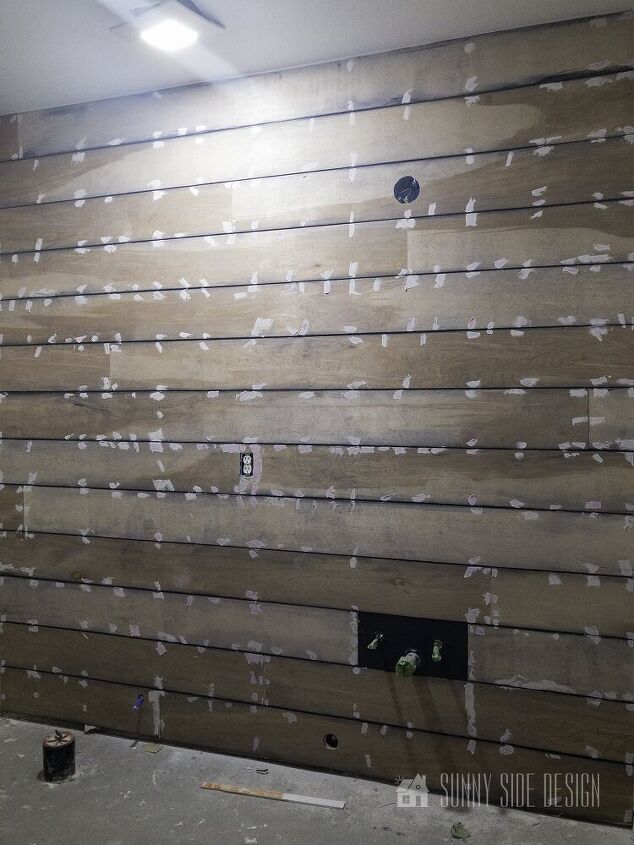
(Refer to our post on how to shiplap a ceiling to learn more about the pros and cons of using true shiplap vs. faux shiplap to help determine what product is best for your space. These DIY shiplap walls were installed using 1/8″ utility plywood.)
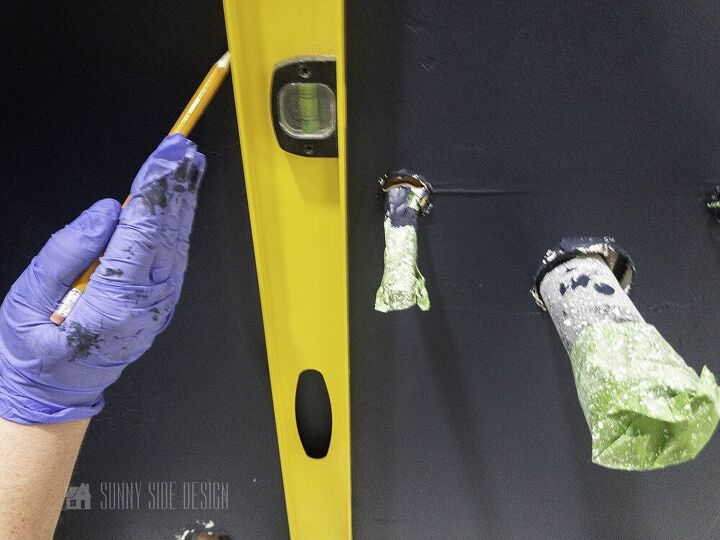
Clearly another time saving tip is to mark the stud placements on the wall. This takes all the guess work out of securing each board into place. By doing this you’ll know exactly where to drive the brads.
(Stud placement can easily be marked with a pencil, or by placing a piece of painters tape down the wall.)
Installing a DIY shiplap wall is perhaps the quickest step in this whole process.
Begin at the top of the ceiling and work your way down. Then align the first board into position. Use a level to ensure the entire design will be installed straight. Secure the board into each stud using 2″ brads and a pneumatic brad nailer.
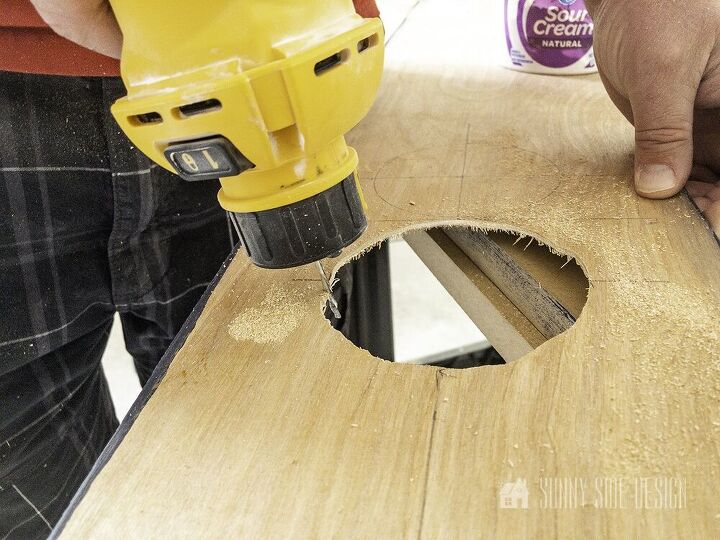
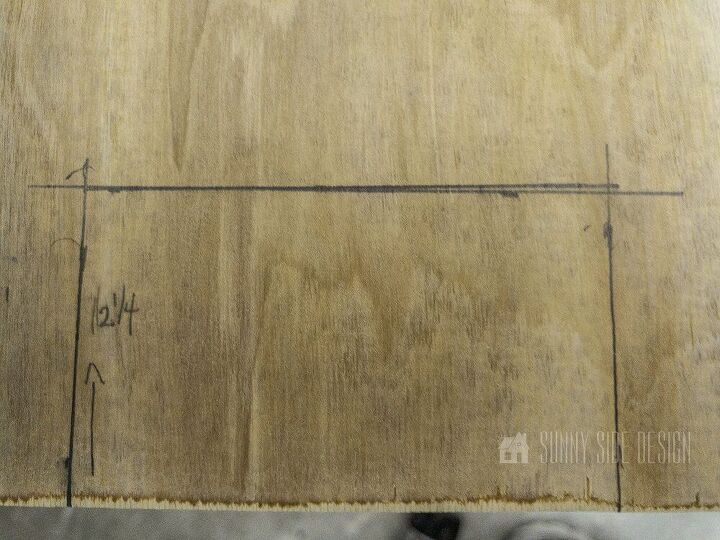
Although it may seem intimidating to make cuts around electrical outlets and light fixtures, it doesn’t need to be hard if you have the right tools.
Use a measuring tape to obtain accurate dimensions. Plot the dimensions on the board using a pencil and a speed square. Then use a speed square to ensure the markings are transferred accurately while remaining square.
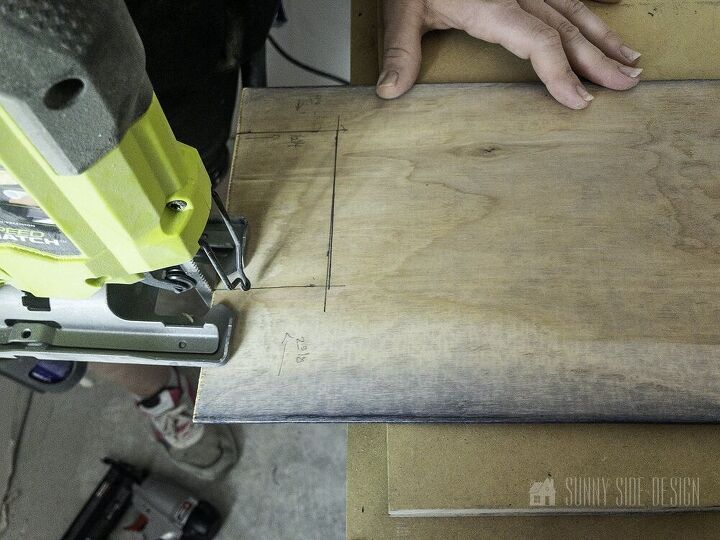
For ease in making these cuts, you’ll want access to a couple of tools.
The straight cuts can be made using a mulit-tool or a jigsaw. And a rotary saw is a great tool to create the circular cuts.
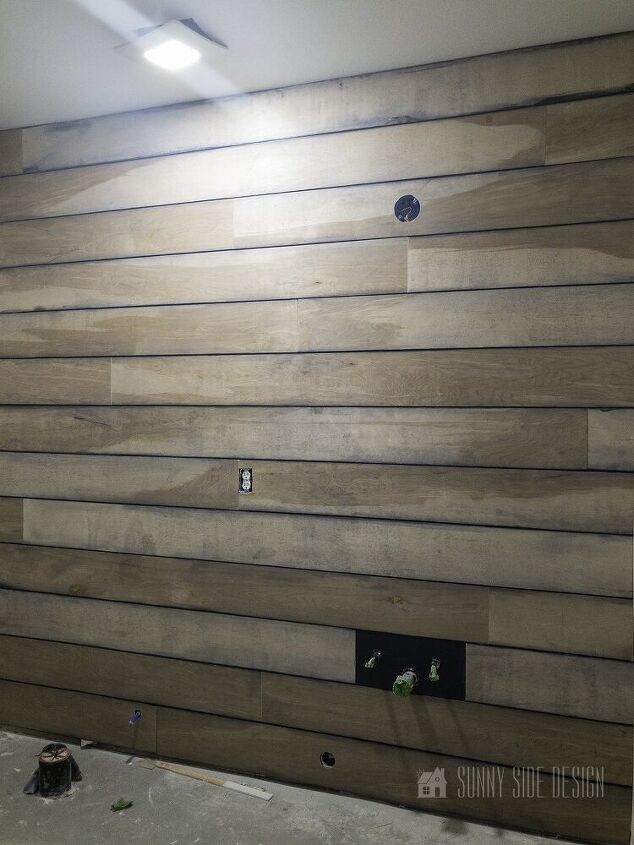
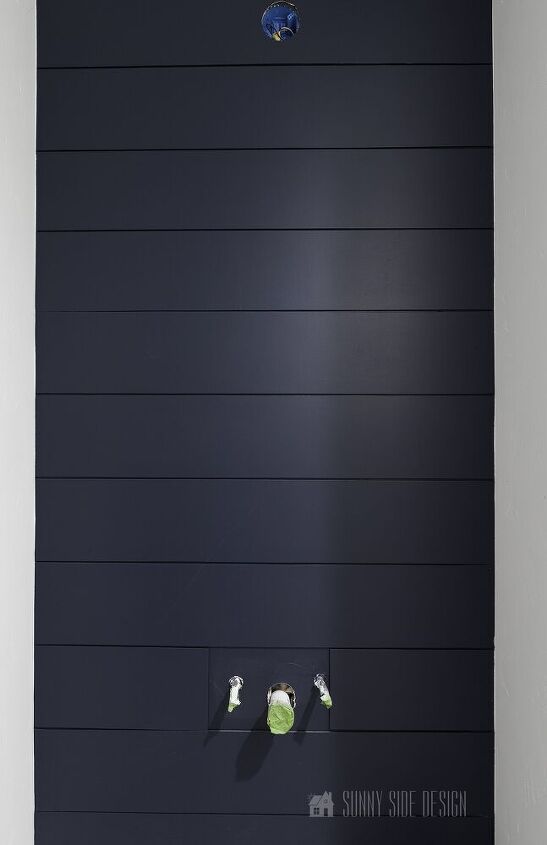
To create this DIY shiplap wall, we used 1/8″ utility plywood cut into 8″ strips. A paint stir stick was used as a spacer to achieve equal spacing between each board.
After the DIY shiplap wall has been installed, the finish work can be completed.
First, fill in each of the brad holes with putty. Then lightly sand smooth when dry. Finally, remove any dust from the wall using a damp washcloth.
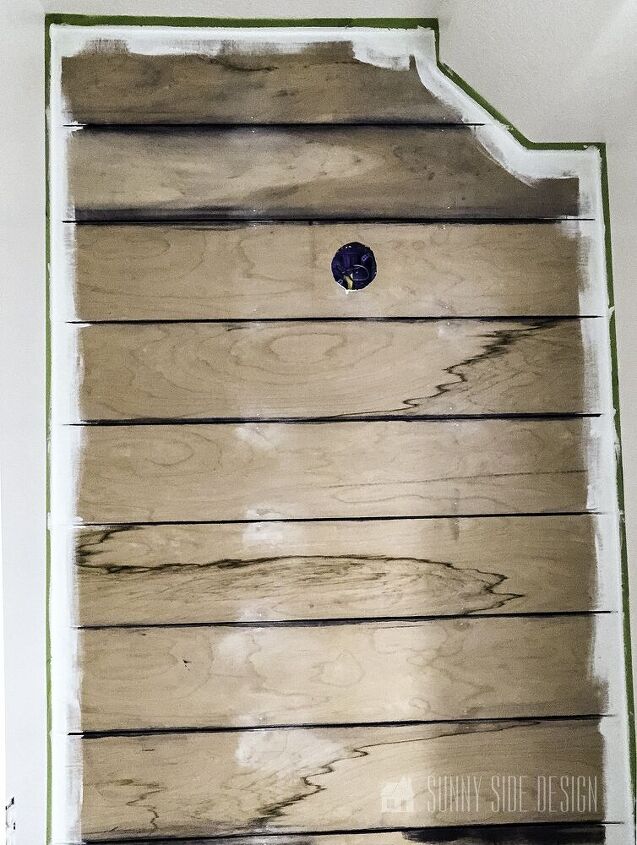
The final task to complete this project is to paint the walls. Over the many years of our painting experience, we have come to use this technique over and over again. If should be noted that it always results in perfect crisp edges without any bleeding!
- Apply frog tape
- Then cut in with the surrounding wall color and allow to dry. This coat of paint is essentially what we like to call the bleed coat. Any paint that bleeds under the tape will match the surrounding walls.
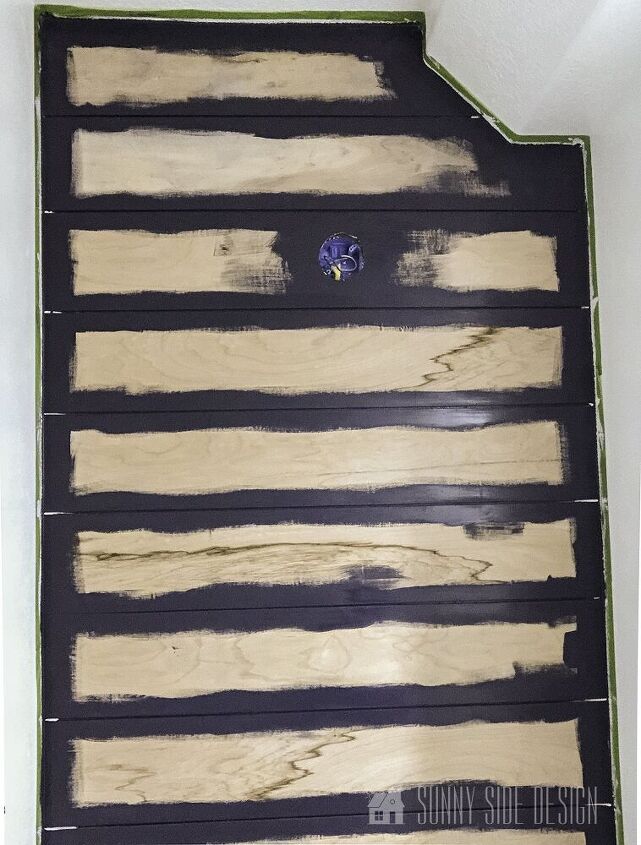
3. Now cut in with the accent wall color and paint the remaining wall space.
(Since we painted the walls and edges of the boards prior to installation the grooves didn’t need to be painted. However, just for peace of mind, I did use a brush to apply one coat of paint on the front surface of each grooved area prior to rolling.)
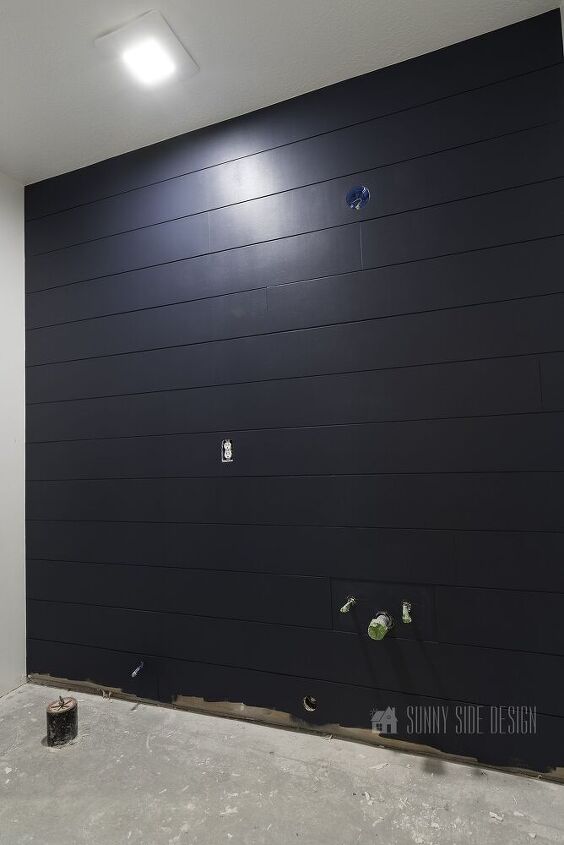
4. Finally remove frog tape while the paint is still wet.
That’s it! Taking the time to paint the bleed coat will result in perfect crisp edges every time!
I’m so happy with the results! Navy is my current obsession and this is the perfect shade! Also, I can confidently admit that I’m 💯% grateful for the ease of this project compared to installing our shiplap ceiling! These tips made this whole process go much more smoothly and saved a ton of time in the long run!
What are your thoughts? How would you go about this project differently? Do you have any tips you’d like to share with us? We love hearing from you, be sure to drop your comments and questions below.
Thanks for stopping by! Be sure to check in again next Thursday to see the updated bathroom progress!
Please PIN and share with your friends!
And as always here at Sunny Side Design
WE HOPE TO BRING YOUR HOME TO THE SUNNY SIDE OF THE STREET!

Be sure to follow us on Pinterest for even more home decor and DIY ideas.
To see what we are working on before it’s on our blog, follow us on Instagram.
You can also find our video tutorials on our YouTube channel.


Frequently asked questions
Have a question about this project?