


How to Mat a Print Using a Gift Box
I love displaying printable art, but sometimes I want to use a frame that is bigger than the art I have.
I came up with a simple way to create a photo mat in a frame using gift boxes left over from the previous Christmas.
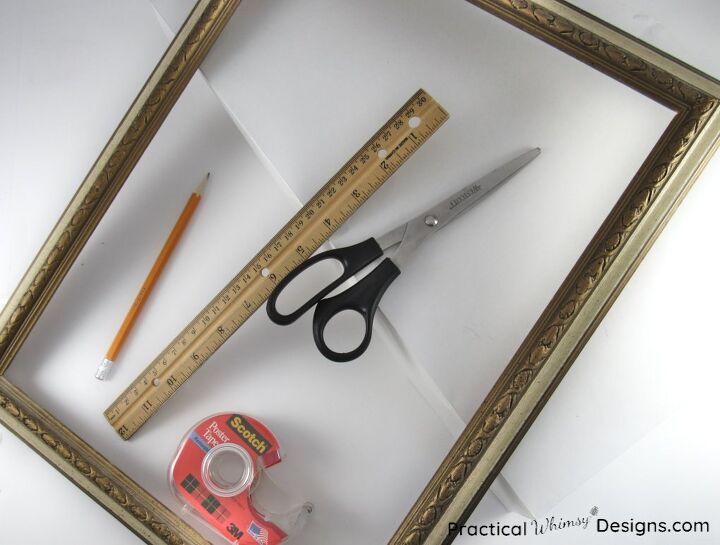
1) Gather your supplies
- pencil
- scissors
- ruler
- frame
- gift box large enough to fit inside the frame (I used one with white on one side and brown on the other)
- printable
- double sided tape
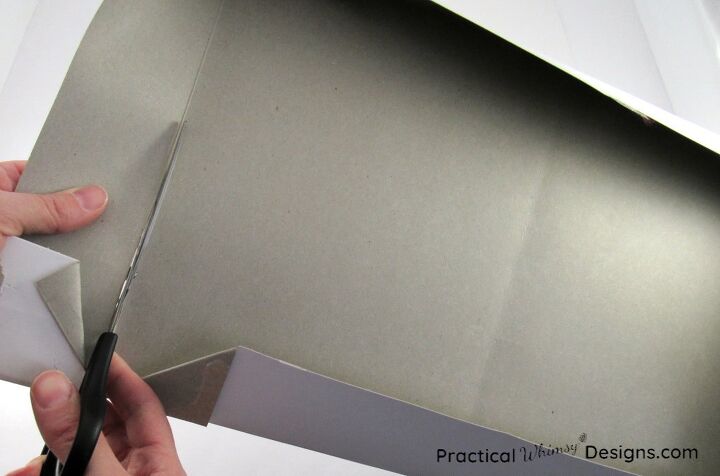
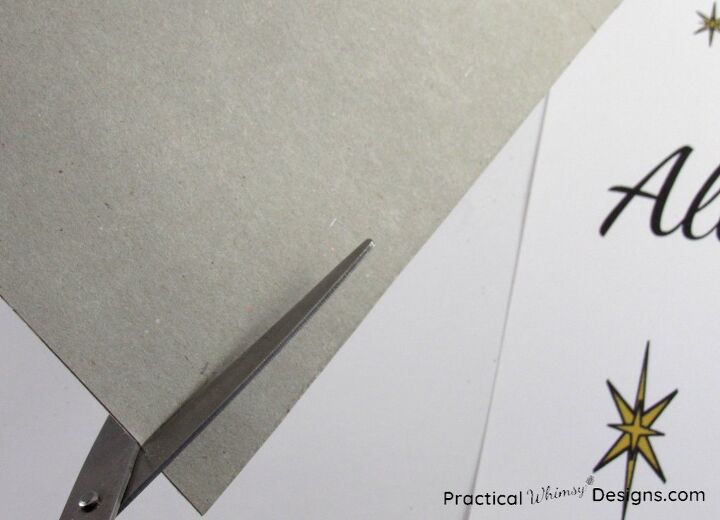
2) Cut the edges off the box
Use a scissors to cut the edges off of both the bottom and the top of the gift box so you are left with two flat pieces of box.
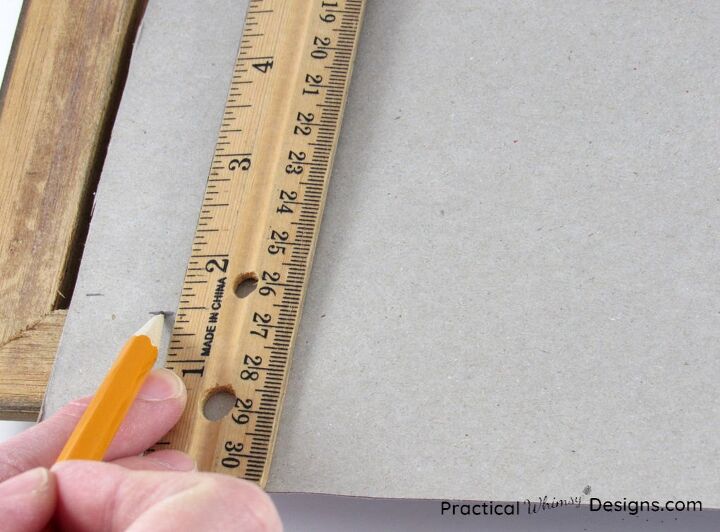
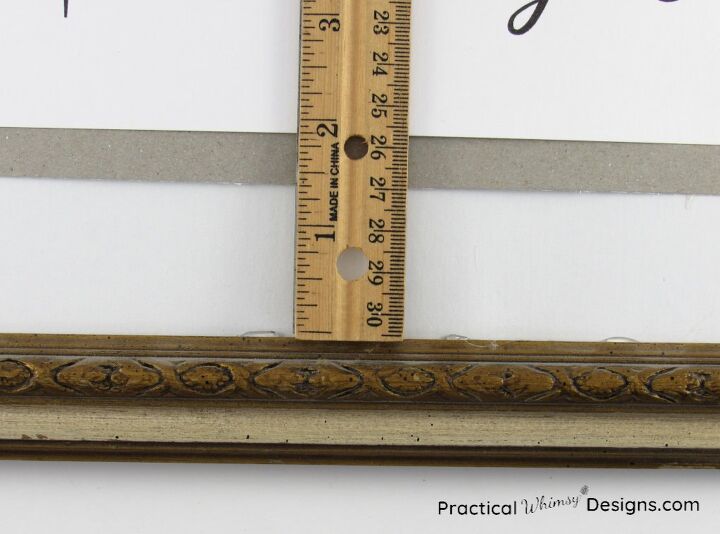
3) Measure the box
Use a ruler and pencil to mark the box to fit inside your frame. I flipped my box white side up because I wanted the white part of the box to be the side everyone could see.
4) Choose which method to mat your print
Method 1:
This is the method I used.
Stick the print over the mat with tape.
I already had the white portion of my box cut and ready to fit into my frame.
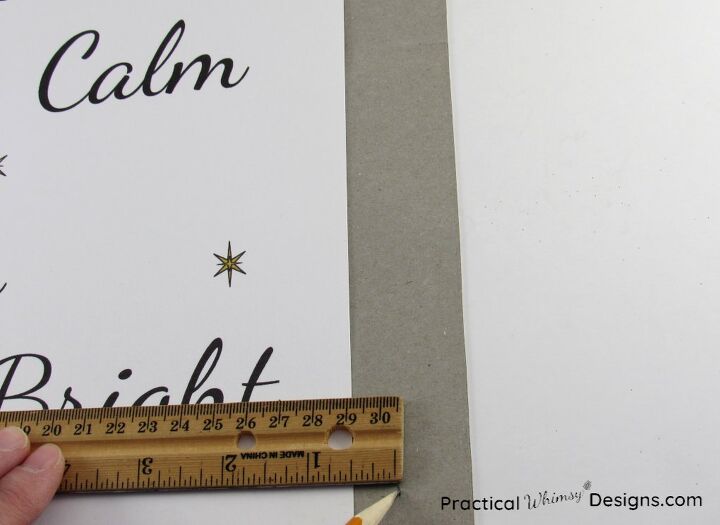
Since I wanted to create the double layer look and contrast the white printable from the white background, I flipped the box over to the brown side and set my print on top of it. Then I measured a half inch around the print using a ruler and pencil.
I cut out the brown side of the mat to stick out 1/2 inch larger than my printable. I used double sided tape to tape the printable to the brown mat and then used double sided tape to tape the brown mat to the center of the white mat.
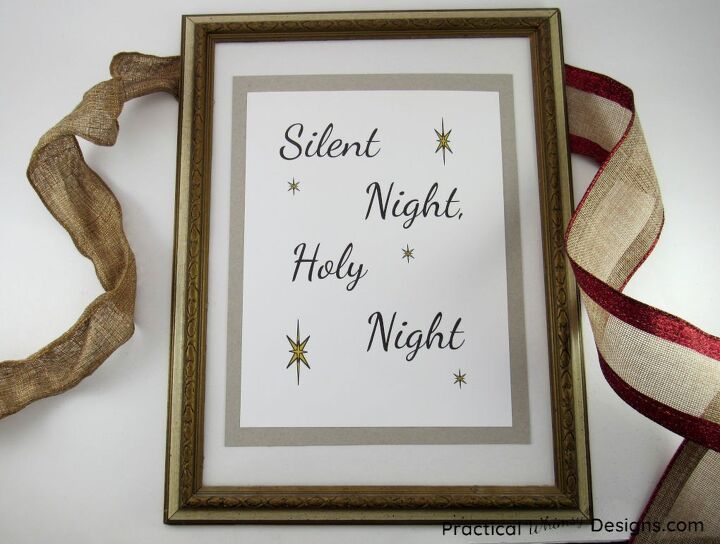
Here is the final result of this method of matting the printable.
Method 2:
This second method requires you to cut a rectangle into the center of your matting. The rectangle fits over the print and frames it.
The first step: determine if you want two colors in your matting. To get the layered look of two different colors, measure the center rectangle of the brown layer until it just covers the edges of the print. (ex. if your print is 8 1/2″ x 11″ you would cut the rectangle to 8″ x 10 1/2″, 7 1/2″ x 10″, etc.) Cut out the rectangle you measured.
Then measure and cut the center rectangle on the white box to be about 1/2″ larger on each side so that you see the brown peeking through on every edge once the rectangle is cut.
Adhere the print to the underside of the brown layer and stick the brown layer on the underside of the white. Again, make sure to measure so that all of the edges are even.

Using a gift box to mat your printables is an easy way to create a custom mat for your frame while re-purposing something you probably already have at home.
To see more pictures and details head to the blog post How to Mat a Print Using a Gift Box.
Or head to my blog to find out how to get the free printables in the photo plus all of my other free printable art.

Comments
Join the conversation
-
Hi Erin. Love this project! Great use of salvaged gift box. Also great instructions. I have so many things in my head that I can use with this project! Thanks for sharing. Great job!
-
This is a wonderful idea! I pick up frames in all different sizes from thrift stores to frame my grandchildren's art work and this will be the perfect way to add a little polish to the end result. Thank you for sharing this with us!


Frequently asked questions
Have a question about this project?