


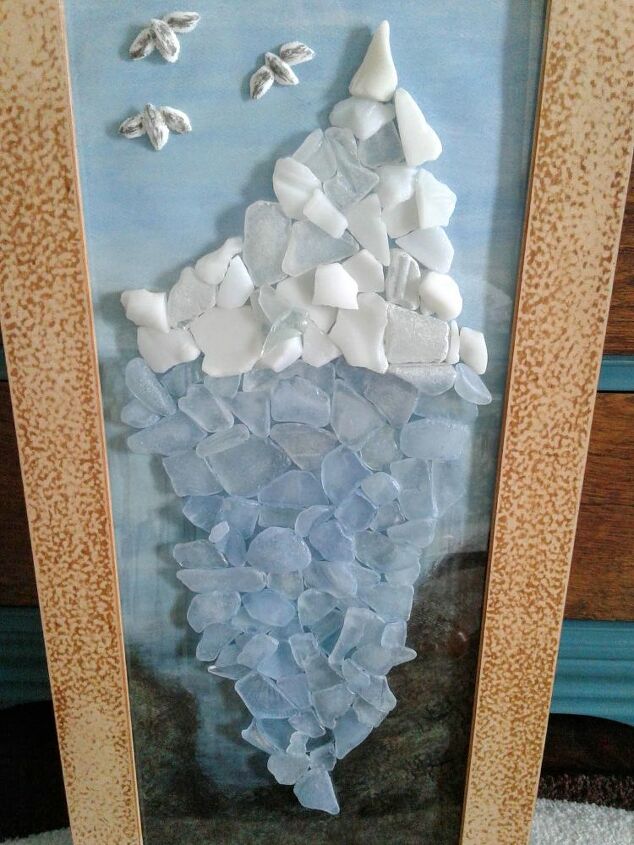
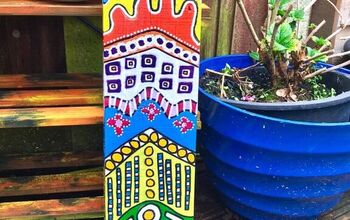
Iceberg Straight Ahead -Seaglass Art

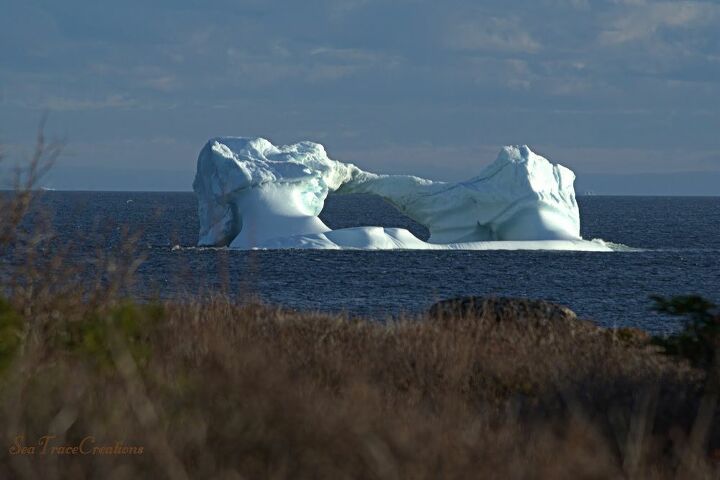
I live along the edge of Iceberg Alley and as Springtime edges closer so do the icebergs! They often provide an array of interest and beauty off our coastlines, I love to photograph them as do our visitors. The icebergs were the inspiration for my latest seaglass project.
I love to recycle picture frames for my crafts as was the case here too, it was a goodwill find and exactly the shape I wanted, tall and narrow.
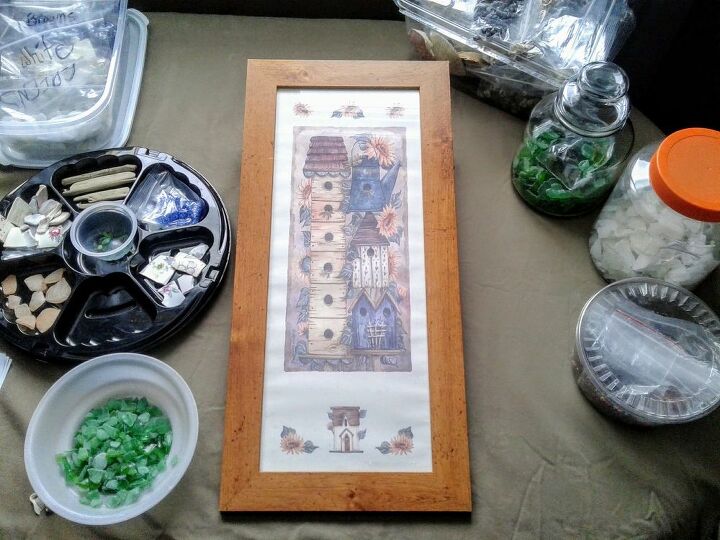
The frame wasn't real wood, just a wood laminate film over pressed wood. The original artwork luckily was on watercolor paper, that was a bonus I'll just flip it over and use the other side! Yay!
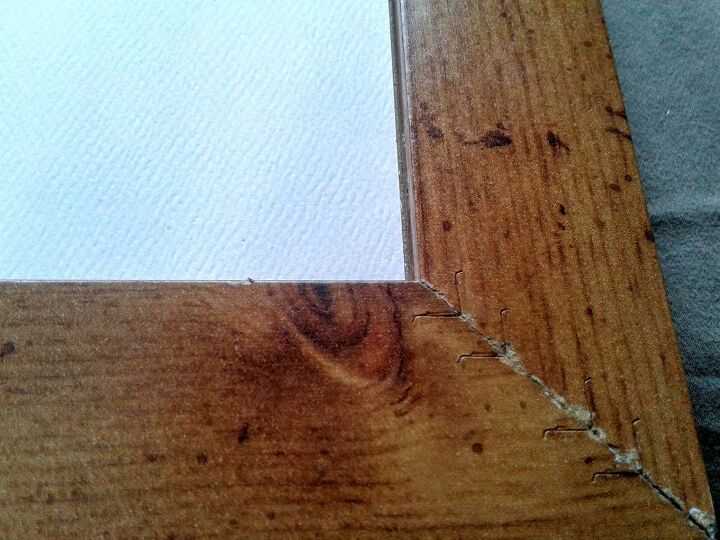
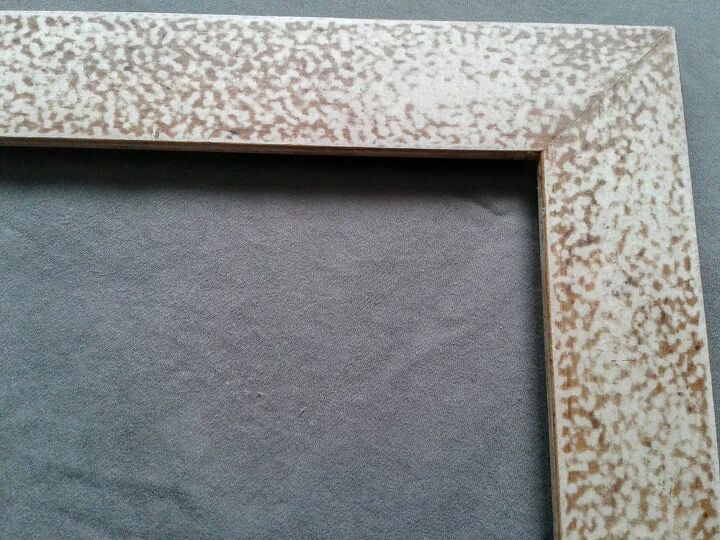
The frame....hmmm??? Well I'll try to sand it enough to give me a better surface to paint onto. I did this with a higher grit sanding pad because I knew there was a very thin layer of fake grain before I hit the MDF base material. You know what? I like how it looked after it was sanded, it reminded me of the trapped air bubbles that are in iceberg ice. Score for me, yesss.....I got this!
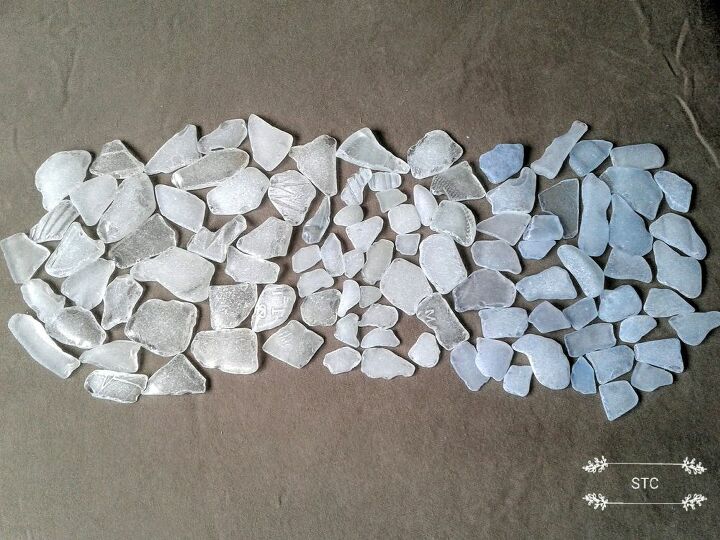
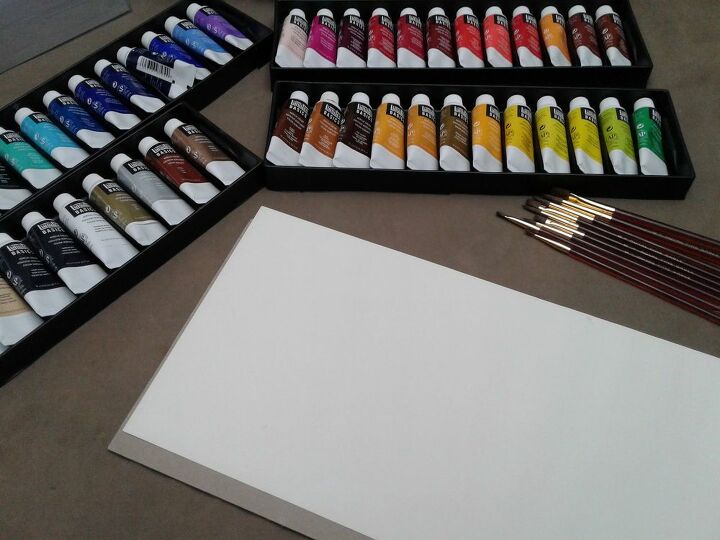
So most of the seaglass found along our shorelines is the worn, clear class but with the help of glass paints I was able to create a light blue as well.
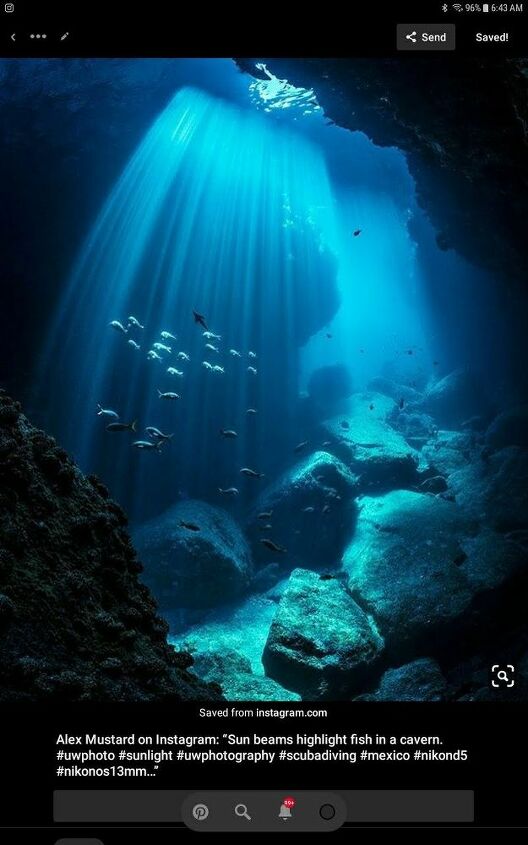
Why the blue glass you are asking? Well the fact is the ocean color affects the appearance of the iceberg's ice color. Shown below is an image showing the full side profile of an iceberg to help you understand my thought process.

I used E6000 Adhesive to apply the seaglass to the front on the glass, make sure the glass sheet is clean before you start.
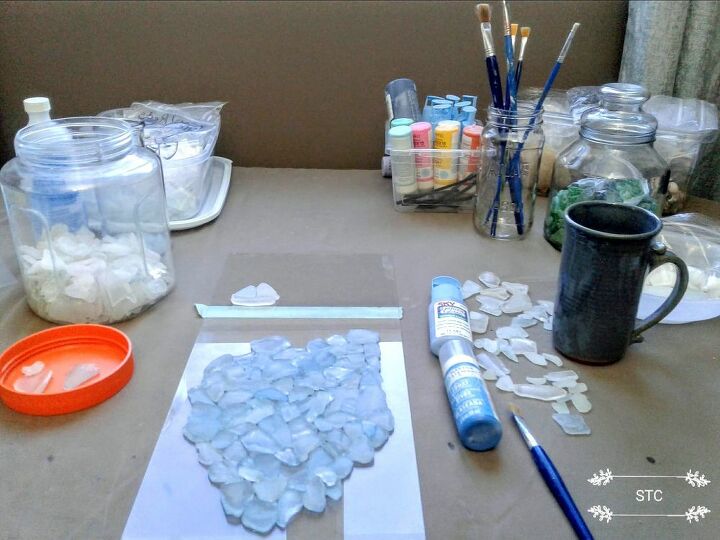
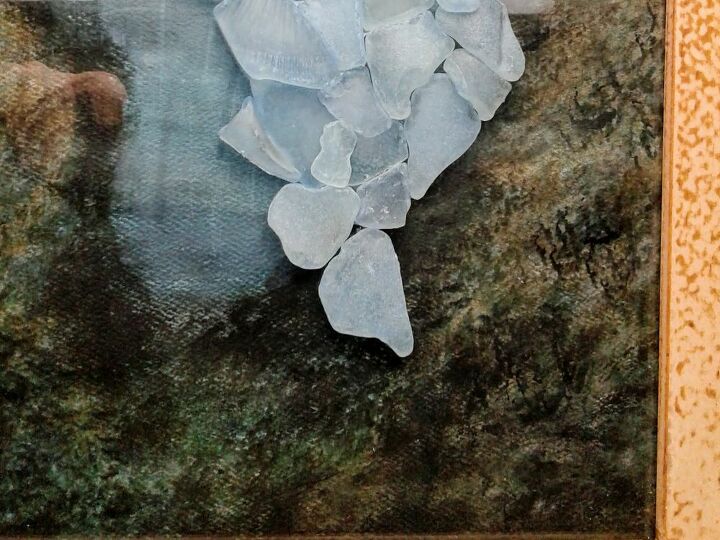
A few facts about icebergs, no two are alike and 9/10ths of the berg is below the ocean surface. With that in mind I divided my glass into 2/3 for the underwater area and 1/3 for the above water area. Painters tape is on the back of the glass to act as my guideline as I create the iceberg.

I kept adding blue shards until I reached the tape mark and then switched to clear glass and some milk glass shards for the top. I did a preview of it with the frame added and it just didn't look right. Too uniform? Too chunky? Too boring? I couldn't add anymore so I started removing pieces.
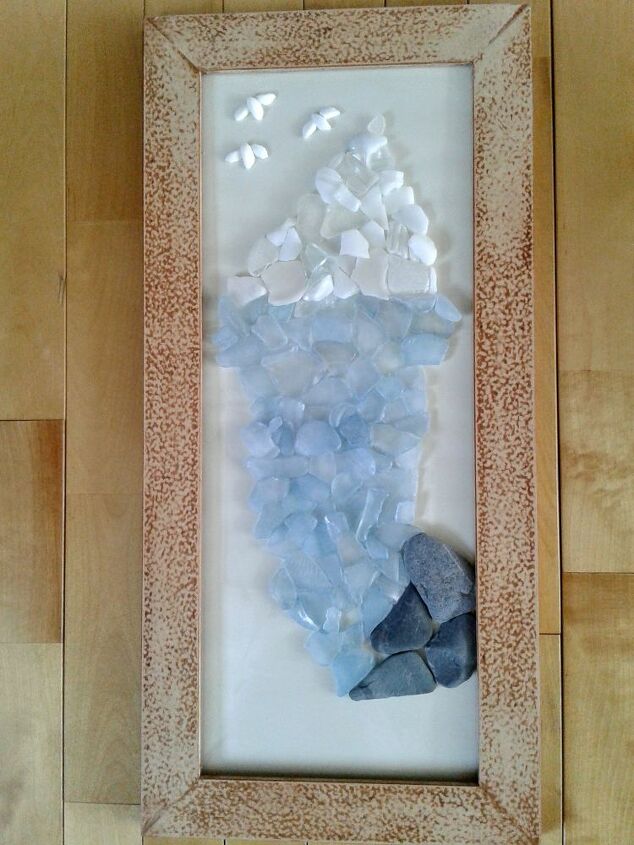
I took away glass, I added flat rocks as if it had struck the seabed and was now grounded as often happens with them...it wasn't impressing me! Maybe once I add color to the background it'll be better?
*I easily removed excess glass and or glue ith a razor scraper.
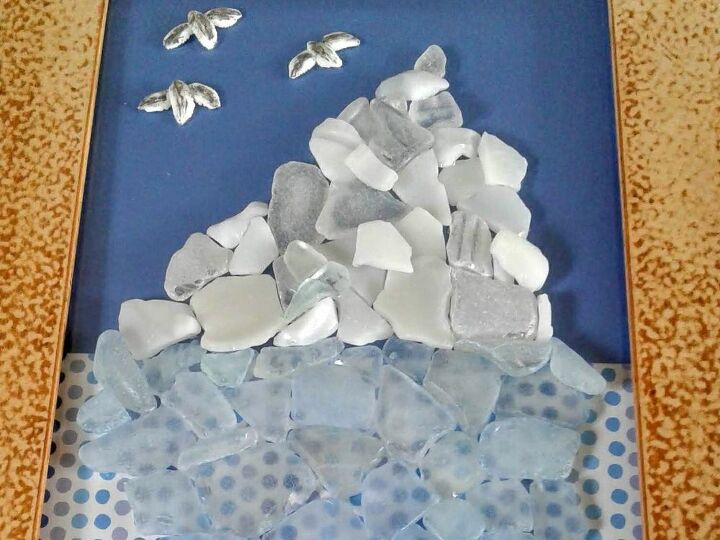
So just as a substitute I added two colors of scrapbook paper to help give me an idea on what color would bring to the piece. Oh yes and seagulls, they migrate back here in the Spring too! They were made with cod fish ear bones, otholiths.
I always source images to help me see what the real subject should look like, in this case the seabed. I used this one and other similar ones as a reference.
I've never took a painting class or any other art class so please keep that in mind before I share the painting. Remember this is the original art insert that I flipped over to use again for my background.

So I started, stumbled and succeeded after many ups and downs, I am pleased with the final look. I tweaked the above ocean part of the iceberg by adding more pieces here and there. Now I have very own iceberg even if I don't get to see one drift by me this Spring, how cool is that?
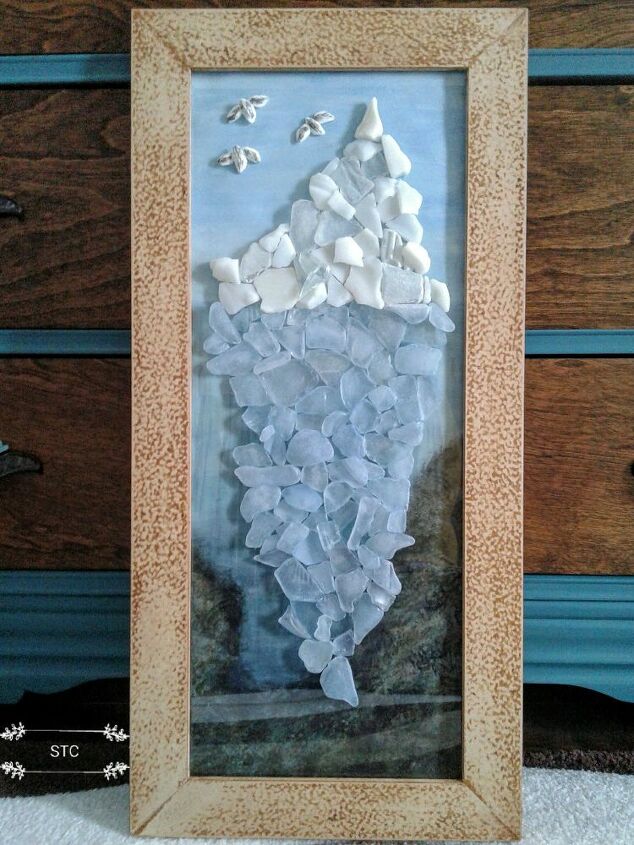
So you see I did make it look as if the iceberg was grounded, it's snagged into the seabed there. Lol, that's my thumb reflection in the upper left not a sea monster!🤣🤣🤣
It has color in the background, it has pattern in the frame and it has texture with all of the seaglass pieces...I think that's artsy enough!
I hope I didn't bore you with all of my steps and thought processes and that it has given you a little more insight into icebergs and a behind the scenes glimpse into my Spring time views! Thanks and if you enjoy seaglass art there's lots more to be seen on my profile page here on Hometalk!
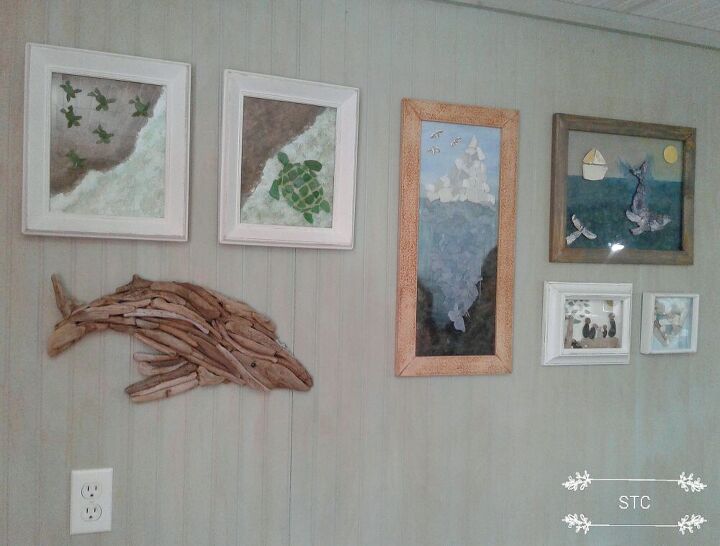
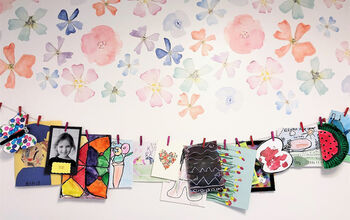
It found a forever home along with other of pieces of my art as part of a gallery wall in my craft room.
Resources for this project:
See all materials


Comments
Join the conversation
-
How beautiful ! Thank you so much for sharing this and also for letting me share with you the beauty of your Spring. I will definitely be trying this, I only hope that I can do a beautiful background as yours !
-
that is ammazing


Frequently asked questions
Have a question about this project?