Shiplap Ceiling Tutorial To Cover Textured or Popcorn Ceilings

Do you have heavily textured or popcorn ceilings and you don’t want the hassle of removing it? Learn how to install shiplap on your ceiling!
If you love this project, grab your quick start DIY guide & subscribe to our blog!
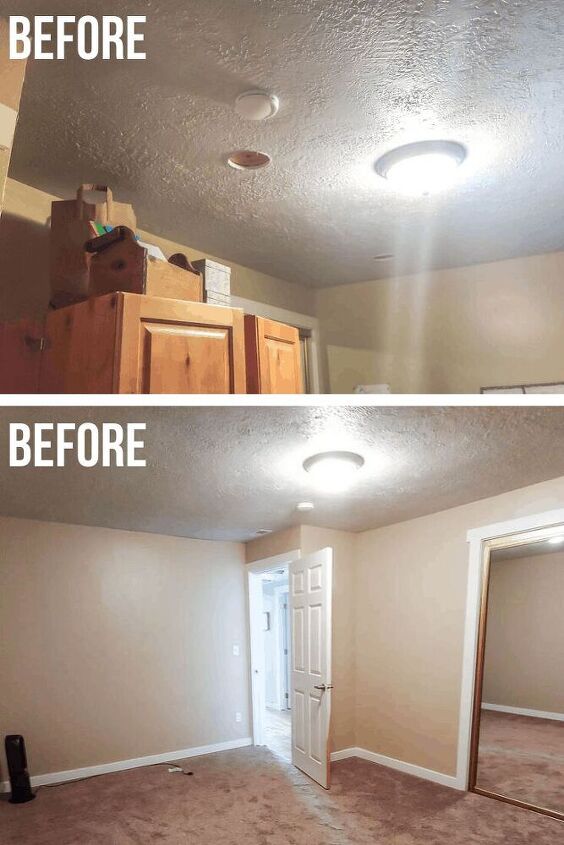
Before Pictures
Installing shiplap is a great way to give a room a little boost. After we completed this project, we marveled at how much brighter and bigger the room seemed!
Step 1. Remove everything from the ceiling.
Start by removing fixtures from your ceiling, including lights, chandeliers, air vents, and anything else that is attached to your ceiling.
Step 2. Locate the ceiling joists.
Before you begin nailing, find the ceiling joists with a stud finder.
Step 3. Attach the shiplap planks.
Instead of joists, we had sheets of plywood right above our ceiling, so we were able to nail right into the plywood which worked perfectly.
Ideally, the joists and planks should run perpendicular to each other.
After attaching the furring strips into the joists, you can nail the planks directly into the furring strips.
As you begin nailing, make sure you are holding your nail gun at a 45 degree angle. This will prevent the planks from shifting against the other boards and straining the enforcements above.
Using a hole cutter for the circular cuts and a multi-tool for the straight cuts, we cut along the markings so we could easily reattach our fixtures and vents over the shiplap ceiling.
Step 4. Sew things up with caulk and spackle.
Now that your shiplap planks are in place, it’s time to caulk and spackle.
First, apply caulk in a small bead, along the edges of the room. Then, smooth with your finger to create a seal between the walls and ceiling planks.
Keep in mind that paint touch ups along the wall may be necessary after caulking. For this project, we planned on painting the entire room, so the messy caulk smears weren’t a major concern for us.
If you wanted to make sure your lines were clean, you could apply painter’s tape to the wall first and then remove the tape after you’re done caulking.
Spackle the nail holes using a putty knife, sand to smooth, and then you are ready to paint.
5. Complete the project
For all of our ceilings, we use Behr’s Flat White ceiling paint, but you can use any color of your choice. Roll on the paint in the directions of the planks.
If you find the paint is running between the shiplap planks, run a screwdriver along edges between the planks while the paint is still wet.
As you are painting, be mindful of “bumping” the walls with your roller. For this reason, it’s a good idea to “cut” into the ceiling with a paint brush, painting about an inch or two into the ceiling planks and away from the walls. We use an angeled paint brush for this.
After the ceiling is painted and dried, replace your light fixtures and vent covers, and enjoy a beautiful and bright new look!
Updating aging ceilings doesn’t have to break the bank! Installing shiplap over textured ceilings is a great way to skip scraping and will give your home an updated look that you can be proud of.
If you love this DIY, check out all of my DIY wood projects tutorials in the archive here!
Affordable Home Upgrades
Enjoyed the project?
Resources for this project:
See all materials
Comments
Join the conversation
-
 Ars54268128
on Feb 15, 2024
The contractor I hired told me he couldn't lay shiplap over my popcorn ceiling. He said he'd have to scrape it first. I still have popcorn. Thanks for the tips.
-
-















Frequently asked questions
Have a question about this project?
What would the cost for a pro to install, any ideas?
Why not paint the boards before you install them. You can touch up boo boos as you work.
What about using drywall and using beautiful wood to enhance it. Nice moulding. It elevates a room.