


Turn An Old Window Into Coastal Wall Art Using A Transfer And Epoxy

Vintage windows are so versatile! You can do so much with them so I always grab them when I see them 🪟
Redesign With Prima makes a product called decor transfers. Mostly, people add them to furniture, but they can be applied to pretty much any hard surface! And they have about 200 different designs in a variety of sizes and styles!
Applying a transfer to a window is an inexpensive way to get a unique piece of art for your home.
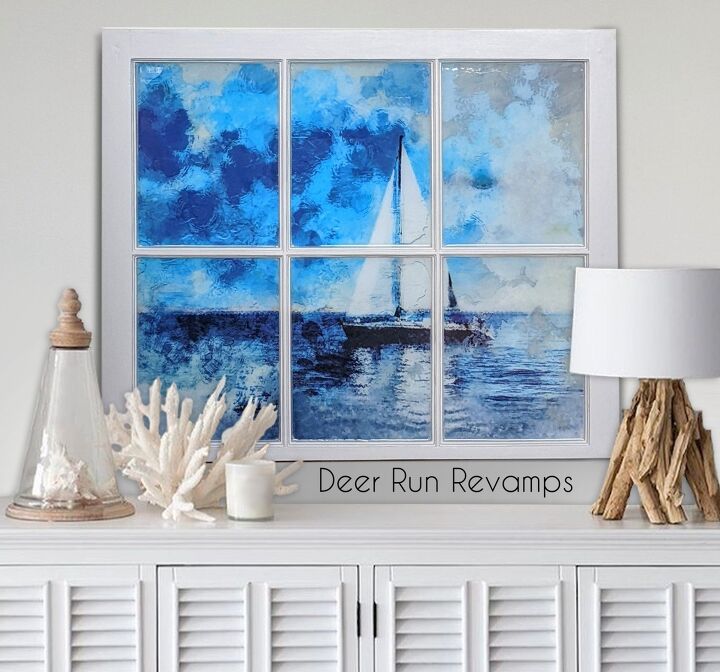
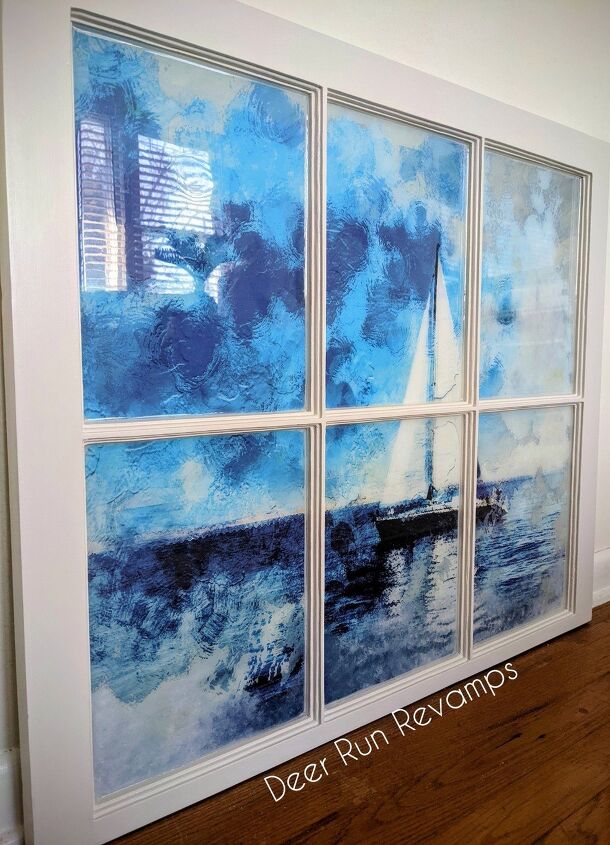
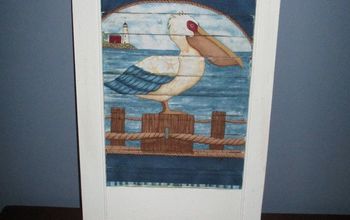
Read below to see how I turned an old window into an ocean scene with sailboat ⛵😍
This project is actually a lot easier than it sounds 😉
*Time listed is for work time only, it does not include dry times
*Price listed is for the amount of product used
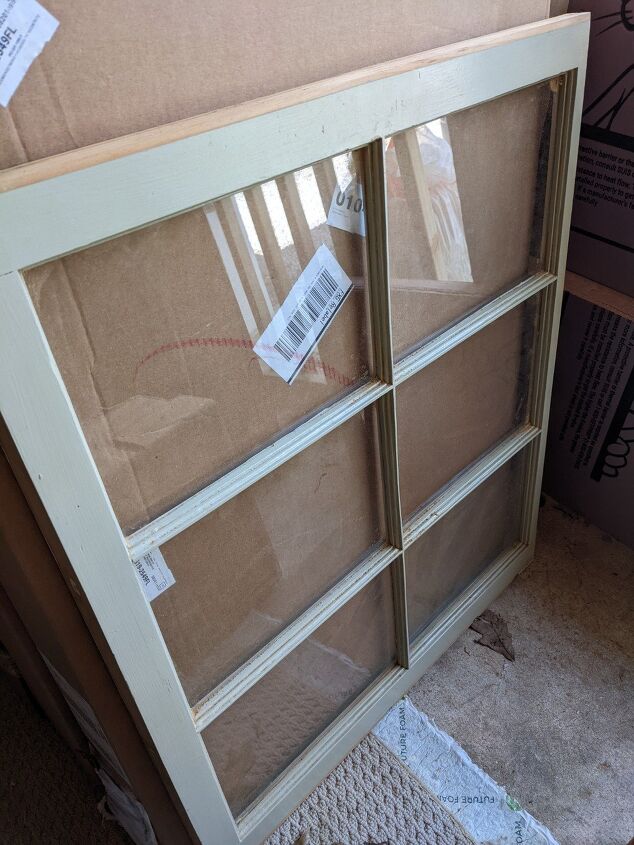
I forgot to take a photo of the exact window before I started transforming it, but this window is the exact same one, just a different color.
The biggest problem that I had was that I really wanted the transfer to be on the back of the glass so that it looks as tho you are inside looking out at the ocean scene, but unfortunately, transfers just don't work that way. It has to be applied on top of the surface.
So, to get the illusion that the ocean scene was behind the glass, I poured epoxy over the transfer 😁 This worked beautifully and gave me the exact look I was after. And for an added bonus, the epoxy really protects the transfer and makes it super easy to clean the window.
But, the epoxy is not necessary. Just follow all of the steps right up to the epoxy pour.
I first painted the frame with a white chalk paint - I used the color snow by Renaissance.
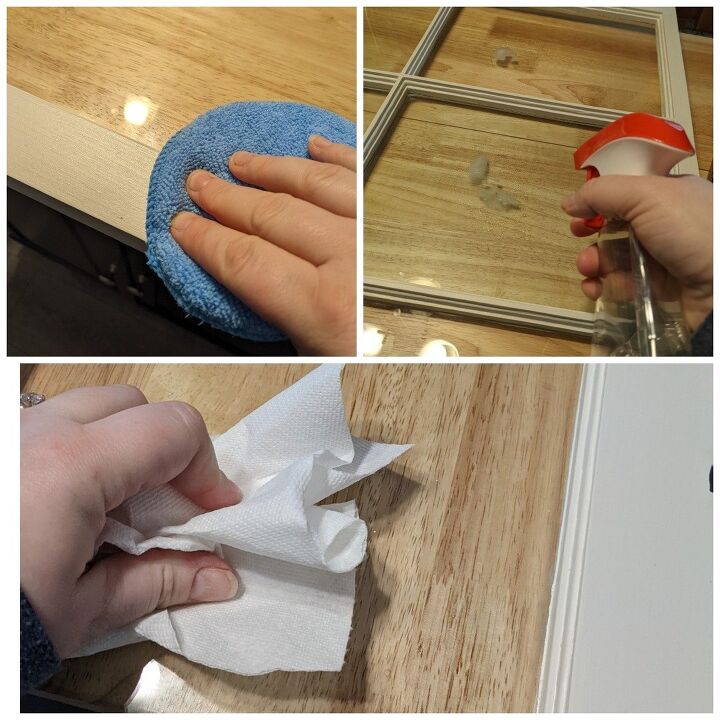
Then I applied a thin layer of clear wax on the frame. I made sure to get the part of the frame closest to the glass, but tried not to get any wax on the glass itself. This was difficult but necessary to keep the transfer from adhering to the frame. Next time, I'll just tape the frame so that any excess transfer sticks to the tape instead of the frame.
After I applied the wax, I cleaned the glass really well with Windex and then a quick wipe with rubbing alcohol
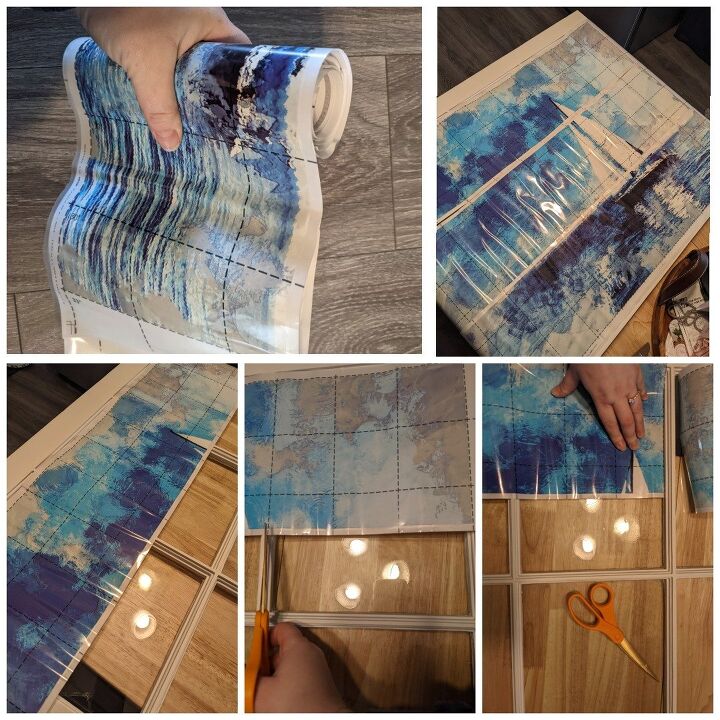
Lay out your transfer and match up the edges so that you can see the complete design. This transfer came in 3 sheets. If you find it difficult to keep track of the design, number each section so that you can be sure to match up the design on the window correctly.
I started at the top of the design and roughly measured out the transfer in the pane of glass, then cut the piece I needed for that 1st window pane. I made sure to leave just a bit extra in case my rough measurement was off at all. I had about ⅛ of an inch extra on both sides
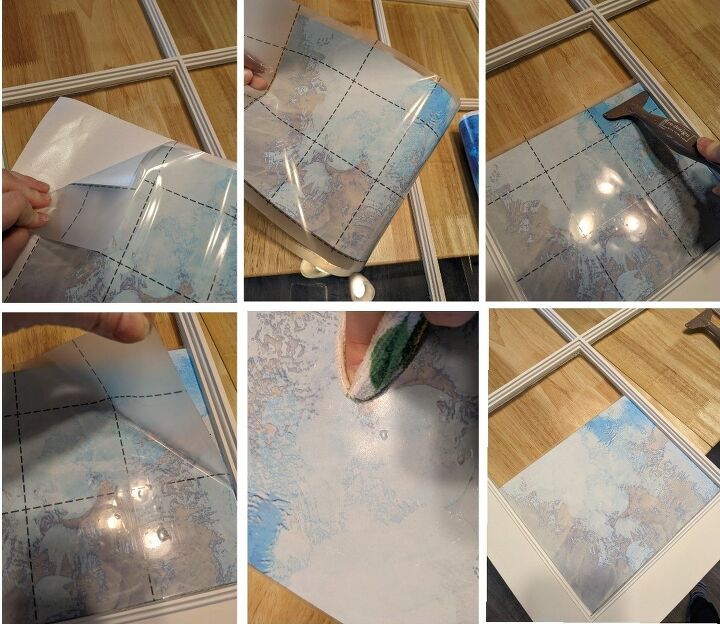
Once that first section was cut to size, I peeled the white backing off and got ready to adhere it to the window. Take your time here. Once the transfer touches the glass, it's going to stick, so you won't be able to move it around.
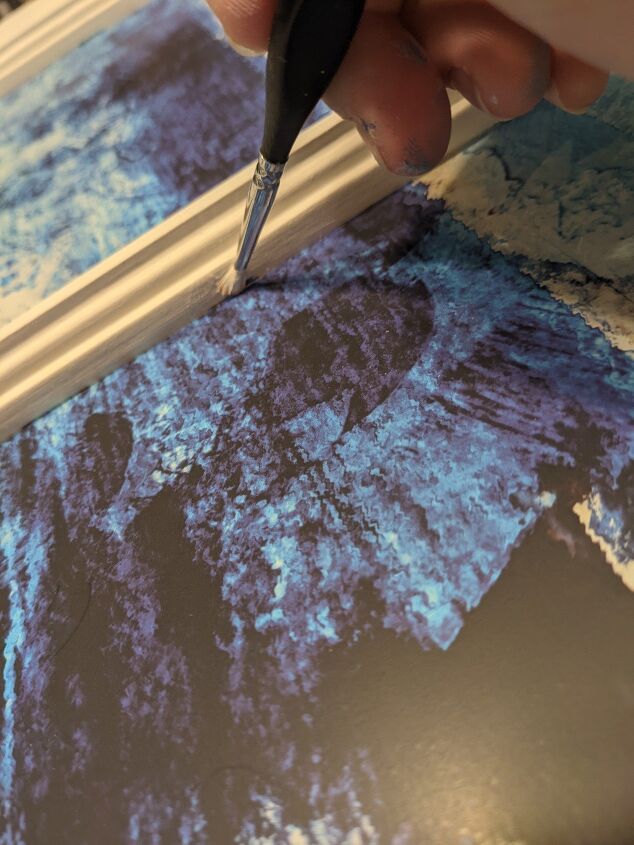
Hover over the window pane and line up the edges, then press the transfer into place. Using either the wooden stick included with your transfer or the transfer tool, apply pressure and go over the entire transfer, especially the edges and corners. You want to be sure it's adhering completely.
Once you have the transfer adhered, slowly remove the clear protective layer. If at any time the transfer didn't adhere completely, lay the clear layer back down and go back over it with the transfer tool.
Usually, when you apply transfers to a nonporous surface such as glass, you'll get air bubbles. These can easily be diminished by burnishing the transfer. To burnish, take a dry, soft cloth and go over the entire transfer applying a good amount of pressure. If you still have noticable air bubbles, you can pop them with a pin and burnish again.
Don't worry about the super tiny ones, they won't be noticable after applying the epoxy.
Continue this process for the other top 2 window panes making sure that you're lining up the design correctly
From here on out, you will need to cut the excess "halo" from the edges of the transfer you'll be butting up to the other one....I'll remind you when to do this in each step.
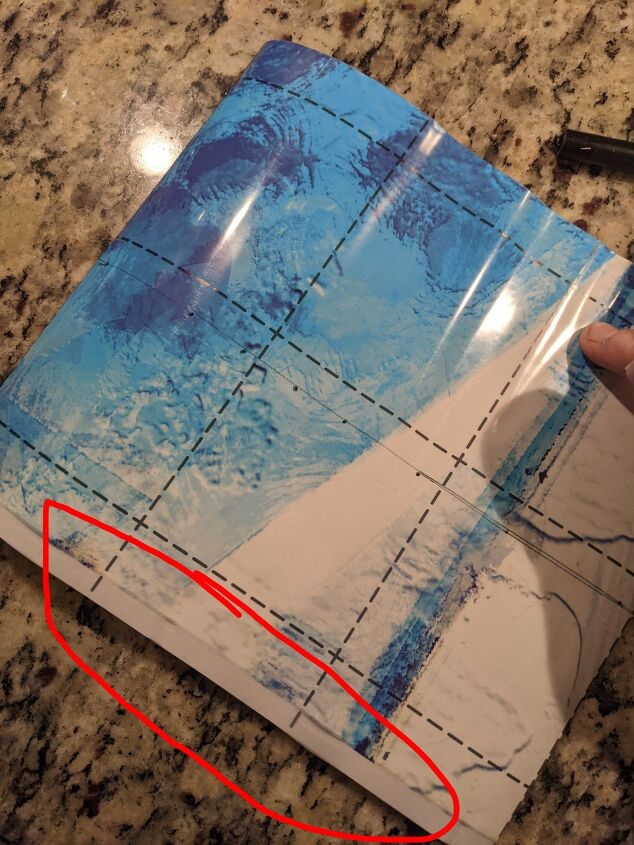
If you've worked with transfers before, you know they have a halo effect around the design. The halo is the clear excess strip that goes around each design. Since the transfer that I'm using is a solid design, the halo is only around the edges of each sheet.
When lining up designs, this halo can make the seam between each sheet more noticable. But cutting off this excess edge (the halo), you'll be able to get a more seamless look when you line up the sheets correctly.
I circled the halo in the photo above for a visual.
To cut off the halo, carefully cut right up to the design, removing the clear excess strip
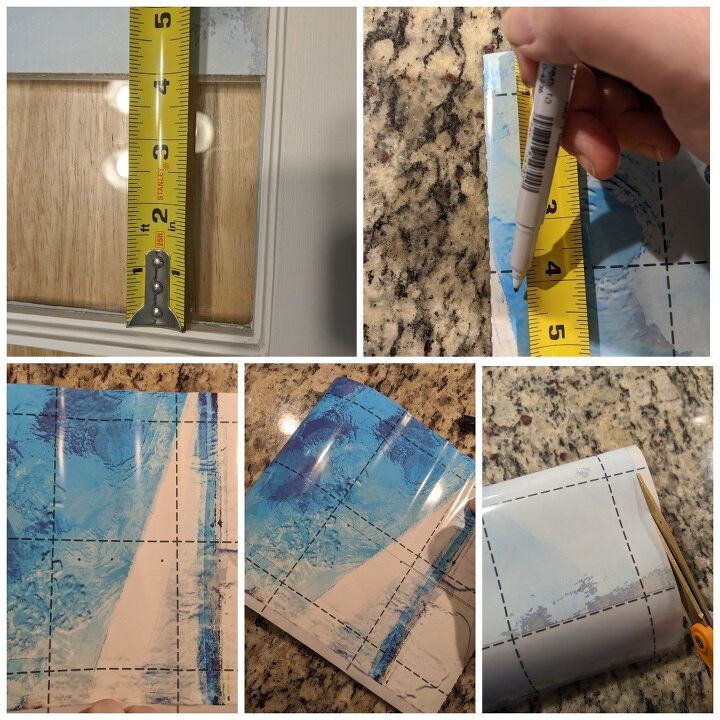
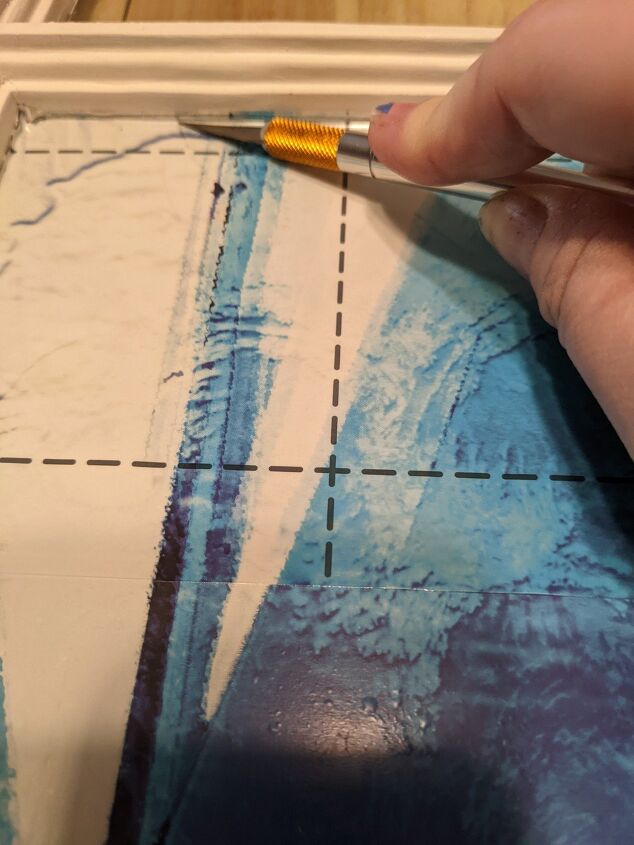
To finish off the top panes, I measured the space left on the glass pane and then marked that measurement on the next sheet of transfer, again making sure that I was marking the correct sheet and that it will all line up correctly.
To mark the transfer, I took the measurement from the window and measured from the top of the transfer design down, marking a dot. I then went across the transfer and marked a dot at that same measurement every few inches, and then took a straight edge and connected the dots.
I then cut along that line.
I also carefully cut off the halo on the edge that I'll be lining up
You'll be applying the other half of these sections to the bottom panes, so make sure that you keep them in order
This part can be a little tricky so take your time.
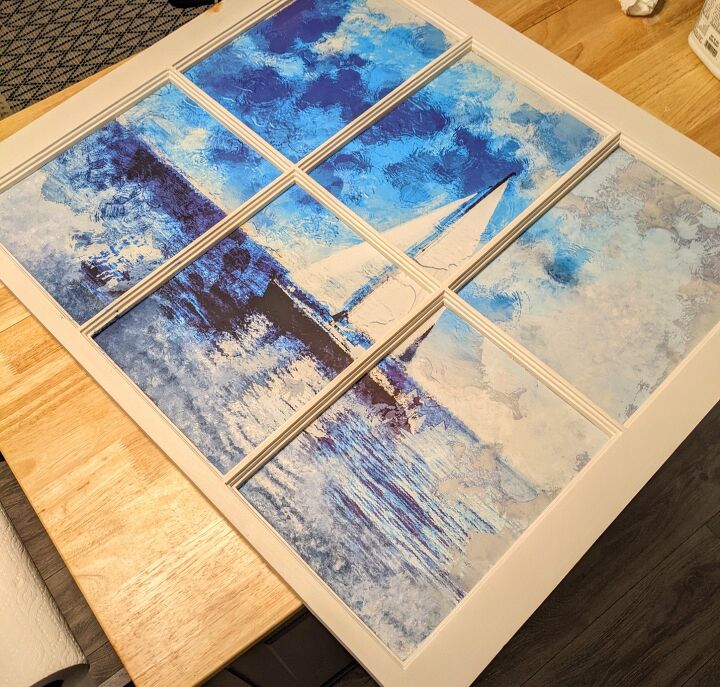
When lining up transfers, there's not much room for error (as shown in the below photo 🤦♀️, but fixable if a mistake is made)
Remove the white backing and carefully line up the pieces of transfer so that the design lines up as well as the edges along the frame, careful not to let the transfer touch anything until it's in the correct spot.
When lining up transfers, you want to slightly overlap the 2 pieces. And I mean slightly, just enough to not allow any crack to show.
Once you have it lined up correctly, press it into place and use your transfer tool to adhere it to the glass.
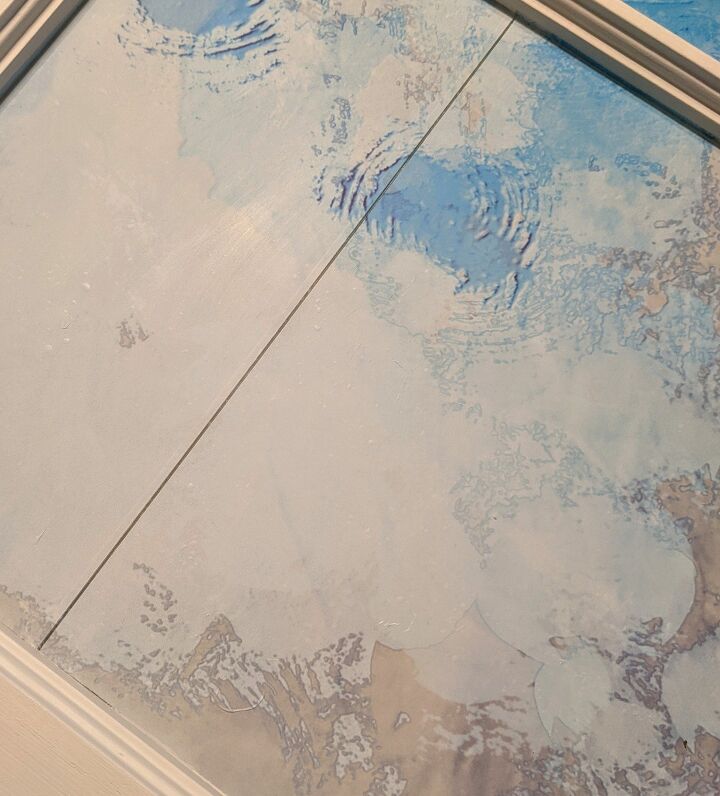
This is what a mistake looks like. I didn't overlap the two sections at all and was slightly off. But, I'll show you in a few steps below how I fixed this
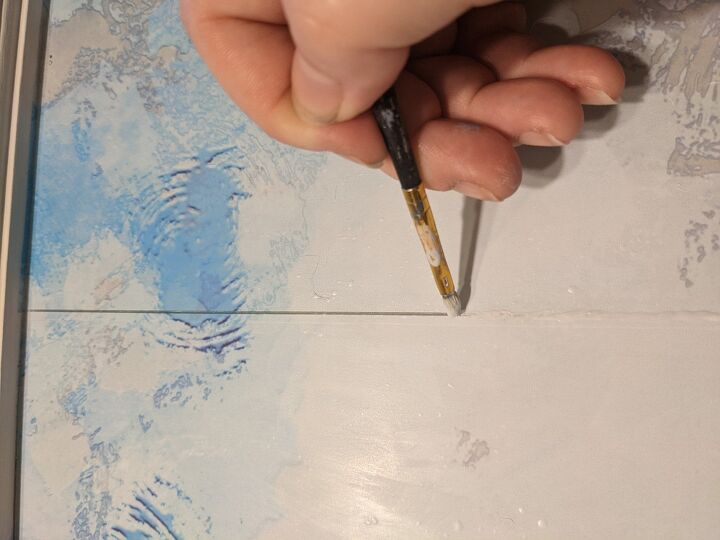
Then, burnish the transfer and use an exacto knife to cut off any excess transfer. Just run the knife slightly under the frame for a perfect fit.
If you applied tape all around the frame, still cut the excess transfer with a knife so that when you remove the tape, it doesn't rip up and take the transfer with it
Continue this process for the rest of the top 2 panes
Next, apply the rest of that sheet that you just cut to the top of the bottom panes making sure that each section is lined up correctly.
It is not necessary to remove the halo from the bottom of this sheet since we will be overlapping that part with the next section.
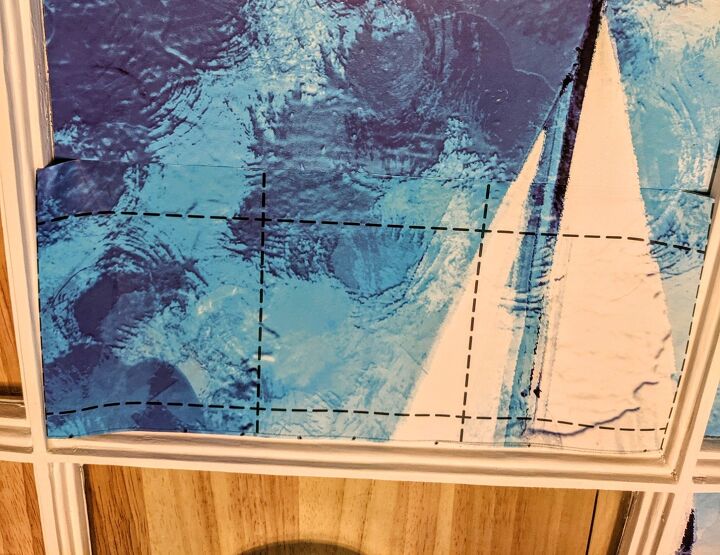
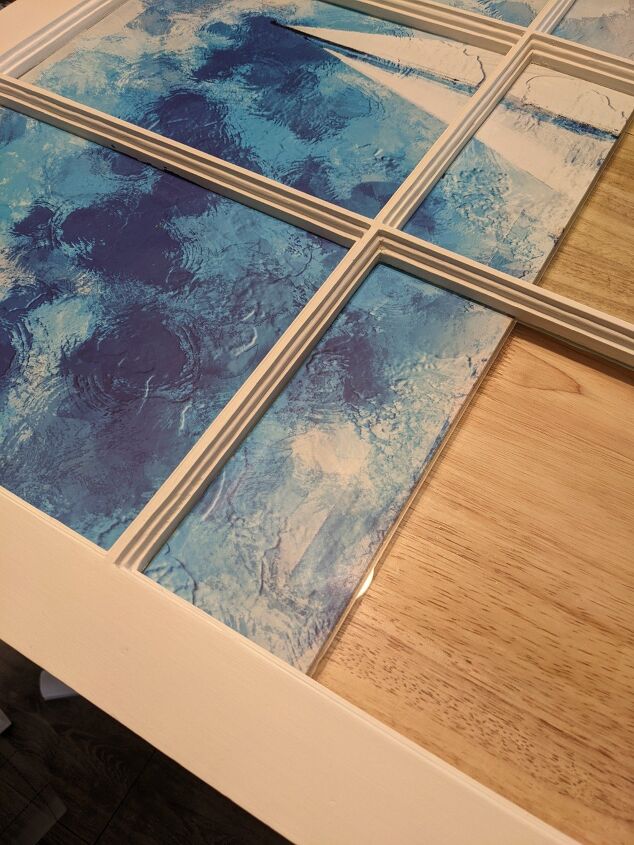
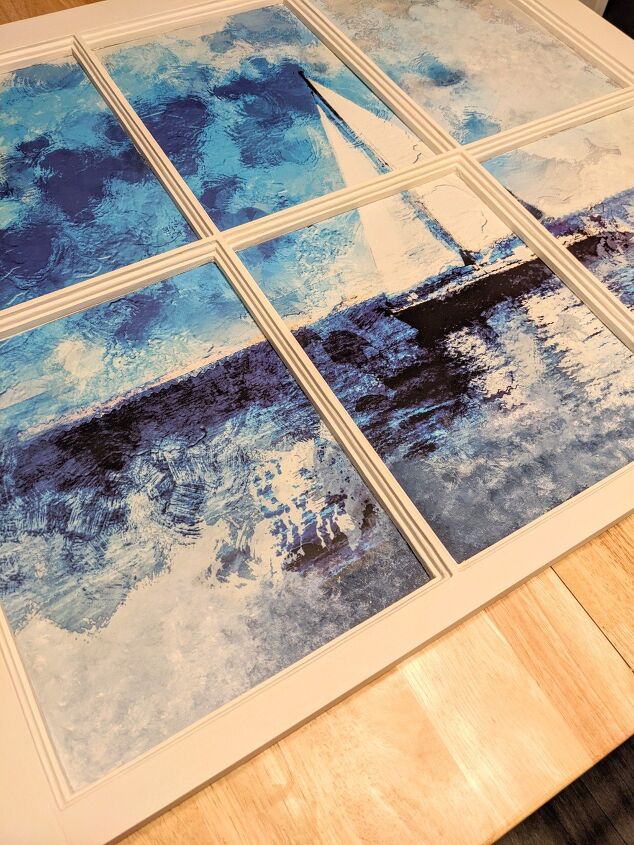
And then apply the final sheet to the bottom of the panes, making sure each section is lined up properly.
Don't forget to cut off the halo from the side that you'll be lining up.
Just as before, burnish the transfer after adhering and cut off any excess transfer with an exacto knife.
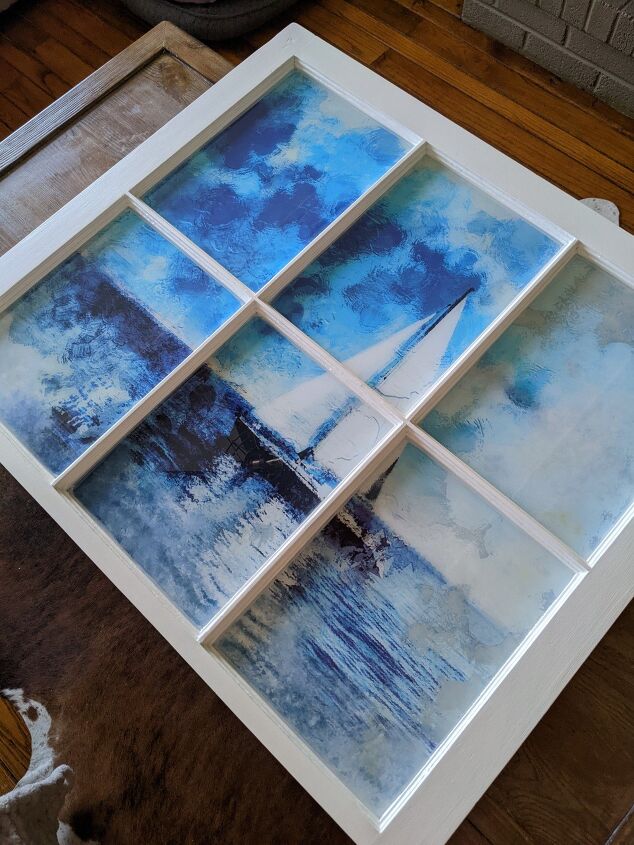
You can see that I'm about an inch short, but no worries 😁
Now it's time to fix my mistake and that bottom inch of the window......hand painting
This transfer design is rather easy to match and paint by hand. The biggest problem will be texture and sheen, but both of those will be fixed after I pour the epoxy over top.
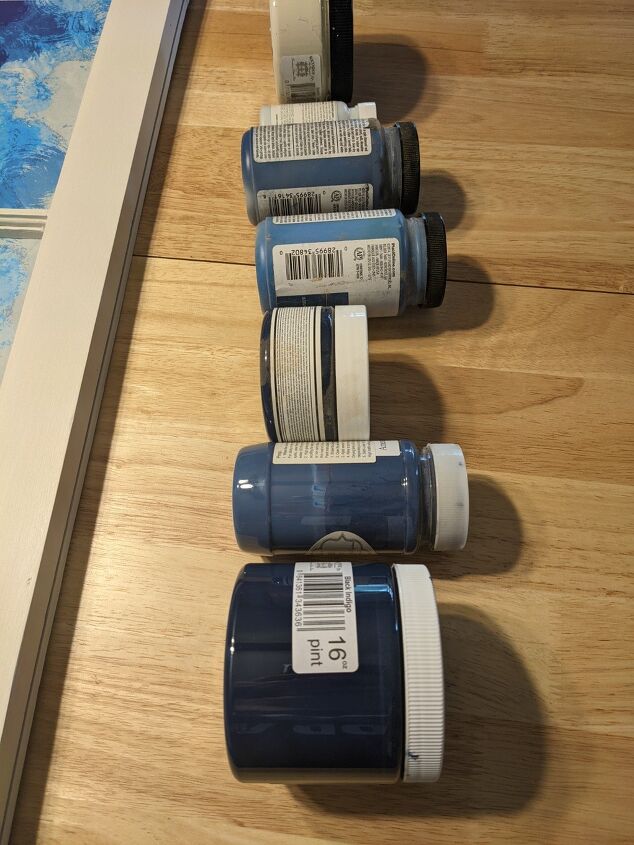
I used a few different blue shades, gray, black, white and an ivory
You can't paint over just the crack or just the missing inch at the bottom, you need to paint a larger area and blend it all in to make it look natural.
For the area where I didn't line up the transfers correctly (we'll call this the mistake), I added a little bit of paint all over the bottom 3/4 of that window pane, but the middle 2 inches or so are mostly all paint.
Then for the bottom (this will just be called the bottom), I painted the last 3 inches or so.
I first applied a coat of white to both the mistake and the bottom, just enough to cover the glass.
For the mistake, I started with dabbing on the very light blue, white and light gray using a small paintbrush. I also followed the pattern on the blue design on the side, I just made it darker.
But you can tell that something is off, it still doesn't look right
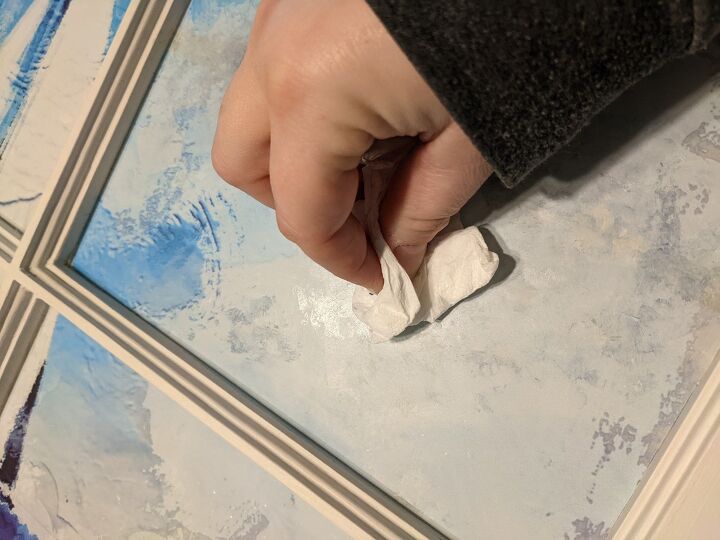
So I just kept dabbing on little bits of those 3 paint colors, trying to follow the current design, dabbing with paper towels, and blending.
After about a total of 30 minutes of dabbing and blending, I got it to where I was happy with it
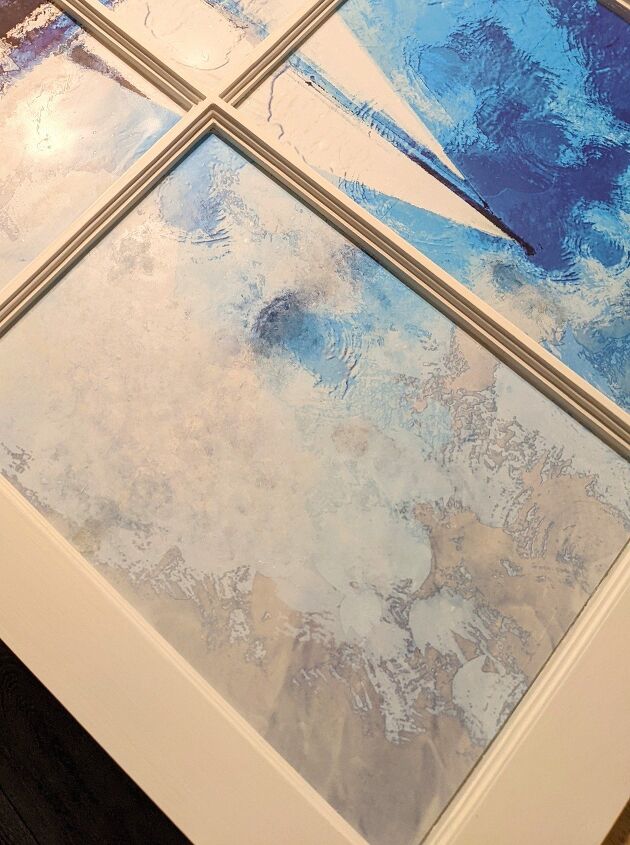
The bottom was actually easier. The ocean already had a dabbed on look to it, so I just took the darker blues and dabbed them on on a random pattern.
I also added in some of the "ripples" as the reflection of the sails with the white and navy blue.
You can definitely tell the difference knowing which areas were hand painted, but i am very happy with how it turned out
I ended up not applying enough clear wax to the frame in some spots, so the transfer stuck to the frame in a couple areas. I just went over it real quick with the white paint to cover it up.
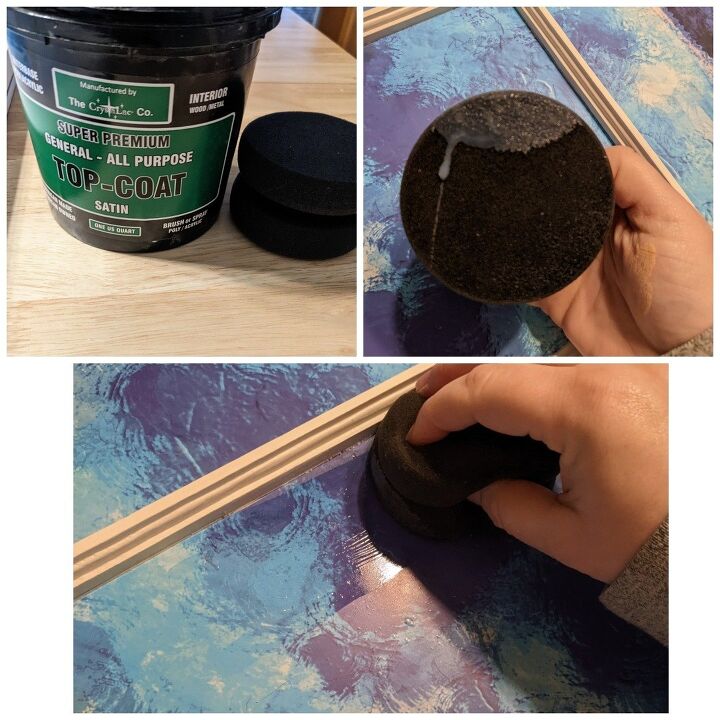
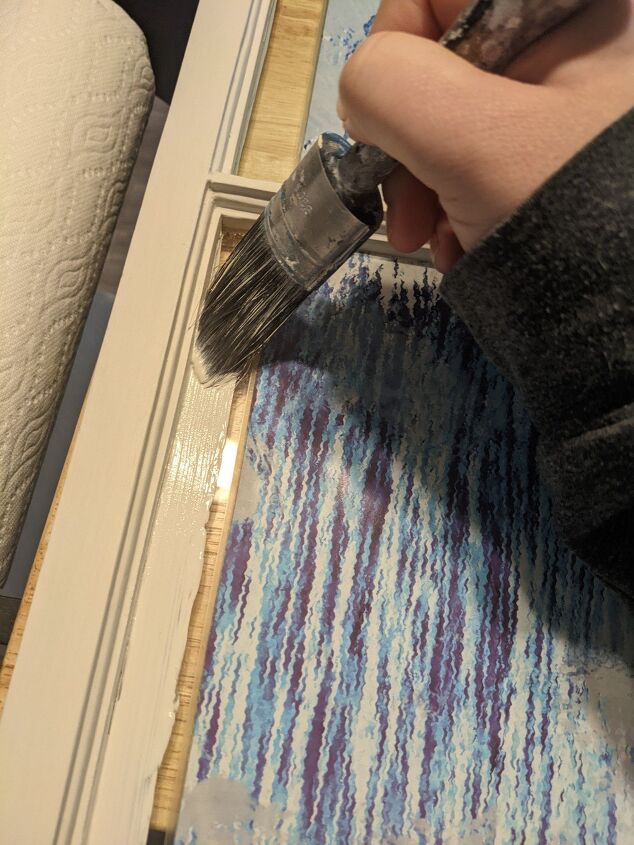
Before adding the epoxy, I need to seal the transfer.
I used crystalac super premium waterbased top coat.
Using a sponge, wipe on the Topcoat in thin coats. I applied a total of 3 coats, allowing to dry completely between coats.
Allow your final coat to dry for at least 2 hours.
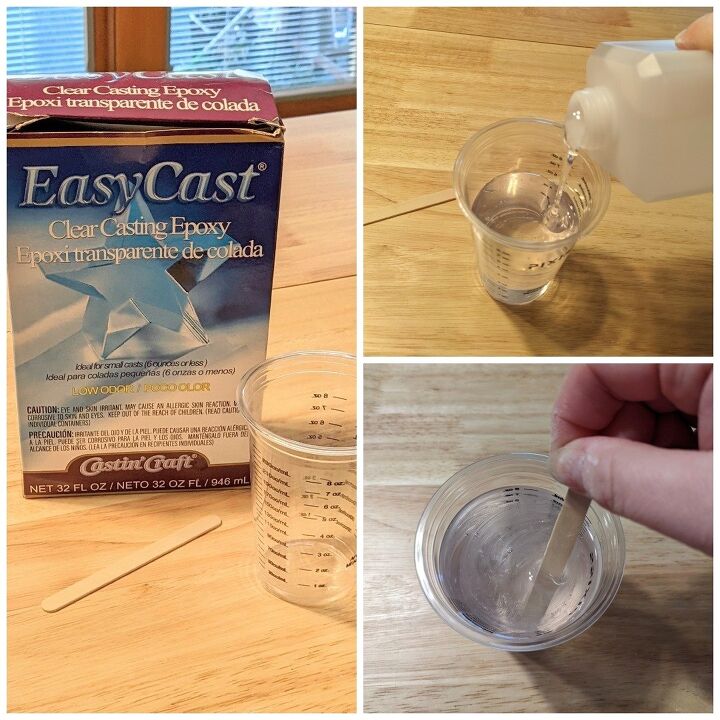
Then, mix your epoxy. You want to use a disposable mixing cup and stirrer.
Epoxy comes in 2 parts, part A and part B that you mix at a 1:1 ratio
I mixed a little over 8oz of epoxy at a time
Mix well for at least 2 minutes. If the epoxy isn't mixed well enough, it won't cure properly. So mix thoroughly
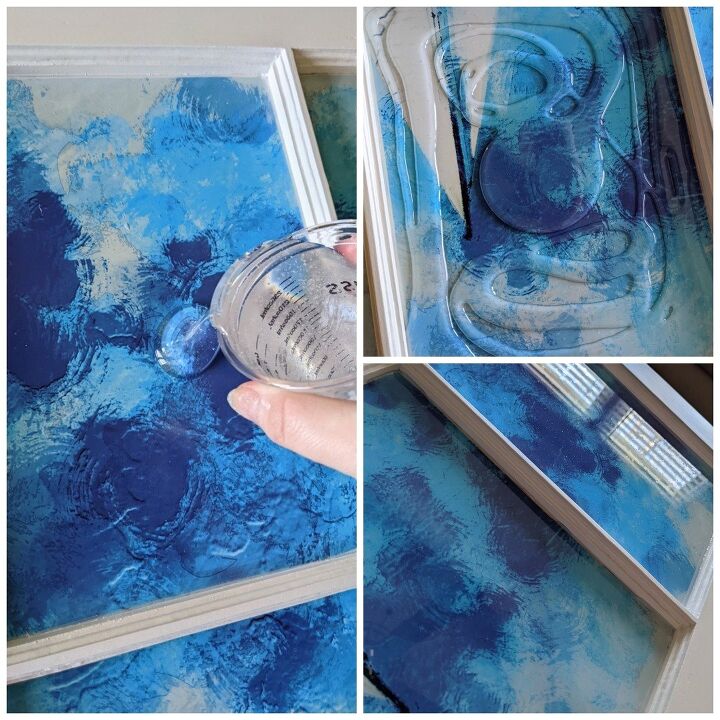
To get a nice, even coat of epoxy, I poured about 4oz onto each pane and allowed it to settled. If I found the epoxy wasn't covering the entire pane after allowing to settle for 10 minutes, I added a little bit more (I had to add more to 2 panes).
You can see how it has bubbles. We definitely do not want bubbles
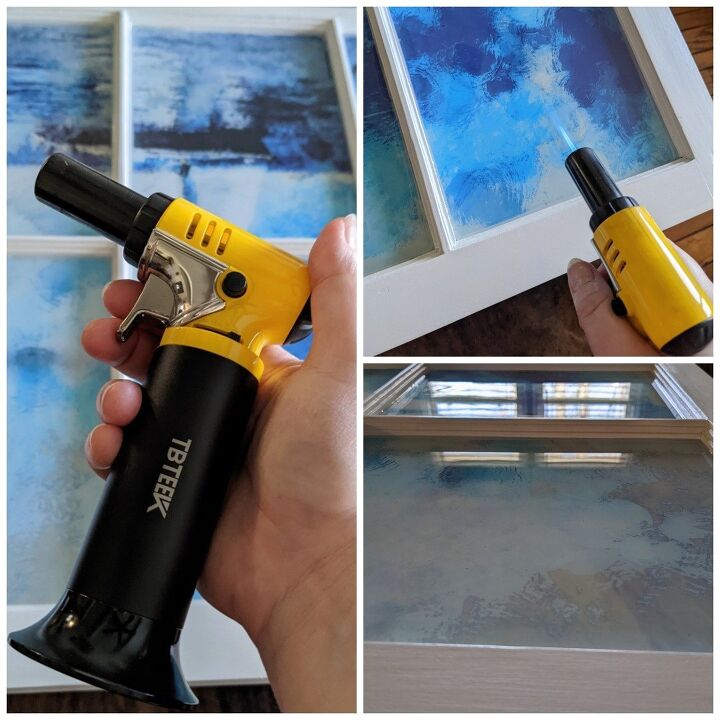
I used a butane torch to get rid of the bubbles, or you could use a heat gun as well.
Go over the epoxy quickly with the heat. Do not let it heat one area for long
Let the epoxy cure for at least 24-48 hours and then add picture hanging hardware to the back. Make sure the specific hardware you choose will support the weight of the window
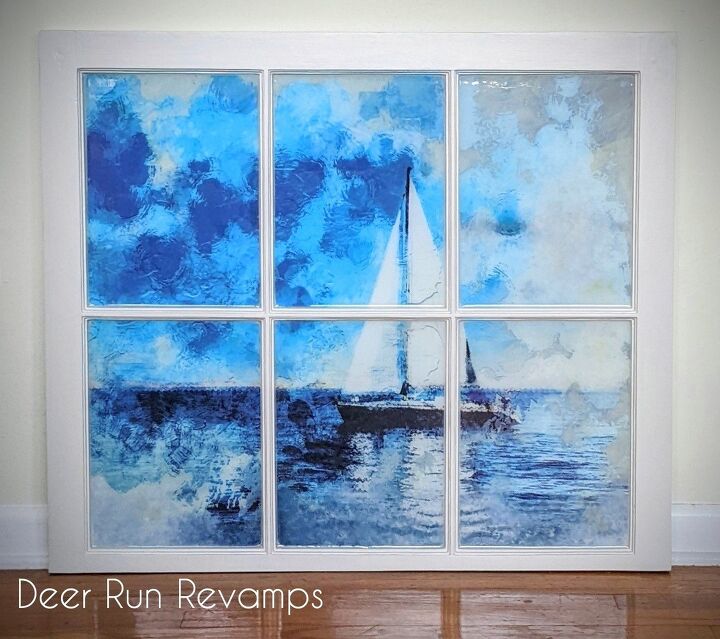
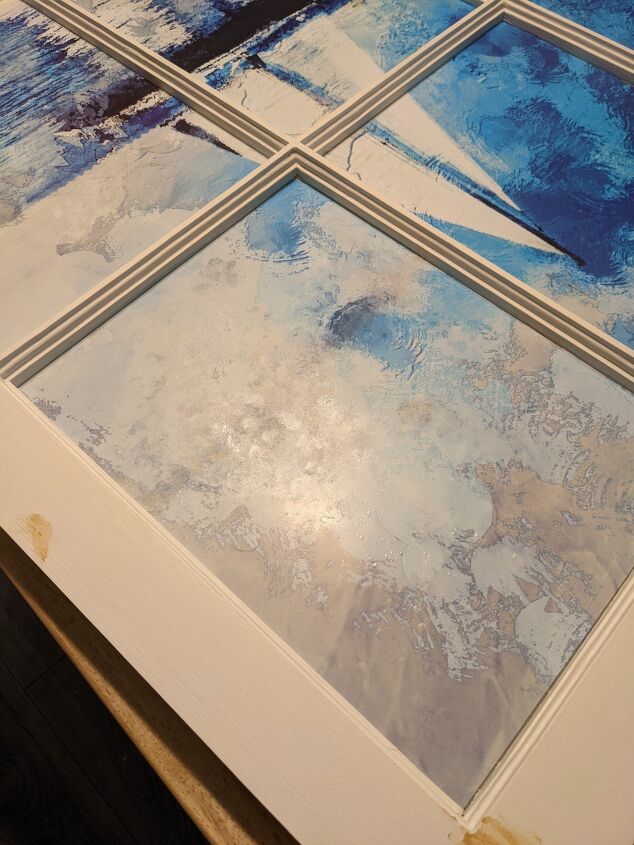
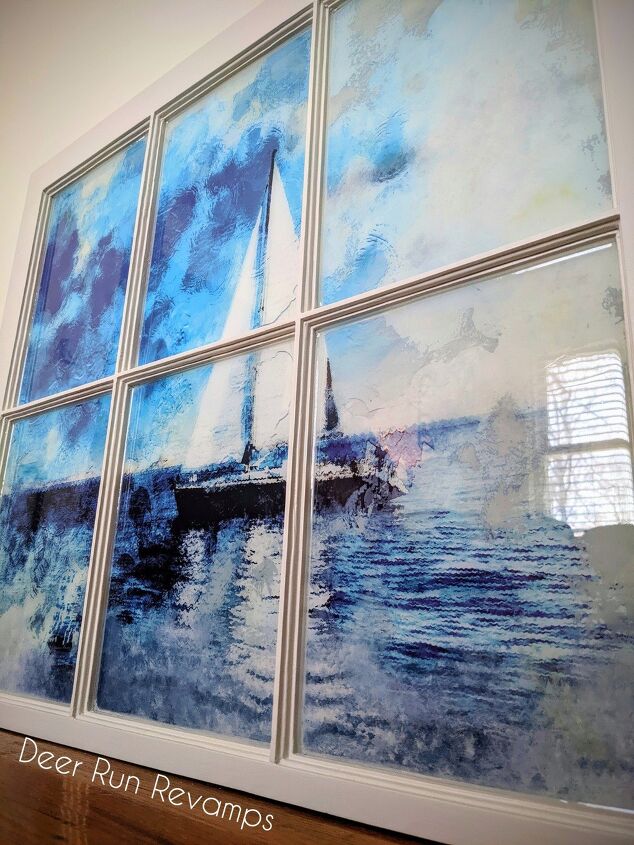
Then enjoy your hard work 😍
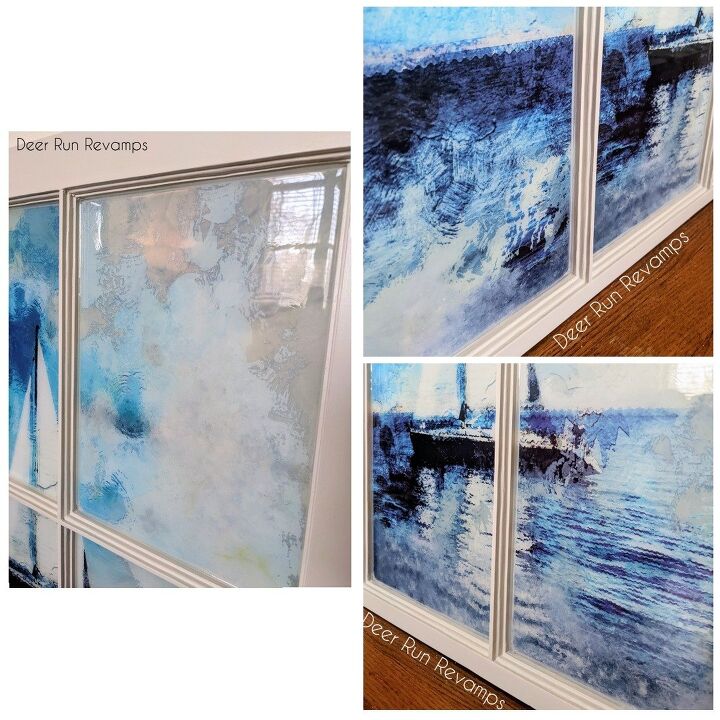
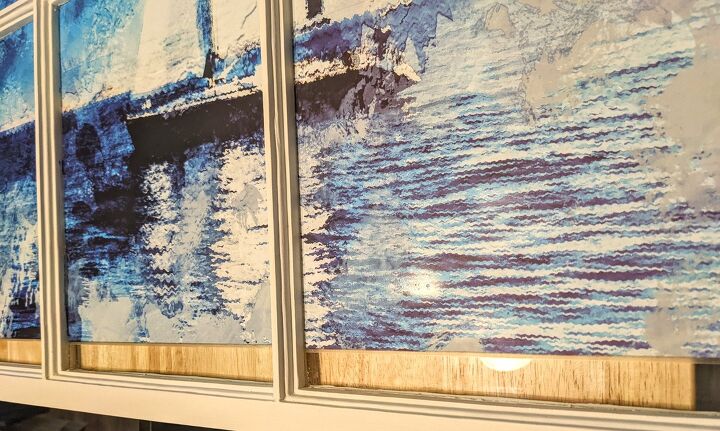
These are the hand painted areas up close.
You can also see how the epoxy helped to diminish any remaining air bubbles
I hope you've enjoyed this tutorial 🥰
And thank you so much for reading!
You can find this transfer along with about 600 other products, designs and colors in our Etsy shop
If you'd like to see more of our projects, visit our Facebook page
https://facebook.com/deerrunrevamps
And if you have any questions, feel free to reach out! 😁
Resources for this project:
See all materials


Comments
Join the conversation
-
WOW! Beautiful job
-
This is beautiful, but when you are talking about epoxy and a butane torch, I get visions of the whole thing going "poof"!! I'm 75 and that's scary!! But the transfers are a great idea. I can't find anything like that locally. And spending $15 plus and shipping.... But I love your finished product. Thanks.


Frequently asked questions
Have a question about this project?