


DIY Lemon Doormat
When life gives you lemons make a lemon doormat! This simple step-by-step tutorial will teach you how to make your own lemon doormat so you can bring the joy of summer to your doorstep all season long!
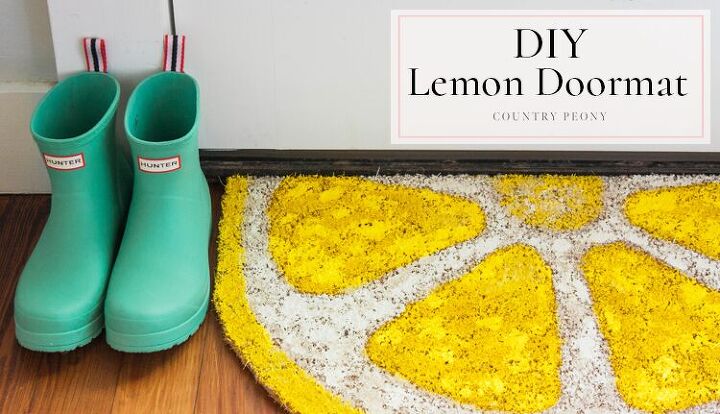
I love switching out my wreaths and doormats each season. It is such a happy way to set the tone for guests, and for yourself to come home to. Summertime lends itself to bright, cheerful decor to match what is happening outside of your home. I have always been drawn to yellow in home decor because it represents freshness, happiness and positivity. To follow the yellow trend, I love decorating with lemons this time of the year. Since my lemon glass plates (tutorial found on my blog - Country Peony) and lemon wreath (tutorial found on my blog - Country Peony) bring me so much joy I wanted to expand on both of those ideas, and create a door mat that greets my family and my guests with positivity. Enter the DIY Lemon Doormat!
Aside from the cute factor, I love this doormat because it is was simple and inexpensive to make. For about $10, I purchased a coir rug from Target, and used craft paint I already had on hand.
I hope you enjoy customizing your own doormat to bring cheer to your front doorstep!
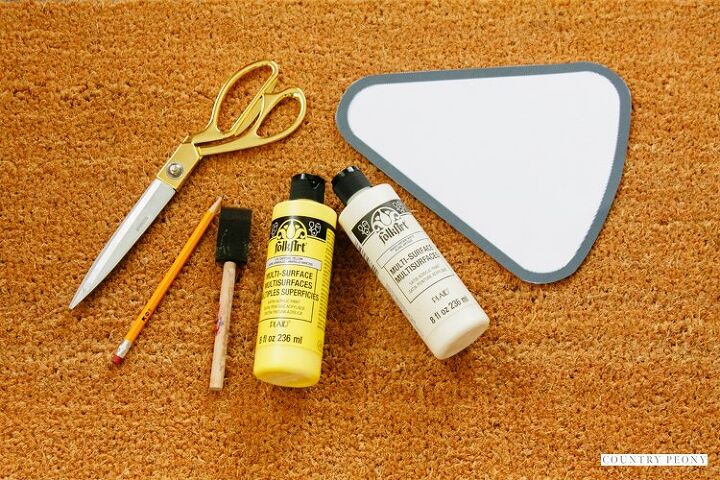
- Coir Door Mat
- Pencil
- Heavy Duty Scissors
- Cardstock Lemon Wedge Stencil. Please see download link below on my blog.
- 8 oz. Yellow and White Multi-purpose craft paint
- Foam Brush
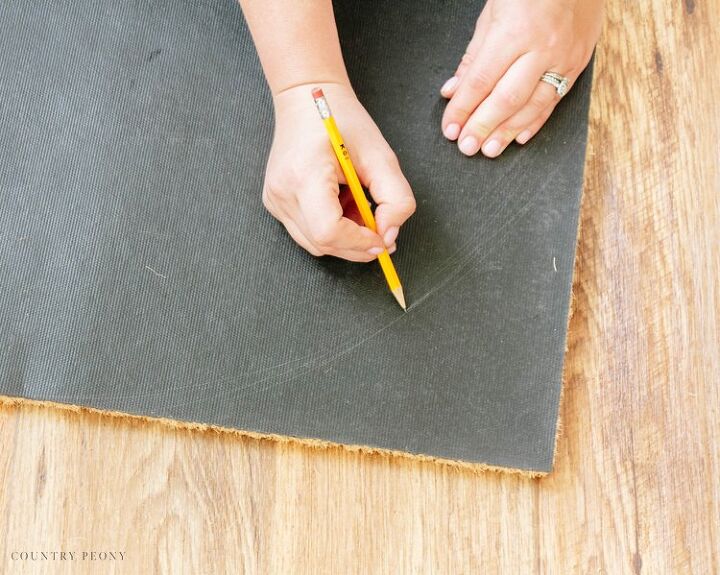
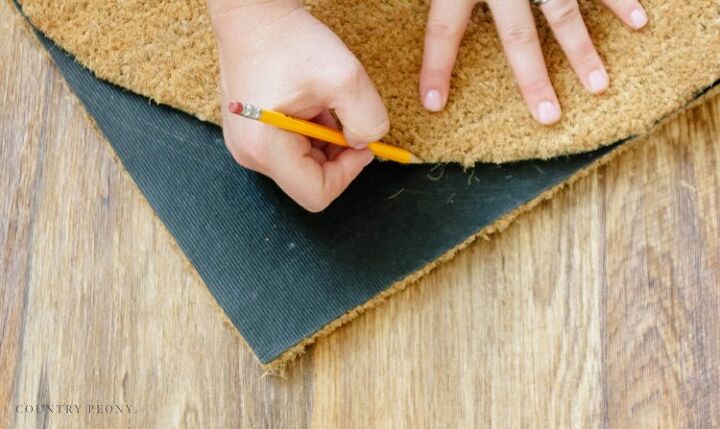
On the back of the doormat, trace the curve of the lemon slice.
*You can use a template for this, or you can eyeball it like I did.
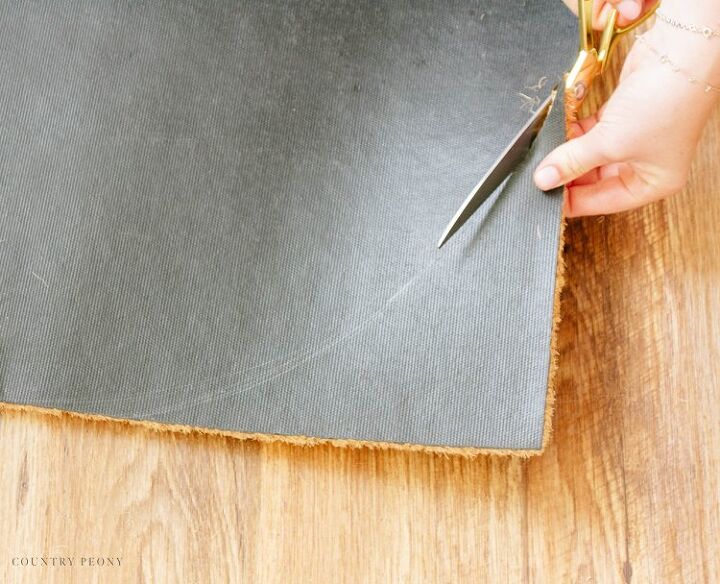
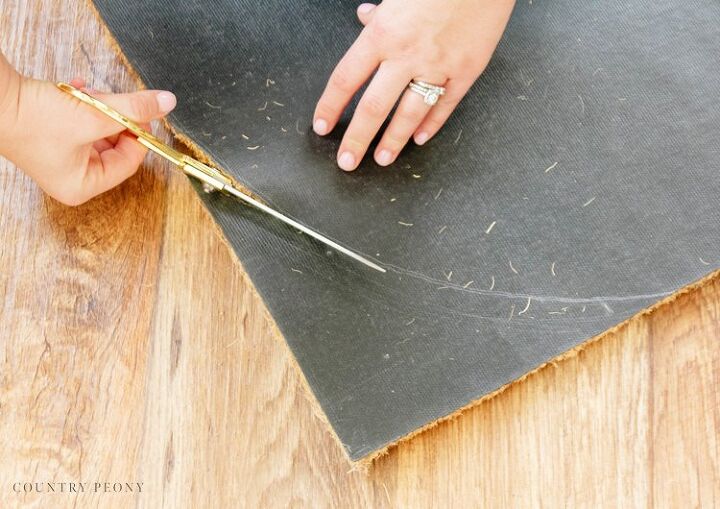
Cut out the curved top of the lemon slice with the heavy duty scissors.
*This process is very messy and the coir material likes to shed. I would recommend doing this outside, or keeping a broom nearby so the coir pieces don’t get into the paint later.
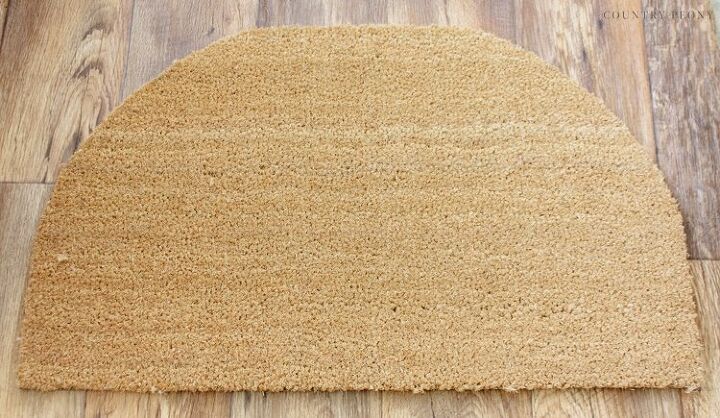
Fold the doormat in half, and use the already cut side to act as a stencil for the other side. This will ensure both sides are symmetrical.
Cut out the other curved side of the lemon doormat.
*Here you can tweak your lemon door mat shape. You can continue to trim the sides until you like what you see.
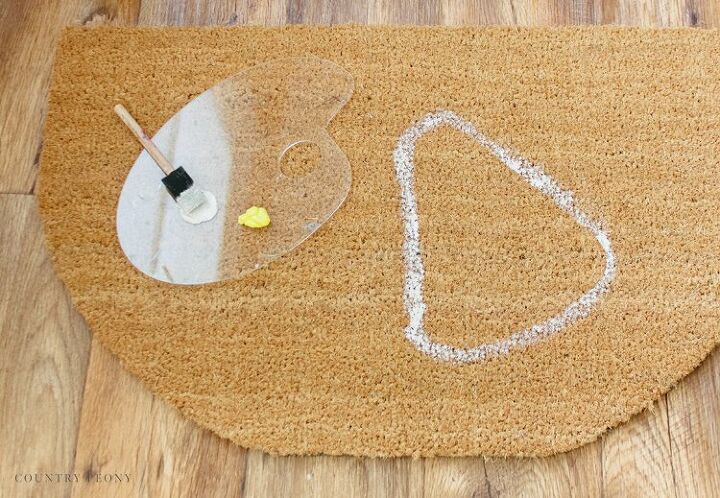
Click here for the original blog post to download and print out the lemon wedge stencil onto an 8.5 X 11 size paper, preferably on cardstock.
Then cut out the lemon wedge download to act as a stencil for the doormat.
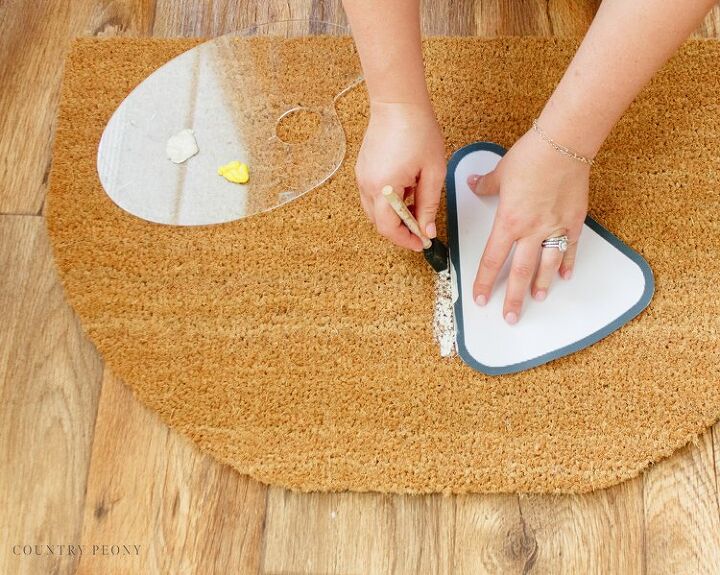
Place the outer edge of the lemon wedge in the middle of the mat. Then use the foam brush to blot white paint around the outside of the stencil.
*It may be helpful to print out 4 separate wedge templates and attach with double-sided tape so you ensure the spacing is accurate with each wedge. Or, you can keep it simple and go one at a time like I did. The process is up to you, and how you prefer to work.
*It is important to heavily blot the paint, instead of brushing the paint on because the coir is very rough and will not take a brushstroke well.
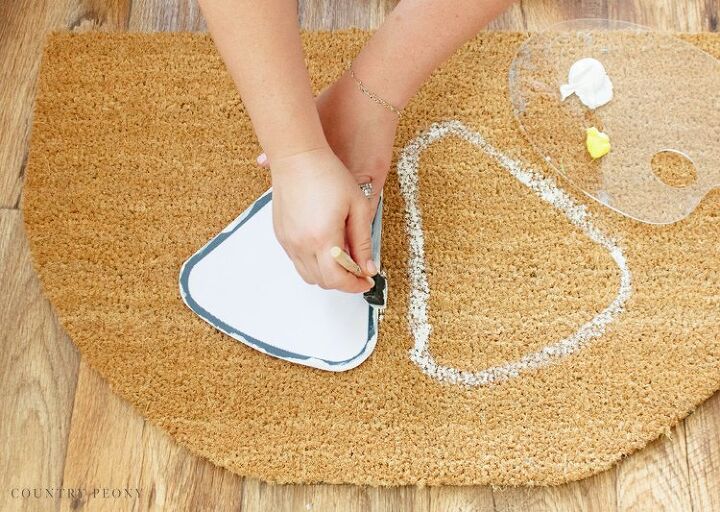
Continue to blot around the stencil to create 4 wedges inside the half lemon. Each wedge should be about 6 inches from each other.
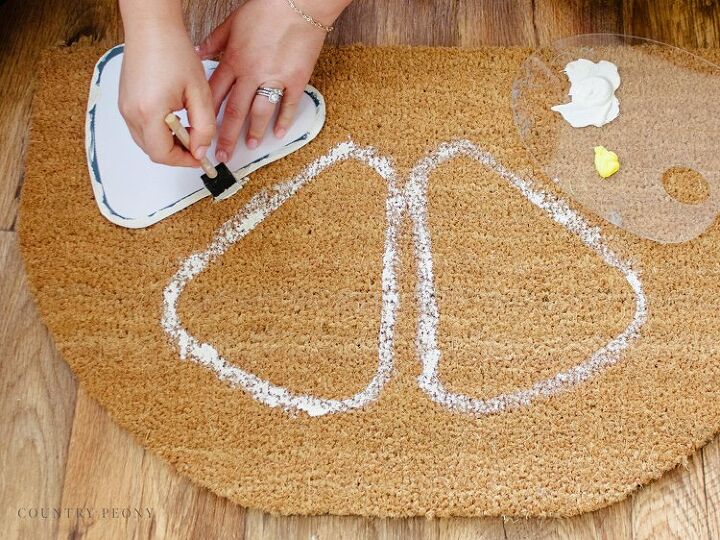

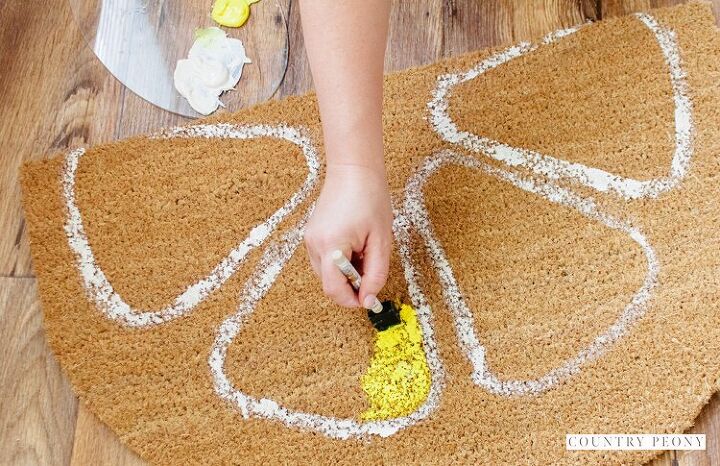
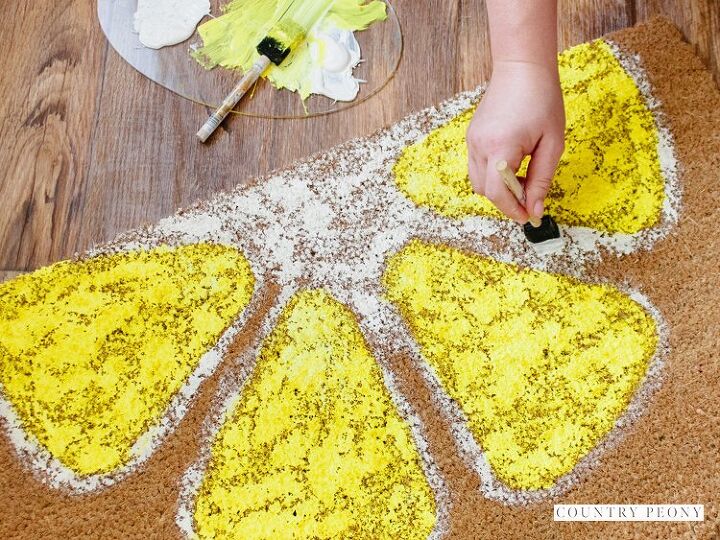
Paint the insides of the wedges with yellow paint. For best results, apply a lot of paint and blot the paint on with the foam brush, instead of using brush strokes.
*Please keep in mind that the rigid coir material may ruin your foam brush overtime. Also, the more paint you apply the better for coverage and for longer wear of the doormat.
Once all of the wedges are painted yellow, start to fill in the areas between the wedges with white paint.
*Remember to blot the paint on versus using a brush stroke motion.

Add a yellow border around the top edge of the lemon doormat with the yellow paint and foam brush.
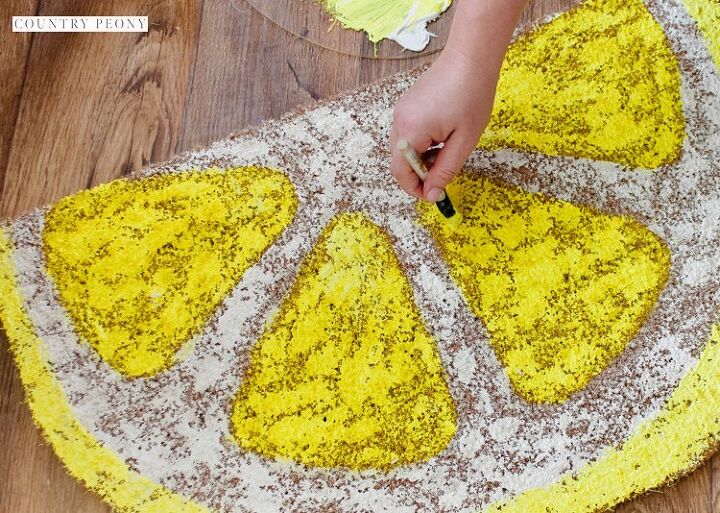
Add a little texture to the lemon by painting a lighter yellow on top of the yellow lemon wedges.
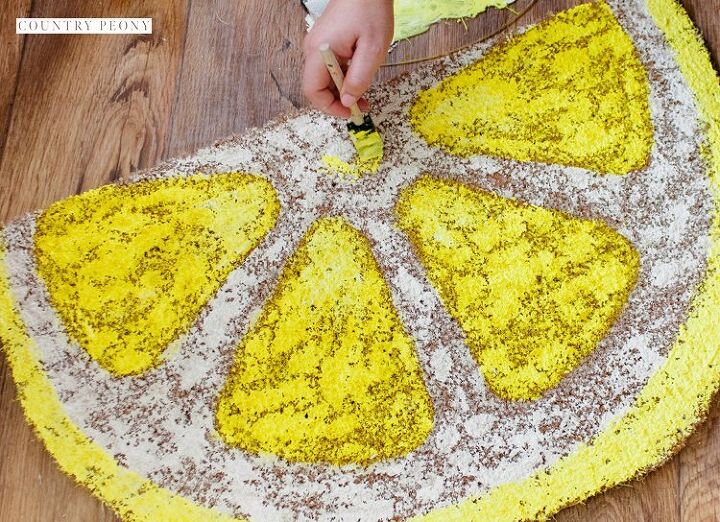
Paint a yellow semi-circle in the middle of the doormat.
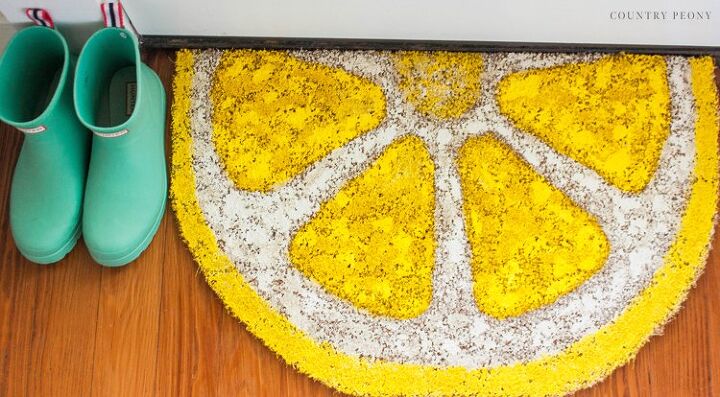
Let the doormat dry overnight, then set it out for all to see!
I am so happy with how the lemon doormat turned out.
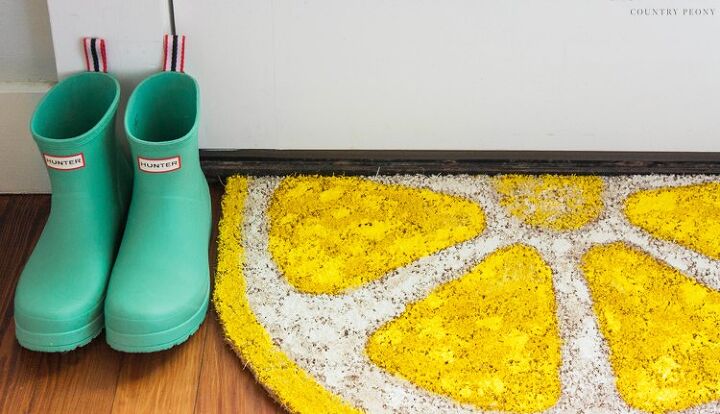
Every time my children and I step up to our door, it makes us smile. I hope you enjoy making your own lemon door mat as much as I did!
Resources for this project:
See all materials


Comments
Join the conversation
-
A very cute and cheery welcome!
-
great project, very pretty and simple. Will definitely try to make it.
thanks for sharing. ❤️
the creativity is the inteligente having fun 🤣


Frequently asked questions
Have a question about this project?