


Another Corrugated Iron Raised Garden Bed

by
Carole
7 Materials
$50
2 Hours
Medium
A couple of years ago we made a garden bed using scrap corrugated iron from our neighbours vacant plot of land. Recently there has been two more houses built in our road and the builders used brand new sheets of this corrugated iron to make a temporary fence around the new build area. When the houses were almost complete, they removed the corrugated iron fence and that is when I swooped! Never one to pass up a freebie, I asked what they were going to do with the discarded metal sheets and they said I could take what I wanted. So I had four large sheets of this stuff (2.4 metres long or about 7 feet long) under the house for a while. I decided recently to drag two of the sheets out and make another raised garden bed. This one is 1.4 metres long, by 1 metre wide. Around 4 feet long and 3 feet wide. First I measured the sheets and then marked out where I wanted to cut them to shorten the length. I used a pair of tin snips to start a cut on the edge of both sheets. If you lay the sheets flat on the ground and snip the edge to get it started, one person stand on the sheet and the other person pulls and peels the sheet back along the initial cut and it will tear the sheet all the way across the corrugations. You can tear across them but not along them lengthwise. If you wish to make a more shallow bed than the one pictured here, you would need to cut along the length of the sheets using an angle grinder with a metal cutting disc attachment. This bed, not including the vegie mix soil or plants or netting only cost $50 to make. To buy a raised garden bed of similar size from a nursery or hardware store costs considerably more.
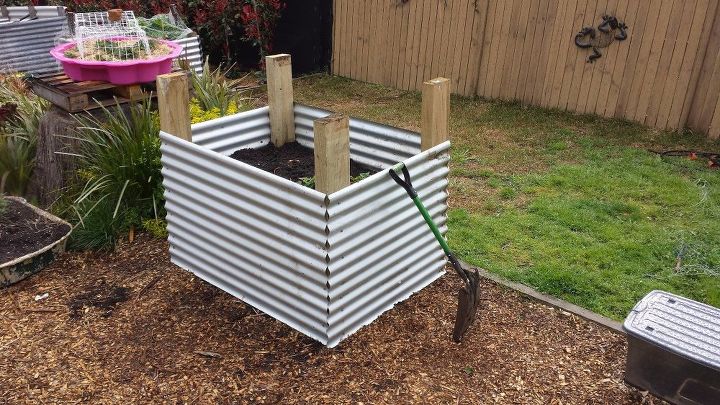
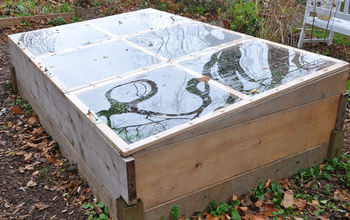
This is the bed assembled and almost full of good vegie mix soil from the local nursery plus some of our own compost added in. We lined the bottom of the bed with garden debris such as hanks of bark, bracken and twigs and branches and then trod it down before adding the soil as the soil does not need to be this deep to grow vegies. I also lay cardboard on the base before adding the garden debris to prevent grass runners from our lawn coming through. The bed is 85 cm deep. About waist high on me and I am very short at 5 feet tall!
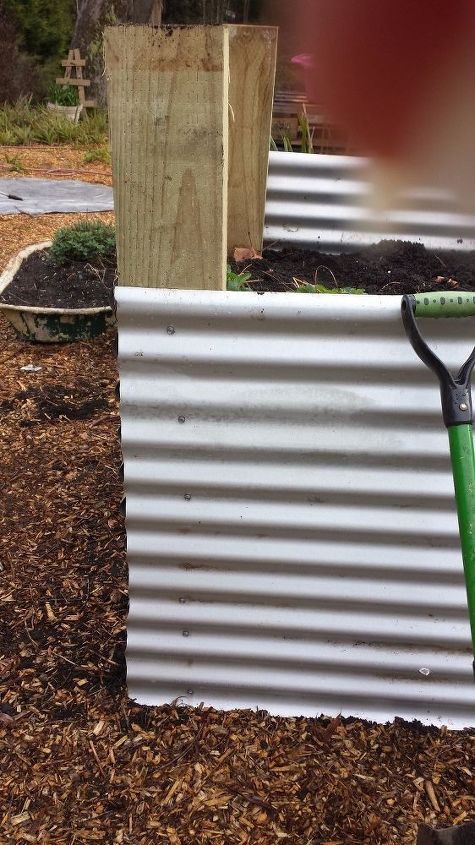
We used chunky timber sleepers cut down to make the posts. If you are putting the timber on the inside of the bed where it will come into contact with wet soil then you need to use hardwood posts so they won't rot out. You can use H4 treated timber if putting the posts on the outside. Be aware that H4 is treated with arsenic so that can leach into your soil and veg so best not to use it inside the bed. H4 is what is usually used for any garden timber that will be in contact with wet soil potentially such as sunk into the ground. These posts are not sunk into the ground but sit level with it. If you make a bigger or wider bed, you may need to add timber bracing to the inside about halfway along the bed to prevent the weight of the soil bursting the sides of the bed. We used a special type of galvanised screws that you don't need to pre-drill through the metal or timber first. You pop them into a special drill bit that has a hexagonal shape to hold the screw head and the drill drives them through the metal and timber easily. Check with your hardware store if you are uncertain of what to use. It saves a lot of work!

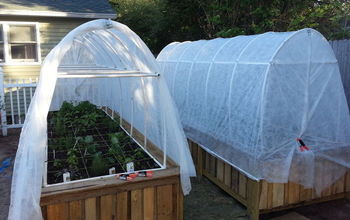
Excuse my finger in this shot but here you can see the posts on the inside of the garden bed. Soil level is not quite there yet. We deliberately left the posts long rather than cut them down level with the bed so that we can easily add bird netting or plastic sheeting or shade cloth (whatever you may need) to the bed by attaching to the tops of the posts. This way you don't need to add anything extra like PVC piping to keep a bird net or shade cloth up high and off the veg when they start to grow. I have since added lettuce seedlings and tomato seedlings to this bed after topping up the soil and then mulched with sugar cane. I used a staple gun to attach the netting at the tops of each posts and it is big enough to hang down the sides so you can easily lift for access to your plants. If you don't want the netting to blow about in high winds or the chance of birds or butterflies getting in at the sides of the net you can always add some tablecloth clip on weights to the edges of the netting or something like that - anything that will weight the edges of the net and keep them from lifting when it is windy but still allow you to easily lift them to access your plants.
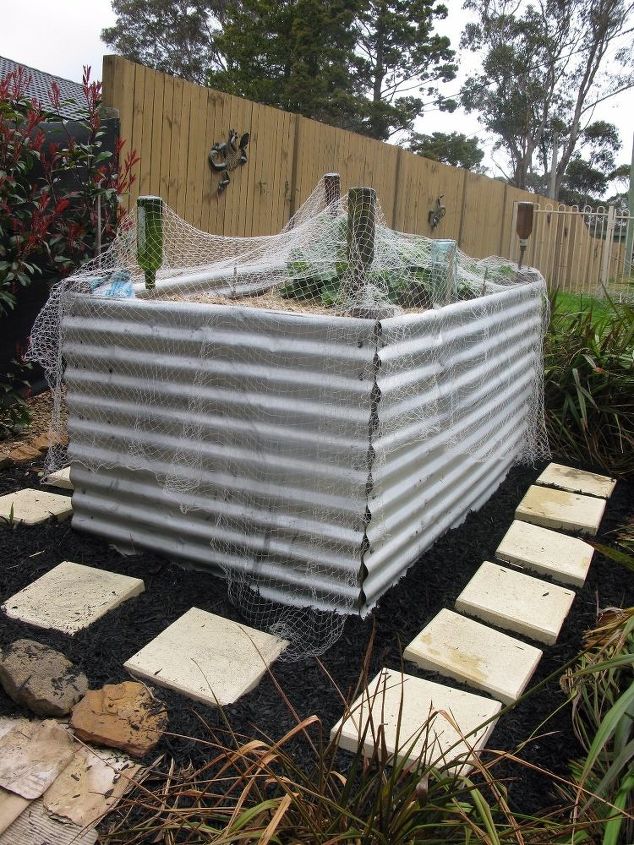
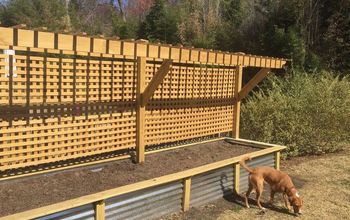
Here is the first bed we made in the same way. You can see I am using bottles on bamboo sticks to hold the netting off the plants with varying success. I may add PVC pipe hoops to this bed at some point to keep the netting off the plants. This one has asparagus crowns and rhubarb in it. We mulched around it with black mulch and added pavers to make it more easily accessible from all sides. The pavers still need to be fixed onto a bed of sand to sink them and level them into the ground and make them safe to walk on. Woodchip mulch would have sufficed but I like the look of pavers better.
Comments
Join the conversation
3 of 7 comments
-
Well, your bonnet must be full of bees. You sure are productive! Enjoy your healthy and lush garden!
-
Great work! Thanks for sharing!!


Frequently asked questions
Have a question about this project?