


How to Grow Onions Like a Pro Gardener

One of the oldest known cultivated plants, onions are a staple in kitchens around the world, adding flavor to soups, sauces, stews, salads, salsas, and so much more.
Known in the plant world as allium cepa, the onion crop is as diverse as it is delicious, with globe-shaped types you see at the supermarket, more rare heirloom varieties, and mild green onions — and the list could go on.
The beauty of growing onions, though, is that no matter what type you’re looking to cultivate in your garden, onions are hardy — they don’t mind a bit of early spring frost — and are consistent in growing requirements, which includes a lot of sunlight and well-drained, nutrient-rich soil.
In this guide, we’ll cover all the basics of how to grow onions, tips for tending to your onions as they grow, plus how to harvest onions and store them.

Photo via Carol Speake - The Gardening Cook
Choosing Which Onions to Grow
The very first thing to know about growing onions is that not all onions will thrive in all climates equally. The varieties of onions that will flourish in your garden depend on your location — specifically, how many hours of daylight your region experiences during the crops’ peak growing season of late spring into summer.
There are three main types of onions:
1. Short-day onions
Such as White Bermuda's or Texas 1015Ys — grow best in regions that have 10-12 hours of daylight in late spring/early summer. These onion types are better suited for more southern latitudes that have milder winters, overall warmer temperatures, and a less drastic change in daylight hours over the course of the year.
2. Intermediate-day onions
Such as Candy and Red Apple Candy onions — prefer roughly equal hours of day and night (12-14 hours of daylight).
3. Long-day onions
Such as Walla Walla Sweet or Red Wings — grow best in regions that have 14-16 hours of daylight during the same time of year. They thrive in more northern climates, where early spring could still have quite a wintery bite, but come May and June, the weather’s warmed up and the sun doesn’t set until past 9 pm.
To get an idea of which red, white, and yellow onions grow best across these three zones, check out this visual map of growing zones in the U.S. and this interactive chart from Maine seed purveyor Johnny’s Selected Seeds, which categorizes several dozen varieties of onions by day length, as well as characteristics such as color, shape, and size. And you can always check in with your local garden store or nursery for recommendations for your specific region.
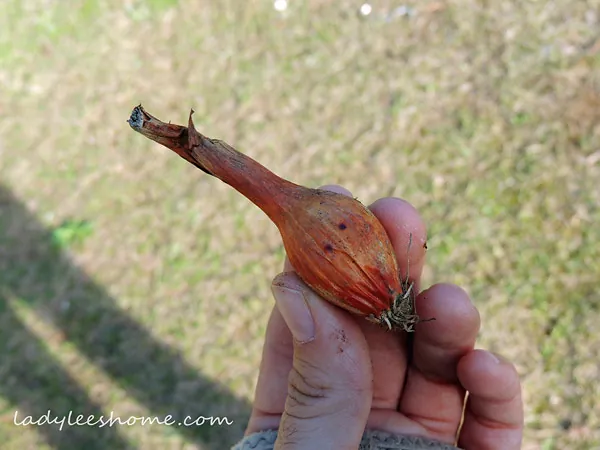
Photo via Lee @ Lady Lee's Home
Types of Onion Starters
Onion starters are what you physically plant in the ground when it comes time for the growing season. The most common types of onion starters are onion seeds, sets, and transplants. (The onion that sprouts in your kitchen can be used as a green onion, and may eventually flower, but it won’t produce more onions.)
Time, budget, green-thumb curiosity, and interest in an indoor (and family-friendly!) winter gardening activity are all factors to consider when deciding how to grow onions each season. Here are three ways to grow onions:
1. Onion Seeds
Germinating onions from seed is the most time-consuming, but it’s also the most budget-friendly option and can be a lot of fun — especially if you’re looking for an indoor winter project that will (hopefully) pay off heartily once it comes time to move the seedlings outdoors. Buy onion seeds from seed catalogs or from your local garden nursery.
2. Onion Sets
These small onion bulbs are cultivated, harvested, and dried to jump-start the growing cycle next season. Even with this head start, it still takes another 3.5 months for onions to grow to maturity.
Often sold in mixed variety packs, onion sets are more pricey than seeds, but they’re the easiest to plant and one of the surest bets you’ll have an abundance of onions to harvest from your garden.
3. Onion Transplants
Slightly more mature onions with stalks intact, onion transplants are available through some nurseries and seed companies. Depending on the company, you may need to order transplants in advance (some companies start taking orders as early as the fall prior to planting).
These dormant young onions should be planted immediately once you receive them in the spring; as soon as their roots take hold, their stalks should perk up with a little water and sunshine.
Growing Onions from Onions
When to Plant Onions
Two factors determine your growing season: your regional climate and also what type of “onion starter” you’re using. Here, we break planting onions by season and then by type of onion starter.
Fall
Onion sets: In most climate zones, onion sets can be planted in the ground between October and November before the ground freezes. The bulbs go dormant when cooler weather arrives and begin growing again in early spring, around the same time that daffodils or other early perennials start to emerge from the ground.
Winter
Onion seeds: Prep seedling trays (see how to below) 10 to 12 weeks before your region starts seeing 50-degree Fahrenheit days—look to the Farmers’ Almanac for a forecast. Or, if you’re in a more moderate climate zone, start seeds approximately 10 weeks before you want to transfer your seedlings to your garden.
Late Winter
Onion sets and onion transplants: These two onion starters can be planted as soon as the ground begins to thaw and frigid temperatures are no longer a threat. They’ll even take temperatures that hover around freezing as long as there are at least 10 hours of daylight. Of course, as winter marches toward spring, the days will only become longer and warmer.
Early Spring
Onion seeds: Less hardy than sets or transplants, tender new seedlings require temperatures above 50 degrees F to take root in your garden (mid-February to mid-March in most climates). Make an educated guess as to when you’ll reach that benchmark with the Farmers’ Almanac as your guide, and work backward from there to figure out when to start your seeds indoors.
Year-Round
Onion seeds, onion sets, and onion transplants: In parts of the world that never have a threat of freezing temperatures or rarely see frost, onions can have a consecutive growing season — so long as they have sufficient hours of daylight and a minimum of six hours of direct sun a day.
How to Start Onion Seeds
Onion sets and transplants are meant to be planted straight in the garden. Growing onion seedlings, however, takes a little more effort. But, if you have the patience and interest, it can be worth the reward!
Tools and Materials Needed:
- Seeding trays
- Spray bottle
- Good soil mixture
- Indoor plant grow lamp that mimics sunshine (optional)
Recycled Seed Trays
1. Plant Seeds and Set Aside
Plant two or three seeds in each seeding tray cell, ¼-inch deep. Or, if you’re repurposing household containers, plant one seed per square inch at ¼-inch deep.
Use a spray bottle to moisten the soil and tamp it down to ensure the seeds are in place. Water lightly — the last thing you want is to flood your carefully planted seeds, pushing them to the surface — and set your seed trays in a warm, sunny, well-ventilated location, such as on a sunny porch, on a windowsill, or in a greenhouse.
2. Ensure Seeds Receive Enough Sunlight and Water
Once the seeds begin to sprout, it’s essential that they receive 10 to 12 hours of daylight daily and at least six hours of direct sunlight. Depending on your climate, consider purchasing an indoor plant grow lamp that mimics sunshine. Keep the potting mix damp but not saturated.
3. Trim Seedlings
Once the seedlings reach five inches tall, trim a few inches off of the top, leaving about two inches of growth.
Trimming helps make the seedlings stronger and thicker, which boosts their odds of success when it comes time to transplant them into the garden. Also, the trimmings are delicious!
4. Prepare Seedlings for Transplanting
The last step to preparing your seedlings for transplant is called “hardening off,” essentially readying them for the move from indoors to outside’s lower temperatures, weather elements, and less frequent watering.
One to two weeks prior to transplanting the seedlings, move the seed trays outdoors to a protected spot. Start leaving them outdoors for just a few hours on a sunny day and bring them back inside. Gradually work your way up to leaving them outdoors for an entire day. (Just don’t forget about them overnight!)
How to Plant Onions
Now that you know a little bit more about onions and when to plant them, we’ll show you how to get them into the ground for growing.
Tools and Materials Needed:
- Garden spade or shovel
- Stakes or long sturdy sticks
- String
1. Choose an Approximate Planting Date
Set a planting date two to four weeks after temperatures are no longer consistently below freezing for sets and transplants, or are regularly surpassing 50 degrees F for seedlings.
2. Prepare the Garden Plot
Onions should be planted in a full sunlight section of your garden as they need a minimum of six hours of direct sunlight a day. The more sunlight, the better!
Onions also prefer to grow in nutrient-enhanced soil that drains well and dries out. Work the soil when it’s so dry that it doesn’t clump onto or stick to your gardening tools, removing rocks and breaking up soil clods. Then enrich the soil with a 10-10-10 fertilizer, such as Scotts All Purpose Flower & Vegetable Plant Food, working the fertilizer into the top three to four inches of soil.
3. Stake Out the Rows
As onion plants don’t take up much space, they grow well in raised garden beds, as well as in raised rows in your garden (plant in soil mounds three to four inches high).
Stake out your garden rows with a garden stake or sturdy stick to mark the start of each row, which should be 12 to 18 inches apart from each other.
Tie a string to each stake and measure the string to the full length of each row you’re about to plant and stretch out across the dirt. (With this “line” as a guide, it’s easier to dig nice, straight rows.)
4. Plant Onions
Plant onion sets and transplants ¾ inches deep and three to six inches apart. Plant two or three seedlings in a clump together, four to six inches apart. (Keeping them as a cluster minimizes the impact on their tender root structure.)
Once all onions are planted, fill in the rows with any extra soil and tamp down lightly with your hands.
5. Label Your Garden Rows and Get Watering!
Label your garden rows with garden stake tags (or write on the stake used to mark the row). List what’s been planted and also the planting date.
For onion sets, water daily until you start to see sprouts. Water transplants and transplanted seedlings once or twice a week.
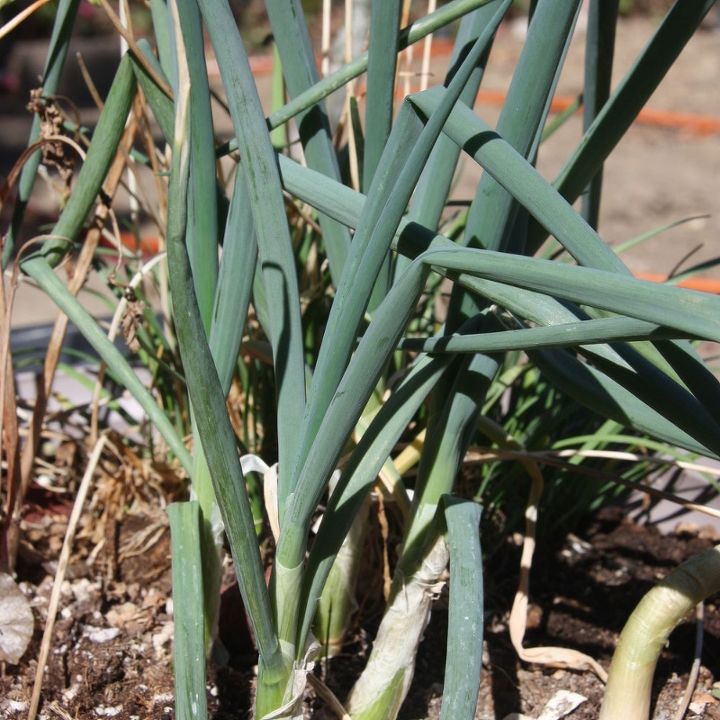
Photo via Lavende
How to Care for Onion Plants
After, they’re safely planted in the ground, knowing how to care for onion plants will yield big, flavorful bulbs.
Water
Onions prefer well-drained soil and watering weekly is usually enough, coupled with some spring showers. You may need to water more frequently during dry, windy weather or unseasonably warm weather. Water onions slowly, allowing for water to soak into the top inch of soil. Doing so supports growth and strong roots.
Fertilizer
It’s a fact that onions are “heavy feeders” and require constant supplementary nourishment. In addition to priming your planting plot with fertilizer, once the onions have taken root (look for at least five to six leaves on the plant), the plants respond well to a high-nitrogen fertilizer, such as chicken manure or Dr. Earth Nitro Plant Food, every couple of weeks.
Distribute evenly across your onion rows prior to watering, and discontinue once the bulbs start to emerge above the soil.
Weeds
Given onions’ lengthy grow time, there’s plenty of opportunity for grasses and weeds to take root in the fertile soil of your garden. It’s essential to stay on top of weeding your onion rows as all foreign plants are competing with your onion crop for nutrients in the soil.
Once the stalks are tall enough, a layer of straw mulch will greatly reduce the amount of weeding required.
Pests and Diseases
The most common issue when growing onions is the rotting of their stems, bulbs, or roots, which is caused either by overwatering or because the soil is not well-draining and stays perpetually damp.
This hardy crop has few insect predators. Occasionally, very small flying insects called thrips can be found in the plant’s center leaves. If plants are too frequently attacked by thrips, they’ll stop growing and the onion bulb won’t mature. Organic sprays with sulfur and Bti-based insecticides, as well as neem oil sprays, will provide safe relief.
Onion root maggots, the larvae of brown flies, can also burrow into the earth and ultimately kill onion bulbs. Covering young plants with a fine mesh netting prevents eggs from being laid. Spreading garden-safe diatomaceous earth is also effective.
Onion Companion Plants
How to Harvest Green Onions
While full-size onion bulbs take around 14 weeks to mature, green onions (also known as scallions and spring onions) are ready within a couple of weeks of planting.
Watch for leaves that are about the size of a pencil in size and diameter. At that size, the onion has begun to form a bulb and the green onions can be harvested.
If more than one seedling took root in the same spot along a row, harvesting an “extra” one to use as a fresh green onion in the kitchen will free up that soil for the other onion to continue growing.
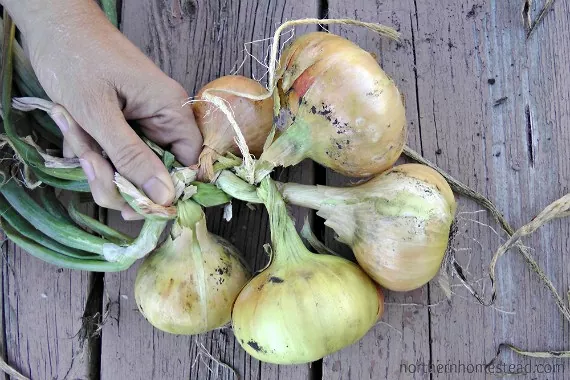
Photo via NorthernHomestead
How to Harvest Matured Onions
After weeks of tending and watering, it’s no doubt that you’re anxious to harvest your mature onion crop! One of the secrets of growing onions is knowing the visual clues that indicate onions are ready for harvest.
Watch how the bulbs push further and further out of the soil — that’s a sign they’re getting closer to harvest time. As the plants reach maturity, look for signs of their stems weakening; those tall stalks of leaves will start to flop over and turn yellow and brown.
Watch for Flowering
1. Press the Onion Plant to the Ground
Once the main stalk of the plant starts to weaken and its leaves have started to droop and wither, it’s time to begin.
Gently bend the plant towards the ground with the bulb still in the soil and leave as-is for a few days. (This speeds up the final ripening process and starts the drying process for the stalks and leaves, which are essential to the next phases of drying and curing your onions.)
2. Dig Up the Entire Plant and Begin Drying
When the tops are brown, it’s time to dig up the entire plant out of the soil. Use a small trowel to loosen the bulb and roots and pull the plant up gently from its stalk.
Only harvest onions during dry weather; the plant and bulb still need to dry out for a few more days in the garden or be placed in a sunny spot nearby (up to seven days).
How to Cure Onions
Now for the rewarding part, bringing the harvested onions into your home for eating. But they’re not ready to be cut into quite yet. Follow the next steps to get those onions properly cured and follow the tips for storing and saving them for later.
The process of drying out onions after harvest is called “curing” and can take a couple of weeks. Ultimately, the curing process is what gives onions that thin, papery, outer layer of “onion skin.” If an onion harvest is not properly cured, residual moisture inside the onion bulb leaves your onions vulnerable to rot and shortens their shelf life.
1. Move the Onions Inside
Continue to cure your harvest in a cool, dry, well-ventilated location, such as on the floor of a garage, shed, or barn. Set them on top of a large canvas tarp or on mesh drying racks to allow for airflow.
2. Check to See if Onions Are Finished Curing
You’ll know your onions are finished curing when you cut off their dried stems and stalks and they’re dry; if the onions aren’t quite cured enough, a milky white substance will seep out.
3. Prepare Harvest for Storage
Once the onions are fully cured, the last step is preparing your harvest for storage. Cut off the dried stems and leaves (leaving just an inch or so at the top of the onion), trim the roots, and you’re ready to set them away.
How to Store Onions
Storing onions properly prevents rot from spoiling your harvest. Follow these tips to maximize the shelf life of your onions:
- Onions keep best in a cool, dry, well-ventilated areas, ideally with temperatures between 40 to 60 degrees F. A basement is just fine, so long as it’s not too damp, as is a storage pantry or food cellar, so long as it’s climate-controlled.
- Storage ideas include: hanging the onions in a mesh or nylon bag, or in nylon pantyhose, which allows them to breathe; storing the onions in a wire bin or building your own wall storage bins; layer the onions in a box (but no more then two deep); braid the onion stalks and hang the braided bundle (don’t cut off as much of the dried stalks if you want to do this).
- A pungent onion will store longer than a sweet onion, so if your harvest has a mix of both, work through using the sweet ones first.
Growing, caring for, and harvesting onions can be a rewarding process for any gardener or home cook. By following the tips above you can enjoy a bountiful harvest of flavorful onions that can be used in a variety of recipes.
Have you grown onions before? Do you have any tips you’d like to share? Comment below!


Frequently asked questions
Have a question about this project?