


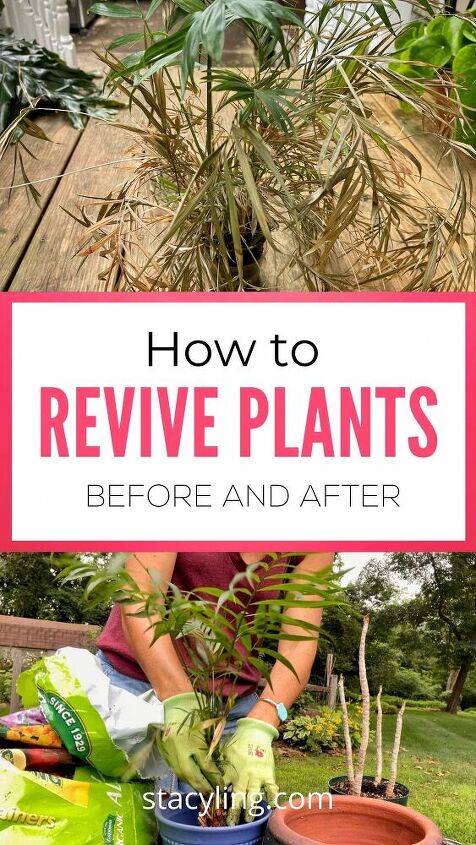
How to Revive Plants in 9 Easy Steps
Do you have a plant that looks wilted, sad, or otherwise in need of attention? Learn how to revive plants with these simple tips.
The other day, my daughter brought some plants home from my husband’s office that are in dire need of attention.
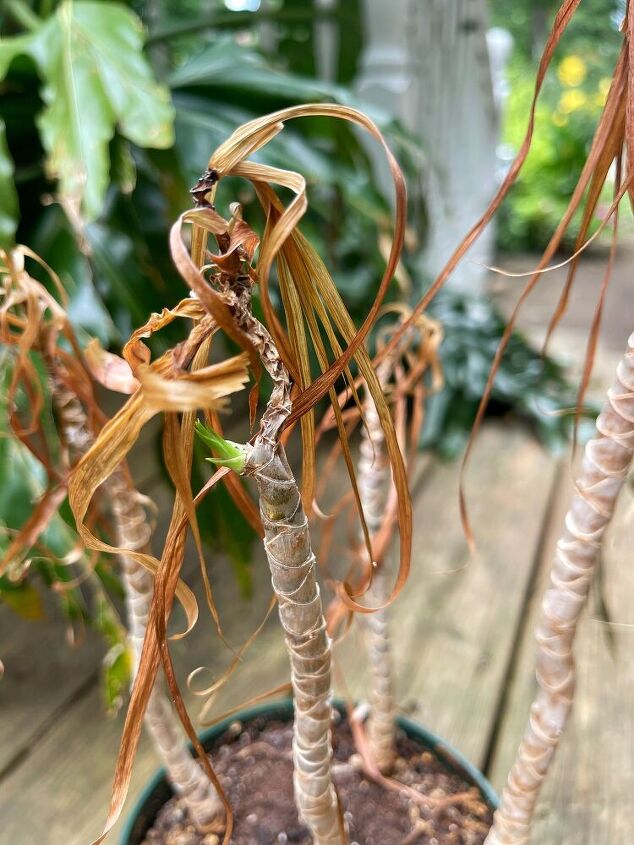
The leaves are crispy and the soil is dry on a dracaena.
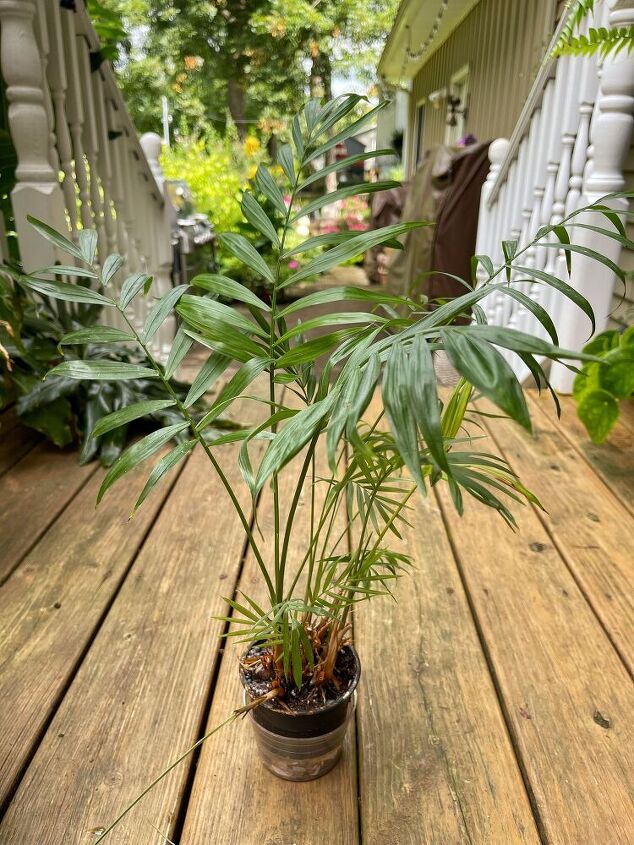
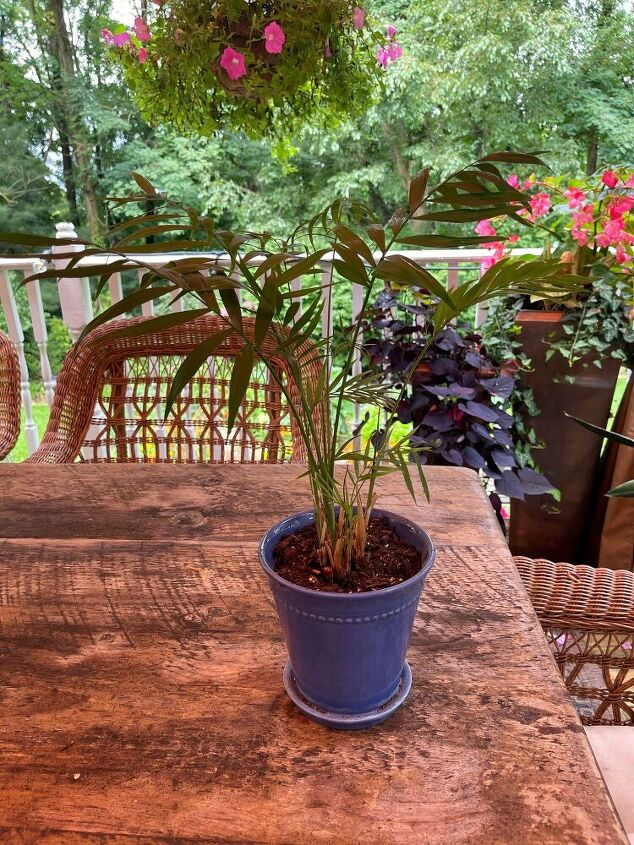
The foliage is partially crispy and the soil is saturated on a parlor palm plant.
Although the diagnosis of what went wrong is a little different with each, the revitalization process is similar.
This post will explain how to revive plants and give them a new chance at life.
What Happened to These Plants?
Much like people, plants grow and need food, water, light and air to survive.
When caring for plants, it’s important to keep in mid that not all plants are the same and can’t be treated the same.
So why do plants decline?
Sometimes bad things happen to good plants.
There are so many other factors that can cause plants to decline.
They get overwatered.
Underwatered.
Or a combination of both so the plant really stresses.
Plants sometimes get over-fertilized.
Placed in a site that doesn’t receive the proper light.
Or maybe they outgrew their containers.
Maybe they haven’t been fed at all.
When we bring houseplants home in their containers, many of us, keep them in those nursery pots.
The plants do well for a while, then start to decline.
When plants get dusty, they don’t get enough photosynthesis.
Don’t beat yourself up too much over it.
It happens, even to the best of us.
But all is not lost.
In most cases, plants can be revived with a little TLC.
Hometalk Recommends!
Looking at my husband’s office plants?
The dracaena was totally neglected. It needs water, fresh potting soil and a new container that is slightly larger than its current size.
The opposite is the case of the parlor palm.
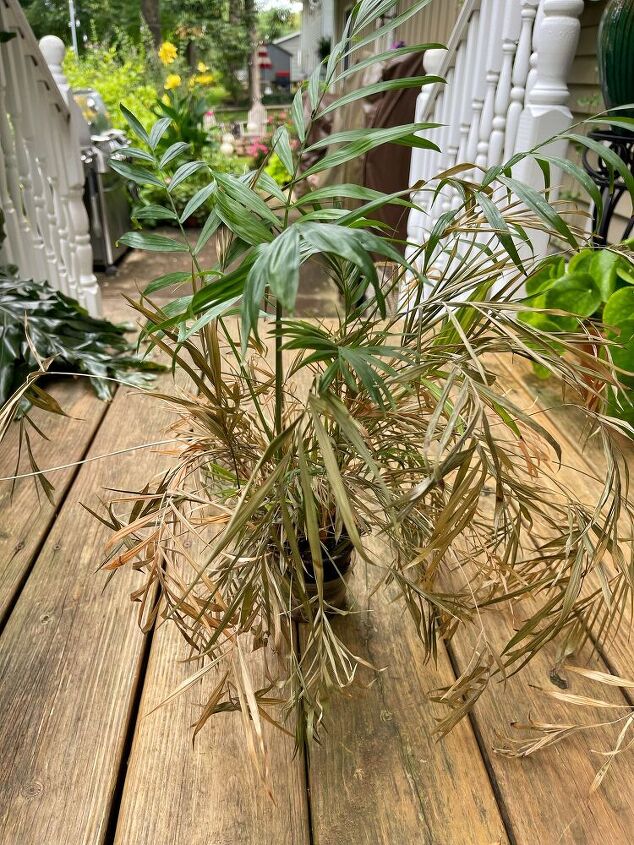
That plant’s soil is completely saturated and appears really stressed.
Looking at the size of the plant in comparison to the container and the root system, it too needs to be potted up in a larger container.
Although the diagnosis is a little different for each, the revitalization process is the same.
Here’s how we will save my husband’s office plants.
How to Revive Plants
In general, follow these steps to revive plants.
Supplies Needed to Revive Plants
- Sharp Pruners or Garden Snips
- Potting Soil with Perlite
- Compost
- Larger Container
- Fish Emulsion
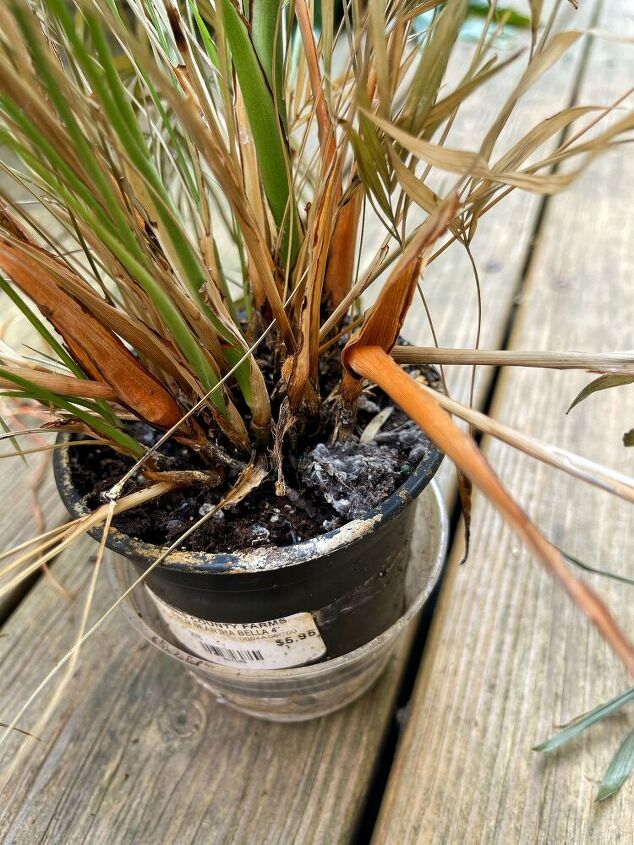
Step 1 – Assess the Plant
Is the soil saturated or dry as a bone?
Is any of the foliage green and healthy?
If only stems are present, like this dracaena, scratch the stem to see if it’s green underneath?
Is there any new growth that is visible?
Do you see any bugs or signs of disease.
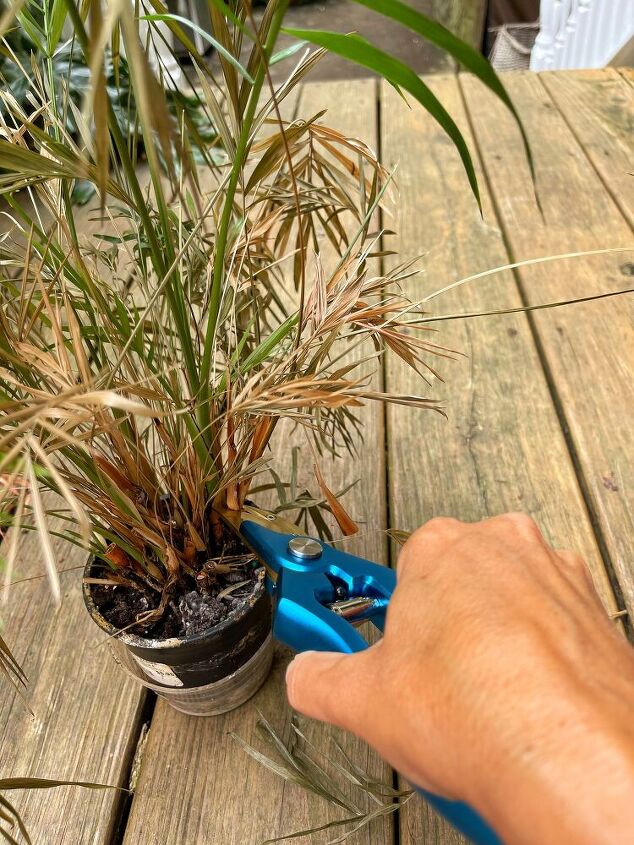
Step 2 – Cut Off the Dead Foliage
Take a sharp set of pruners or garden snips and cut off all of the foliage that is dry, then discard.
It looks better already!
But there’s more.
Step 3 – Remove the Plant From the Container
When reviving a plant, remove the plant from it’s container.
Then check the root system and soil.
Are the roots all bound up and wrapped around each other?
If so, the plant is pot bound, which means, it needs to be replanted in a larger container so the roots have room to grow.
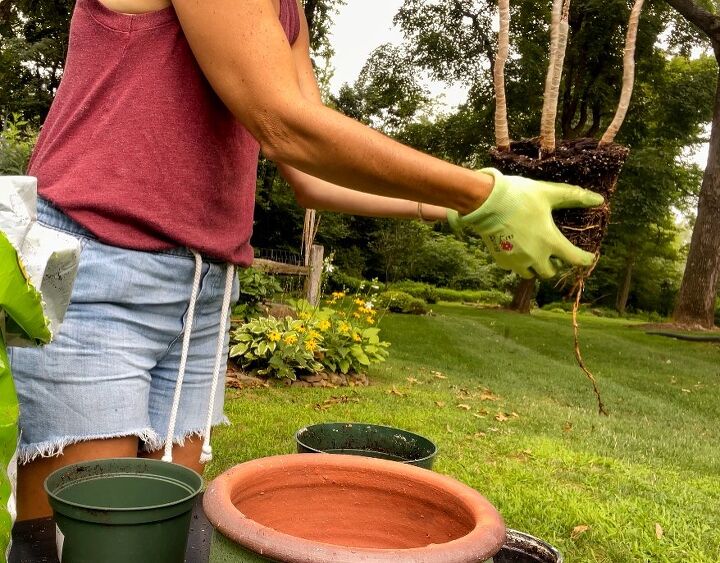
Step 4 – Tease the Roots
After removing the plant from it’s container, tease the roots to encourage them to grow outward into the soil.
Root bound plants need a little help.
Don’t be shy scoring a few to encourage growth outward.
If the soil is dry as a bone or super-saturated, remove as much of the soil as you can.
Then replant it in a container with new potting soil.
Step 5 – Choose a Larger Container
Before repotting the plant, select a container that is slightly larger than the one you just removed it from.
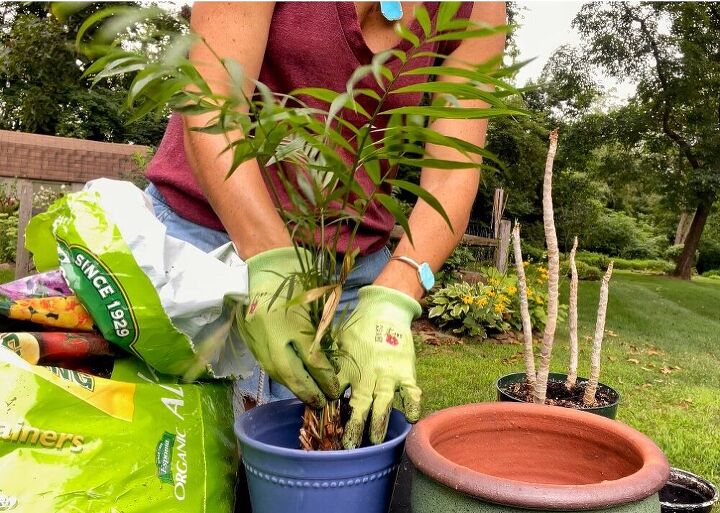
Step 6 – Repot the Plant
To repot the plant and give it a fresh start, grab some new potting soil LIKE THIS.
If the potting mix doesn’t already have it, mix in a little perlite to aerate the soil.
Then add some worm castings or compost to help add fresh nutrients into the soil to feed the plant.
Step 7 – Water
If the plant you are reviving was waterlogged, I would give it a few days before watering it in it’s new home to allow the roots to dry out a little bit.
Soggy roots encourage pest and disease problems and we would want them to dry out a little before trying to water them again.
If the plant you are reviving was dry as a bone from neglect, water it well but don’t waterlog it.
Note: During the winter months, plants need less water while they are in dormancy. So always check the soil before watering.
Over time, you will learn how much water each plant actually needs.

Step 8 – Place In an Area that Receives Light, But Not Direct Sunlight
Even if your plants love bright sunlight, they are rehabbing, so keep them under an awning or on a porch in the shade, or near a bright window without receiving direct light while they recover.
As the plant rebounds, do some research and determine the best location for that plant in your home or office.
To learn more about siting plants, CLICK HERE.
Step 9 – Monitor Plants
Keep an eye on plants while reviving them.
If the soil starts to dry out, water it but do not oversaturate it.
And make sure the plant dries out between waterings.
(Check the soil before you water.)
I know it’s easier to pick a day of the week to water plants, but like I mentioned earlier, not all plants will need it on that particular day.
Do THIS test to make sure it’s not wet near the roots.
If the soil is still damp, leave it alone.
After Reviving My Husband’s Office Houseplants
The parlor palm looks pretty good.
I removed most of the soggy, saturated soil and repotted it in a slightly larger container that I had on hand.
Now that it’s been repotted, it will stay outside for the rest of the summer humidity under the roofline on my deck so it gets fresh air, light and will receive water as needed.
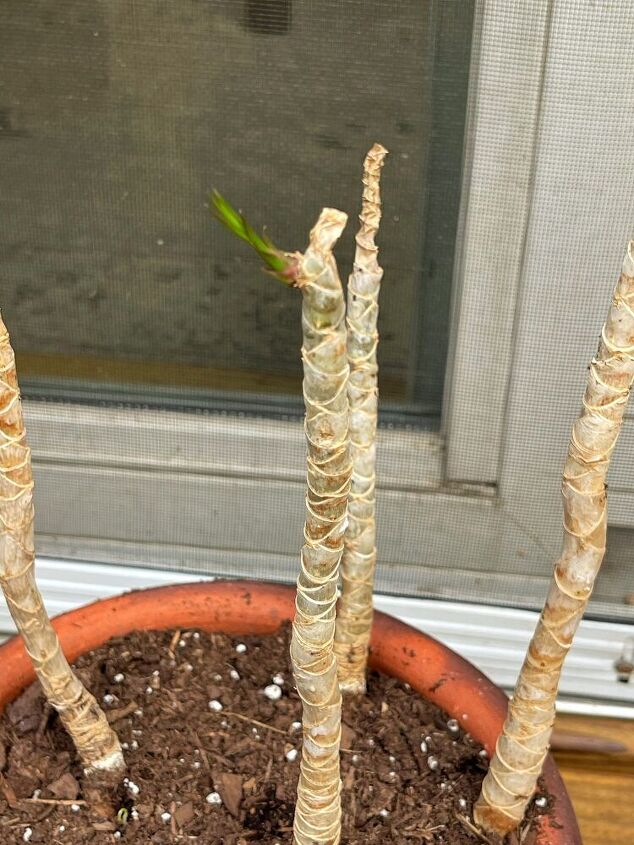
Although the dracaena has seen better days, it too looks a lot better.
And check it out!
The fresh growth doubled since I repotted it.
So hopefully this plant will eventually make a recovery.
In about a week or so, I’ll feed them with some fis h emulsion to help them along.
Thanks for joining me today in the garden!

For More Posts About Houseplants and More Gardening Tips CLICK HERE
Shop My Favorite Garden Supplies
CLICK HERE to shop for my favorite garden supplies.
Want to Learn More?
Watch it on YouTube and learn the secret to keeping houseplants alive that will change your perspective on how and when you water.
Pin and Save It For Later
If you like this post, please share and pin it on Pinterest. (If you hover over the image, the Pinterest button will be in the upper left corner.)
I’ve created the below-custom pins for this post.
Subscribe to the blog and gain access not readily available to the public.
Thanks so much for following along.
Enjoy a beautiful day! xo

If you like this post, please follow me @bricksnblooms on Pinterest, Facebook, Instagram, and Tik Tok. Subscribe to my YouTube Channel. Or join my Facebook Group.
Resources for this project:
See all materials


Comments
Join the conversation
-
Thanks for sharing all this information; it’s very helpful!
-
These are good tips. Adding epsom salts has worked wonders for me. I have found these tips also work for smaller landscape plants too. Before I toss in the towel (especially on those nipped by late frost, I just scrape bark slightly if brown is dead toss most of time it’s green. Now prune off dead feed and keep water as needed and before you know it a gorgeous plant. Almost tossed hibiscus ($50) and fed and watched couple of weeks. Now have beautiful focal plant in garden. Indoor or outdoor, check before tossing


Frequently asked questions
Have a question about this project?
What is fish emulsion and where do you get it?
I have a problem with gnats. I’ve tried vinegar and Dawn mixtures, watering with peroxide and water……what else can I do??